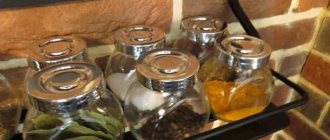
In nature, horses do not require any additional equipment. Pets need equipment that will allow the owner to easily control the horse and also protect the pet from the cold. It is also important to remember about horseshoes; without them, domestic horses, unlike their wild counterparts, have a very difficult time. Fans of making their own everything necessary for their pet not only receive exclusive equipment for the animal, individually tailored to it, but also significantly save their budget. When made with high quality, homemade products are not inferior to purchased ones, and sometimes even surpass them.
Construction of a summer stable and insulation
Summer quarters for horses do not require registration, as they are not permanent buildings. It is easier to build and there are no special requirements.
The most common option for building a summer stable is the frame construction method. Using timber, boards, fasteners and a level, the frame and frame of the room are assembled.
The walls are assembled from lumber using insulation. A wooden floor is being installed. Windows and doors are inserted into the openings.
When laying ceiling and roof beams, take into account the slope to organize drains. The beams are hemmed with a board, a heat-insulating layer is laid on top, and a special film is nailed with a stapler. Plywood with moisture-repellent impregnation is nailed on top. Next, the slate roof is installed.
Materials
There are many options for materials for building a stable. There are debates about which one is better, there is no consensus. Even the best materials have their drawbacks.
Generally speaking, materials with the following characteristics are suitable:
Brick stable lined with wood
Tree
This material perfectly retains heat indoors, at the same time, buildings made from it are permeable to atmospheric air, which allows for natural gas exchange. If you compare a brick and a wooden wall with the same thermal conductivity, the brick wall will be several times thicker. Wood costs relatively little, and building with it is easier and more convenient.
This material has not only advantages, but also disadvantages. These include:
Source
Choosing a site for construction
The site for construction is chosen on a small hill. Groundwater should pass no closer than 1 m from the foundation, which will ensure elevation. If there is no such area, the site will have to be dried and groundwater drained from it. High humidity causes leg problems in horses.
The longitudinal axis of the building should be located from north to south. The building is protected from the north wind by trees or other buildings - this will ensure an optimal microclimate in the stable without heating. The door to the stable is planned on the eastern side, then in winter it will not be excessively cooled by northern winds, and in summer the animals will not suffer from overheating.
From the stables to the nearest track should be about 2 km. The minimum distance to residential buildings must be at least 100 m so that people and horses do not interfere with each other. Please also take into account that a horse walking area and a paddock (a place for open keeping of horses) are being designed next to the stables. Its area is 20 square meters. m for 1 horse.
Konyak
Since I posted my last work here, I learned that a frame makes everything better) Now I’m concerned about the proper design of my paintings. Even if they don’t go to any exhibitions, I want everything to be in order. I would love to read advice from those who know how to design watercolors or know where to get an inexpensive but high-quality mat cutter.)) *I mean online stores with delivery not only in the Russian Federation
How to make a bridle for a horse
You can make both a simple and an exclusive bridle with your own hands. It will be exclusive, since various options for its creation and decoration are possible. The only limitation can be the imagination of the creator. But first you need to learn how to sew a simple snaffle bridle. or you can sew by hand. The threads must be strong. It is worth watching video tutorials on this topic with comments. Since leather is usually used to create bridles, you will need several straps about 1.5 cm wide, 2-3 rings, several buckles and a snaffle.
Good friends
These cute toys became New Year's gifts for kids.
Hi all! I’ve been reading the pica for a long time, but only now I decided to post something.
For a long time now, my husband has been asking me to make him a cover for his passport, but no one has gotten around to it. And then we got there, and in the end I got my hands on something like this. It was only the second time I worked with leather on my own (the first was an indistinct bracelet with a button with perforation). I cut out the blanks according to the pattern from a piece of black leather, covered them with a thin layer of red acrylic paint, depicted the emblem of the horde using an ancient Soviet burner and sewed them together with nylon thread. I didn’t take any photos of the process because I was overwhelmed with inspiration and didn’t even remember about the photo at that moment. Material: leather, nylon thread, acrylic paint. Tools: tapestry needle, scissors, punch (without any steps, makes only one hole, so everything had to be measured and marked by hand under a ruler), crooked hands and great enthusiasm.
I would be grateful for criticism and advice, as I enjoyed working with leather.
What do we build from?
To recreate the most comfortable stay for pets in a stable, when constructing it you need to resort only to porous materials.
After all, they create natural ventilation and retain heat perfectly.
Due to the fact that it is not recommended to use various types of heating here, it is better that the materials for construction have high thermal resistance.
Brick is best suited for fencing, as it meets all the requirements for materials for stables.
Materials for arranging floors in a building must have low thermal conductivity, and also high moisture impermeability and not have slippery surfaces.
The outside of the building can be painted with lime. Proper use of materials allows you to achieve the desired microclimate in the stable. We will consider the horse stall and its dimensions below.
Horseshoes
You can make horseshoes yourself only if you have your own forge and experience in creating them. This product is not expensive, and you should not experiment, endangering yourself and your horse by making dubious homemade horseshoes.
Horse shoeing
Making your own equipment for a horse is, of course, an interesting and exciting endeavor, but most often unjustified, since unprofessional accessories do not meet quality requirements and can even be dangerous.
Horseback riding is an exciting activity, but to make it safe, you need to prepare special horse equipment.
In our article we will tell you what horse control equipment is and how to use it.
Whip
During horse riding, a horse whip is used as a means of control, telling the animal what to do. It is strictly forbidden to use the whip as punishment. It is used only in cases where the pet cannot figure out what is required of him. Depending on how it is used, the horse understands what they want from him.
At horse races, control of the horse occurs exclusively with the whip, since the stirrups are raised high and the rider loses the ability to control the horse, squeezing its sides with his feet. The longest whips are used when training horses in dressage. Their length reaches 1 m 30 cm. A standard whip has a length of 70 cm.
Whip with leather clapper
The whip can be made from different materials: plastic, leather or synthetic. They vary in weight and flexibility. The whip is bought in specialized stores or made independently.
To make a whip you need:
- 2 laces;
- A tip designed for a summer fishing rod;
- A small piece of leather;
- Metal D-ring;
- Sewing threads.
The whip is made in a certain sequence. To begin with, cut off the ends of the laces. The hollow cord is put on the fishing rod immediately, and its core is first pulled out of the braided cord. The ends of the lace are secured with knots and lubricated with glue. 2 laces and a ring are attached to it, after which everything is wrapped with thick thread. Next, a piece of leather is cut into a deep fringe. The leather is glued and then the fringe is woven into the laces in a spiral.
Jumping whip
To give the whip a factory look, a thermal tube is stretched onto the braided cord. The firecracker is made from leather folded in half, which is glued and stitched. A hand strap loop, similar to the one found on mobile phone cases, is attached to the ring.
It is unacceptable to hit the animal hard. The whip should not cause pain. The horse also responds to the rider’s aggression with aggression and can throw off an inexperienced rider, which is fraught with serious injuries.
Arc for harness
The bow is the main part of the harness (harness) and connects the shafts to the clamp. If there is an urgent need and certain skills, you can do it yourself. Ideally, buy this piece of equipment made by professionals. An arch is needed to hold the tugs perpendicular to the clamp. This helps prevent injury to the horse's neck when riding on uneven roads. Harness riding without an arch is unacceptable.
Parade arc for harness
Elm wood is suitable for the arc. Birch, oak and hazel can also be used. It is necessary to harvest wood at the very beginning of sap flow. The tree is sawn into blanks. The edges of the workpieces are trimmed, giving them the desired shape.
Bend the workpiece after steaming it, as without this it will crack. It is most convenient to steam the arc in a bathhouse. A bending machine is used for bending. The arc must be bent without jerking. They do this in two or three people. When the workpiece bends heavily, it is steamed again.
After the arc is bent, its ends are fixed with wire and left until the wood dries. The dried arc is removed from the machine and final processing is performed. It is sanded and painted. In the old days, arcs were painted and decorated with intricate carvings. With artistic abilities, this can be done now, turning this part of the harness into an exclusive one. A bell or bell is required on the arc, and it is attached to the zge (metal loop).
Horse in harness
Making an arch yourself is justified only if the horse owner loves and knows how to work with wood, and is also willing to spend a lot of time on the work. Harness for a horse is necessary even if it is rarely harnessed.
DIY horse halter
The horse's headband should be comfortable and fit the size of its head. Braided or leather halters consist of two rings. The diameter of the first for the occipital-chin strap is about 105. It is made with an adjustable buckle. In the second ring with a diameter of approximately 65 cm, where the horse's muzzle is inserted, you need to sew a metal ring for a chumbur, which is used for tying or driving a horse. The larger and smaller rings must be sewn with two cheek straps of 20 cm each and a chin strap of 13 cm. When sewing from a sling, the straps are made double.
How to make a halter with your own hands from rope
influence on the horse through knots . The rope for weaving should be 6-8 mm thick, round in cross-section, preferably nylon. In addition, you need scissors, matches for singeing the ends and a marker. To create such a halter for a horse with your own hands, there are measurement tables depending on the girth of a particular horse and the weaving pattern from knot to knot. They can be found on the Internet. You will also need to learn how to knit simple knots , and based on them - double round knots. It is important that the double knots are round, since it is such a knot that will properly exert the correct directional effect on the animal. Once you master the weaving technique, you can easily make a halter. All that remains is to try it on your favorite horse.
Warning
Since the resulting horse halter will be made from a single piece of rope, it has increased strength. To avoid accidents to your horse, never leave your horse unattended in a rope halter, either in a stall, in a levade, or on a tether.
blanket
Horses cannot tolerate frost without harm to their health. To be in good condition, they need, like people, outer clothing, which is a blanket. The blanket looks like a blanket. There is no need to buy a ready-made blanket, because it is very easy to sew it yourself.
To obtain measurements the following are measured:
- Length from chest through legs (sides) to tail;
- Length of the back from the withers to the beginning of the tail.
When taking measurements is impossible, you need to rely on the average table used to sew blankets in workshops. A DIY horse blanket is as comfortable as possible for the animal.
blanket
Using a standard pattern, adjust it to the size of your horse. After this, all the details are cut out from the selected fabric (cotton for summer, wool for winter). You need to add 15-20 cm to the seams. First, all the elements are swept away, and then stitched on a sewing machine. For a winter blanket, you also need to provide a lining. A fastener is made in the abdomen and chest area. At the discretion of the owner, it can be made of Velcro, buttons, carabiners (preferred) and large metal buttons. Blankets should be summer and winter, as well as light wool, which are put on the animal if it sweats during work in cool weather. You can’t put on a warm blanket right away, but a light, slightly insulated one is necessary. As soon as the animal has cooled down, it is wrapped in warm clothes. Knowing how to sew a horse blanket can save you a lot of money.
Types of equipment and their decorations
Traditionally, equipment for harnessing horses includes:
In order to choose the right harness, an individual approach to each horse is required, since its physique, dimensions and personal characteristics will be of significant importance.
The art of decorating your stallion has been known since the times of the Scythian peoples and Tatar invasions. Horse owners tried to decorate their equipment with silver, gold, and precious stones, not to mention the use of ribbons and bells.
The decorations were made with high quality, no expense was spared on them, because they had to fit the horse perfectly, not interfere with its movement and be comfortable for it.
Scythian horse jewelry, found during excavations and presented in museum collections, has gold and silver plates and is made in the form of convex metal foreheads.
In the 17th century, it became especially popular in Russia to create jewelry for horses, which very often looked like real masterpieces of handicraft. For their manufacture, goatskin, morocco fibers, silk braid were used, and copper and gilding were used as frames.
On the horse's head there was a grip with balls and tassels. On the occasion of the celebration, the horse was decorated in a special way, replacing simple chains with beautiful ones with silver rings.
Turkmens, as in ancient times, still consider horse jewelry to be a subject of high national art. Precious and semi-precious stones and metals are used in their manufacturing process.
Traditions and beliefs associated with the creation of accessories are cherished, honored and passed on to the younger generation. In the forehead part of the harness of a Turkmen horse there must be a carnelian stone, which acted as a talisman for the horse.
The bridle was made of thin leather straps coated with silver, with carnelian inlay at the junction of the straps. The elegant decoration emphasized the beauty of the horse. For modern bridle decoration, various shaped metal plates, coated or uncoated, made of precious metals are used.
The cape was embroidered with precious threads, often depicting the family coat of arms or the warrior's motto, richly decorating it with stones and silver plates.
Halter
This part of the harness is a bridle to which the bit is not connected. It is used when it is necessary to take a horse out of the paddock, and also when there is a need to secure the horse on a leash in a level position.
For these purposes, decoupling belts are attached to it. A halter is always used in combination with a chumbur.
An everyday halter is made from leather straps, rawhide or thick braid. The festive version can be decorated with pom-poms or embroidered with beads, and rings made of precious metals can also be used to make it.
The advantage of a braid halter is that you can wash your horse without removing it. When choosing a halter for your horse, you should also pay attention to the country of origin, since English ones are softer, and Belarusian ones are stiffer, which means they will last longer in use.
Leather halters last longer than braid halters, but require more care, since the leather should not be allowed to dry out; moreover, if it gets wet, it can mold and tear.
But when wet, raw material becomes limp and stretches, losing its previous shape.
When choosing a halter, be sure to take into account the size of the horse: there are special ones for ponies and for heavy breeds.
Headband
This is a decorative element that is part of the horse's harness and is attached to the head strap under the ears on both sides. It practically does not perform a functional role, but is only a decoration.
The headband is made from leather or woven from nylon cord, decorated with leather or silk fringe, embroidered with beads, precious or semi-precious stones.
Moscero
This is a traditional Spanish decoration that is actually a forehead piece. It is decorated with tassels made of threads or beads. When the horse swings its head, the tassels on the moscero, scattering in different directions, drive away annoying insects that bother the animal.
Moscero can also be decorated with metal elements and embroidered with stones and beads.
Bib
This decorative element is often made in combination with a forehead, sometimes with a cap. It is often made using the macrame technique, woven or knitted from threads, abundantly decorating the bib with pompoms and fringes, and embroidered with beads and sequins.
Bibs are made from leather, decorated with ornaments and rivets. Thanks to modern technologies, horse accessories can not only be sewn, but also made from LED elements so that horse equipment looks more impressive, for example, during circus or night performances.
The horse's croup is also decorated in combination with other accessories, so that the overall appearance is harmonious and beautiful. Decorations can be: The last type of decoration of a horse is very original: for example, on the horse’s croup, skilled specialists (necessarily with the help of several assistants) can create:
Saddle
Making a saddle with your own hands is difficult, and you should not do it unless absolutely necessary. Professionally made, it is safe for the horse and rider. Only a person associated with professional production can independently make a high-quality saddle. There are many recommendations on how to make a saddle for a horse.
Saddle
Before you start making a saddle for a horse with your own hands, make a model of it. For this, a dense wire is applied to the animal’s back behind the withers and bent clearly along the contour of the body. Next, according to the resulting pattern, the outlines are transferred to cardboard. A model is cut out of cardboard and applied to the back of the animal. It must exactly follow all the curves. Afterwards, a tree is made according to the model and then the saddle is assembled.
Tree of saddle
An amateur will not be able to make a saddle correctly. You cannot skimp on this piece of equipment, and you still need to buy a high-quality saddle made by a master.
It is not necessary to buy a sleigh for a horse. When you have certain skills in working with wood, a tool and a desire, you can make them yourself. The sled is not high and therefore, even if something goes wrong and it gets damaged during the ride, it is almost impossible to get injured.
Painted sleigh
The most difficult thing to make is the runners. They use strong metal pipes. The length of the pipes is needed 2-3 meters longer than the sled. This is necessary in order to bend the runners on both sides and place them under the sleigh without difficulty. For bending, a special tool is used - a pipe bender.
Afterwards, the bottom of the sled is assembled with stands made of thin tubes or strong wooden blocks. Whenever possible, all non-load-bearing structures are made of plywood to reduce the weight of the sled.
After the horse sleigh is assembled, it is finished and painted. If the sled is designed for riding, then it should be painted to give it an attractive appearance.
Design and dimensions
The total area of the building depends on the size of the main room for horses - the stall. This is where the horse will spend most of its time. The basic size of the room is 6 x 6 m. If there are fewer than 10 horses, then the stalls are lined up in one row with the passage in front of them. For a larger number of heads, they are placed symmetrically on both sides of the aisle. The width of the aisle for a single-row building is 2.2 m, for a double-row stall system it is 2.7 m.
You will also need:
- place for storing hay - forage (each horse consumes from 2 to 4 tons of hay per year);
- storage space for equipment – saddle-inventory room;
- washing.
If you have a large area, you can create large stalls, since the maximum area is not limited. Large draft breeds will appreciate comfortable housing. Also provide removable partitions between the two stalls. Remove the partition and 2 standard stalls will turn into one large stall or vice versa.
Even if you don't need large rooms, consider at least one for the future (for the mare and foal). Large stables are additionally equipped with a staff rest room and a bathroom. The size of the utility rooms is 10–12 square meters. m. Final dimensions of a single-row stable:
- width – 5.2–8.2 m;
- length – a multiple of the number of stalls, that is, 6 m (maximum);
- height – 3 m.
Select the type of building materials to be used. Wood is most often used for construction. A stone or metal frame is also possible, which will ensure the stability of the building.
Determine what type of lighting will be used. Electrical wiring must be inaccessible to horses or rodents. This is very important, since there are many flammable elements in the stable and a short circuit can cause a fire. Determine the correct water needs for your horses. We are talking not only about drinking water, but also about the water that is needed to maintain cleanliness and disinfection, as well as bathing animals. Select the type of roof for the stable.
Metal tiles are attractive, easy to install and durable; it is used as often as slate. Don't forget to design the ventilation system and its weather protection. A horse can be injured very easily, so there should be no protruding nails, unstable structures or knotty surfaces in the walls of the building. The partitions between stalls should be high enough so that the horse cannot accidentally touch the top bar with his foot.
A solid partition is made up to a height of 1.4 m, and the lattice part is installed higher. Thanks to this form, horses can communicate with each other, see and hear each other. Stall doors can be sliding or swinging. Latches must be installed on them. The minimum opening width is 1.2 m. Forage doors can be smaller, but must close tightly.
Basic rules for fitting saddles
In order for the fit to be carried out efficiently, it is worth adhering to some rules.
- The saddle must be adjusted individually to the horse. The main indicator that the procedure was performed correctly is the moment at which the sides of the saddle coincide with the relief of the animal’s back. To achieve this result, the tree is placed on the croup, and those places where it does not fit tightly are filled with felted wool. After this, place it on your back again and check how tightly it fits.
- It is important to take into account that when moving, the girths weaken, so you must initially adjust their tension.
- The fit of the underarm must be done well. To do this, place your palm with its edge in the empty hole between the support and the animal in the lumbar region. If it fits, the procedure was performed correctly.
- In some cases, it is necessary to shorten the belts, but reducing the length of the belt by tying a knot is not permitted.
- Remember that there should always be space between the sweatshirt and the ridge - it is necessary for ventilation.
In those days, when a person was just beginning to tame a horse, he made do with one bridle. Gradually, the horse became an integral part of human life, and more elements of equipment were already needed for comfortable interaction. Over time, equestrian sport appeared, which also made its own adjustments to the set of equipment for the animal. Nowadays, the set of elements is unchanged, and you can purchase it in special stores or make it yourself - this will be discussed in the article.
Decoration
Special importance is attached to the artistic design of the product; the area of manufacture or use can be determined by the style of painting. Many styles of folk art are reflected in the decoration and design of the harness. Having seen a painted arc, a historian can easily tell the region of its use or manufacture.
Special importance was attached to the artistic design of the product. Gold and red painted arcs were especially valued. First, the wood is well primed and painted, then the decorating ornament is applied. Such artistic finishing is not only aesthetic, but also protects the wood from rotting and drying out. In addition to painted ornaments, the harness could be decorated with decorative carvings and embossed leather.
The bell and zga played a significant role. Zga is a small ring that is made at the bottom of the arch to secure the bell and lanyard from the bridle. Such a belt made it possible to support the head of a harnessed horse at a certain height. The bell was an integral attribute of Russian harness. Here, as they say, it should be “both seen and heard.”
Horse bridle without bit
The halter is the most commonly used piece
of horse harness . It is used when leading a horse out of the stable, in the levada, out to pasture, when placing a horse at a turnout, and for tying during transportation. A halter differs from a bridle in the absence of a snaffle and consists of cheek, noseband, occipital and forehead straps. The bridle strap is made from various materials. Leather, often made from rawhide, is considered durable with proper care. But more practical, not afraid of dampness, is a halter made of synthetic materials: slings, ropes, braids.
Types and types of buildings
- Modular design is a pre-fabricated structure using a modular system; it is transported to the buyer in a fully complete set, together with ready-made stalls. The components of this structure provide the buyer with a wide choice, because with their help it is possible to assemble a stable of any size and scale. The assembly uses elements made from high-quality galvanized steel with a width of 4.5 to 7 cm, a thickness of at least 3 mm and up to 6 mm. It is recommended to clad the outer side of such a building with wood of various species or other finishing materials with the addition of insulation. Its thickness should be at least four centimeters, but no more than six centimeters. The construction of a modular structure takes a maximum of two weeks. The price of such a house for a horse is approximately five thousand euros per horse.
- Tent structure - such an arena is formed from a prefabricated frame using metal arched structures. The approximate width of the building can be from five to fifty meters, and the length is negotiated individually between the supplier and the customer. The strength level of an awning structure, as usual, is calculated based on the indicator that determines the snow load on it, because different intervals are maintained between the arches. The uniqueness of the tent building lies in the transparent coating of its material, which gives the entire structure a high degree of strength. Thanks to this transparent “roof”, the stable receives constant natural light. In addition, it gains the ability to withstand large temperature changes. Such a building can be erected quickly and easily; it is distinguished by durability and reliability during operation. Often, tent structures are used as buildings for stables; they can be assembled in twenty days. The cost of structures varies and depends on the size of the arena, for example, 22 meters x 42 meters of tent construction will cost approximately 80 thousand euros.
In addition to types, stables also differ in types.
Today, experts present buildings of open types, with the presence of stalls or levadas, standard and active, and also of a combined type.
More often there are buildings whose stalls are located indoors, but there are also those where they are located outside.
Only the horse owner can choose a successful suitable variation, depending on his financial capabilities, the number of horses, and also based on the needs of the animals themselves.
Control Equipment
Let's look at what is included in this horse control group and how to use individual devices.
bit
The bit is an integral part of the bridle. Their main purpose is to directly influence the horse for control. Horses have spaces in their gums where there are no teeth. These holes are ideal for placing bits.
The bit is represented by two metal rings and a bit that presses on the horse’s tongue, jaws and lips. Depending on how hard they press, the animal slows down or stops.
Bridle
There are several types of bridles.
Let's look at how they are structured and for what purposes they are used.
| View |
How to put on a bridle correctly
- Using your right hand, you need to unfasten the chin strap.
- Take the bridle in your left hand and the leash in your right, stand to the left of the horse. Then you need to step forward towards the head, using your right hand to throw the reins over the horse’s head and onto his neck.
- With your right hand you need to grab the animal’s head and lift the headband with your left hand so that with the palm and fingers of your right hand you can firmly press the middle of the cheek straps to the nose. Using your left hand, you need to fix the bit in the animal’s mouth.
- Make sure your horse grabs the bit with his teeth.
- Then you need to pull the bridle up with your right hand and pull the head strap onto the back of your head. Then you need to put the ears under it and place the strap on the back of your head.
At the last stage, you should take the bangs out from under the forehead, straighten them and adjust the chin strap.
Video: How to put a bridle on a horse
Halter
The appearance of this equipment is very similar to a bridle, but without a bit. It is necessary to take the horse out of the paddock, to saddle the horse, or to tether the horse. It is very important that straps are attached to the halter - uncouplings, which must be fixed in a level position. The halter should be placed on the animal's head and used with a chombur.
Reins
In most cases, they are made from a leather strap that needs to be fastened to the rings on the bit. Reins are needed for contact between a person and a horse. With their help, the rider can coordinate the front part of the animal’s body, thereby controlling it. With the help of reins, the direction of movement of the animal is set.
Martingale
Sometimes a horse can throw its head back high. To prevent this, they use a martingale - additional reins that hold the head and protect the person from injury as a result of throwing back the horse's head.
One side of the martingale needs to be attached to the girth, and through the remaining 2 straps with rings, which are located on the chest, you need to thread a rein. This design is needed to fix the animal’s head.
Chambon
The design of the chambon includes a long belt that must be placed on the horse's head. This is necessary to fix it during the training. The chambon must be fastened to the girth and snaffle. It is important to ensure that it is located under the belt, located close to the cheeks.
One of the benefits of chambon is that it allows the horse's neck to stretch normally and takes the pressure off the back.
Saddle
The main purpose of a saddle is to protect the animal's back. In addition, it is necessary for the comfort of the rider.
In the absence of a saddle, enormous pressure is placed on the horse's body, and with it it is evenly distributed over the entire body.
Selecting a saddle is a rather important moment. Many nuances should be taken into account, and ideally, it should be made individually for the horse, because all animals are unique.
- educational;
- competitive;
- triathlon;
- dressage;
- drill;
- officer;
- Cossack;
- Caucasian;
- ladies';
- racing;
- Vaulting;
- pack;
- saddle for transporting cargo.
Stirrups
Thanks to stirrups, a person's leg is held and the balance of his body is maintained when moving on a horse. The first stirrups were loops, but they were quite dangerous and inconvenient. Today, metal is used to make them. Depending on the types of saddles, there may be stirrups of different shapes, but they all perform one function - they are a support for the legs.
Whip
There is another name for this weapon - stack. This is an auxiliary element that is needed to control the horse. The whip allows the horse to more clearly understand the commands coming from the rider. The stack can be of different lengths - from 75 to 125 cm. You should not hit the horse too hard, the blows should resemble light pats. To reduce the impact force, it is recommended to attach a firecracker to the end of the stack. You need to hold the whip with your right hand.
A whip is an elongated whip that can reach a length of 2 m. Its main purpose is to carry out “educational work” to which a horse is subjected while in the arena. The design includes a wooden handle and a bowstring, for which thin straps are used. The end of the bowstring is equipped with a knot, which can be used to produce a sound resembling a click. Under no circumstances should you beat a horse with a whip; it is needed to choose the direction of movement.
How to build a stable correctly
If you have created a good general plan with all utilities, all that remains is to work out in detail the individual structural elements. The degree of comfort for animals depends on how correctly the materials are selected and the calculations are made.
Foundation
The foundation of the stable is assembled from ready-made blocks, which are laid in a trench; This type of foundation is called prefabricated strip foundation. This is the fastest and easiest installation method - you do not need to fill the formwork and wait for it to dry.
The top of the structure will be covered with a layer of concrete. It is leveled and walls begin to be erected. The gaps between the blocks and the foundation are filled with coarse sand or crushed stone. The outer part of the blocks can be treated with bitumen mastic to protect them from moisture.
Walls
The optimal material for building walls is wooden logs with a diameter of 20–23 cm. Wood retains heat well and maintains an optimal microclimate. Brick or concrete masonry is not recommended for use due to the fact that brick easily cools down in cold weather and heats up in hot weather.
To keep the indoor temperature in the positive range, you will need to lay 1.5–2 bricks. The northern wall is made thicker than the southern one by 25%. To make it equally comfortable inside, the minimum thickness of a wooden wall should be 20 cm, and a brick wall should be 2 times thicker.
Roof
Most often, gable and single-pitched roofs are used, which prevent snow from sticking in winter. Covering - metal tiles or slate. When laying the ceiling, use a ceiling board at least 5 cm thick. The top of the board is covered with a clay mixture. The main task of such a mixture is to ensure moisture resistance and eliminate drafts.
The height of the ceiling should allow the horse to comfortably raise his head without worrying about hitting the ceiling. For ponies and small breeds, a standard height is convenient - no lower than 2.4 m. For long-legged trotters, the desired height is no lower than 3 m. Make sure that there are no nails sticking out of the boards and that there are no unprotected lamps hanging from above, which the horse could hit.
The most important element is the floor. Its main qualities:
- low thermal conductivity;
- moisture resistance;
- dryness;
- strength;
- no slipping in autumn and winter.
An adobe floor is considered optimal. Its composition is a special “cushion” of layers of crushed stone, lime, and clay. The minimum floor thickness is 150 mm. The obligatory slope of the floor from the outer wall inwards is at least 1.5 cm. The slope is necessary for the convenience of cleaning excrement. This type of floor needs to be repaired once a year due to the fact that hooves make it uneven. More modern floor coverings are made from clinker tiles. Advantages of this floor:
- moisture and frost resistance;
- immunity to mechanical damage and high wear resistance;
- absence of dust in contact with hooves, unlike clay;
- maintaining a presentable appearance throughout the entire period of operation;
- a reliable barrier that prevents the penetration of rodents.
Windows and doors
Windows provide natural ventilation and light. There should be quite a lot of them, since natural light is important for horses. Hinged window designs are better than monolithic ones because they are easier to keep clean. Windows must be double glazed. The minimum distance from the floor to the window is 1.5 m, but not higher than 2.1 m. The inner side is covered with bars. The window size is about 15% of the total wall area.
The door can be sliding or hinged. The doors to the stall, like the partitions, are made half solid with a lattice upper part. Height - to the ceiling, width - at least 1.2 m. A strong latch is required. Doors (two) to the stables are installed at the ends of the building.
Rainbow unicorn
My daughter loves unicorns, ponies and other horses. Well, I finally decided to knit a similar animal for her.
Knitted from 45% acrylic, 55% cotton yarn. Stuffed with holofiber.
Legs, mane and wings on a wire frame.
Thanks to the fact that the legs bend, he can stand, sit and lie down. By the way, in the original MK the hind legs are described differently, which is why the unicorn can only lie down. This didn’t suit me and I had to improvise a little.
I glued the eyes with rays on with super glue. She also decorated her face with super shiny rhinestones. The Unicorn's height turned out to be quite large. Body length 23 cm (from nose to tip of tail 36 cm). The body height is also 23 cm (from the hooves to the end of the wings 27 cm). The width of the wingspan is approximately 25 cm.
I'm happy with the result, my daughter even more so)
And finally, a traditional selfie^^
Thanks for watching and ALL THE BEAVER!
Brooch kitten
My first portrait embroidery from a photo.
I really enjoyed working in this direction.
Do the kittens look alike? I will definitely continue to work in this direction. Magic ✨
handmade, artistic surface
⚜natural threads, felt, Japanese pin
What else do you need?
The feed room is used to store hay and concentrated feed. Concentrates are stored in special boxes to prevent them from being damaged by rodents. Partitions can be installed inside the box for convenient placement of different types of food.
Saddles and other harnesses are stored in the harness room after drying. There must be good ventilation and heating in winter so that the leather of the saddles is less likely to deteriorate from moisture. There must be a boiler in the staff room.
Laying the foundation
- Our first priority is to eliminate all weeds and other vegetation from the site on which the horse house will be built. We remove the trees along with their rhizomes.
- Next, remove the top layer of soil. More often, a columnar type foundation is used for such a structure; it should be placed on a gravel bed. If we plan to build a brick building, then we will lay a strip type foundation.
- When laying a columnar foundation, we will initially install supports in the corners, then install other pillars. Their number will depend on the size of the structure. Place the supports along straight lines. We do this using a special construction cord.
- Having built the foundation, we install the sheathing, which is usually made of pressure-treated wood for protection.
Frame
Only high-quality wood is used to construct the frame. The building will not last long if you neglect this requirement and save money by using second-rate or defective material. When approaching the construction of a frame structure, you must strictly follow the diagram. The height of the building should be from three to three and a half meters. If the floors are made of concrete, then we do not install an additional frame.
The simplest choice when building a building on your own is to build a wooden stable, the frame of which will be made of wooden blocks. To ensure maximum strength to the structure, it is recommended to use diagonal fastening of the support beams using wooden blocks. When constructing the structure, we will take into account the location of the windows and gates.
Care items
In order for an animal to have a well-groomed, beautiful appearance, it needs to be looked after. For this you need the following items:
- rough mittens used to remove dirt;
- a scraper that allows you to clean wool efficiently;
- brush used for wet cleaning;
- a brush, thanks to which you can add shine to the wool;
- sponges used to clean mucous membranes;
- scrapers to remove excess moisture from wool;
- bucket;
- brush for applying oils to hooves;
- a hook with which dirt and small stones are removed from the hooves;
- rubber scraper for massage.
How to make a horse cart with your own hands
5 minutes to read the article The times of dashing horse-drawn troikas and carriages have long since sunk into oblivion, and with them the main attribute of the Russian harness - the arc. Being a very important part of the harness, the movement and safety of the entire crew depended on its quality. It is not surprising that master craftsmen have always been revered on a par with blacksmiths and saddlers. Today, such skill is mastered by only a few people who have passed on their knowledge and skills from their grandfathers and great-grandfathers. We will lift the curtain on this “great” task and tell you how to make a horse arch with your own hands.
It is the main attribute and important part of the Russian team, on the quality of which the movement and safety of the entire crew depends.
General information about horse equipment
There is an opinion that only a professional can use any equipment for a horse and various aids. However, it is precisely for such a specialist that two reins, a leg and mutual understanding with the horse will be enough. But, if you are planning to learn how to ride a horse, the first thing you need to do is understand the horse equipment, study what is included in this set and how to use it correctly.
How to set up a horse barn
If the horse is kept not in a stable, but in a barn adapted for this purpose, a stall is made in it, a manger with hay is installed next to it, a feeder and a drinking bowl are secured. Bedding is laid on the floor.
Stall
Until the beginning of the twentieth century, horses were kept in stalls; Some farms still keep working horses this way. The horse was tied next to the feeder in a small fenced-off area - if necessary, he could lie down, but could not turn around. Standard stall dimensions are 3 x 3.7 m. The minimum stall size suitable for ponies is 2.4 x 2.4 m.
Feeders and drinkers
When a horse chews, it scatters grain to the sides, so the feeder and drinker should be kept away from each other. Their wall mounting prevents them from tipping over. A wide box-shaped container mounted on the wall of the stall will be sufficient for distributing feed. The height of the feeder is 1 m. Length is 1–1.2 m. Width is 30 cm. The hay is placed in special mangers: they must be deep enough to hold the hay and not have holes so that the horse does not get caught in his foot and is injured , if he decides to lie next to him.
Wall-mounted hay racks and nets are not recommended for everyday use, as horses normally feed with their heads bowed. The drinking bowl is installed at a height of at least 0.9 m from the floor so that two horses can drink from it. Horses can use an automatic water bottle if you decide it would be more efficient. But some horses like to play with the automatic sippy cup - opening the valve and having a small shower in the stall.
Litter
The horse is kept on bedding, its thickness is 10–15 cm. Straw, sawdust, and peat are used for it. Straw is considered the most effective because of its softness, ability to retain heat and allow moisture to pass through well.
Every day, part of the contaminated litter is removed, uneven areas are smoothed out, the entire layer is compacted, and 6–8 kg of new litter is added. Dirty litter can be easily collected and burned. You can also sell it as fertilizer or substrate for growing mushrooms.
Protective equipment
To provide the animal with protection and comfort, you need to purchase protective equipment for it. With it, the horse will not be afraid of bad weather, and it will not get injured when moving.
blanket
This invention is needed in order to provide the horse with warmth and dryness. The blanket is needed for transportation; it is put on the horse when it is in the stable to protect it from temperature changes. Special fasteners are used to secure it to the horse's body.
Let's look at the most common types of this ammunition.
Levadnaya
Used to warm and keep the animal dry during walks and grazing. For manufacturing, synthetic fabrics that do not allow air and moisture to pass through are used. In such attire the horse is not afraid of wind and rain.
Night
Used to warm the horse at night. It should be shorter than the day blanket, as the horse may step on it when standing up. For fastening, straps are used on both sides and a shank. Such “pajamas” have a wide opening for the neck.
Wag and Gladiator
Synthetic materials are used for sewing. The peculiarity is that they have an extended part that covers the neck. It is thanks to this that the animal will certainly be warm and dry.
Konyushennaya
This blanket is both called and used. It is thrown over horses while they are in stalls and stables. It serves to protect the wool and prevents it from getting dirty. In summer, cotton products are used, and in winter, quilted, insulated products are used.
Melton
Melton is a cape made from wool. It can retain heat perfectly, but at the same time it has a lot of weight, which is a negative quality. It is also quite difficult to clean.
Bandages
They are used to provide protection to the animal's limbs. Most often, cotton products are used to protect the animal from sprains. In winter they serve as additional insulation.
Bandages made of knitwear or crepe with a width of approximately 8 cm are suitable for training. Bandages should be applied on pads. It is important that they do not squeeze the limb, otherwise blood flow may worsen. Also, there should be no gaps between the layers of the bandage - through them dirt gets onto the limb.
Saddle pad
A saddle pad is a special bedding that is placed under the saddle. It protects the horse's back from injury and chafing.
The most common are cotton products that contain soft filler.
Rubber holsters
This piece of equipment is used to protect the animal's hooves in case it hits them. They are mainly made of rubber, as it is soft, but at the same time able to protect the hoof from impact. Sometimes it can be used at the same time as a decorative element - a beautiful holster will highlight the horse and give it individuality.
Tags
Stable for designing Stable for making a stable with your own branded stable already a real stable. ordered a stable near the stable. with your own hands. made with your own hands. with your own hands. Handicraft with your own hands and with your own hands with your own hands with your own hands as much as possible with your own hands and can direct the actions. We decided to make a stable; layout of what the doors are made of, the doors are made. How to make a truss can be made from
video classescut
Description of the stall
A stall is a place where horses are kept without a leash; individuals of different ages, sexes and sizes can be accommodated here. The stall creates the necessary peace for the animal, protects it from the outside world, controls mobility and protects it from external influence. Compartments are required to preserve the healthy condition of horses, to protect them from cold, rain and frost.
In addition, these premises are a mandatory attribute for training an animal - the stall, with its modest space, disciplines the animal, limiting its playfulness.
The compartment for horses in large stables measures three by three meters. These values are chosen taking into account the dimensions of the horses and the minimum financial costs. Territory sizes that are less than nine square meters cannot be allocated for an animal.
Sewn handicrafts (table of contents on page 1)
ramota
This diary presents technologies and options for making horse harness, clothing for riders and other stable necessities, made at home, on household sewing machines, hand-sewn, knitted and woven.
For personal use. Perhaps it will be useful to someone I immediately declare that I am categorically against copying material for posting on other resources without the permission of the authors of the work
I appeal to the authors of the works - girls, please do not upload photos of your works through attachments, they are not stored for a long time, and there will be holes in the diary. What's the point of such a benefit? I will ask you to remove such photos, don’t be offended. An image exchanger is a resource for storing photos. For example: contact, my world, Yandex photos, etc. Photos are stored there for a long time. How to use it is written on the websites in Russian.
Hi all! I want to share my humble “creativity”. I was prompted to do it by the request of the owner of the stable where I train, to sew something for pony rental. I unexpectedly enjoyed coming up with and implementing “outfit” ideas. Kids really like plump ponies and horses in beautiful decorations. Perhaps someone also has similar ideas? Share.
Barbie (just a beautiful girl)
The idea to sew blankets came from a basic shortage. There is simply nowhere to buy equipment and equestrian textiles in our city or nearby. So we sew our own saddle pads and blankets. At the same time, each “client” is measured and the clothes are sewn to measure. This is what “tailoring” is like.
Source
Manufacturing
As they say, “you can’t make a shaft from an arc,” and making each piece of harness requires your own skill and knowledge. In the case of an arc, it is important to choose the right tree and be able to work with it. If you make a mistake, the product may break at any inopportune moment. A good arc can withstand very heavy loads, so once it’s done well, the product can last for decades.
Made from light and durable wood, it can withstand high loads during movement and maintain balance.
The production of this part of the harness begins with the selection of wood. The material should be light and durable. In ancient times, willow, elm and oak were most valued. In regions with a mild climate, where in winter the temperature does not drop below 10 degrees below zero, you can take bird cherry. Birch and hazel have excellent properties. You need to take a wooden blank in the spring, during sap flow, and preferably in a low, humid place.
A high-quality arc can be checked by weight: the product should be held freely with one finger.