To make a scooter you will need
- Workbench or saw sawhorse
- Fixed square for carpentry work
- Electric drill with drills with a diameter of 0.6 cm and 13 mm.
- Two adjustable wrenches
- Tape measure
- crosshead screwdriver
- Pencil
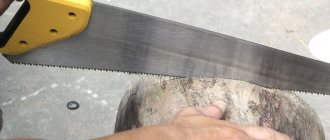
- Sharp saw
- Hammer
- Treated pine wood for longitudinal bars, handle and handle post 3.8 cm x 5.1 cm
- Treated pine wood for connecting neck 5.1 cm x 7.6 cm
- Plywood for the deck-footboard, 1.9 cm thick
- Four ring bolts: two bolts 0.6 cm thick, 5.1 cm long, with a ring hole diameter of 1.6 cm and two bolts 0.6 cm thick, 7.6 cm long, with a ring hole diameter of 1.6 cm [J]
- Four carriage bolts, 0.6 cm thick, 4.4 cm long, with washers and nuts for each [B1]
- Two hex bolts, 0.6 cm thick, 7 cm long, with nuts for each [B2]
- Six carriage bolts, 0.6 cm thick, 4.4 cm long, with washers and nuts for each [B3]
- Two carriage bolts, 1.3 cm thick, 12.7 cm long, with washers and nuts for each [B4]
- One hex head bolt, 1.3 cm thick, 15.2 cm long, with two nuts (screw in the opposite direction) and four washers. This is a pain for the front axle of the wheels [B5]
- One hex head bolt, 1.3 cm thick, 15.2 cm long, with two nuts (counter-tightening) and four washers. This is a bolt for the rear wheel axle [B6]
- One carriage bolt 1.3 cm thick, 20.3 long, with two nuts (screw in the opposite direction). This bolt fits into the O-ring bolt holes and acts as a swivel rod [B7]
LINA'S COMICS #39 - a real shame
ZY Please, cyclists and scooter riders, do not rush at the speed of cars on the sidewalk, especially when there is a bike path nearby.
Walking on bike paths with strollers, or staring at phones is also like that.
We will build a scooter like this
- Measure, saw off, drill holes and arrange: a) Saw off pieces of wood in accordance with the indicated dimensions. b) Carefully measure and mark the centers of the holes to be drilled. c) Then we drilled the holes. Please note that they are of two different diameters. The holes for the axial bolts and the bolts that secure the longitudinal bars [A] to the connecting neck [C] have a diameter of 1.3 cm. All other holes have a diameter of 0.6 cm. d) Lay out all the parts on the floor.
- Assemble the scooter handle: Attach two corner brackets [I] to the top of the handlebar post [E]. Then bolt the handle [F] into place.
- Assemble the front wheels of the scooter: Assemble the front wheels using a 1.3 cm thick bolt as the wheel axle. Place a washer on each side of each wheel. After checking that the assembled axle is not too tight to allow the wheels to spin freely, tighten the two nuts opposite each other to create a “lock nut.” This will help ensure that the assembled axle does not vibrate during constant movement. Place the two O-ring bolts in the corresponding holes in the steering column [E].
- Assemble the platform frame: Attach two longitudinal bars [A] to the connecting neck [C]. Place the remaining two O-ring bolts into the corresponding holes in the connecting neck [C].
- Attach the Deck: Attach the deck [D] to the two side rails [A] with six carriage bolts.
- Attach the steering: Align the collar bolt rings [C] with the steering column bolt rings [E]. Place a carriage bolt through the ring bolt holes to act as a kingpin—the pivot pin for the swivel joint. Check that the swivel joint can turn freely, and then tighten the two nuts on the carriage bolt to create a “lock nut.” This will ensure that the rod does not fall out and does not vibrate with constant movement.
- Install the connecting neck: Attach the corner bracket to the connecting neck [C] and deck [D] with screws. This is done to strengthen the structure.
- Assemble the rear wheels of the scooter: Assemble the rear wheels in the same way as the front wheels in step 3. Make sure there is a washer on each side of the wheel and that the wheels rotate freely before tightening the “lock nut” on the end of the bolt.
- Add Brake: Screw the T-Loop to the back of the deck [D].
DIY bicycle crafts
On our website you will find the most interesting homemade bicycles collected from enthusiastic craftsmen around the world. Most of them can be made with your own hands, with a minimum of tools on hand. Homemade bicycles include:
- Solutions used to improve bicycles and expand their scope of application (strollers, luggage racks, panniers, etc.).
- All kinds of products made from bicycle components (furniture, souvenirs, wall clocks, tools).
- Non-standard bicycle models from professional designers and DIYers.
- Devices for storing bicycles indoors and outdoors (parking, racks).
We will also be glad if you add any of your homemade bicycles with descriptions and photographs.
Bar stools made from bicycle frames
It turns out that bar stools can be made from bicycles. It is enough to remove the wheels from them and fasten them along the bar counter so that they hold tightly and there is a passage between them. True, the convenience of such chairs is questionable; it’s probably worth removing the back of the frames so that no one trips over them.
Homemade clock from a bicycle sprocket
From the rear and front bicycle sprockets you can make excellent homemade watches with your own hands with an original appearance.
The simplest option is to attach a large front sprocket to a round base (plastic, wood, chipboard) using screws, bolts or even glue. Well, displaying arrows and adding numbers is no longer a problem (by the way, you don’t have to add them).
Bicycle storage trays
When storing multiple bikes, you have to prop them up against the wall and against each other. This is not always convenient, especially when someone is propping up your bike and you have to pull it out.
An ordinary wooden pallet for transporting goods can solve the problem. It secures bicycles in an upright position, making their use much more convenient.
Homemade catamaran from a bicycle and plastic water bottles
A simple and cheap to make homemade catamaran for still water and rivers with not very strong currents. For production you need a bicycle, large water bottles, a furniture panel, several boards and a metal profile (corner).
Homemade two-seater bicycle
This two-seater bicycle was made from two by connecting frames. The outwardly unprepossessing design is quite practical and does not interfere one bit with two people riding at the same time.
Bicycle stroller for dogs
The guy made a small stroller for his bicycle, which his dog enjoys riding in.
All-terrain vehicle made from a bicycle
With the onset of winter, such a bike becomes more than relevant. It walks well in snow and ice, and it is impossible to fall on it and get injured.
Fence made from bicycle frames
From bicycle frames and metal pipes of small diameter, you can quickly assemble an original fence for a vegetable garden or other plot of land.
Barefoot on a bike
Do you like to ride your bike barefoot, but the pedals hurt your feet? One way out of this situation is to attach conventional kitchen sinks to the pedals. They can be glued or otherwise secured.
But, if there are no special spikes on the pedals, then it is still better to ride barefoot, your feet will quickly get used to it and this will even be useful. Pedals with metal cleats can also be replaced with regular ones, such as plastic or aluminum.
Exercise bike made from a bicycle
An ascetic exercise bike made from a bicycle. Despite its external unattractiveness, the simulator works and, most importantly, is easy to do and is cheap.
Gear Bicycle
Homemade product sent by: German Izmalkov
Description: The bicycle has a frame on which two gear rings, made in the form of arcs, are mounted with the possibility of rotation on rods around the centers of their initial circles, connected by gearing to the rear wheel through bushings connected to the wheel through freewheel mechanisms of one direction of action, both these gears are the same, the axes of these rods of the gear rims, on which they rotate on the frame, have a rigid connection with the consoles with pedals, and these consoles are connected to each other by a flexible connection, for example, with a cable that passes through a block mounted on the frame with the possibility rotation. (Further…)
Homemade wooden scooter
We present another and quite nice homemade product from our readers. Kantonistov Konstantin sent us a story about a homemade scooter made of wood. The scooter has a fairly simple design, so if you wish, you can assemble something similar for yourself.
(Further…)
Homemade bicycle: from design to production
A team of students from the Product Design, Level 4 course talks about how they created a unique bicycle and what difficulties arose during this process.
One of the assignments this semester was to make a bicycle kart, a custom type of bicycle that has 3-4 wheels and is powered by human power. And most importantly, he had to actually go.
Initially, we were given a little more than a month to work, and we immediately set ourselves a rather difficult task - to make a complete structure out of metal. We stubbornly opposed the advice of our teachers and friends, who said: “Guys, don’t suffer, make it simpler, don’t bother, there is plastic, plywood...” In the end, we are very pleased with the result, although we suffered for three months and spent a decent amount of money on it. (Further…)
Unusual bike
An unusual bicycle with a short frame and no chain drive. The main feature of the bicycle is the rear wheel mount, which is fixed in the same way as the front wheel, and accordingly, it can also be used to control the movement of the bicycle. To understand how the bike works, be sure to watch the video.
General diagram of a homemade scooter
A homemade scooter is easy to make, and its cost is minimal.
All scooters have 2 main parts - a footrest and a steering column. Manufacturing begins with the footrest. Cut a piece of board 80-90 cm long. A groove for the rear wheel is cut out in the back. The depth of the cut should be 2 cm greater than the sum of the wheel radius and the thickness of the axle. If ball bearings are used, then the axis for them is a wooden rod.
The axis, which should be on the plane of the board facing the ground, is attached with screws. The wheel from a children's bicycle is attached to a wooden boss using nuts. The boss is attached with screws from below to the footrest. The corners on the front of the footrest are cut at 45°. A block is attached to the top, the width of which is equal to the width of the footrest. The front corners of the bar are also cut at 45°.
Now, to get a wooden scooter, remove the iron wire from the window latch and bend the bracket in the shape of the letter P. It should rotate freely in the latch. Cut threads for nuts at the ends of the bracket, insert it into the recess of the latch and secure it vertically to a wooden block of the footrest with screws.
The steering column is made in the same way. The difference is that at the end opposite the wheel, a transverse wooden strip is nailed, which serves as a steering wheel.
In the board of the steering column, at the junction with the footrest, 2 holes are drilled for attaching the steering bracket. Screw a nut onto the ends and insert washers. The rods are inserted into the holes of the steering column. The structure is secured using nuts and locknuts.
Drawings made in advance will make manufacturing easier.
Overall dimensions of the scooter:
- Length - 1.775 m.
- Width - 0.42 m.
- Height - 1.115 m.
- The width along the handlebars is 0.9 m.
- Wheelbase - 1.28 m.
- Ground clearance - 150 mm.
The frame design is foldable; when folded, the scooter takes up less space and can be loaded into the trunk of a car. True, the homemade product weighs about 70 kg.
A homemade all-terrain scooter that can drive through mud, snow, and ice. You can use this technology to go fishing, to the forest to pick mushrooms, or to go hunting.
The all-terrain vehicle has a maximum speed of about 35 km/h, which is quite enough for traveling on country roads. Of course, homemade products also have their drawbacks - a high center of gravity, which affects the stability of the scooter, and also quite heavy weight. Otherwise, this is quite a good technique for outdoor enthusiasts.
Required tools and drawings
To make a wooden scooter, you will need the following tools:
- workbench or saw sawhorse;
- fixed square for carpentry work;
- electric drill;
- 2 adjustable wrenches;
- tape measure;
- crosshead screwdriver;
- pencil;
- sharp saw;
- hammer.
To make a vehicle out of wood, you will need:
- treated pine wood for longitudinal beams;
- pens;
- handle stands;
- connecting neck;
- plywood for the deck-footboard;
- bolts.
First of all, you should make a drawing. Pieces of wood are sawn off according to size and the centers of the holes being drilled are carefully marked, which should be of 2 different diameters:
- for axial bolts and those to which the longitudinal bars are attached to the connecting neck - 1.3 cm;
- all others - 0.6 cm.
Now you should lay out the parts according to the drawing on the floor. To assemble the scooter handle, you need to attach 2 corner brackets with bolts to the top of the handlebar post. Then the handle is bolted into place.
The front wheels are assembled using a 1.3 cm thick bolt as an axle. A washer is placed on each side of the wheels. Now you need to check whether the assembled axle is overtightened. After this, tighten the 2 nuts opposite each other, which will ensure that there is no vibration during constant movement. 2 bolts with rings are placed in the corresponding holes in the steering column.
The platform frames attach 2 longitudinal bars to the connecting neck. The remaining 2 bolts with rings are placed in the corresponding holes in the connecting neck. The deck is attached to 2 longitudinal beams with carriage bolts.
Design Features
The device uses an electric motor that runs on a built-in high-capacity battery. In addition to this part, any described vehicle consists of the following components:
- frames - metal or plastic;
- wheels;
- brake system;
- body kit and electronics.
A Li-On or Li-Po battery is used as a power source. Depending on the volume of blocks installed, the electric scooter can travel distances of up to 50 km. Some models have a gasoline internal combustion engine; as a rule, their travel range is higher, as is their speed. The design of the proprietary device also includes a gearbox with variable speed control. Operating current is supplied to the electric motor through a centralized wiring system from power supplies or a generator. All major electronics are usually enclosed in a sealed box that completely blocks moisture from entering.
Electric scooters weigh approximately 15–20 kg, so they can be lifted if necessary. You can charge the device from any outlet; it takes about 6 hours. You can make such a product yourself, but before you make an electric scooter, you should prepare everything you need.
Frame
Wheels
Brake system
Electronics
Battery
How to make a scooter from plywood?
You can make a scooter out of plywood. For this you will need the following materials:
- plywood 10 mm thick;
- furniture board 28 mm thick;
- front fork from a bicycle (20-inch wheel);
- rear wheel (12 inches).
Self-tapping screws and furniture corners can be used as fasteners. In addition, all parts should be glued with PVA glue. More ground clearance needs to be designed. At the end, the product must be varnished, then the wooden scooter will last a long time.
Additional recommendations
Anyone can independently assemble the “stuffing” for a scooter with their own hands. With basic tools and components, it's easy to create a very competitive model. During the assembly process, it is recommended to adhere to the following tips:
- The basic basis of the scooter may differ, but it is better to use wheels from a hoverboard; a ready-made controller and other electronic “stuffing” will also work. All of the above can be ordered in China.
- A metal chain can be used to transmit torque, as it is quite easy to install and subsequently maintain.
- An electric scooter can have one drive wheel. It is better to use rear wheel drive. This is an important condition for the basic assembly; this design will be simpler.
- The basis of the mechanism is a durable frame. It can be made from metal or plastic pipes. Before creating the frame, weight and load calculations are required.
- For the product, you can use a powerful prefabricated power source ordered from China, or a battery from a simple screwdriver.
The manufacturing process is always creative; trial and error are possible here. Another question is the feasibility of obtaining such a device. On the modern market, they cost no more than a regular mountain bike, but a homemade scooter can cost much more.
Instructions on how to make a scooter from a children's bicycle
Making a scooter from a children's bicycle is quick and easy. To do this you will need the following materials:
- 2 forks from a children's bicycle;
- 2 wheels;
- water pipe 1.5 m long, wall thickness - 2.5 mm, diameter - 35 mm;
- pipe 1.5 m long, 2.5 mm thick, 20 mm in diameter;
- a piece of plywood;
- spanners;
- screws;
- welding machine;
- drill;
- Bulgarian;
- dye.
In order to assemble a children's scooter, you will need basic skills in working with the tool.
- Let's disassemble the bike. Using a grinder, we cut off the frame from the front fork. You will also have to work with a grinder on the rear fork.
- Fabrication of the frame and welding of the structure. To create a frame, take a pipe and bend it. One end of the pipe is welded to the front fork, and a metal plate is welded to the other. Now the rear fork is welded to the plate, which makes the structure more reliable. A bicycle brake is attached to the handlebars.
- Attach a board or plywood. To make it comfortable to stand while riding a scooter, a board should be screwed to its frame. To do this, first weld 2 plates and drill holes in them. The board is attached using screws with nuts or self-tapping screws; a cut is made in it so that the frame fits into it.
- Painting. You can use spray paint. For example, paint the front wheel with matte black, and the back wheel and the board with pink fluorescent paint if the vehicle is intended for a girl.
A wooden scooter or a scooter made from bicycles, made by yourself, will be inexpensive and will serve for a long time.
Manufacturing methods
There are many different diagrams and instructions for making any model of vehicle available in the public domain. In some cases, a homemade electric scooter can consist of 80% of the usual one. You can also borrow components from an old bicycle. Such models are the easiest to assemble and do not require complex welding work. You can get a convenient vehicle even without using an electric generator if you have a simple electric motor from a drill. The battery capacity of the screwdriver is quite enough for a 1.5-hour trip. A more complex upgrade involves the creation of a finished frame structure from metal corners, sheets of steel, hot welded together. As a rule, the steering and wheel drive are taken from old bicycles or scooters.


