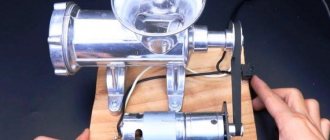
Many soldering specialists face a lack of a third hand. You can hold a soldering iron in one hand, and in the other hand the element that needs to be soldered, but the board itself remains unfixed, which causes certain difficulties when working.
A simple device can solve this problem - a third arm for soldering (it can also be called a tripod or holder). The presence of this device allows you to make the microcircuit absolutely motionless.
3 hand can be made independently from unnecessary things that are stored in the garage or storage room. And here there can be different options - it all depends only on the imagination and specific needs of the master.
In addition, there are many instructions and articles on this topic. It is better to make such a device as a third hand from non-flammable materials, although some consider it quite normal to use wooden and plastic elements.
In any case, the third hand must have a strong, stable base made of metal, a flexible vertically located elongated part that can change orientation in space (this is necessary to fix the clamp in a certain place), as well as the alligator clip itself of a suitable size.
If you don’t want to bother with this yourself, then you can order a board holder for soldering in an online store or on the radio market. Commercially available “third-hand” devices are, for the most part, not expensive, but they are very convenient.
A shop tripod for high-quality soldering can easily withstand high temperatures of hundreds of degrees and allows you to ensure amazing stability of the assembled structure.
In addition, many store accessories may include a backlit magnifying glass (the backlight runs on standard batteries), clamps of different formats, and so on.
The magnifying glass in such holders can be fixed in a convenient position and adjusted both vertically and horizontally. When soldering circuit boards, having a magnifying glass in the “third hand” holder allows you to see the smallest areas and avoid mistakes.
How to make a soldering iron stand with your own hands?
It is dangerous to use a soldering iron without a stand - if placed on any wooden surface and heated to 300 degrees or more, it will char it. The stand must contain a metal structure that removes excess heat.
Types of spinning holders
Devices for fixing fishing rods according to the installation method are divided into two groups. These include:
. Such models of stands are integral with the boat mount. This greatly simplifies their installation and increases mobility. Disadvantage: large dimensions and inconvenient transportation.
Combined- Separate . In this case, the fishing rod stand and the mounting adapter are two separate elements that are connected to each other directly in the boat. Assembly of the product takes longer, but it has smaller transport dimensions.
By design, devices are also divided into two categories. Among them are:
. The rod handle is installed in the holder cup at an angle to the vertical (from 50 degrees). The following models of spinning rod holders are used for trolling.
Vertical glass products- Horizontal horned devices with rings . Holders of this design can be used both for fishing from the shore and from a boat. The angle of the rod can be changed from 0 to 40 degrees. There is a flyer in the front part of the structure, and a ring in the back part. This is an ideal option for floats and feeders.
There is another classification. Types of holders according to the number of places for fixing rods:
- single (one spinning rod can be fixed),
- double (possibility of fixing two fishing rods at the same time),
- targs - multi-place stands.
Tools and materials
The following tools should be prepared in advance:
- a universal screwdriver with a set of heads or a screwdriver with bits and a wrench,
- hammer and pliers,
- a small electric drill and a set of metal drills;
- ruler, square and construction marker;
- adjustable wrench (can be used instead of a wrench).
Consumables you will need:
- a piece of natural wood board;
- self-tapping screws;
- soldering iron stand in the form of a plate or bent wire;
- a clamping element from some electronic device or household appliance;
- small container for solder and rosin;
- steel wire with a cross-sectional diameter from 2 to 3 mm.
the soldering iron itself - to check how convenient the stand you just made is for it.
With diode
The purpose of the diode is to reduce the supply voltage by one and a half to two times. This significantly saves the life of the soldering iron.
The fact is that periodically there are significant interruptions in work when the soldering iron is not actively used. In order not to keep it constantly turned on at full power, and also to eliminate the loss of time for its complete, “from scratch”, warming up when it is needed again, a diode - or a step-down regulator - is simply necessary.
Long-term operation of the soldering iron at a temperature significantly lower than 300-odd degrees prevents the nichrome wire from which the active (heating) element is wound from burning out prematurely. Periodic overheating of the soldering iron can also cause the layer of mica to crumble, transmitting heat from the heated spiral of the steel structure to which the copper tip is rigidly connected.
To build a heat control circuit into the stand, do the following:
- Install on the stand a small-sized switch, pre-built into a small rectangular housing. In parallel, a high-voltage diode should be connected to it, designed for industrial mains voltage up to 300-400 volts. This refers to the reverse voltage that a given diode can withstand. The current strength (we are talking about direct current) must be at least 200 milliamps. All these characteristics are indicated in the description of the specific diode.
- Connect an additional power cord to the stand - it is the one that is connected to the 220 volt lighting network. Connect a switch with a diode into its gap.
- Mount a compact, small-sized socket at the output of the stand. Connect it to a switch with a diode.
Reliably insulate all live contacts. The stand with diode is ready for use.
Manufacturing options
There are several options for stands - depending on the specific requirements for soldering functionality, choose any one.
Regular
First, prepare a wooden board - the base of the stand.
- Select a piece of board - for example, 25*12 cm.
- Mark the points on the board according to the drawing and drill holes in these places. The diameter of the holes should be slightly smaller than the cross-sectional diameter of the wire - it should fit into them with great effort.
- Cut the required piece from a coil of steel wire and mark it with a marker. Bend it along these points, as shown in the drawing. You will get an M-shaped frame - its dimensions can be, for example, as follows: two sidewalls of 5 cm each and two sides (slopes) of 3 cm each. There should be two such frames.
- Press the ends of the frames into these holes.
The simplest homemade soldering iron stand is ready. If desired, it can be modified as follows.
- If rosin and solder are sold in ready-made industrial cylindrical capsules, then drill a hole using a core drill of a slightly smaller diameter than the capsule itself. It may not be through.
- Press the capsule itself into this hole. Before inserting it, this container can be coated with glue - for example, universal “Moment-1”, then it will not fall out over time. There can be 3 of these capsules: for rosin, solder and flux. It is advisable to choose a glass container for soldering flux.
To prevent the stand, made by yourself, from scratching the varnished surface of the table, legs . Do the following.
- Cut four identical circles with a diameter of no more than 1 centimeter from a piece of thick (from 3 mm) rubber. Here, rubber from old car inner tubes can be used as a consumable material.
- Using an emery block, a sharpening stone, or a grinding machine, sand the rubber on one side and the base underneath where these circles are installed.
- Apply a layer of the same Moment-1 glue to the stand and to the circles themselves. After a few minutes, use a vice or clamp to firmly press them to the piece of wood where they are glued. Compression is also carried out by pressing with your hand on the stand installed on these mugs, and any horizontal surface that can withstand the force applied to the stand serves as a support.
After a day, the glue will completely dry and harden, and the stand can be used.
Stands of increased sizes are used for powerful soldering irons of 100 watts or more, as well as for blowtorches running on gas.
Casket
The box design is the most compact and easy to carry . It is made from any wooden or metal box shaped like a parallelepiped. The soldering folding box is a pencil case with several compartments in which capsules with flux and rosin and a roll of solder are stored.
Fixation of such a pencil case in the closed state is carried out using M-shaped wire inserts. If the pencil case is large enough in size - for example, 25 * 12 * 5 cm, then the soldering iron itself will fit into it. The volume of such a box is enough to, in addition to soldering consumables, accommodate the soldering iron itself, its power cord and plug when folded.
↑ Without a single nail
Naturally, non-foil. Otherwise it could have been done much faster. And it would have turned out more beautiful, but I seriously doubt the durability of such a product. Foil has a bad habit of peeling away from the base when heated. Dimensions are determined by “customer requirements” and available pieces of material. I once had a “monster” about 20x40 cm. It’s a shame I lost it. I did this now when I was little. I'm not planning on a large scale yet. You can solder a block on a couple of transistors. Or even something sound on a microcircuit, fortunately they don’t have that many pins now, and they don’t have a lot of accessories either.
2. Using an awl, knife, or some other suitable tool, markings for future contact pads are “scratched” on the surface of the material. The dimensions indicated in the figure were copied from my product. If anyone needs it, others can do it.
3. According to the markings, holes with a diameter of 2 - 3 mm are drilled at the site of future contact pads (for pads 5 mm wide, as in my case).
4. And then the holes on the board are given this shape.
For this purpose, I had to make a tool from a piece of a hacksaw blade for metal. The fragment was sanded approximately like this.
Instead of such a homemade jigsaw, you can use a triangular needle file. The shape of the holes will be slightly different, but they will perform their task (to prevent the rotation of the petals) in the same way. Only there were no needle files on hand at that time. And the drill was only 1.5 mm wide. Therefore, we got absolutely even through grooves.
6 And then strips 5 mm wide are cut from suitable sheet metal. In my case, it was the famous tin from condensed milk cans.
7. The strips are cut into pieces approximately 24 mm long (for 8x5 mm pads). The blanks are bent something like this:
The resulting products are inserted into the holes described above:
The result is something like this.
Now you can safely solder your design (if it does not exceed the size of the board or is not assembled using subminiature components). Measure and run modes, make changes to the circuit. And when it works as it should, develop the signet, housing, etc.
Because of the tins sticking out from the back of the board, you need to work, naturally, on a dielectric surface. Well, don’t let metal get under the board. In this sense, a board with tins compares favorably if the nails are not too long: smile: For greater guarantee, you can attach a piece of textolite (getinax) of the same size to the board from below. Or adapt the legs as in the picture from UT, if the board is large enough.
I agree that everything could be made a little simpler. For example, the “design” of contact pads. (I myself once made a version where a tin blank was simply bent in half.) And the board itself can even be made from cardboard, if something new is not done very often and there is no risk of overheating it during operation. In it, the grooves for the platforms are cut much easier. (I once used it, though for slightly different purposes.)
Or you may not do it at all. But maybe it will be useful to someone. You never know.
And finally - a photo of the board “in action”. That is, while checking a block for the next product.
It was far from civilization, normal instruments, instruments and radio components.
So don’t be too surprised by the “museum exhibits” from which everything is collected. Everything was done only to select the coil, so the type of other elements did not matter. In addition, a friend of mine had an oscilloscope nearby that allowed me to monitor a signal at radio frequencies, which for me still remains in my plans and dreams. The receiver standing in the background in this case acts as a frequency meter.
At the moment, two such boards have been made. I hope that they will be useful for preparing future articles.
PCB holder
The simplest version of the holder is a pair of electrical installation “crocodiles”. They are positioned so that they are turned in one direction. They are installed on supports made of linear sections of the same wire from which the inserts holding the soldering iron are made. There is also a more advanced device with brackets and guides that allows you to hold printed circuit boards prepared for soldering more firmly and reliably. The PCB retainer can be installed anywhere on the stand.
From scrap material
By using materials that are available in the house, you can save the costs required to make the stand.
To build a convenient structure you will need to prepare:
- coarse sandpaper;
- hacksaw for metal;
- Phillips screwdriver (you can use a screwdriver);
- thin screwdriver;
- iron plate;
- a spring that can be removed from the pen;
- a tin covering the board (can be removed from a broken receiver);
- metal retainer from the antenna;
- self-tapping screws 20 mm - 4 pcs.;
- bolts - 4 pcs.;
- Thin-sheet chipboard (up to 18 mm).
Also during the work, in addition to improvised means, you will need pliers and 2 rubber stoppers from chemical test tubes.
For reference! On Avito or Yula you can find craftsmen who make interesting and unusual stands for soldering irons. Such products look almost like works of art.
Step by step guide:
- The cut chipboard sheet is sanded, giving it a rounded shape.
- Rubber plugs are sawn straight. To achieve uniform thickness, you should use sandpaper.
- 1 self-tapping screw is screwed into each rubber leg.
- Holes are made in the structure and legs with screws are screwed in.
- The iron plate is bent, giving the outline of a hook.
- Using a screwdriver, holes are made for a pair of bolts intended to secure the hook.
- The final stage of making a stand from scrap material will be tightening the bolts and checking how well the hook holds.
Recommendations
For stands with a diode, select the diode itself in terms of power, with a margin designed for a specific soldering iron . For example, 25 W soldering irons will require a diode with a maximum operating current of 110-120 mA, and taking into account a 2-3-fold reserve to prevent overheating of the part itself, the maximum operating current will reach 0.3 amperes. The use of diodes with a reverse voltage less than 300 V is not allowed - if the voltage is at the limit or slightly beyond the limit, thermal and electrical breakdown will occur.
Do not use plastic as the main material - the heated inserts of the holders, which transfer excess heat in a matter of seconds, will quickly melt it. The holders will fall to the side, and the soldering iron will “move” off the stand onto the table.
It is recommended to use heat-resistant and non-flammable power cables. Ground the soldering iron body separately.
To learn how to make a soldering iron stand with your own hands, see the following video.
Phone stands: best ideas
A phone stand can be made from the most unexpected materials. We have prepared for you the most interesting ideas and master classes with photos and videos, with the help of which you can easily make this useful accessory with your own hands. Stands made from paper clips, a sheet of paper, corks and other simple things - everyone will find a suitable option for their phone.
Earlier we told you how to make a popsocket. This is also a kind of phone stand. We recommend you look at this collection of ideas.
Paper clips
Using paper clips, you can make a great DIY phone stand in just a minute. This is very convenient when you need to watch something during any other activity, but you don’t have a popsocket or any other stand at hand.
- any cardboard;
- 2 clamps.
Just attach them on both sides and the stand is ready. The phone will be firmly fixed in the “ears” of the paper clips.
This device can be used as a tripod. The holder is useful for taking group photos when you have nothing at hand.
Shell
You don't even need special instructions here. The main thing is to find a suitable shell from which you will make a phone stand. It should be big enough.
You will also need liquid nails or rubber glue that hardens into an elastic, plastic mass. If this is not available, you can use acrylic plasticine - it will not stain anything.
To make a phone stand, you need to apply a layer of this glue to the place where the gadget will come into contact with the surface of the shell. If it is not stable, glue can be applied to the bottom to firmly fix it.
This homemade mobile phone stand looks very beautiful and will fit into any interior.
Beautiful jar
The simplest stand for a mobile phone can be made from an ordinary can. The main thing is to choose the appropriate size and design.
Choose a jar into which the phone fits freely and does not tip over under its weight. If the source does not look too pretty, arm yourself with acrylic paints. With their help, you can make a beautiful phone stand with your own hands. Paint it in an original way, add splashes or patterns, or any inscription.
You can decorate the jar with twine or braid.
Wine corks
Don't throw away wine corks - this is a great material for creativity! They make just a great stand for your smartphone. Durable, environmentally friendly, beautiful, comfortable.
- 20 wine corks;
- Super glue;
- lace;
- leg-split;
- any decor.
Glue the corks together in columns and in a row. First, assemble the pieces for the back wall. Then glue the front completely. The bottom of the stand is glued gradually. Place the plugs against each other one at a time. Then lean against the back wall.
For beauty, you can add lace, thin twine or floss threads and any cute little things.
Bamboo chaise lounge
A very interesting option for a phone stand is a homemade mini chaise lounge. It looks creative, and you can make it at home in just a few minutes.
- bamboo mat;
- bamboo sticks;
- 6 coffee sticks;
- any paint;
- wire cutters;
- glue gun
Watch this short video master class, in which the author shows step by step how to make an original stand for a mobile phone with your own hands. The result is a bright, stylish accessory that can be used to decorate your desktop or even give as a gift to someone.
Origami
How do you like the idea of making a phone stand out of just paper? Previously, we told you in detail about the origami technique and its basic principles. We recommend reading our material on this topic, especially if you are a beginner.
For this craft, you only need a sheet of thick paper.
Watch the video tutorial in which the author makes a cool stand for his phone or tablet with his own hands. Repeat after him - it's quite simple. This accessory can be easily made in an office, university or school to use a mobile phone for reading or watching videos.
Simple and beautiful
The simplest phone stand without glue can be made not only from paper clips. You will need a plastic mayonnaise bucket and scissors, and the rest is a matter of taste. It is better to choose the most dense base so that the phone is securely fixed.
A step-by-step master class is shown in the video below. You can decorate the craft with acrylic paints, markers, stickers, glitter and anything else.
We hope you were able to choose a suitable master class to make a useful accessory for your phone. Each of them can be modified, improved or customized. Your coasters will turn out beautiful, original and very comfortable.
P O P U L A R N O E:
When reading books, it is recommended to turn on a general light or a table lamp of sufficient brightness and area of illumination so that the eyes do not strain or get tired. In cases where it is not possible to provide high-quality lighting, there are book reading lamps for occasional reading. They are compact, mobile, battery-powered, and the LED light source allows you not to change batteries for a long time. One such lamp and how it can be improved at minimal cost will be discussed below.
Homemade spinning rod holder for mounting on a PVC boat
The main inconvenience for a fisherman when fishing from a rubber boat is the poor stability of the boat. It is almost impossible to control a boat and hold a fishing rod at the same time. When using the trolling technique for fishing to catch fish, the spinning rod must also be securely fastened. In such a situation, a fisherman simply cannot do without a special holder for a spinning rod on a PVC boat, which you can buy or make yourself.
How to implement board mounting feet in the case?
I’m making my first 3D model; I want to print a housing for a small device shaped like a TV remote control. There will be 2 boards in the case, which I plan to secure with screws or self-tapping screws.
If you take any ready-made universal case for electronics, then legs are usually provided for attaching the printed circuit board, sometimes with threads (see photo). Those. I can put the board on the legs and tighten it with a screw or self-tapping screw.
Tell me how best to implement a mount for a printed circuit board, taking into account possible features associated with 3D printing?
I think that we need to make similar legs to mount the board, and cut the threads by hand. Or can the thread be printed too?
Tools we will need
Many of the tools may already be available to DIY radio enthusiasts. Otherwise, you will have to purchase them or make them yourself from scrap materials.
Therefore, before unsoldering the radio component, get the following devices:
- A soldering iron of the required power and design for heating the contacts of radio components . You can take a ready-made one, or you can make it yourself; the manufacturing process is described in detail in the following article: https://www.asutpp.ru/payalnik-svoimi-rukami.html
- Tweezers or clamp - used for manipulating radio components. Allows you to hold elements with tweezers, fix their position and provide additional heat removal when you try to desolder them.
- Tubular-shaped needles are sold ready-made, but if you don’t have any on hand, they can be replaced with a regular medical syringe needle, the main thing is that the inner diameter fits onto the stem of the radio component. In addition to needles, you can use tubes or sleeves; with their help, heated radio components are separated from the solder.
Rice. 1. Set of soldering needles
- Dismantling braid also acts as an auxiliary tool if you need to desolder those elements that have a large number of legs on the printed circuit board. You can either purchase a ready-made one or make it yourself.
Rice. 2: dismantling braid
- A desoldering pump is a device for removing solder from a mounting location, allowing you to quickly desolder a large number of radio components. Structurally, it includes a vacuum flask, a return spring and a piston driven by it. In addition to purchasing a factory model, you can make a desoldering pump yourself.
Rice. 3. Desalter pump
Inexperienced electricians may argue that there will be too many tools for soldering radio components. After all, soldering is performed using a regular soldering iron, but all of the above devices will help you solder the necessary elements quickly and accurately. This is especially true with large volumes of contact pins in the board. Now let's look at the practical application of each of the tools described above.
Other possible adaptations
The kit of a good radio amateur and soldering master may include not only a third hand, lenses and microscopes, but also other devices and tools:
- special thermal tweezers (it is needed for retracting and maintaining contacts, heating elements are installed at its ends and this is how it differs from ordinary tweezers);
- miniature pliers or wire cutters (these devices remove insulation and defective wires);
- needle file (necessary for cleaning the soldering iron tip);
- technical awl and sharp knife.
Of course, this list is far from complete; to solve specific problems in the field of soldering microcircuits, additional devices may well be needed. More and more devices are appearing that allow you to test and repair electronic devices.
Dinosaur stand
If you have a plastic toy lying around (in this example there will be a dinosaur), then you can also make a stand out of it. Please note that it should be returned to its original condition.
Step 1. Find the dinosaur. A favorite toy is selected. You need to make sure that it stands firmly and securely. You should also look at its tail to see if it is long enough to rest on the surface, since it is through this that the stand will be held.
Step 2. Cut. Using a utility knife, the dinosaur is cut in half. It is better to use a toy that is hollow inside.
Step 3. Seal the space. The dinosaur's tail must be caulked. You should use your fingers to make sure that the inside is caulked.
Note!
- Do-it-yourself easel - types of designs, choice of materials for creation + step-by-step instructions and simple diagrams for beginners
- DIY wedding glasses: a detailed master class for DIY decoration, selection of decorative elements and materials (photo + video)
Do-it-yourself busy board: we make interesting educational boards for boys and girls from different materials
Step 4. Insert the suction cup. While the caulk is still wet, you need to insert the suction cup. The phone is applied to ensure that the suction cup is at the correct angle. Remove excess putty using a small brush.
Step 5. Seal the legs. This is important to ensure that the dinosaur's tail stays in place when used as a stand.
It is worth noting that the caulk inside the dinosaur tail takes several days to dry (about 4 to 5 days). But having a phone stand with a dinosaur is original, interesting, and inexpensive. So for the sake of this, you can be patient.
Suction cup stand
Step 1. Take the suction cup. With the suction cup you choose, you can start creating your own design on it. The design is limitless - whatever you want can be done. Using different colors of nail polish, the suction cup can be painted.
Step 2. Hole. Now you need to make a vertical hole in the top of the suction cup.
You can use something metallic or sharp. For example, heat a needle over a candle. When it is still hot, you need to immediately poke it into the center of the suction cup, starting from the right side. Repeat this until the top of the suction cup on the left side is pierced.
Step 3. Insert the ring. Once the hole is large enough, the key fob ring is inserted into it. Do this until everything goes through.
Great, now your DIY phone holder is ready! You can use this device both as a smartphone stand and as a holder. Quite convenient combination of 2 functions in one element.
Types of spinning rod holder
This device prevents the spinning rod from being thrown out and helps secure it to the boat hull. There are two main types of this device, which differ in their designs and methods of securing the structure to the body.
Let's consider these types:
Horned holder with rings. It differs in that the spinning rod is installed with an inclination from zero to thirty degrees, and the weight is distributed over the slingshot structure.
It is also worth noting that the holders produced are intended for different types of spinning rods.
Typically these devices are divided into short, medium and long. Prices for spinning rod holders for a boat will depend on the material from which they are made, model and design.
Model range of holders
Note that manufacturers of fishing equipment provide a wide selection of holders.
Let's look at the most popular options on the market:
- Canadian made Scotty holders. This manufacturer provides a very wide range of holders, which is why it has gained high popularity among fishing enthusiasts. The use of only high-quality and durable materials in production, functionality and the ability to be mounted on different boats make this option even more attractive.
- Holders for spinning rods from the Hummingbird brand. This manufacturer entered the fishing equipment market in the CIS countries a very long time ago, which gives reason to trust it, because many users of this equipment give it a high rating. It is worth noting that this manufacturer is distinguished by its low prices for holders for spinning rods on boats, as well as the high quality of its products. The holders of this brand are moisture-resistant and durable.
- Holders for spinning rods of Avachi models. Has gained high popularity among owners of inflatable and rubber boats. The design of this model prevents accidental loss of the spinning rod, protects the rods from external damage and has an excellent appearance. Such spinning rod holders on inflatable boats can be found very often, which proves the quality of this device.
- Holder for spinning rods of Amphibalt models. Installation of this device occurs using bolts and a trolling arc. Amphibalts are distinguished by the highest wear resistance and reliability among the entire range of stands, but the prices for these holders are a little steep.
We can say that choosing a holder for any boat will be quite simple, because today manufacturers offer a wide selection of high-quality products that serve fishermen for many years and leave the fishing rod unharmed.
Wall clamp holder
Carpenter's clamps are often piled up or placed in a corner of the home workshop. Build a shelf holder for them from waste wood and a piece of sheet material.
Our homemade device can accommodate up to six rack clamps. You can increase the dimensions of the hanger to store more tools by approximately 30mm for each tool. Please note that if the holder expands significantly, you will need to strengthen the bar or place additional support in the middle.
Dimensions of blanks for wall clamp holder.
Cut the workpieces according to size and sand the visible surfaces. Align the parts and drill the countersunk holes.
Screw the bar to the supports with 4.5x40 mm screws.
Turn the pieces over and secure the back panel.
Hang the holder on the wall through the drilled mounting holes.
Directly below this device there is a place to store C-shaped clamps.
Ready-made wall holder for carpentry clamps.
The holders for them are very simple and are made separately for each set of clamps. The dimensions of the suspension are selected based on the fact that the width of the protruding shelf should be slightly less than the distance between the jaws.
Holder for storing C-clamps.
Methods for attaching the holder to a boat
In order for the holder to properly perform its tasks and function correctly, it must be properly secured to the body. There are several mounting options:
- Using bolt connections. This option is suitable for boats that are made of steel or wooden materials, because it is impossible to make a hole in inflatable boats.
- Using clamps. Such fastening will help preserve the internal structure of a rubber or inflatable boat. The disadvantage of this design is that it is usually fixed to benches or to the boat’s motor, which significantly increases the fisherman’s discomfort.
- By using glue. In the modern world, there are very stable and strong compositions of adhesive materials, which allows you to securely fasten the device to the boat. This option is considered the best among owners of PVC boats, since it does not harm the hull of the boat at all.
Using screw connections. It can be used on both inflatable and wooden boats. In the photo of a spinning rod holder on a boat, we can see that this option is attached to structural elements of the boat made of wood or plastic (bench or transom). The disadvantage of this type of fastening is that the screws may become loose and the structure will break, which may result in the loss of the spinning rod.
Paper clip stand
The stand can be easily made from a paper clip. All you have to do is bend it correctly. This won't be difficult because the paperclip can be easily shaped and is strong enough to break under the weight of the phone.
Choosing the right model
When choosing a working device, craftsmen have different considerations. For some, the price criterion is more important, for others - security guarantees. But more often than not, the type of work is the most important. The situation is the same with electrode holders for welding. Efficiency and safety come first.
Here are the parameters to take into account when choosing the best option:
Specifications
The device must match the current strength that is required in your unit. If there is a discrepancy, all your devices will quickly fail, and safety will be in question. Once again: the current strength should not exceed or be less than in the main apparatus, that’s the only way.
Preferable are models that fix the electrodes in direct dependence on the current strength in the device.
Dimensions
Electrode holder designed by Anikin.
What is behind the concept of ergonomics? This is compactness and suitable dimensions for the specific hand of the master, light weight. If you have a line of welding holders with the same technical characteristics, choose the one that is lighter and smaller in size.
If you travel to different work sites, purchase a second spare welding holder.
Degree of reliability
The reliability of the devices is tested under non-standard operating conditions. Holders for welding must work reliably and without loss of their qualities at critical temperatures, high humidity, dust contamination, etc. The plastic of the handle should be durable with good insulation.
It is better if the clamp is cast and massive. Screw electrode holders with rigid threaded fixation are very reliable. They are the most durable in operation and, in addition, make it possible to change the angle of the cathode end.
https://www.youtube.com/watch?v=cdTY0Zhn8ic
Price
The range of prices is impressive: from one hundred rubles to fifteen thousand. Of course, the cheapest models, by definition, cannot be considered safe or reliable. If you are not going to buy disposable equipment, you need to pay attention to the average price categories of models.
Expensive options are designed for large-scale professional work; these are also unlikely to suit you. If you decide to purchase an expensive model, analyze its characteristics most carefully. Clamps for professional work cannot cost less than three thousand rubles.