Nowadays it is impossible to imagine the hot season without a fan. At this time, both large and small models are important. But, unfortunately, the latter are many times more expensive, and you won’t find a suitable model in every store. Don't rush to shell out money - there is a way out!
In this article we will give you some ideas on how to make a fan with your own hands at home. This process is quite exciting, so it will be possible to involve teenage children in it.
Several suitable materials
There are several options for suitable materials for creating fan blades and cones:
- Plastic base. It is a favorite material for designers to create devices like fans. Plastic blades are made from the top of the bottle, which is located closer to the neck. The entire part is cut off right down to the cork. In addition, a cone and a base for a fan are made from a plastic bottle. The second piece is usually constructed from the bottom of a plastic bottle. Sometimes additional parts are required: drinking straws or cardboard.
Plastic blades for fan - Cooler. The easiest way to make blades and a cone for a fan is to use a computer cooler. This part is used as an aerodynamic filter in the computer unit. In this way, a cooling system is built for the internals of the system unit. The cooler is just a fan, only reduced in size. To make the ventilation equipment larger, you will need several unnecessary coolers.
Cooler as an integral part of the cone and blades for the fan - Disk. This part is suitable for creating blades. This option is easier to use, as it is small in size. But a disk structure is much more difficult to build. Also, it is not possible to make a cone from a disk.
An example of creating blades from a disk
GPU-Z
A video card is almost a full-fledged “computer within a computer” with its own subsystems and operating modes.
Therefore, developers from TECHPOWERUP have developed a separate program for checking a computer’s video system - GPU-Z. Its basic principles are the same as those of CPU-Z - complete information content and ease of use. It is available online for free use. GPU-Z is an indispensable and necessary tool for anyone who is interested in what their computer consists of. The utility will report to you about all parameters of the video core, video memory and power subsystem, right down to the device identification code and BIOS version. In addition, GPU-Z scans the current readings of the temperature and frequency of the chip, the frequency of memory chips, the rotation speed of the cooling fan, the load and voltage on the core, etc. All these values are recorded at the owner’s request in a text file or screenshot.
The utility has earned special recognition for its ability to detect “fake” video cards that do not meet the specifications stated in the BIOS. Near the name of such a card you will notice the status “”, and an exclamation mark will appear instead of the vendor’s image.
Advantages:
- a full report on the characteristics of the video card and its current condition;
- simple interface shell;
- saving the report as a document or screenshot;
- ability to send a problem report;
- a large website database for checking your adapter and comparing it with similar cards;
- does not require payment.
Flaws:
- the interface is not fully translated into Russian;
- no built-in stress or performance tests;
Step-by-step instruction
For each material listed previously, there are instructions for creating blades and a cone for a fan.
Made of plastic
Let's consider the algorithm of actions with a plastic bottle:
- One part of the plastic bottle with a cap will be the blades. Therefore, the base is cut in such a way that several petals are formed. The petals come off one by one.
- To give the blades their shape, you need to twist them.
A candle, matches or lighter will help with this. The main thing is to carefully monitor the process, since soft plastic is susceptible to fire. It is better to keep the lighter at a maximum distance just to heat up the plastic. Section of the first part of a plastic bottle - The cover is used as a base for a propeller with blades. A hole is made in it that matches the size of the motor axis. To strengthen the connection, the material is glued.
- The fan base or cone is constructed from the remaining part of a plastic bottle. A hole is made in it to place a lid on which blades with a motor are placed. The structure is installed strictly at a right angle. The main thing is to make the base heavier. Large bolts, nuts or other metal elements of significant weight are suitable for this.
- At the end, a hole is made for the button on the base of the future cooling device, and the electrical circuit is closed. You can also place a power supply there.
From the cooler
Next, consider the instructions for using the cooler:
- To turn the cooler into a ventilation device with a propeller, first the wires are prepared, and then the connecting structure. When placing the device near a computer unit, an ordinary USB cable will be useful. The connecting wire is cut and stripped of insulation. A similar operation is carried out with the cooler wiring. During the propeller assembly process, you will need a red and black wire. The first is responsible for the plus, the second for the minus. But if there are other colors in the wires of the cooler and USB cable, they can be cut off and removed. This is done to avoid confusion.
Installing the cooler on a plastic base
- Let's move on to the procedure for joining materials.
First, the wires and cooler are cleaned of dust and other debris. It is better to twist the cords tightly together. Don't mix colors. An incorrect design will lead to difficulties in the process of designing parts for the fan. Twisting requires 1 cm. If necessary, most wires are cleaned and insulated later. Wires and cooler - Don't forget about the safety of the design. Properly insulated propeller wires ensure a low chance of shorting out an outlet or computer. Exposed wires are wrapped with electrical tape if there is no power. It is better that the flooring is thick.
- The final touches to creating the propeller are to equip it with a computer cooler. The point is that this part is light but fast. 5 volts is enough for a very high rotation speed. The voltage indicator was chosen for a reason: the cooler will cope with its task and will not make a lot of noise.
Final layout of parts for the fan
When the minus falls to the plus, a dangerous situation is created. Do not allow the black and red wires to touch while connecting the electrical circuit. In this case, not only the USB cable burns out, but also the components of the computer system.
Typically, a computer is not afraid of such situations if it has special protection against voltage surges built into it. The problem is much more complicated with sockets. During surges, the socket short-circuits and the entire wiring is disrupted. Therefore, care should be taken to insulate the exposed part of the wires in order to avoid complications and unusual situations.
To create a full-fledged fan of significant dimensions, you will need several unnecessary coolers. Otherwise, the device will fall due to oscillations and vibrations. This situation cannot be allowed for the following reasons:
- If dropped, the device may bounce directly into your face. But such a device will not cause deep cuts.
- If the made device falls on a flat surface, the blades will simply break. The fragments will fly to different places. A dangerous part can also bounce into the eye.
- Other dangerous unforeseen circumstances.
From disk
You can't make a cone out of a disk. But this material is useful for creating blades. Let's look at the detailed instructions for creating parts:
- Since a fan with disc blades does not use a cooler, you need to buy or find a special motor.
He sets the structure in motion. But it is actually possible to use the engine from the system cooler for cooling. It is necessary to select a motor that moves with a certain part - protruding iron or plastic rods. But the disk will make a much better and stronger propeller. Parts from an old VCR and player are taken as a motor. These materials are good because the devices are based on the process of spinning disks and cassettes. You cannot use a motor from a washing machine or a broken fan. Such devices spin the propeller strongly. When you assemble a product yourself with low-quality tools, the structure turns out to be flimsy. Therefore, a motor with a suitable rotation speed is first selected. If the motor is spinning at high speed, it is likely that the disc base of the blades will break apart and scatter across the room. The running motor is connected with wires in the same way as described earlier. Example of disk layout - Next comes the design of the blades.
The disc is the base of the propeller that is attached to the engine. Therefore, you need to work more carefully with this detail. To begin with, several disk surfaces are cut into 8 identical parts each. The material is first lined using a ruler and a simple pencil. This is necessary to prevent errors. In this case, a soldering iron will be more useful, since the tool does not leave sharp edges, unlike scissors. After this, the disk surface is slightly heated with a lighter. This makes the material more pliable. The separated parts twist like the blades of a real fan. A similar procedure was done with a plastic bottle. A wooden plug is fixed in the center of the device. If the size does not match the hole, the plug must be planed. Final disk fan with 2 bushings - After creating the propeller with blades, everything else is designed. The disk is not useful for constructing the cone. The central part of the disk fan is mounted on a standard toilet paper roll sleeve. The resulting part is fixed strictly in the center of the second disk surface. This structure will act as a foundation for the fan. The remaining part of the sleeve is located at the top. The propeller motor is placed in this place. Disc blades are attached to the motor. The device is now ready for use. Additional decorative elements in the form of lighting are always added upon request. This makes the device look presentable.
Manufacturing.
We cut out the connector on the USB cable that we don’t need.
2.
Carefully remove approximately 3 cm of outer insulation from the cord so as not to damage the wires located inside. Usually, with a fairly sharp knife, apply slight pressure, around the wire and then pull out the cut part.
Under the insulation there are usually just 4 wires
In my case, the wire is shielded and in addition to 4 wires there is also foil and the screen itself, but this is not important
We cut off everything unnecessary, leaving only the red and black wires
And carefully strip the remaining wires by approximately 1 - 1.5 cm.
5.
We cut off the connector from the fan.
In my case, the fan is without a sensor, so there are only 2 wires, but if the fan is with a speed sensor, then there may be 3 wires (a yellow one is added) or 4 wires if the fan is controlled, as a rule these are processor fans
It doesn’t matter how many wires you have, but if there are more than 2 of them, then just like with the USB cord, we leave only red and black (if there is no red, then yellow and black.), we bite off the rest a couple of centimeters at a time
), we bite off the rest a couple of centimeters.
And carefully strip the wires from the fan in the same way as on the USB cable, by 1 - 1.5 cm.
Twist the black and red wires together. DON'T BE CONFUSED! BLACK SEPARATELY! RED SEPARATELY!
Fan Design Considerations
The amount of air will depend on the size of the propeller
Before you begin design, you need to imagine the design of a cooling-type product. Depending on their location, they can be floor, ceiling and tabletop.
Both factory and homemade fans consist of the following parts:
- Propeller. The larger its diameter, the larger volume of air will be supplied to the object.
- Electric motor. A product powered by a household network, adapter, batteries or rechargeable batteries can be used. The performance of the finished device is directly proportional to the motor power.
- Stand. Here you need to show imagination and ingenuity. The stand must meet criteria such as safety, stability and presentability.
- The wire. For a small motor, any cable left over from broken watches, lamps and other small household appliances is suitable. It is advisable to install a switch on the wire to control the device without leaving your seat. If you plan to connect a USB, an extension cord or a cord from an old mouse or keyboard will do.
The starting point for starting design and construction is finding a motor. If you have unnecessary tools, toys and kitchen appliances in your home, you can donate them. Motors from a drill, screwdriver, screwdriver, mixer, children's car, trimmer, electric razor can be used. Sometimes in an apartment you can find broken coolers from system units or laptop stands. Considering the saturation of modern housing with technology, finding a motor will not be difficult.
CPU-Z
The CPU-Z program can easily be called the world's most popular Windows-based system analyzer.
It provides comprehensive information about the processor, RAM and its subsystem, and graphics adapter. CPU-Z is completely free and compatible with all current versions of Windows. CPU-Z stands out among competitors due to two qualities: great depth of computer analysis and simplicity of the shell. With its help, you will learn about such parameters of your processor as the type and process technology of the chip, its heat dissipation, core voltage, revision and stepping, as well as the level and capacity of the cache. The same detailed report is available for RAM and motherboard chipset. This data is indispensable both for enthusiastic overclockers and for ordinary users who are interested in upgrading and customizing their computer. However, information about the video system is presented here in a compressed form, and the hard drive is not affected at all.
In addition to dry text display in CPU-Z, you can conduct simple stress tests of the system to check its stability under load. Test reports and PC status reports are saved as TXT and HTML documents.
The appearance of the utility is extremely simple and has not changed since the beginning of its development. Moving through the items is done through the tabs on the top panel. There is also a portable version for running from a flash drive or other media.
Advantages:
- maximum information about the CPU, RAM and chipset;
- works on a computer with any version of Windows;
- undemanding to resources;
- has a simple interface (including in Russian);
- saves reports in text form;
- free software.
Flaws:
- does not display information about the status of the hard drive;
- a meager report about the video card.
- Does not show the temperature of system components.
Design of an electric motor cooling fan impeller and its application
When choosing an electric motor cooling fan impeller, special attention should be paid to its design and application.
The design of the electric motor blowing impeller can be:
- Composite. The working blades are mounted on the manufactured mounting hub.
- One piece. The hub and blades are stamped as a single piece of sheet material.
The amount of air that reaches the cooled surfaces depends on the diameter of the impeller, the angle of attack of the blades, and the type of impeller relative to the direction of rotation. The impellers are forward curved, straight radial and backward curved.
Generator discussion
Walker7745 Over the last year I have been working on designs using stepper motors, and during my leisure time I tried some as a generator. So I have an idea of their capabilities. At the speeds shown in the video, such an engine operates in almost optimal mode, but there are a couple of notes so as not to be disappointed later: The maximum energy of such a generator is enough to light one or two bright LEDs, so you shouldn’t expect special lighting (no light bulb one won’t light up, no matter how you look at it). This energy can only be obtained with a fairly weak wind of 5-6 m/sec and above. And such winds don’t happen very often.
Nevertheless, the very idea of using a stepper motor as a generator deserves attention, despite their low efficiency.
Someone here hinted that all that remains is to buy a lathe to make such a device. It sounded somehow unworthy for a home designer. There is no machine - there is a drill and a file. There is no burnt-out fan - there is plywood, tin cans... A year ago, for example, I made something similar from halves of two-liter plastic bottles and a plastic medicine jar, and it spun. You were given an idea - then let your imagination work. And if you can’t imagine how to do it without a lathe, it’s better not to start.
SergIv The idea is normal, although it was implemented in a draft. And there is no need for such angry comments. This is probably due to one’s own laziness, or the habit of buying something ready-made, and not bothering to delve into the unfamiliar jungle of technology... after all, if you don’t understand something, you feel insecure, right?
As for the lathe, some people have one at home; I personally have no problem turning something if I’m in the mood. Yes, and in principle you can do without a machine there, if you wish. As for the fan, I recently passed by a trash heap and someone put out just such a non-working fan, all the mechanics looked intact, only the engine was dead. So it is not always necessary to break the worker. And even when it’s hot, you can catch a cold from a fan. There weren't enough specific measurements of current and voltage in real time. Although it would not be so difficult to show.
CD
Don't know how to make an efficient CD fan? It's easier than it seems. We divide the disk into 8 sectors. An even number of blades is easier to balance if axial runout occurs.
We cut out the blades with ordinary scissors. You can do this work with a construction knife, or melt the sectors with a soldering iron - there is not much difference. If you accidentally break a CD, get a new one.
The extra segments are broken out, the rest are given the aerodynamic shape of a propeller. To do this, just heat the workpiece over a candle or using a hair dryer. If you make a mistake with the geometry, you can always correct the situation by reheating. This is the advantage of crafts made from a CD.
In the center of the structure we glue a thickening: any piece of plastic 5–10 mm. We drill a hole in it for mounting on the electric motor shaft.
Idea No. 1 – Use a cooler
As a rule, it will take no more than 15 minutes to assemble a USB fan from a cooler. First you need to prepare the cooler. There are two wires coming out of the device - black and red. Strip the insulation to 10 mm and set the prepared element aside.
Next you need to prepare the USB cable. Cut off one half of it and peel off the insulation at the cut point. Under it you will see four contacts, of which two are necessary: red and black. You also clean them, but it’s better to cut off the other two (usually green and white) so that they don’t get in the way.
Now, as you understand, you need to connect the prepared contacts in pairs, according to: red to red, black to black. After this, you need to carefully insulate the cable connections and make a stand. As for the stand, it’s a matter of your imagination. Some successfully use wire, some very interestingly cut out a seat in a cardboard box.
In the end, the homemade mini fan is connected to the computer, and you can enjoy the operation of your own electrical appliance.
Cooler idea
Review and comparison of production ready models
When considering a radial volute fan, you need to take into account the material of manufacture: cast aluminum housing, sheet or stainless steel. A model is selected based on specific needs; consider an example of serial models in a cast case.
From time to time the need for a kind of fan arises, but small models are relatively expensive. There is no need to rush to shell out money, because you can easily make a small fan with your own hands. In terms of efficiency, it is not inferior to purchased analogues, and its creation will require a minimum amount of materials.
Homemade gas heater
The main advantage of this model is that its production requires a minimum of parts, which can always be found in the household of any craftsman.
Preparation of materials and components
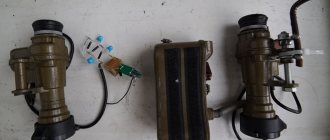
To make a gas heater for the garage, you need to prepare in advance:
- burner with valve;
- tin sheet;
- metal scissors;
- drill with a thin drill bit;
- rivets;
- riveter.
To make the grille, you will need a piece of fine-mesh metal mesh. It’s great if you have a regular wire colander sieve on hand, it will act as a protective grid.
Collet cylinders are convenient because when using them, you don’t have to use up all the contents at once. The presence of shut-off valves allows the devices to be used repeatedly.
If desired, the heating structure can be made using not only disposable cans used for refilling lighters, but also using a small refilled cylinder.
Cutting blanks and assembling the structure
When making the structure, the first thing to do is fix the heater to the burner.
Four rectangular ears are added in the direction of the four sides of the workpiece applied to the galvanized sheet. One of the ears should be made twice as long as the others. The blanks are cut along the intended contour, trying to make smooth, burr-free cuts.
The burner is screwed to the cut-out tin blank using bolts. The ears located on four sides of the workpiece are bent in the opposite direction and used to fix the strainer.
To attach the second protective mesh, take another piece of sheet metal and cut out a circle of exactly the same size from it. Elongated ears are added to the workpiece, necessary for attaching the mesh.
Stepping back half a centimeter from the edge of the circle, drill 10 through holes along the circumference. A strip is cut from a piece of fine-mesh metal mesh, the length of which corresponds to the diameter of the cut tin blank.
The bent ears of round tin blanks are fixed to opposite sides of the mesh strip using a riveter and rivets. When assembled, you should get a cylinder with mesh walls and tin ends.
At the final stage, all that remains is to turn on the gas water heater and check its performance. The heat produced by this small device is enough to heat a small room or garage.
How to determine the power pins of a USB cable
Any USB connector consists of 4 pins. We are not interested in averages, these are information wires. The 5 volt power supply is on the outermost contacts. Wiring in the illustration:
If you reverse the polarity, nothing bad will happen. The motor will just spin in the wrong direction. How to determine the motor supply voltage? There is no need to look for markings. If the toy (where it was installed) is powered by three batteries (1.5 volts each), then the motor is 5 volts. If it runs on two batteries, it will not be suitable for USB power.
FurMark
The FurMark utility has been the unspoken “standard” for testing high-performance video cards and integrated computer video systems for many years. It is a set of stress tests to test the graphics subsystem for stability and maximum performance in 3D with support for the OpenGL API. FurMark receives regular updates and is distributed free of charge.
Fur Mark consists of a settings dialog and a test window, in which a complex render of a toroidal-shaped object (or popularly known as a “hairy donut”) rotates. Before starting testing, you must select the graphics level and operating mode. In addition to resolution and anti-aliasing, the user can enable full-screen mode instead of windowed mode. An important point is to indicate the time for the test, since keeping the video accelerator under 100% load for a long time can damage the device.
After pressing the GPU stress test button, a rotating object appears on the screen, drawing which consumes the entire resource of the video card. The upper part shows a graph of changes in the temperature of the video core. Depending on the specified parameters, the test stops automatically after a certain time or manually by the user.
Advantages:
- checking the video card under the maximum permissible load for stability, performance, power consumption;
- several modes of “running” the test;
- simple interface without unnecessary elements;
- includes GPU-Z and GPU Shark utilities;
- free software.
Flaws:
- FurMark puts maximum load on the video adapter, which can lead to failure of the graphics chip, memory chips and other “unpleasant” consequences;
- The interface is not Russified in the official version.
Fan based on a plastic bottle
What our craftsmen don’t do from plastic bottles! The time has come to say that they also make a very good fan. It may not ventilate your entire room, but it will definitely help those who have to work at a computer.
We offer two options for creating such a fan model.
Hard plastic model option
To complete the work we will need:
- plastic bottle with a capacity of 1.5 liters;
- a motor from an old toy;
- small switch;
- Duracell battery;
- marker;
- scissors;
- candle;
- hammer and nail;
- Styrofoam;
- hot glue gun.
So, we take an ordinary 1.5 liter plastic bottle with a stopper. At the level of the label line, cut off its upper part. This is exactly what we need to make the propeller. We divide the surface of the plastic blank into six parts.
We try to mark it out so that we get equal sectors: the quality of operation of the future device depends on this.
We cut the workpiece along the markings almost to the neck. We bend the blades of the future propeller and cut off every second of them. We are left with a blank with three blades equidistant from each other. The edges of each blade must be rounded. We do this carefully.
To remove those parts of the blades that are closer to the neck of the workpiece, it is better to use a utility knife; do not forget to round the edges of the blades
Now we will need a small candle. Let's light it up. We heat each blade at the base on it to turn it in the direction we need. All blades must be turned in the same direction. Remove the lid from the workpiece and punch a hole in the very center using a nail and hammer.
We place the plug on the rod of a small motor. Such motors can remain from old children's toys. As a rule, getting them is not difficult. Secure the cork with glue.
Now you need to make a base on which the motor will rest. For this purpose, we take, for example, a piece of polystyrene foam. We attach a rectangle to it, which can also be cut out of foam packaging.
Our motor, to which the propeller is attached, will be fixed on the upper surface of this rectangle. To do this, you need to make a recess in the foam that corresponds to the parameters of the motor.
Hot melt adhesive is used to secure the elements of the product. If it is unavailable, other adhesives can be used. It is important that the fastening itself is as reliable as possible.
Polystyrene foam is a convenient material for constructing a fan stand, because it is easy to give it the desired shape, but it is better to make the base of the stand heavier.
A small switch and a power supply, the role of which is played by a rectangular Duracell battery, are attached to a foam stand. We assemble the simplest chain, trying to do everything as carefully as possible.
All we have to do is screw the propeller onto the plug fixed on the motor. Our fan is completely ready for operation.
The foam stand probably weighs too little to give the device the necessary stability. After all, with a sufficient span of blades, it can turn out to be quite powerful. Therefore, it is advisable to make the base of the model heavier.
Option product made of soft polymer
Let's prepare in advance everything that we will need during the work:
- two bottles of SevenUp lemonade;
- electric motor 12 V DC;
- seven thick straws for drinks;
- connector for power supply;
- the power supply itself;
- switch;
- scissors and utility knife;
- marker;
- hot glue gun;
- Super glue;
- plastic ties;
- wire cutters;
- soldering iron;
- insulating tape;
- CD disk.
So, there is another option for building a homemade fan from a plastic bottle. Let's take a bottle of smaller capacity, for example, SevenUp lemonade.
The algorithm for cutting the blades of the future propeller is the same as in the previous version. The plastic of this bottle is much softer, so you can give the desired slope to future blades without resorting to heating them.
A hole in the center of the cork should be made using an awl or nail heated over a fire for this purpose. The 12 V DC electric motor, on the shaft of which the propeller will be attached, can be taken from old toys or a hairdryer that is unnecessary in the household.
The cover is fixed to the shaft using hot melt adhesive. We immediately screw the light propeller to the lid.
When talking about this option for constructing a fan, we mentioned seven tubes, but if the tubes you have have a smaller diameter, you will need more of them: you need them to fit tightly into the neck of the lower workpiece
The most interesting thing is the construction of the stand. It turns out to be not only stable, but also attractive. To create it you will need seven thick drinking straws. It is necessary to glue them together with superglue. It turns out to be quite a strong and attractive stand.
For the base, take the top part of a plastic bottle larger than the one from which we made the propeller. We push the stand of tubes into the neck of the workpiece, approximately to the middle of its length. We fix the stand in this position using superglue applied to the neck of the workpiece.
Now you can install the engine on the rack, securing it with hot glue. The fact that the stand itself is made of hollow tubes helps hide the wires nicely. We simply pass them through the central tube. This way the wires end up inside the base of the device.
To further strengthen the structure, you should use plastic ties, which are glued with hot glue to the stand on the sides of the motor so that the tie lock is tightened over the motor itself, ensuring its immobility. The excess tip of the fastener is removed with pliers.
In the plastic surface of the bottle, which serves as the base of the structure, holes are cut for the power supply connector and switch. It is better to do this with a utility knife.
We connect the connector for the power supply and the switch. The wires should be soldered and insulated. The switch and connector are fixed to the plastic with hot glue.
The CD disk, which becomes the bottom for the base of the future fan, is not only the finishing touch of the work, but also makes the product more stable
To make the base heavier and more stable, we will build a bottom for it from a CD.
To do this, lubricate the edges of the plastic blank with hot glue and press the disk against it.
The motor is connected to the power supply via a connector, and the device itself is turned on using the red button located on the left
Now we connect power through the connector. For this purpose, you can use a power supply for LED strips, which is sold in electrical appliance stores. Well, this homemade product is ready to go.
To make sure that you correctly understand the sequence of work performed, watch the video at the end of this article.
Stylish product without blades
We are accustomed to the fact that the main part of the fan is the propeller. This design part rotates, creating the necessary air flow.
But there are also bladeless models. They have become fashionable, primarily due to their safety for younger family members and pets. In addition, these products look stylish: they can fit into any interior and decorate it.
The finished bladeless fan is completely different from the device we are used to seeing, however, it works great
Like most other things that serve a person, a bladeless fan can also be made with your own hands.
The principle of its operation is simple: at the base of the device there is a small turbine, which allows you to create air flows passing through the side openings.
For work we will need:
- computer cooler;
- power supply unit and connector;
- small switch;
- hot glue gun;
- cardboard or thick paper;
- scissors, pencil, ruler, compass and caliper.
In principle, we need a caliper solely in order not to make a mistake in the dimensions of the product. If it is not available, then you can get by with a regular ruler, tape measure or measuring tape.
Let's get to work.
First, let's make the body - the base of the product. To do this, cut out four rectangular pieces of cardboard. To determine the parameters of the base, measure the width of the cooler. The resulting size will match the width of the rectangles.
For convenience, we will operate with specific sizes. The width of our cooler is 120 mm. This means that the width of the rectangle is also 120 mm.
A small switch and power connector will be built into the body of our product. In order for them to stay tight enough in the future, you need to take measurements from them.
The holes in the housing must correspond to the obtained values. You need to make holes until the rectangles become part of the body: cutting them out in flat objects is always easier.
We need a twelve-volt power supply and a corresponding cooler that consumes only 0.25A. Taking into account the fact that we have a 2A unit, we can assume that we are quite well prepared for the further operation of the future device.
Now we take sheets of cardboard from which we have to cut out the elements of the main part of the fan. First, let's draw two circles. The radius of each of them is 15 cm. Cut out both circles.
In one of them, let's call it A, we will draw an inner circle with a radius of 11 cm. In the second, which we will call B, the radius of the inner circle will be 12 cm. Carefully cut out the inner circles. We received rings A and B.
The resulting rings will be attached to the body of the product. In order for them to better adhere to the surface of the body, we will apply one of the rectangular blanks to each of the rings and cut off a segment, the flat side of which corresponds to the width of the rectangle.
In order to reliably glue the rings to the base on which they will be installed, it is necessary to ensure the maximum contact area: for this purpose, a sector is cut off at the bottom of the product
The main part of a bladeless fan is cylindrical in shape. To make it, we need strips of cardboard with the following parameters: the first - 12x74cm, the second - 12x82cm, the third -15x86cm. During the assembly process it will become clear what to do with each of these three strips.
Before assembling the body, cut a notch in the bottom of each rectangle. This way we not only make legs for the future fan, but also create channels for incoming air.
The recesses in the lower part of the base can be made in a rectangular shape, but it is better to add an arc to the original rectangle, drawing it using a CD disk
We will assemble the body using hot melt glue. The cooler should be located approximately in the central part of the case, surrounded by four rectangles that form the walls of the structure. Lubricate the cooler around the perimeter with glue and surround it with walls.
Don't forget that the notches in the walls that we just cut should be at the bottom of the case.
The wires from the cooler can be tucked into a corner of the structure, securing them in this position with glue.
At this stage it is best to mount and connect. Since we are using a switch, we need to split one of the wires and form a circuit.
The wires should be connected to the power connector (red - positive, black - negative). If we get the polarity wrong, we just need to swap the wires. Using hot glue, we secure the connector and switch in the places intended for them.
We connect the power and check if the turbine is working. If everything is in order, we continue assembling our bladeless model.
We take ring A, which will be located in the front of the device, and the first strip (12x74cm). We close the strip into a circle and glue it into the inner circumference of ring A. The result is something like a cylinder hat without a top, but with a brim. The same must be done with ring B and the second strip (12x82cm).
This kind of hat came out of ring A and the first strip that we glued along the inner circumference of the ring
We glue the first “cylinder” to the front side of the body in the place where we cut off the segment. We also glue the second “cylinder” to the back side of the body with a cut surface. In this case, the smaller “cylinder” ends up inside the larger one.
The stability of the structure can be imparted using five strength partitions, fixed between the rings using the same glue. They need to be cut out of cardboard. The length of the partitions should be slightly less than 12cm.
Now the side surface of the main structure should be covered with the remaining third strip of cardboard (15x86cm).
This photo shows the internal structure of the fan quite clearly, which will be hidden from us by the last (third) strip
In principle, the fan is ready. All that remains is to give it an external gloss. To do this, remove excess glue and cover its outer surfaces with paint or decorative paper.
You may also find the information on fan speed controls contained in our other article useful.
So that you can see how correctly you understood and did everything, watch the video on how to create a bladeless fan yourself, which we placed at the end of this article.
If you are interested in assembling interesting and useful devices, then you may be interested in the information about making an air conditioner at home, discussed in our other article.
And in the cold season, you can assemble a heater or a homemade fan heater using a minimum of materials.
Use of factory parts
Let's return to the presence of conditionally unnecessary computer components in the home workshop. For example, a cooler from a power supply or system unit.
The electrical part of the work is reduced to a minimum. If the power is 5 volts, we work according to the scheme: USB cable. To supply 12 volts you will have to look for a power supply or a phone charger. In addition, there are “turbines” that are connected to a 220 volt network.
Actually, to make a fan from a computer cooler, you just need to fix it on some kind of stand. And if you use batteries instead of a USB cord, the flow of fresh air can be organized anywhere.
Causes of malfunction
We list the main problems when the device does not work and possible ways to eliminate them.
The unit does not turn on. If the light is on, but the device does not turn on, then the possible reason is that the buttons are broken. If the light does not light up, then the reason is most likely in the cord or plug.
Weak rotation of the blades is a signal of insufficient lubrication of the bearing inside the engine.
The fan has stopped rotating left and right. It's all about the crank; its mounting screws can become loose or unscrewed.
Humming and no rotation. There are three possible causes of failure - lack of lubrication on the bearings, a broken capacitor or electric motor.
Useful DIY garage gadgets
Reading time: 9 minutes Don't have time?
The link to the article has been successfully sent!
We will send the material to you by e-mail
For rational use of space, communications and do-it-yourself garage accessories from scrap materials are used. It is necessary to use walls and an underground level in the process, place machines inside the room, and organize normal lighting.
Homemade gadgets for the garage
Video: 29 useful DIY projects for the garage
Recommendations for arranging a garage
For comfortable operation of a room intended for car storage, you should adhere to certain recommendations:
- the tool must be as accessible as possible;
- storage spaces equipped with shelves/racks are much more convenient;
- workbenches, inspection pits, homemade machines and do-it-yourself garage accessories expand the capabilities of the car owner;
- the cellar allows you to save space;
- The productivity of work and minor repairs depends on the quality of lighting.
Organization of work space inside the garage
Depending on the dimensions of the building, the area occupied by equipment, fixtures, and communications should not be more than 10–20% of the size of the garage floor.
Storage areas, racks, workbenches
In 80% of cases, do-it-yourself garage fixtures are built to store accessories, tools, and vehicle equipment. It should be taken into account that the most bulky parts of the car are sets of winter/summer tires, depending on the season.
DIY crafts: we make them at home, in the country, in the garage
If you still think that DIY projects are boring, uninteresting and somehow childish, we will debunk this myth and tell you about the most incredible ideas that can be implemented at home. If you have inspiration, and at the same time, as they say, your hands grow from your shoulders, we will teach you how to make all sorts of useful things designed to simplify your life and save time. For example, useful devices that will be useful to you in the garage, at the dacha and at home will help you organize a hundred little things, arrange a workplace , or quickly build a hammock. We have prepared for you some useful tips for fishing, for the car, for the garden and are ready to share them with you right now.
DIY crafts for the garage and DIYers: YouTube video
As they say, there is never too much space in the garage. Men who spend a lot of time in the garage will agree that in some cases every minute and every square centimeter of free space counts. That is why a garage master needs competent organization of his workspace.
Here, various devices for storing building materials, work equipment , machine parts and other things necessary for work are helpful and helpful.
To ensure that your electronic, garden and garage gadgets are always in their place, use the following devices:
- stands;
- shelves;
- retractable panels;
- racks;
- organizers for tools.
Also, for clarity, we offer do-it-yourself homemade products for the garage and home craftsman - the YouTube video will reveal all the nuances of organizing the workspace and suggest fresh ideas.
DIY crafts at home with your own hands
Man has been making homemade crafts since prehistoric times. Actually, all industrial processes are the improved once handicraft or home-made developments of folk craftsmen.
Sometimes we don’t even think about the fact that we pay for things that we can do with our own hands.
DIY plans are easy to find online, and materials can be purchased at a hardware store or found at home.
For example, from a cardboard box and a piece of fabric you can make a convenient portable organizer for towels and other textiles. The topic of storing all sorts of little things is inexhaustible, fortunately, as is the number of ideas. Successful ideas for decoration can also be drawn from ordinary things - let it be buttons or empty tin cans. Cool shelves are made from ordinary drawers . How do you like this idea?
As you have already understood, if you have detailed instructions, it is not so difficult to make homemade products with your own hands at home. The video will help you understand all the nuances of this enjoyable activity. Useful tips, interesting ideas - everyone should watch it.
DIY crafts for the garden and garden with your own hands
At the dacha there is usually some free time for creativity and arrangement of the surrounding space. Therefore, it’s worth having a few fresh ideas on hand to implement them in your own summer cottage. Do-it-yourself country crafts at home can be brilliantly simple.
From scrap materials you can make unexpected and extremely useful things for home use.
Ordinary pebbles turn into fairy-tale animals . An old teapot makes a wonderful flower pot.
Used tires - this has already become a classic in the world of garden figures. Stylish lamps for a country house interior - do it yourself from an ordinary jar and a candle (do not forget about safety precautions). Hanging flower beds are a great idea for a small dacha. Do-it-yourself crafts for a dacha and vegetable garden are often made by yourself, without extra time and financial costs. plastic bottles would be for the household Plastic bottles that have gone out of use can serve as the basis for an incredible decorative flower bed. Cool “blooming” pillars will greatly decorate your summer cottage space.
Do-it-yourself garden furniture, successful homemade products: photos and drawings
In the previous sections, we told you about homemade products that will become indispensable for the household and home life. However, we should not forget about rest, before which, nevertheless, you will have to work a little.
Cozy armchairs, various tables and benches, swings and hammocks - all this country and garden bliss can settle on your site. We invite you to familiarize yourself with photo instructions and drawings for making garden furniture.
We have selected the best options for you.
DIY homemade tractors at home: video
One more car in the household will never be superfluous. With the help of video lessons, you will learn how to construct homemade tractors for cultivating your garden and summer cottage without any extra effort.
Video: DIY crafts at home
New and simple crafts for decorating your home, garden and vegetable garden await you in this section. We will tell you completely free of charge how to make useful and beautiful things with your own hands.
DIY fishing crafts: video for you
Every fisherman loves to brag about a good catch. And in order for your fishing plans to coincide with your capabilities, listen to the advice of professionals and experienced amateur fishermen.