One of the most important criteria for the effectiveness of video surveillance is sufficient illumination. However, not all objects have the possibility of using lamps. In such a situation, IR illumination comes to the rescue. Let's consider what types of it exist, when is the best time to use it, what are the models designed for video cameras, what types of IR illuminators are there and what are their advantages, as well as how to make an IR device with your own hands and what you will need for this.
Main characteristics
An IR illuminator is a special device that operates exclusively in the infrared spectrum due to the presence of 1 or more lamps. This advantage makes all dark objects visible to the outdoor CCTV camera. Backlighting is a very important component, since outdoor video cameras can normally record images only if there are effective light rays that bounce off various objects, thereby making the picture clearer. Without the necessary lighting, objects in the picture will be blurry and gray.
The IR illuminator consists of the following parts:
- A panel that has light-emitting diodes in its structure. This element is necessary to ensure normal operation of the device even with minimal or no lighting.
- Light filter. A special filter is needed to unmask the device. The function of the filter is to completely absorb the visible component of infrared radiation.
- Sealed housing. Typically, outdoor surveillance cameras are installed outdoors; the entire electronic circuit requires protection from adverse weather. To do this, the device is placed in a sealed housing.
- Power driver. This device is necessary so that the camera can be connected to a 220 V network, since the light-emitting diode itself is powered by a small amount of energy.
Revision of NVG 57E
Not long ago I made a video about the NVG 57e and questions began to come from searchers about its modification.
The night vision device is powered from the on-board network of a car, tank or helicopter, from 12 to 30 volts is supplied to its input, and the multiplier itself operates from 12. The output voltage of the multiplier is about 19.5 kV.
The homemade power supply on the left runs on 2x18650, but the transformer quickly overheats, and the radiators do not help it. In a good way, it’s worth winding your transformer, but you’re too lazy and don’t have time to do it. Today we will talk about the right, original power supply and its modification.
After unscrewing all the bolts and carefully removing the power cable, we take out the power board. A diagram of the device is attached at the bottom of the case. The diagram is also in the technical service for the device.
I labeled the polarities of the wires on the board so as not to forget.
The red circles highlight the places where you need to solder a constant voltage of 9-12V; the original voltage adjustment unit (the left part in the diagram and in the photo) can either be completely cut off with a piece of the board or simply desoldered, as I did.
The same places are allocated on the board itself, on the side that is closer to the multiplier. The multiplier must be disassembled carefully so as not to damage the spring and seal.
I power the block from the crown, the response contact for the crown is taken from the old crown, in case someone didn’t know that this was possible =) Because of the power from the crown, I didn’t even saw off the board, it conveniently sticks to it with double tape and doesn’t dangle around body.
Now about the fastening.
I went with the cheapest option: my helmet is plastic, without ballistic protection, so a steel plate was riveted onto it and rolled into a tube.
Instead of expensive fasteners, the fittings were taken and bent so that they fit perfectly under me. 2 washers are welded to it and the NVD is attached to these washers through standard holes with an M6 bolt.
The power supply itself is attached to 2 self-adhesive Velcro strips, I found these in the automotive department of a construction store. They are quite enough so that the block does not fall off during light running.
An infrared flashlight with a wavelength of 850 nm was attached to the side rail of the helmet in a regular inch ring for optics. I have a 3-watt diode, but this turned out to be very little, in the video almost all the frames were shot with this flashlight and it doesn’t hit far, I didn’t see a standing non-contrast target at 100m.
As I already said in the video, the device itself is interesting, like a cheap toy (can be found from 5 tr) it works quite well. I tinkered with it during quarantine and was pleased with the resulting creation. Now the helmet with lead plates has become a Soviet NVG =)
Disadvantages and advantages
Like any technological device, an IR illuminator has its pros and cons in its application. Here's what you need to know about the benefits of this device:
- low energy consumption;
- high wear resistance;
- safety;
- optimal level of range.
Infrared lighting also has its disadvantages. Touching on this issue, it is worth saying that this type of lighting is incompatible with color CCTV cameras. Also, the operation of an outdoor camera directly depends on weather conditions and often requires regular cleaning of the glass from various contaminants caused by external environmental factors.
It is also worth emphasizing that in the dark the camera may be visible due to the fact that the LEDs have a red tint at night. Manufacturers of infrared spotlights have repeatedly indicated that the spotlights can heat up during camera operation; this indicator is quite normal. Before use, the owner is recommended to adjust the brightness and set the required contrast.
False motion sensor alarms
Those who use CCTV cameras notice that during snowfall, rain or fog, the camera constantly sends alarm messages. This also happens in the summer due to insects that fly into the light of the night light built into the camera.
False positives occur due to the illumination of objects moving close to the camera lens.
Let's look at ways to avoid false alarms at night.
- Installing the camera under the visor. This will prevent triggering in case of rain and snow. But it will not help against fog, cobwebs and insects.
- Scheduled shutdown of the motion sensor at night. Not the best option, as you may miss important events.
- Disable the built-in infrared illumination and install additional lighting, such as an IR illuminator or a regular flashlight. This option solves the problems described above.
How to do it yourself?
The diagram for making IR illumination with your own hands is quite simple; it is a clear linear structure that connects several elements together in parallel.
- Connecting diodes in a certain sequence. The number of diodes is directly related to the voltage of the power supply.
- The use of resistors, which also need to be connected in a chain order. They are necessary to limit the current.
To gradually increase the power of the spotlight, it is imperative to connect elementary lines consisting of a resistor and diodes. At the next stage, the finished structure should be connected to a power supply or battery. This principle of creating a backlight with your own hands allows you to build a constant power supply circuit. This backlight is considered a reliable option for an outdoor surveillance camera.
Very often, owners of such cameras are faced with faulty image transmission, as well as problems responding to requests. First you need to identify the cause, in this case there may be several of them:
- burnout of the electronic control board;
- problem caused by a damaged network cable.
After identifying the problem, you can repair the CCTV camera yourself by carefully replacing the faulty part.
The video explains how IR illumination works for CCTV cameras.
Operation of video surveillance systems involves providing round-the-clock monitoring of the protected area.
If the configuration is incorrect, a problem with video quality at night may arise. Poor images can be obtained by cameras installed in enclosed spaces where the lights are turned off or on the street where the use of bright visible light sources is undesirable (sleeping areas).
There are several solutions to this problem:
Webcam – the basis for infrared vision
In order to make a device for night vision, you need a regular webcam, which needs to be slightly modified by removing the infrared lens from it.
As a result, the camera will begin to transmit infrared radiation. For illumination we use an infrared flashlight. In the video, the author of the video mentions the power of the flashlight, but in the commentary he reports his mistake when he mentions its power. In fact, its power is 3 watts. The infrared filter is transparent and sits on the camera lens. After assembling the webcam without a filter, you can watch night views, but only with the use of such a flashlight. Next, watch how this homemade camera works, illuminated using a television remote control. With a remote control, infrared lighting only works at close range, but for example, for a staircase it will be enough.
Infrared flashlights are necessary in many situations; they are used in unlit rooms, in security activities, when hunting, as well as in other equally important areas of civilian use. One of the most popular and sought-after brands of IR flashlights is Pulsar. You can find a large assortment of infrared flashlights for hunting on the page https://opticstore.com.ua/catalog/infrakrasnye-fonari.
Main characteristics
Length of IR rays. Humans see light in the range of 40-700 nm (nanometers). Most models of IR illuminators generate radiation with a length of:
- 730-750 nm;
- 800nm;
- 870-880nm;
- 930-950nm.
Possible problems
Overheating of the internal IR radiation module - some cameras, due to design flaws, overheat when operating in the IR range, which leads to impaired image perception. In this case, the module is turned off, but video surveillance at night becomes impossible.
The presence of blind spots in the frame - the illumination angle of the built-in IR module is extremely narrow, so sometimes it is necessary to install several cameras to cover the required area. By purchasing an IR illuminator, you can solve this problem on a budget.
The presence of shielding protective glass of the camera - some models have translucent glass or plastic that protects the “insides” of the camera. The infrared ray may be partially reflected from such material, creating highlights in the image.
Overall, buying an IR illuminator for a video camera is a profitable investment that will help improve the quality of video surveillance in a short time! However, it is recommended to get specialist advice to determine that the problem is the low quality of the IR illumination, and not something else.
Application area
The use of CCTV cameras with IR illumination depends on the effective illumination distance of the control area. All IR sources are divided into 3 groups:
- Near – 1.5-10m;
- Medium – 25-60m;
- Distant – 80-350 m
Near IR illumination is advisable to use in the following cases:
- Video intercom calling panels;
- Additional lighting for electronic video eyes;
- Fully functional lighting for hidden video surveillance systems;
- As a duty “dark lighting” in 24-hour video surveillance systems.
Medium and long-range spotlights are recommended to be used:
- The main source of lighting for outdoor CCTV cameras monitoring the area around residential buildings;
- Illumination for video cameras of security systems of cinemas, nightclubs and other establishments with similar specific lighting;
- Illumination for monitoring registration numbers on the highways.
Simple waterproof flashlight
A simple waterproof flashlight can be made using a film can. We will need: a new can of photographic film, a 3 V LED, 2-3 reed switches, a 3 V lithium battery of size 2032, cotton wool (case filler), a battery socket from an old flashlight. To ensure water resistance, it is necessary that there are no holes in the flashlight body. So, as a switch, you can use sealed contacts. For reliable operation, it is better to take 2-3 reed switches, since when turning along the longitudinal axis, the sensitivity of the reed switch changes. So, let's assemble the flashlight according to the diagram.
We bend the wires so that everything fits in the case, I filled the empty space with cotton wool so that nothing dangles. We place the circuit in the case
It is important that the film can be new, i.e. so that the lid closes as tightly as possible
Any magnet will work as a switch. A flashlight of this design continued to work after 10 hours in the water. The cotton wool remained dry. So, lying in a puddle for a long time will not harm such a device.
DIY IR spotlight
The easiest way to make IR illumination for a video surveillance camera with your own hands is to solder IR LEDs - TSAL5100 - into the matrix of the LED spotlight instead of conventional LEDs.
high-quality and reliable IR illuminators for CCTV cameras with your own hands . The purchase of factory-made devices is quite affordable both in terms of cost and the ability to select optimal performance characteristics.
A video surveillance system of a modern enterprise cannot be complete without monitoring the surrounding area. Filming at night can significantly reduce the risk of vandalism, theft and break-ins.
IR floodlights for video surveillance guarantee uniform illumination of the territory and allow you to save money on the purchase of cameras with powerful illumination. You can assemble such a device for domestic use yourself.
Features of work
There is nothing complicated in the operation of an infrared lamp, which is used for outdoor video surveillance. Often cameras at night without additional lighting cannot form a clear picture. A budget option is to install an infrared spotlight. Thanks to the photosensitive camera sensor, this device is capable of clearly recording both the area visible to the camera and has the ability to intercept the infrared range. Thus, the camera is able to show a very clear picture of the entire area in which the video is being filmed.
IR illumination has a number of features that a potential buyer needs to know about:
- The power of the floodlight LEDs is not enough to increase the video surveillance range.
- Do not rush to install more powerful lighting, as this option is considered uneconomical and may result in unplanned waste. For example, after installing more powerful equipment, the owner will have to purchase power supplies and strengthen the power transmission line.
These features enable a conventional camera, the structure of which includes IR LEDs, to capture images of objects with a range of only 10-20 meters. An outdoor camera under such circumstances does not include the formation of images of additional ranges, but can only provide a view of a limited area. As for external sources of illumination, things are much better with this solution. An IR illuminator is a huge number of LEDs that can efficiently use the power of the power source. With such a device, you don’t have to spend a lot of energy to illuminate a large area.
Operating principle of IR illuminators
The mechanics of operation and the idea of using an IR lamp for video surveillance are quite simple. At night, with low levels of natural light, the camera cannot form images because the sensor elements simply do not change their characteristics.
The option of organizing a constant background of the visible spectrum is quite expensive. It will require the use of powerful spotlights, will entail the cost of purchasing equipment, and will include the cost of constant maintenance in the form of replacing burnt out lamps or LED cells.
Picture of CCTV camera image with IR illumination
Important!
Don't forget about the cost of paying for electricity.
Infrared illumination for video surveillance uses the properties of the camera's light-sensitive sensor. This element is capable of recording not only waves of the visible part of the spectrum, but also capturing the IR range.
As a result, you can get a fairly clear and contrasting picture of the illuminated area. But there are several features that characterize IR illumination for a video surveillance camera.
- The LED power is not sufficient to expand the observation area.
- Installing a more powerful backlight may entail the need to equip the camera with expensive power supplies, strengthening power transmission lines, which will entail an increase in the cost of the technical solution.
Due to the difficulties listed above, the average camera, which is equipped with IR LEDs for video surveillance, can form an image of objects located 10-20 meters away, as well as provide an overview of a limited area.
The situation looks different with the use of external illumination sources. The infrared illuminator consists of a large number of LEDs that optimally use the power of the power source.
IR illuminator device for CCTV camera
Such a device is capable of illuminating a large area without significant waste of energy. At the same time, a do-it-yourself infrared floodlight for video surveillance can be built on two basic mechanics:
- with constant voltage supply to the LEDs. This solution is characterized by energy consumption, which increases linearly depending on the number of installed emitters. In addition, the service life of semiconductor elements is limited; it is necessary to organize heat removal;
- Switching power circuits are much more practical. They are somewhat more complex in hardware implementation, but are easy to configure. By installing IR LEDs for video surveillance with your own hands and adjusting the circuit until you get a high-quality picture from the camera, you can easily achieve reduced energy consumption and low heat generation. The lifespan of semiconductor elements also increases significantly.
At the same time, the general mechanics of using a homemade device are similar to those of infrared illumination for CCTV cameras. A free-standing spotlight provides uniform illumination of a large monitoring area, guarantees the identification of objects at a considerable distance, and offers optimization of energy consumption and the cost of the system as a whole.
How to make IR illumination for video surveillance with your own hands
The simplest diagram for constructing IR illumination for a video surveillance camera with your own hands looks like a linear structure where the following are connected in parallel:
- series-connected diodes, the number of which is selected in accordance with the voltage of the power source;
- resistors connected in series, acting as a current limiter, the value of the elements is selected in accordance with the characteristics of the semiconductor light emitters used.
To increase the power of the spotlight, the required number of elementary lines of diodes and a resistor are connected in parallel. After this, the entire structure is connected to a battery or voltage conversion unit.
Electronic circuit for IR illumination of a video surveillance camera for DIY production.
This circuit implements the principle of constant power supply. Such IR illumination for a video surveillance camera is reliable, but as the power increases, problems arise with overheating of the structure enclosed in the housing, and the required voltage source also becomes more expensive. A circuit with pulsed diode control looks much more attractive.
NE555 integrated timer circuit
The pulsed diode power supply circuit is not only characterized by reduced consumption and therefore high efficiency, but is also the best solution for powering the system from batteries.
This DIY IR illumination for a camera works according to the following mechanics:
- the basis of the circuit is an automatic pulse generator assembled on the NE555 element;
- the carrier frequency is set using a chain of resistors; for ease of adjustment, one of them is variable;
- power is transmitted to the diodes by a transistor switch;
- To limit the load current, a resistor is paired with each diode.
Setting up the circuit is very simple. When power is applied, the autogenerator generates pulses, the power of which is increased by a transistor switch.
Electronic circuit of an IR illuminator for video surveillance based on the Ne555 integrated timer
The whole setup comes down to changing the resistance of the variable resistor to select a frequency so that the picture from the camera does not flicker or blink.
Advantages of using IR illuminators
In addition to the already mentioned possibility of expanding the night shooting area, free-standing IR illuminators allow you to:
- slightly increase the consumption of the existing system or optimize the performance of the one being developed;
- reduce overall equipment costs;
- minimize interference with existing energy supply networks;
- ensure high-quality and uniform illumination of a large area;
- improve the detail of observed objects at a great distance;
- increase the maximum motion detection range.
The average individual who wants a cheap and reliable solution for night video surveillance can easily use a pair of a homemade IR illuminator and an inexpensive black-and-white camera.
Conclusion
A homemade IR illuminator is a simple and reliable solution. Implementing the mechanics of constant and pulsed power, it is built on common, inexpensive elements and is conveniently configured and regulated.
Such a device will make it easy to solve the issue of night shooting for a private user and can reduce the cost of resources and time when organizing a large-scale video surveillance structure. Even with little skill in working with a soldering iron, almost anyone can assemble an IR illuminator with their own hands.
Tools
Infrared lighting has always been relevant for the development of various security systems, as it allows you to see objects even in complete darkness. Recently, the manifestation of the positive influence of IR light has also been noticed when growing greenhouse plants. The cost of professional equipment is quite high, and the components do not always correspond to the goals set. Therefore, let’s look at how to make an infrared flashlight with your own hands.
Table of contents
Operating principle of an infrared flashlight
First of all, let's define what an infrared flashlight is and for what purposes it is used. Such flashlights provide the opportunity to provide additional illumination of objects for observation using rays in the infrared range.
The light emitted by such a flashlight is invisible to the human eye, but allows you to see the object of interest even in complete darkness due to the use of infrared LEDs. This will be especially relevant for the security sector, because it is difficult to install a powerful spotlight at the site, the operation of which will cause more inconvenience. In this case, it is worth using an infrared illumination flashlight, which has the following number of properties:
Such lighting would be the best choice, since such lanterns have a number of advantages:
Components for assembling an infrared flashlight
Assembling an infrared flashlight with your own hands is not that difficult. To get started, you will need the simplest tools:
- Phillips screwdrivers (various sizes),
- soldering iron with a thin tip, power 60 W,
- infrared LEDs (average cost from 1 dollar per piece),
- wire for supplying power from the LEDs to the battery,
- actually, the battery itself for the IR flashlight
In addition, you should use electrical tape and take a base for the lantern. A simple flashlight that will be converted to infrared will also do. To create such a device, you do not need anything specific; any components can be purchased at your first electrical store.
The process of assembling an infrared flashlight
Creating an infrared flashlight is also not difficult. In fact, if it is designed on the basis of a simple LED, then it is often enough to replace conventional LEDs with infrared ones by soldering them - and the device is ready. If you want to create a more complex technique, then you will have to carry out a few more manipulations:
- the old flashlight is disassembled and the lens is removed from it (the protective glass, if any, is better to leave),
- power wires are soldered to the infrared LEDs (or LED, if one is used),
- then the second end of the wire is soldered to the battery (battery or rechargeable battery),
- The final step will be to isolate the connections. When soldering, it is advisable to cover the soldered elements using heat shrink tubes; the wires should be secured together with electrical tape.
After the steps have been completed, the infrared flashlight is ready.
Quite often, to effectively observe distant objects, you need to use something more substantial than a simple IR flashlight. For these purposes, it is quite possible to assemble an infrared spotlight. For people unprepared for such work, when the word spotlight is mentioned, they may associate it with bulky lighting equipment, but this is not the case. Roughly speaking, floodlights are powerful infrared lights with a significant number of infrared LEDs.
The base requires a housing, which in the future will be an IR illuminator. If you plan to create a low-power lighting device for domestic needs (for example, for night photography), it is not necessary to cover the LEDs with protective glass; otherwise, if you intend to use the spotlight as a lighting device for video surveillance systems, it is highly recommended to use a ready-made design in a waterproof case.
- in the selected case (let's say it looks like a plastic box), marks are made (for example, 8-10 for the same number of LEDs in each row, of which there will also be several). The marks should be at an equal distance from each other (it is optimal to choose a difference of 5 mm),
- Using a drill and a low-power drill or screwdriver, holes are drilled at the indicated marks for inserting LEDs. On the other side of the case, you should also consider the fastening system. If an amateur IR illuminator will be connected to a camera or video camera, then it is enough to make one hole into which a bolt will be inserted and subsequently tightened with a nut,
- the breadboard (for mounting LEDs) is cut using simple scissors to the dimensions required for installation,
- then infrared LEDs are placed in it so that the cathodes and anodes are arranged in a row, and the IR LEDs themselves fall into the drilled holes in the box body,
- the legs of the LEDs are bent in one line for further soldering, each row separately,
- using a soldering iron (a model with a thin tip and a heating power of 60 W is optimal), the tracks of the LED legs are soldered into lines,
- After these steps, the black power wire is used to connect the anode tracks (for example, if the IR LEDs are arranged in three rows and, accordingly, will have six rows of legs on the back side of the board, then the anodes are three rows. A wire is soldered to the outermost of them, with the rest it is connected in rows using a jumper),
- a resistor with a resistance of 220 Ohms should be soldered to the cathodes, after which the resistor jumpers are connected into a single unit and the red power wire is soldered to them,
- the battery must be connected on the other side of the cables,
- After these steps, the body is assembled and the amateur IR illuminator, assembled with your own hands, is ready.
Read also: How to make gabions with your own hands step by step.
It is advisable to add the ability to turn off the power supply to the LEDs. Despite their low power consumption, it is simply not practical to supply power when there is no need for IR illumination (especially during daylight hours).
Application areas of infrared flashlight
As has already been written above, the main environment for using infrared flashlights and floodlights lies in the security sector. Flashlights are best suited for the following purposes:
- as a backlight at night in front of intercoms and door video eyes, in order to be able to directly see a person,
- illumination of internal video surveillance systems (especially important for small rooms),
- additional lighting of the space at night (for external surveillance cameras),
- infrared spotlights (excluding the amateur class, which in terms of operating range should be classified as IR flashlights) are used in cases where it is necessary to ensure a good degree of observation of objects at medium (from 20 to 50 meters) and long distances (up to 400 meters) ,
- providing effective lighting for video surveillance systems when protecting large buildings,
- viewing the protected perimeter,
- additional lighting for night vision devices,
- if it is inadmissible to use spotlights, which may cause inconvenience when working with them.
Separately, it is worth highlighting another interesting aspect of the use of infrared flashlights, since we are talking about video surveillance. For some reason, not every person wants a video camera to record him. In this case, there is a simple and extremely cheap option to provide yourself with camouflage and hide your face from CCTV cameras. To do this, it is enough to create a simple device that works on the principle of an infrared flashlight. According to the indicated method of assembling such a flashlight, several infrared LEDs connected to a nine-volt battery should be attached to a headdress (an ordinary cap will do). Such a system will not stand out at all in its appearance, however, for video surveillance cameras, the upper part of a person’s body will appear as a bright spot in which it will be impossible to distinguish a face.
Attackers may not rush to rub their hands happily; this method only works against budget CCTV cameras; more expensive models are not so sensitive to the influence of IR radiation on them. Therefore, such tricks will not affect a good video surveillance system; a person’s face will be clearly visible even when using several rows of IR LEDs.
Safety precautions when working with an infrared flashlight
It is important to remember that the use of this technology can be harmful to human health if safety requirements are not followed correctly.
- Infrared radiation from powerful sources, when directly hitting the retina of the eye, can dry out the mucous membrane, which will lead to eye fatigue and even pain. Therefore, when using a device such as an infrared laser flashlight, you should never point it at a person’s eyes (unless such a flashlight is used for the purpose of self-defense from an attacker),
- contacts through which power passes - should be reliably isolated from possible exposure to moisture, which will cause corrosion or short circuit of the circuit,
- soldering of contacts should be carried out with well-functioning soldering equipment to prevent the possibility of burns during work,
- you should try to avoid direct exposure of infrared LEDs to sunlight to avoid overheating,
- The infrared equipment housing must be securely assembled to prevent contamination or moisture from entering the system.
These devices have recently become increasingly popular due to their quality and long service life. Low energy consumption, budget cost of infrared lighting equipment, combined with its capabilities, will be a convincing argument in favor of choosing such devices to ensure safety. The assembled amateur systems will allow you, without extra costs, to have, in addition to your camera or video camera, full-fledged auxiliary equipment for taking photos and videos at night.
Criterias of choice
Infrared illuminator IR-84-30-880
When choosing an infrared illuminator for video surveillance, it is important to take into account the main characteristics of these devices, depending on which their scope of application may vary
Before purchasing an IR illuminator, you need to pay attention to the following 4 parameters:
- Wavelength;
- Range of possible object detection;
- Backlight angle;
- Amount of energy consumed.
Wavelength. The wavelength determines whether a person can notice the effect of the backlight. The human eye is capable of perceiving radiation with a wavelength from 400 to 700 nm, when, as mentioned above, for IR illumination this figure ranges from 730 to 900 nm. By the way, at 730-880 nm you can still notice a slight glow from the spotlight, but after 850 nm the image quality may deteriorate due to a decrease in radiation power and detection range.
Range. The maximum range of infrared illumination at which the camera is able to distinguish a human figure depends on the detection range. The range of the illumination can be increased by reducing the angle of radiation and concentrating the light beam on a distant area. Also, the detection range depends on the sensitivity of the camera sensor itself.
PIK-42F
Backlight angle. Good image quality is achieved only when the angle of illumination is greater than the viewing angle of the camera - only this ensures uniform illumination of the entire area without blind spots.
Current consumption. The amount of energy consumed by infrared spotlights is in the range of 0.4-1 A, the operating voltage is 12 V, like any other low-current devices.
In order to choose the right IR illuminator and CCTV camera for your specific needs, you need to describe in detail to a specialist the conditions in which you plan to use the equipment - only in this case will they be able to help you in choosing the right camera-illuminator combination that is suitable specifically for your situation.
Option 2 device on candle soot
It should be made by those people who cannot find graphite in their home or do not want to bother with it. The sequence for creating an IR heater with your own hands is as follows:
- Take two pieces of glass. The dimensions of each piece should be the same. These parameters can be as follows: length 5-7 cm, width - 2-3 cm.
- The material is cleaned of any dirt. If necessary, it is washed and then dried. It also needs to be degreased and cooled. You can reduce the temperature of the glass by placing it in the refrigerator.
- A conductive layer is applied to the glass. To do this, light a paraffin candle and place glass over it so that it is covered with a dense layer of soot. It is desirable that this layer be thin. Soot will be a conductive material that contains unburned carbon particles.
- Take a rag and wipe off a few millimeters of soot from all sides of the rectangle.
- Pieces of copper or aluminum foil are placed on the sides of the glass, 3 cm long. One end of the material should be on the soot, the other should protrude a few centimeters beyond the edge of the glass. The pieces of foil will be the terminals to which the ends of the cable will be connected.
- Another glass is placed on top of the smoked glass with pieces of foil. It is treated with steam before installation.
- Each end of the structure is sealed with epoxy resin or covered with a layer of sealant.
- The resistance of the heating element of the future IR heater is measured and its power is calculated. It is the product of resistance and the square of current. The formula is: N = R x I², where R and I are the resistance and current, respectively.
- If the power does not exceed permissible standards (for example, for apartments with old wiring it should not exceed 3 kW), then proceed with installation on a wooden base. If the power is not satisfactory, then the structure is dismantled and recycled. Similar actions must be taken during possible repairs. To change the resistance, you need to change the width of the soot strip. The larger it is, the less resistance. Heating is also reduced.
- A groove must be made in a board longer than the length of the heating element made. Its width should be equal to the width of the glass structure. Depth - 0.5 cm.
- Install the heating element on the base. To do this, it is inserted into the groove.
- A wire with a voltage regulator and a plug is connected to the terminals.
The number of such heating elements can be large. They can be connected either in series or in parallel. The method depends on the person who can also repair his device.
Comparison of backlights
Let's compare how the camera shoots at night with built-in infrared illumination, with an external IR illuminator and without illumination.
In terms of lighting power, the built-in backlight is slightly inferior to the IR illuminator. For brighter lighting, install 2-3 external IR spotlights and highlight the desired areas, and the spotlights can be placed away from the camera.
Important!
Another addition. In summer, the diode radiation attracts insects, which swarm in front of the lens all night. In this case, the recorder that writes by motion will write all night, emptying the disk. And cunning spiders begin to spin their webs right on the lens, where there are more midges. The reflection from the web is very strong - a bright stripe across the entire screen, knocking down the camera sensitivity.
Admire how crazy things can get:
And the midge itself clogs visibility.
In general, there are problems. If possible, the illumination of street cameras should be kept separate from the cameras.
What are they?
What does an infrared LED look like and can it be distinguished from a regular one? The question is quite complex, since infrared semiconductors have a huge number of form factors - it all depends on their characteristics and purpose.
In computer mice and remote controls, for example, there are ordinary three-millimeter devices, in CD drives and laser printers there are subminiature ones in SMD or a metal-glass case. IR illuminators can contain both many low-power and several high-power infrared LEDs: conventional, with a diameter of up to 10 mm, or in an SMD housing.
The color of the cylinder can also be different - from transparent and metal with a transparent window to matte black. Of course, these devices can be distinguished from light-emitting devices with red and yellow cylinders - infrared LEDs do not have such colors, but that’s all.
As for the technical characteristics of infrared LEDs, the main ones are as follows:
- Scattering angle. The higher this parameter, the less illumination falls on a certain surface of the object, but the larger the area it covers with IR radiation. It is measured in degrees of solid angle - steradians (Ω).
- Output power. It is measured in watts (W) or milliwatts (mW) and can range from tens of milliwatts to several watts.
- Operating current. Current at which the declared characteristics are guaranteed, including mean time between failures and radiation output power. It is measured in amperes (milliamps).
- Forward voltage drop. The voltage that drops across the chip at rated current. Depends on the crystal material and usually does not exceed 2 volts.
- Reverse maximum permissible voltage. The reverse polarity voltage that the crystal can withstand without electrical damage. For infrared devices it usually does not exceed 1 volt.
- Emitted wavelength. If the LED is laser, then one wavelength is indicated, and this is understandable. If this is an ordinary infrared LED, then the range of waves emitted by it is often indicated, which are measured in nanometers or micrometers (nm or microns).
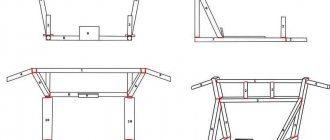
Making a heater frame from wooden slats
Now it is necessary to make the frame of the future heater. To do this, a square of the same dimensions as the section of the heated film floor remaining after the repair is assembled from wooden slats. You can use corners to secure the slats to one another, but it will be easier to attach the slats by simply driving self-tapping screws into the end. Too much strength is not needed here, and the film will add rigidity to the structure when it is fixed in place.
To make it more convenient to attach the film to the frame, it is better to use wider slats, however, for lack of a better one, you can even get by with window glazing beads that should hold the glass in the frame.
It is necessary to assemble a frame from wooden slats according to the size of the heated floor film
When the frame is assembled, you need to make it so that it can stand vertically, similar to a conventional heater. To do this, you can use a pair of short slats that are fixed at the bottom of the frame perpendicular to it. These improvised legs are also fixed using self-tapping or regular screws. After this, the frame can be considered complete and proceed directly to the installation of the infrared heating element.
The legs are attached to the frame - now you can proceed to installing the heating element
Experiment
Photo 1 shows a quad freeze frame taken by a color camera (color), a day/night camera without IR sensitivity (dn), a camera with constant IR sensitivity (dn ir) and a camera with a movable, controlled IR filter ( dn cut). Lighting in the measuring chamber is provided by incandescent lamps. Color distortion is clearly visible in a camera with constant IR sensitivity. It is noteworthy that synthetic materials are especially susceptible to discoloration.
Photo 2 shows a still image taken with similar cameras in minimal light. All three day/night cameras switched to black and white mode. However, it is clear that the contrast and brightness of the images of a color camera and a day/night camera without IR sensitivity are almost identical and are clearly inferior to cameras with a sensitivity spectral range extended to the IR region.
Naturally, only day/night cameras with IR sensitivity can work with IR illumination. However, the real sensitivity in the IR region, and even more so at a specific wavelength of the IR illuminator, remains a “closed secret” for the consumer. This is partly why day/night color cameras with built-in IR illumination are so popular. In this case, the manufacturer reports (if, of course, this is true) at what range the observation can be carried out.
If you use a separate IR illuminator with a day/night color camera, you cannot avoid trial and error. Moreover, as a rule, somewhat mythical data on night sensitivity in lux will not help here, since IR radiation in lux is not standardized. To illustrate this situation, photo 3 shows a freeze frame of the cameras mentioned above at extremely low illumination from incandescent lamps.
It is obvious that a camera with constant IR sensitivity has a significantly lower integral sensitivity compared to an ICR (cut) camera. On the other hand, when illuminated by an IR illuminator with a length of 930 nm, the images of these cameras are almost identical, as shown in photo 4. Unfortunately, we never even know the relative spectral sensitivity characteristics of day/night cameras. And in this case, the information from sensor manufacturers is not able to help us, since it very rarely covers the IR range in comparison with black and white sensors.
In Fig. 1 (see page 72) shows the spectral sensitivity characteristic of one of the most popular CCD matrices today - SONY Super HAD II, which, as we see, is normalized only in the visible range.
Naturally, it can be interpolated into the IR region, taking into account the course of similar characteristics of black-and-white sensors. But we don’t know what filters the manufacturer uses. After all, even cameras with ICR sometimes have serious sensitivity in the IR region. Obviously this “trend” is due to the desire to increase sensitivity in color (daytime) mode.
Difficult lighting conditions
Perhaps the main reason for using infrared illumination is to provide video surveillance capabilities at night. The quantity and quality of light determine the quality of the resulting image. The quality of light in this case means how evenly it is distributed in the field of the frame. If the object is poorly lit - there is not enough light or it is unevenly distributed, then you should not expect good recordings from CCTV cameras, even if excellent equipment is used. Often such records are simply useless. Several examples allow us to clearly illustrate the qualitative improvement achieved through infrared illumination (Fig. 2).
Fig.2 Qualitative improvement achieved through infrared illumination. Top row - backlight is off. bottom row - backlight on
A common misconception about infrared illumination is that it provides no benefit when the subject is illuminated (Figure 2). While this statement is generally true, the truth is more complex and, as always, depends largely on the specific application and characteristics of the object being observed. There are also special applications where the use of infrared illumination is justified during the day rather than at night. But this is a topic for another discussion. As for night video surveillance, even in artificially illuminated areas, infrared illumination allows you to achieve better results. Infrared spotlights are usually placed next to the camera and pointed directly at the object being observed. This allows you to even out the exposure of the frame and highlight shadows created by other light sources. As a result, the image is better “readable”: significant details are better distinguished.
The basis of any camera is a CMOS or CCD matrix. It is the matrix that is the photosensitive element. If there is light, there is an image. If not, backlighting is needed. Otherwise, the matrix does not work. What if there is light, but there is very little of it or, on the contrary, too much? How important is the amount of light for a camera?
Most modern cameras, as already mentioned, have excellent light sensitivity characteristics. The specifications indicate 0.1 Lux or less. While a camera manufacturer insists that its camera can perform in low-light conditions, the image from such a camera may be virtually useless.
Let's consider the spectrum of tonal transition from white to black. Ideally, the camera should convey all possible gradations of brightness of the observation scene (Fig. 3): from the complete darkness of a deep autumn night to the dazzling sun of a summer day. In reality, any camera has a limited dynamic range. And although there are cameras on the market with high dynamic range, this high dynamic range is often still not enough to simultaneously correctly convey image detail, both in deep shadows and in bright light. Let's try, for example, to consider a high-contrast scene where there is both a bright light source (point A) and details on a dark background (B).
Fig.3 Spectrum of tonal transition from white to black
Typically, a camera with standard settings will only show the mid-tone range. If you fiddle with the settings, you can adjust the camera to shift this range to the right side of the tonal spectrum, and reveal poorly lit details in the shadows. But then the light areas will merge into one solid white spot. Or vice versa, “shift” the range towards the light, while losing all the information in the shadows. It will not be possible to consider both at the same time. Dynamic range is not enough.
The solution to the problem is additional lighting. By adding light, we highlight the shadows, exclude the darkest parts of the object of observation, crop the tone diagram on the right and, as it were, adjust our image to the dynamic range of the camera. This technology helps both during the day and especially at night. However, it should be noted that the selection of a source of additional lighting in this case must be approached especially carefully. The greater the brightness range that needs to be compensated, the more powerful, and, most importantly, the more uniform illumination must be provided. Uniform, flood light is key, as a directed, powerful beam may not improve, but may even make matters worse by increasing the brightness range rather than decreasing it. Modern high-quality LED spotlights allow you to achieve uniform illumination without exceeding reasonable energy consumption.
Homemade product #1 - based on the “Good Warmth” heater
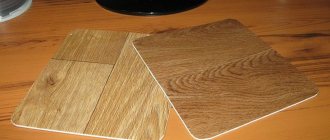
Many heating devices operate according to the so-called “thermal film principle.” For example, the well-known “Kind Warmth”. Assembling its analogue at home will not be difficult. For this you will need:
- Laminated paper plastic. Two sheets of equal size with an area of about 1 square. m.
- Graphite powder. You can grind graphite yourself, for example, old graphite trolleybus brushes.
- Epoxy adhesive.
- A piece of good wire with a plug at the end.
Heater Good Warmth - a prototype for many homemade devices
The work is carried out in stages:
- Mix the glue with graphite powder and stir the resulting mixture thoroughly. Thus, we get not just an adhesive composition, but a graphite conductor with high resistance. The amount of graphite in the glue directly affects the maximum temperature of the future heater. On average it is about 65 °C.
- Apply the prepared composition onto a sheet of plastic using zigzag wide strokes. For processing we use the rougher side of the sheet.
- We connect the plastic sheets together using epoxy glue.
- For greater structural strength, we construct a wooden frame that securely fixes the sheets.
- We attach copper terminals to the graphite conductors on different sides of the structure. As an option, you can also connect a simple thermostat, which will allow you to set the most comfortable heating mode. However, this is not necessary.
- Dry the structure thoroughly. Even slight humidity will damage the homemade heater the first time you try to turn it on.
- We carry out tests and measure the resistance of the device. Based on the obtained value, we calculate the power and determine whether the heater can be safely connected to the network.
The device is ready for use. It can be placed on the floor or on the wall, does not take up much space, is quite effective and safe, provided it is well insulated.
Graphite is crushed and mixed with epoxy glue to create a graphite conductor.
Diagram of the future heating device
heating elements
For heaters: types you will have to buy heating elements: 220 V electrical appliances with open heaters are extremely dangerous. Here, pardon the expression, you need to think first of all about your own skin and property, whether there is a formal ban or not. It’s easier with 12-volt devices: according to statistics, the degree of danger decreases in proportion to the square of the supply voltage ratio.
If you already have an electric fireplace, but it doesn’t heat well, it makes sense to replace a simple air heating element with a smooth surface (pos. 1 in the figure) with a finned one, pos. 2. The nature of convection will then change significantly (see below) and heating will improve when the power of the finned heating element is 80-85% of the smooth one.
Types of heating elements
A cartridge heating element in a stainless steel housing (item 3) can heat both water and oil in a tank made of any structural material. If you buy one, be sure to check that the kit includes gaskets made of oil-heat-gasoline-resistant rubber or silicone.
A copper water heating element for a boiler is equipped with a tube for a temperature sensor and a magnesium protector, pos. 4, which is good. But they can only heat water and only in a stainless steel or enameled tank. The heat capacity of oil is much less than that of water, and the body of a copper heating element in oil will soon burn out. The consequences are severe and fatal. If the tank is made of aluminum or ordinary structural steel, then electrocorrosion due to the presence of a contact potential difference between the metals will very quickly eat away the protector, and then eat through the body of the heating element.
T. called. dry heating elements (item 5), like cartridge ones, are capable of heating both oil and water without additional protective measures. In addition, their heating element can be changed without opening the tank and without draining the liquid from there. There is only one drawback - they are very expensive.
General recommendations
The infrared switch needs to be adjusted after purchase. To do this you need to do the following:
- adjust the sensitivity of the sensor;
- set the operating time in the on state;
- If the device is equipped with a microphone, this should also be adjusted.
Many switches are equipped with an LED indicator that changes the frequency of flashing when activated. This property can be used when configuring the sensor.
An infrared switch is a device designed to make the user’s life easier and more comfortable. The device is equipped with an IR sensor that responds to human heat. When an action begins within the sensor's visibility radius, the lamp turns on. The switch can also be operated from a remote control.
Heating cables
Laying a heated floor in a garage is not always advisable, but in one situation such a design will be more than justified. We are talking about starting a car in cold weather - often a lot of problems are associated with this, and the presence of a heating cable will significantly simplify the task. In addition, you can lay the cable only under the car and turn it on only if you have problems starting the engine.
The machine must first be covered with a cover that will cover it completely - this will allow the thermal energy to be concentrated in one zone. The air will not move into the garage itself, so the level of heat loss will be minimized. This technique will allow you to quickly warm up the car even in severe frost.
Making a heater frame from wooden slats
Now it is necessary to make the frame of the future heater. To do this, a square of the same dimensions as the section of the heated film floor remaining after the repair is assembled from wooden slats. You can use corners to secure the slats to one another, but it will be easier to attach the slats by simply driving self-tapping screws into the end. Too much strength is not needed here, and the film will add rigidity to the structure when it is fixed in place.
To make it more convenient to attach the film to the frame, it is better to use wider slats, however, for lack of a better one, you can even get by with window glazing beads that should hold the glass in the frame.
It is necessary to assemble a frame from wooden slats according to the size of the heated floor film
When the frame is assembled, you need to make it so that it can stand vertically, similar to a conventional heater. To do this, you can use a pair of short slats that are fixed at the bottom of the frame perpendicular to it. These improvised legs are also fixed using self-tapping or regular screws. After this, the frame can be considered complete and proceed directly to the installation of the infrared heating element.
The legs are attached to the frame - now you can proceed to installing the heating element