- home
- /
- Arrangement
- /
- DIY table lamp made from scrap material
In this article I share with you my experience on how to make a lamp at home from scrap materials with your own hands or from what is on hand in the house, garage and using a minimum amount of tools.
Looking ahead, I note that here you can find out how you can secure the socket in a loft lamp or a homemade pipe lamp.
Important! I remind you about electrical safety! If you do not have experience in electrical installation work, it is better to contact a specialist or purchase a ready-made lamp. All electrical circuit connections must be soldered and carefully insulated, if any!
Secret of success
Looking at the photo of a homemade floor lamp, it turns out that the secret of their universal adoration lies on the surface. The most original ideas and bold decisions produce the most attractive options.
So, clay, putty, liquid nails, and sealant can be used.
In addition, the floor lamp can be made from a vase, an ordinary umbrella, an old mesh with handles, or, alternatively, a denim skirt.
Necessary materials
To make a floor lamp with your own hands, you can use a variety of parts and materials found in your home. You can give new life to things that no one has used for a long time.
When starting to create your own unique lamp, you need to prepare the materials. Key details you can't do without:
- The leg of a floor lamp is any hollow pin - metal or plastic. It is better to avoid wooden parts in contact with the cable;
- electrical cable of the required length;
- the cartridge is from an old electrical appliance. Usually they use E27, which is suitable for a light bulb with a standard base;
- light bulb - energy saving or LED. An ordinary incandescent lamp becomes very hot during operation, which can lead to a fire hazard.
Important! For a metal leg, it is best to choose a three-core cable.
Additionally, you may need materials to create a lampshade. They depend on what type it will be - paper, textile or glass.
Personally made floor lamp
In order to find out how to build the specifics of the work, it’s worth, first of all, to familiarize yourself with the step-by-step instructions on how to make a floor lamp.
At the initial stage, we prepare the materials: an ordinary plastic bucket, a board, at least 100 cm, wood glue, a multifunctional adhesive, a lamp with an electric cord and plug, fasteners, and, in addition, a copper elbow and, of course, paint.
But the production of the frame will require a beam of 150 cm with a diameter of 3 cm and a copper tube of a similar size.
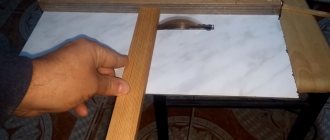
- Let's make the base. We divide the board into 2 segments so that one is approximately 2 cm larger than the other. Glue the boards together in the center. We retreat 5 cm from the edge and drill a through hole with a diameter of 3 cm.
- When making the frame, it is necessary to make a hole in the wooden post in order to thread a copper tube into it.
- On the opposite side, the pipe should protrude 25 cm. At the joint, drill a 6 mm hole.
- A wooden stand is inserted inside the hole in the base and fixed with glue. After which, a copper pipe is inserted towards the floor.
- An elbow is attached to the pipe, on which the lampshade is hung.
- A cord is threaded into the previously made hole so that it protrudes from the end elbow.
- Time to make a lampshade. We amputate the side of the bucket, and cut out the bottom so that the cartridge fits there.
- Paint the bucket in 2 layers. We apply the second one only after the first one has completely dried.
- The socket with the lampshade is attached to the wire.
How to secure a light bulb socket in a homemade lamp?
To secure the light bulb socket, twist two parts together - the adapter nipple and the coupling.
We twist this part with the pipe. We use sandpaper to smooth out all corners and sharp edges.
Let's create a lampshade
Making a lampshade for a floor lamp when the old one has become unusable will not be difficult. There are many options here, from the more classic to the trendy.
For example, you can use the decoupage technique and decorate the lampshade with beautiful openwork napkins or similar decorated elements.
Satin ribbons, all kinds of bows, chic gathered fabric, photographic film. There are actually a lot of ideas.
Floor or tabletop?
By and large, the only significant difference between a floor and table lamp is the length of the leg. For a floor-standing one, as a rule, it is a hollow pin into which the wire is placed, but for a table-top one, options are possible.
You can take a ready-made leg from an old lamp that has fallen into disrepair, or you can make your own unique stand for the lampshade. For example, you can take a plastic vase and make a hole at the bottom for the cable, and at the top - a holder for the cartridge. A floor lamp usually has one leg, but you can make a unique model with several supports, and then it will become a real decoration of the interior, attracting the eye with its unusualness.
Fabric version
By the way, any fabric can be used. The main thing is to play with the idea beautifully.
- How to make a transformer with your own hands - step-by-step instructions, diagram, drawings, list of materials + photo of a finished homemade transformer
Which hidden wiring detector is better? TOP 10 best manufacturers with photos and descriptions
Technological maps in construction - what is it?
You can create a collage from a wide variety of scraps, you can come up with small flowers or bows, or you can come up with a version with a piece of children's clothing.
Paper moon lamp
For work you will need: a Chinese paper lamp, white paper, a stationery knife, hot glue, scissors.
— triangles are cut out of paper, with sides 3x20x20 cm, up to 50 pieces;
- triangles are glued along the bottom ball of the paper lamp, with the smaller side in a circle. This work is done over the entire surface of the ball;
- for volume, all the ends of the triangles are wrapped using scissors;
— a cord with a light bulb is pulled into the upper hole.
Voila, the paper lamp is ready!
Photos of beautiful DIY floor lamps
- How to fix a laptop that won't charge
Insulated dielectric screwdrivers up to 1000V - tips on how to choose the best manufacturer
Dielectric insulated tool for work - which one is better to choose? Review of manufacturers, photos + video
Did you like the article? Share

6+
Errors during installation and operation
At the end, we will briefly summarize and make a selection of common mistakes that you should avoid when connecting and servicing a light bulb socket.
1Connecting the phase conductor to the threaded part of the base.
How it all ends was described in detail above.
2Do not forget to tighten the screws that secure the contact plates to the ceramic liner at the very beginning.
You can solder all the wires super securely, but if these screws are loose, then heating of the connection is still inevitable.
3Connecting multi-core wires without soldering or tinning. 4Connecting phase and zero to two adjacent contacts of the keyless chuck and creating a short circuit.
5 Squeeze-adjust the central plate in the carbolite cartridge when bending it, using a non-insulated tool.