- December 6, 2020
- Equipment
- Vasilisa Odoevskaya
An ax is a multifunctional tool and people use it both in everyday life and in construction, tourism, and travel. It happens that axes are sold without a cover, but this, of course, is not safe, and also not convenient. This article contains step-by-step instructions on how to make your own ax case.
Leather is such a durable material that is easy to work with. However, despite how simple it is, there is always the possibility of completely ruining the capricious material.
Why do you need a cover?
First of all, it is worth noting that the case for any ax (be it a huge household ax for chopping wood or a small garden hatchet, or even a case for a fire ax) primarily serves to ensure the safety of its owner. In addition, using the case, you can add to the instrument a device for attaching to a belt or any decorations of your choice.
Before you begin, it is important not only to know how to make a case for an ax with your own hands, but also to choose the material for the future product. It is best to use leather, whether artificial or natural; it is a matter of price and taste. It is the leather, because it will not quickly rub against the ax blade, unlike ordinary fabric, that will not stretch when worn and used, maintaining its original shape.
Made of plastic
Making a cover is not difficult if you use plastic that softens when heated. Many similar artificial materials have these properties. The easiest way to make a case is from plexiglass or polyvinyl chloride.
Required tools and materials:
- PVC pipe 100 mm, PVC or plexiglass sheet;
- hacksaw, saw, jigsaw;
- hair dryer, burner, metal bath.
Step-by-step manufacturing instructions
In the case of using sheet PVC, make a drawing of the cover as described above.
It is better to outline the ax along with the handle. It is necessary to leave a margin of 10-20 mm around the perimeter.
Then do this:
- Mark the place for the bend (a strip slightly larger than the width of the butt).
- Heat the sheet in the middle of this strip.
- Place the ax and bend the plastic.
- The place where the ends meet is heated well, one is wrapped and welded.
- It is processed with a file or “sandpaper”.
- A lid is made from plastic and placed on top or secured on small hinges.
Types of axes
The history of the modern ax is the stages of transformation of the American ax for cutting wood. The colonists arrived with European patterned, beautiful axes with a narrow blade and shaft that curved gracefully from top to bottom. They were effective on the major tree species found throughout Europe, but were ultimately unsuitable for the vast forests and huge trees that the settlers encountered.
Most modern axes have steel heads and wooden handles, typically hickory in the US and ash in Europe and Asia, although plastic or fiberglass handles are also common. Modern axes are sorted by use, size and shape. Representatives with short handles, designed for use in one hand, are often called handheld. Hatchets are small axes with a handle, often with a hammer on the back. Being an easy weapon to make, axes were often used in battle.
Traditionally, handles were made from hickory, with their length varying depending on the task at hand. Attaching the handle was a complex process involving screwing, planing and wedging, which was usually controlled by the ax owner. These graceful curved handles with a yellowish-brown tint only became popular in the mid-19th century with the advent of contour lathes, which were subsequently adapted to the making of weapons. Well, now many people use a tourist ax sold in a case, since it is compact, modern and lightweight.
You can also touch on the mythical additions to this instrument. Steel axes were also important in superstitions. There were rumors that throwing an ax could protect against hail. Sometimes the ax was placed in crops with the cutting edge pointing toward the sky to protect the crop from the elements. An upright ax hidden under the windowsill of a house would ward off witches, and an ax under the bed would “guarantee male offspring.”
Materials and tools
Before making a leather ax case, you should prepare:
- Hatchet.
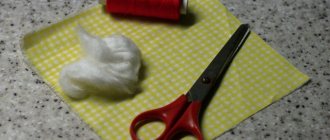
- A piece of leather. This could be specially purchased material, or you can use old shoes to save money (especially since you don’t need much material). The leather must be thick enough, otherwise it may tear during the process of sewing together parts of the workpiece, or when wearing the finished case.
- Waxed thread, or just a very dense thick thread.
- Rivets for fastening the strap; if desired, you can use smaller rivets instead of thread.
- Sewing needle. It is worth choosing a thicker one: when working with leather, it may break off.
- Utility knife and scissors.
- Hammer.
- Mink oil.
- A drill bit or an awl, but it is better to use a fork, sharpened and flattened with a hammer.
- Paper and pencil.
- Adhesive tape, scotch tape.
- Pliers for gripping a sewing needle in case it gets stuck in the leather.
- Oil for soaking the skin.
Final assembly of the product
In order for the seams to be smooth and neat, the holes for them must first be marked. Usually a tailor's gear is used for this, but the markings can be made using a regular fork. Holes are punched with an awl or drilled. For this work, professionals use a drill with a diamond-coated drill. You can use a thin drill designed for working with porcelain stoneware.
First you need to make holes in the corners of the cover. Thread sewing needles or small nails through them, securing both parts of the sheath. Then punch the blanks in the middle of the intended seam and repeat the operation. This will allow you to form even punctures without displacement. You can cut a groove for the thread over the punched holes. The recess is formed using a scalpel or wood cutters. Such sheaths not only look neater, but also last longer.
The seam should start from the thinnest part of the case. After assembly, the sections of the product are carefully processed with a grinding machine. The edge of the valve is trimmed with cord, braid or glued with leather tape. The button is installed last. In this case, it is wiser to use a holster fastener. Any other fastening will be unreliable, since the sheath is quite heavy. Such sheaths are usually decorated with a burnt or engraved design on the leather.
Sample
And again about safety: you should put the ax on paper folded in half and tape it along the blade, this way you can make further steps easier and protect your fingers from accidental cuts. Next, you need to outline the metal part of the ax (cutting edge, blade to handle), then step back from the drawn line and take into account the thickness of the edge of the ax. After this, you need to cut out the resulting template and try to try it on the ax blade. It is important to adjust the size of the “pattern” to the desired result: the blade must be completely closed.
Making a wedge for expanding the blade
Next, you need to prepare a wedge for the expanding part of the ax and blade. Some cases are made without such a detail. But the case, which has a reinforced insert, lasts longer and is much more convenient to use.
The wedge consists of 5 parts:
- corner piece (outlined according to the shape of the blade from the side and bottom of the tool) – 1 pc.;
- lower wedge (shaped like the blade from below) – 2 pcs;
- gaskets (according to the shape of the blade from below, ½ the length of the lower wedge) – 2 pcs.
The width of the parts is 12-15 mm. The result should be blanks, as in Fig. 2.
Figure 3. Gluing the wedge to the main part of the cover.
The wedge must be assembled and glued. First, one piece of the gasket is applied to the corner piece, then the lower wedge is glued, and the operation is repeated. The parts must be completely covered with glue, avoiding dry areas, otherwise the seal will dry out and tear over time.
In order for the wedge parts to connect more reliably, they can be grabbed with clamps and left there until completely dry. But you need to make sure that the “sponges” of the tool do not leave pressed marks on the material. To do this, you can place pieces of foam rubber or soft flannel between them and the workpiece.
After the glue has completely dried, the wedge must be glued to the main part of the cover as shown in Fig. 3.
To make the cover look neater and make it easier to sew, the wedge must be cut off or ground off the short side obliquely by about 9 mm. In the illustration, this part is shaded with a marker. To perform this task, it is wiser to use a grinding machine. But the allowance can also be cut with a knife. You just need to act extremely carefully, removing the skin in layers.
Skin cutting
You need to attach the existing paper template to the leather and make a pattern for the ax cover by cutting out a piece of material. You should cut out a little more than necessary, because the excess can be cut off during the process. After the workpiece is cut, you need to place it on the ax blade, check everything again (measure seven times - cut once), and then cut off any excess from the skin, if there is any.
After this, it is worth noting where the strap is attached and where the rivet or button will be inserted. This design will hold the sheath on the blade itself. After this, you need to measure the girth between these two points and cut a strap of the appropriate length from the leather. If the material is difficult to work with, then this is where leather oil comes in handy, or you can use water by simply wetting the product. These procedures will make the skin softer and more pliable, making it easier to work on making a case for an ax with your own hands.
Top Menu
Mikhail (Romantic)
Once upon a time, the question arose before me of how to close the blade of a hatchet when carrying it so that it would not become dull or cut anything, and how to do this as simply as possible.
And after some thought, this is the ax case I came up with.
To make it you will need a strip of leather, I took it from the top of an old boot, a piece of Velcro and a little glue to glue the parts of the Velcro to the leather.
In order not to experiment with leather right away, I recommend taking a strip of fabric and trying it on and adjusting it at least approximately in length and width, and only then cutting out a strip of leather cover from it.
The cover itself is a strip of leather with Velcro glued to it in two experimentally determined places.
The trickiest thing is the way of wrapping the ax in this strip; I admit, at first I forgot how I did it and remembered for a few minutes, but then I remembered and everything became very simple.
We place a strip of leather under the ax, as shown in the figure below, and bend the corner onto the blade.
We place the long end of the strip on top, it is desirable that its right edge becomes parallel to the blade
Now we place the long end under the ax
And close the entire open blade. You can safely cut off the excess.
Now we glue Velcro in the right places
And this is how it turned out in the end
This case has served me for many years and has never let me down. The main thing is that you don’t mind losing it and just do it.
One more point, the strip can and should be made not strictly rectangular, but trapezoidal.
Sewing the cover
You need to take the resulting workpiece and fold it in half into the intended final shape; for ease of work, you can fix the layers with clothespins so that the skin does not move. Next you need to make a seam along the edge of the product, but since leather is a durable material, this is where additional tools come in handy.
You need to pierce both layers of leather through, and then stitch it with waxed thread. You can make holes in different ways: some people use an awl and pierce the leather by hand, some take a small drill and just drill holes, but most people who have extensive experience working with leather products mainly use a homemade tool.
This is a simple fork familiar to anyone. The teeth are sharpened with it and a quadruple awl is obtained. This method is chosen simply because the seam is much neater and smoother.
Take a fork and place it on the edge of the workpiece, hit the fork from above with a hammer and make holes in this way. This makes 4 suture holes, then the fork is inserted into the last, fourth hole, and the skin is pierced again. The end result is a seam with an ideal fixed distance between the holes.
After these manipulations are completed, you should sew a thread along the workpiece with a simple stitch, diving the needle into one hole and exiting in the next. Since this is not fabric, but leather, you should keep the thread taut all the time, and when you reach the end, make a loop over the edge and go in the opposite direction, creating a double stitch.
Of course, you can use any other stitching method, but when working with leather, it is this option that shows itself to be most effective in terms of speed, strength, durability and ease of production.
A loop
In the marked place you need to punch a hole or simply cut it out and secure the prepared strap with a rivet.
A rivet is a term used to describe a simple fastener, which is usually mechanical. It is a cylindrical shaft with two ends. One of them has a head, while the other, called a tail, does not. Rivets are the ideal way to attach two pieces of leather together. In addition, they can be used as decoration.
In order to attach the rivet, you will have to punch a hole in the leather. The hole size should be the same as the rivet shank. The next step is to insert a rod into one side of the hole and attach the cap to the other. If you want to keep the cap rounded, you should use a special hammer that has a concave striking element, but if there is no such hammer, then you just need to drive one part of the rivet into the other with a regular hammer.
On the reverse side, fasten a button or button, as is more convenient for you. There shouldn't be any difficulties with this.
Fabrics for work
An important element, without which the bag will not last long and will quickly become unusable, is the lining. The fabric serves as a seal that protects the base material from the inside. Usually, during the creation of a pattern, several necessary parts are made, and then their copies are created from lining fabric using the same templates.
Lining fabricHow to make a bag from a leather skirt
Leather products always look stylish and elegant. They are suitable for both women and men. You don’t have to purchase additional material for sewing a belt bag, but instead, be practical and use an old skirt, boots or jacket that you simply don’t want to throw away.
Leather bag pattern
Genuine leather is a rather dense material that is not so easy to work with. Therefore, you should be careful and strictly follow the instructions when sewing.
To create a pattern for a belt bag, you need to take thick cardboard or paper, and for the bag itself, leather, 2 zippers and fittings for fastening.
Auxiliary tools will be a ruler, a leather knife, an awl, scissors, a compass and a sewing machine. The product can also be sewn by hand if the person is familiar with the technique of working with such material.
Leather handbag
Creating a pattern:
- Draw a circle with a diameter of 27 cm on cardboard.
- Draw a horizontal line AA1 2 cm higher than the center of the circle.
- Thus, the bag will be divided into two components - lower and upper parts. The smaller part will act as a lid, and the second side will become the back wall.
- Measure the length of the smaller part of the circle from A to A1 and remember the result. Set point B in the middle of the arc.
- Do a similar step with the second part. Set point B1 in the middle of the arc.
- Draw the front wall. Take a suitable sheet of cardboard, bend it into two parts, placing the fold vertically. Along the top edge, mark half the length from point A1 and put a mark there. Measure 13 cm down the fold and place a mark. Connect the points with a smooth line along the pattern, the length of which will be half the length from point B1.
- Cut and accept as the front wall.
- Make markings for the zipper on this part.
- Transfer most of the circle onto paper and cut it out. Point A will be on the top left, A1 on the top right, and B1 on the bottom, in the middle of the arc.
- Cut out the back wall from leather and sew a zipper into a special hole.
- Sew the back pocket wall according to AA1.
- On the pattern below points A and A1, that is, on the sides of the zipper cutout, points GG1 are installed. You need to sew parts for attaching the zipper into them. Rings can play their role.
- Sew the parts on the reverse side, aligning points A-A, A1-A1, B-B, B1-B1.
- Unscrew the product through the zipper and enjoy the result.
Tassels on a slider are a good choice for a woman's purse. To do this, you will need to take a rectangle from the remaining leather, make several cuts, roll it into a roll and secure it with glue. This way you will get an imitation brush that will look harmonious with the product.
Important! This handbag can be worn on the belt, over the shoulder and on the chest. It will look appropriate when creating a business image or a casual option.
Pattern No. 2
Treatment and care
After you have made a leather ax case with your own hands, you should treat it with a moisture-resistant mixture. This will protect the leather from premature destruction, but will also protect the ax blade itself from rust. Moreover, it is worth lubricating both the internal and external parts.
Keep the blade sharp in the same way as a knife, using a whetstone. Keep it dry to prevent it from rusting.