-> How to make veneer at home
Veneer is a very thin sheet of wood, the thickness of which can vary from 0.1 to 12 mm. For industrial purposes, veneer is often made from valuable wood species such as oak, ash, beech, walnut, mahogany and others. But if you need veneer for personal purposes in small quantities, for example, for aircraft modeling, then you can read how veneer is made at home and, if you have the tools, do it yourself. In this article we want to talk about how to make veneer with your own hands.
How to make veneer at home
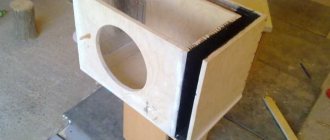
The easiest way to get yourself a few pieces of veneer is to “disassemble” a sheet of plywood. Place the plywood sheet in a container with hot water for 2-3 hours, maintaining a high temperature throughout the soaking period, and then cut the plywood into layers with a well-sharpened knife. Immediately after this, you need to put the resulting veneer slabs under a press to maintain a flat surface.
You can even make sawn veneer at home, but be prepared that this work will take a lot of effort and time. All you need is a prepared beam (not necessarily elite wood, ordinary maple or birch will do), a pencil, a ruler, a workbench and a good jigsaw, preferably with a set of replacement blades in reserve. Fix the workpiece in the workbench and mark it vertically in increments of 10-12 mm (thicker is not practical, and if thinner, it will be very difficult to saw). Take a jigsaw in your hands and cut the veneer along the lines, layer by layer.
How to make veneer if you have a plane at home. Sliced veneer is made from the same timber as sawn timber, with the only difference being that thinner plates can be made. But there is also a downside to the coin - it is difficult to make plates of the same thickness with a mechanical plane. Well, if you have an electric plane with an adjustable layer thickness control, then the task is much easier. Firmly secure the timber in the workbench and remove the veneer, remembering to use a clamping ruler or beam. If you have access to a peeler or other woodworking machines, then the process of obtaining veneer is no different from the industrial one. How to make veneer suitable for further use? It must be sanded, coated with waterproof solutions or varnished, depending on the purpose of production.
There comes a time when wooden furniture or doors lose their original appearance. There is no need to throw away such products. Thanks to new technologies, a variety of finishing materials, and design developments, they can be given a modern look.
One of the finishing materials is veneer. To make it, wood is used, from which a thin layer is cut. At the same time, the material retains the structure of the tree.
You can decorate interior items using veneering technology. Making a new one out of an old product is not too difficult. If desired, repairs can be done by yourself. It is advisable to watch the video before starting work.
general information
There is no definition of the term “veneering” in various dictionaries. In essence, it means pasting materials with the thinnest layer of decorative wood-based coating. In principle (if you don’t go into specific details) this is the same lamination technology. The only difference is that, as a rule, products (objects, structural parts) made of wood are subjected to such surface finishing.
Veneer has a certain classification. Differences in production technology, as well as durability and specific use. A detailed description of the groups is unlikely to interest the reader. It is enough to note that if you plan to finish furniture with your own hands, then it is advisable to focus on peeled veneer (a natural product)
and fine line (the so-called reconstructed modification).
They have a lot in common - ease of working with the products (the layer is very thin), a variety of textures (especially fine-line modifications) and an affordable price.
Therefore, talking only about furniture restoration is not entirely correct. With the help of veneer, you can give a “second life” to old door jambs and panels, wall panels, countertops - there are plenty of options for using such finishing.
There are several technologies for fixing veneer. There is only one available for DIY implementation - “hot”, which is based on the use of glue. This technology is excellent for restoring wooden furniture. The other two require special equipment and are not suitable for home use.
Advantages of the material
Natural veneer has a number of advantages:
- Veneer made from wood is an environmentally friendly material. Its qualities are equal to solid wood.
- Decorative trims with patterns, different colors and textures are available on the market.
- The surface after pasting is smooth, chips, scratches, and mechanical damage are almost impossible.
- Finished products covered with veneer are distinguished by sophistication and nobility.
- Plywood is made from veneer.
It is important to know:
When choosing the right material, read the composition. Today there are similar products made of plastic or eco-veneer (glued together pressed wood waste).
It is not advisable to replace wood veneer with them; they are less environmentally friendly and have a short service life.
Add a beautiful border
Cut 5mm strips from the black veneer and 25mm strips from the walnut veneer in the same way as before. Attach these strips to the edges of the pattern (photo K), overlapping at the corners. Cut the overlaps diagonally from the inner corner to the outer corner (photo L). After making mitered joints at all four corners, turn the set over and apply strips of masking tape to the border. Remove the transparent film from the front surface.
Quick tip! Apply clear tape diagonally to all corners on both sides to prevent cracks when cutting the veneer.
Preparatory work
To perform high-quality veneering you need to acquire:
- veneer and glue;
- ruler and paper for cutting out the template;
- plywood knife and veneer cutter;
- iron and syringe;
- with a wooden roller or iron.
Restoration should begin with the dismantling of fittings and decorative elements on furniture walls, doors or other products. The old coating, which has served its purpose, is removed with a spatula.
The surface must be carefully leveled, eliminating any defects with glue or putty.
. After complete drying, sand it with sandpaper.
Under each sheet you need to put soft paper (to absorb moisture) and plywood. Place a small press on top. This is clearly visible in the photo. Smooth sheets are cut into strips with a veneer cutter or plywood knife, in accordance with measurements.
The facing material is glued to the base of the restored products using the hot veneering method:
- The adhesive composition is applied to the prepared tape, as well as to the required part of the product. To ensure that the veneer is glued, the glue application procedure is repeated again after the first layer has dried. If the glue is applied only once, then it needs to dry slightly for 10 minutes.
- Using an iron heated to 50 degrees, we iron our workpiece, using white paper as a backing. The glue should not boil so as not to lose its properties.
- We press the veneer using a roller to the place to be restored on the product.
- When joining, an overlap of approximately 4 mm should be used. In these places you need to work hard with the iron. If there are any defects left, you will have to trim the veneer and add glue by squeezing it out of the syringe.
- After this, the area is ironed again with a hot iron.
Assemble the pattern
To keep the pattern flyers in place so you can continue assembling, place a sheet of so-called contact paper, sticky side up, with a piece of cardboard underneath (photo E). Mark two perpendicular lines on the contact paper, intersecting in the center of the sheet. These lines will help neatly
arrange the fly so that the finished pattern is rectangular. Place squares and rectangles face down (photos F and G).
If some parts move or do not stick well to the sticky layer of contact paper, temporarily secure them with clear tape. Having assembled the pattern completely, trim its edges (photo H, I, J).
Finishing
For veneering to be successful, you need to iron the coating for at least 15 minutes with a roller or wooden iron.
Start from the middle and work towards the edges. You shouldn’t spare any effort, but don’t forget about accuracy. Then iron again with an iron at a temperature of approximately 50 degrees.
It often happens that bubbles form under the coating, making the veneer look like leather. This is a defect that is easy to get rid of. The swelling areas are moistened with water, small punctures are made, into which glue is injected from a syringe. Needs to be ironed again.
We leave the veneered piece of furniture alone until it dries completely at a temperature of 25 degrees. All that remains is to apply stain or furniture varnish. Lastly, the fittings are installed. If desired, the finished product can be decorated.
In the factory, special machines are used for this process.
But it’s not difficult to glue veneer on your own at home. Then the price of the finished product will be much lower.
The main thing is to prepare the necessary means at hand and choose high-quality finishing materials. And, of course, adhere to the recommendations for veneering. Then the finished product will delight you with its sophistication and novelty.
If you have the means, you can purchase veneer, for the manufacture of which valuable wood was used. Then the finishing of interior items will be called veneering.
How to veneer the edges of furniture, see the following video:
In simple terms, veneering is gluing thin plates of wood with a beautiful structure (actually) onto a wooden base - be it a table, wall or door - of lower decorative qualities. It turns out that veneering furniture means dressing it in beautiful clothes.
Veneering is more correctly called veneering
. But it just so happens that the slang word “veneer” is more familiar to the average person’s ear than “veneer.”
Restoration of wooden surfaces
No matter how carefully you handle the furniture, abrasions, scratches, and stains still appear. They are easy to eliminate. The main thing is to know how and with what.
- If the wooden surface has simply lost its shine, find a wood care product that contains orange oil. Take a clean sponge, dampen it slightly and microwave for 20-30 seconds. Spray the product from a spray bottle, then wipe with a hot sponge (hands should be wearing rubber gloves with a coating on the inside).
A hot sponge and orange oil will restore the shine of wooden furniture - If there are scuffs or stains on the wood, you can try to get rid of them by rubbing it with a banana skin. It works well for minor injuries.
- More serious stains require serious measures. These are retouching markers (available in furniture stores), denatured alcohol and wax. First, clean the surface (dishwashing detergent diluted in water is the best solution). After cleaning, dry the wood with alcohol: use a moistened swab to rub the lightened areas well. In most cases, the color is restored. In deep scratches, alcohol does not restore the color; they are painted over with a marker of a suitable color. To add shine, the top surface is covered with wax and polished with a soft cloth.
Such transformations are possible using a marker, alcohol and wax. - If you need to smooth out small unevenness, you can use a nail file. For meticulous work, it is easier to use than sandpaper.
- If the wood is locally swollen from moisture: place a leaking vessel, you can quickly get rid of the defect and neutralize its consequences by mixing salt and olive oil. The paste is applied to the damage and rubbed in a circular motion. Leave for 20-30 minutes. The salt will draw out the water, and the olive oil will restore elasticity to the fibers.
- If there are chips, you cannot do without putty. Suitable for both wood and automotive applications. The best way is to buy a light one and add color to it as needed. The chip is covered, a little putty is spread on the adjacent surface. After drying, everything is smoothed out well with fine-grain sandpaper.
You might be interested in reading what types of wall shelves there are (with drawings).
Why veneer furniture?
Two main points can be highlighted.
Firstly, the price
. You can veneer a pine table with your own hands, “turning” it into oak, and the appearance will hardly be inferior to real oak. But the price will be much lower. And if you remember that it does not dry out, does not deform, and is not affected by moisture and temperature, then you should seriously think about whether it is worth spending money on furniture made from valuable wood?
Secondly, wide design
. Do-it-yourself veneering allows you to turn a tattered window sill into a new one, and a boring cabinet into a completely new item in the Art Nouveau style without much expense, just by applying veneering.
Veneering: types
There are several main types of veneering, let's take a brief look at them.
— Hot veneering. With this method, the veneer is glued to the base using adhesives. The most accessible method for home conditions, it will be discussed in the article.
— Cold veneering. Here the veneer is pressed onto the base. We are talking about pressing machines or screw clamps, which not every home owner has.
— Membrane veneering. An industrial method used for veneering complex surfaces. Membrane veneering is based on vacuum joining of veneer and boards - both smooth and textured.
Stick the set onto the base
To glue the set to the base, you can use a vacuum press, a plywood press, or simply clamp the work with clamps between two thick plates cut from 19mm plywood or MDF board. I usually use traditional bone glue as it allows you to transfer the kit even after the glue has dried by simply heating it with an iron, but you can use any wood glue. Cut a base from a durable and stable material, such as MDF or plywood, to the size of the set. Then cut a piece of veneer the same size to glue onto the back of the base. Choose a veneer that will look good on the inside of the box. It is glued to the underside of the base to prevent the finished panel from warping.
Apply glue evenly to the base and glue the veneer sheet. Then turn the base over, apply glue and carefully stick on the braided pattern set (photo N). The adhesive should only be applied to the base and not to the veneer. Place the panel in the press and squeeze tightly (photo O). Leave the panel under pressure for several hours, then remove and wait another day to allow the glue to dry completely.
Stages, materials and technology of the production process
So, you have to initially soak the wood for some time in water (the time depends on the density of the wood and its initial condition) and steam it.
Soaking and steaming are necessary to give the wood the same physical properties throughout its entire volume.
Otherwise, you risk damaging the interior of the wood or even rendering the equipment unusable. Next comes the drying process in a drying chamber. Natural drying of the wood will not give the uniformity you were striving for. Insufficiently dry wood is not used in the production of veneer, since in this case the percentage of defects is very high.
The moisture content of wood can also be checked in a homemade way using a laboratory hygrometer. To do this, cut a small section of wood and place a thermometer in the sawdust. The second thermometer remains open. Humidity is determined by the difference in thermometer readings and using a table. This method is not entirely reliable, because it gives very noticeable deviations from real results.
Return to contents
Sawing finished material
Sawing veneer is similar to sawing an ordinary board. But the requirements for the sawmill are much stricter: very precise adjustment of the cutting planes is required, and the wood feeding speed is much lower than usual. The veneer turns out even, smooth, requiring virtually no modification. Band sawmills are quite suitable for this method of veneer production. There is only one thing to consider: about 60% of wood inevitably turns into sawdust. Let's call this a payment for the quality of veneer, but when using valuable types of wood, this production method is not used. High-quality material obtained by sawing is always used to produce expensive goods. They decorate furniture with it. The soundboards of musical instruments are made from the same veneer.
Veneer obtained by sawing must still “ripen” for a certain time in a darkened room where a certain humidity is maintained. In mass production, the resulting veneer is kept under pressure for a short time. This is a completely unnecessary procedure, since after sawing the wood can be heated, and the process of moisture evaporation will accelerate. This can cause various distortions and bends. It is better to play it safe and avoid damage to the material by placing it under a press.
It is much easier to obtain veneer by planing. Don’t be alarmed: it was only in the Middle Ages that veneer was planed from an ordinary board using a plane. Nowadays, everything is much more technologically advanced: a block of wood (namely a block!) is fixedly fixed on a workbench, and a wide, sharp knife removes a layer of a given thickness.
Here's the veneer for you. The equipment requirements are the same: very precise settings, low feed speed. The knife must have a certain sharpening angle, which is selected depending on the thickness of the required veneer and the density of the wood. This veneer is very often used for the production of plywood. For plywood to be of high quality, the veneer must be of the same quality. True, this rule is often abandoned in production in favor of the quantity of goods produced. At the same time, it is completely forgotten that at the final stage the plywood is pressed, which means the veneer is subjected to a rather impressive load. When its quality is low, normal cracking occurs.
Veneer refers to wood materials that have the form of thin sheets of wood, the thickness of which ranges from 0.5-3.0 mm. Veneer is usually glued to wood panels or fiberboard, thus giving the material a more aesthetic and attractive appearance.
Varieties of veneer
Veneer is divided into various types. Depending on the production method, the material is divided into:
- peeled;
- sawn;
- planed.
Depending on the appearance, veneer is divided into the following types:
- Natural. This material takes the form of thin sheets of natural color and structure. The main task in the production of such material is to preserve the naturalness of the wood. The advantages of natural veneer are its environmental friendliness, preservation of the unique structure of wood, and attractive appearance. Products finished with the material are similar to products made from solid wood, but cost an order of magnitude lower, and the weight of the structure is less.
- Color. When producing colored veneer, its surface is painted and treated with stain. As a result, the material comes in a wide range of colors.
- Fine-line. This type of material is obtained as a result of the reconstruction of peeled veneer obtained from softwood. Initially, blocks are formed, from which veneers of various structures, patterns and colors of natural wood are subsequently produced. This method allows you to imitate valuable wood species when making material from cheaper wood. As a result, veneer has a more aesthetic appearance and costs less.
Veneer has found application in the manufacture of various structures and products. The most popular material is for finishing doors, furniture, and for making plywood. It is also quite often used in the production of guitar bodies and for decorative work. In addition, veneer is widely used in car tuning and interior trim.
It is worth noting that some manufacturers save on high-quality glue and varnish by using low-quality compounds. All this significantly affects the environmental friendliness of the product.
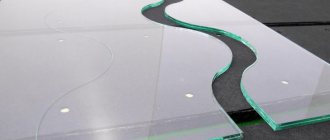
Fabulous beauty by human hands: the principle of marquetry
These intricacies are amazing. As if such mosaic beauty was made not by people at all, but by gods! The marquetry technique is not easy, but it is quite accessible to anyone who has a creative imagination. In fact, everyone who creates a multilayer applique from wood, beads, feathers, petals, sawdust, and sparkles is introduced to the study of the basics of inlay. Products decorated with mosaics will be a great gift for any of the holidays,, or.
The technique for making marquetry is as follows:
: Thin figured plates from various types of wood are glued onto a wooden or some other surface that serves as a base. These fragments differ in shade and structure. Thanks to this effect, an original ornament is obtained. In addition to wood, mother-of-pearl, thin ivory plates, various stones, ceramics, and small metal pieces are actively used for the marquetry technique.
Examples of marquetry in the photo that are stunning in their detail:
Veneer manufacturing methods
As mentioned above, veneer is divided into three types according to the manufacturing method.
Let's take a closer look at these methods of producing material.
- Peeling method. In this case, specially prepared wood is used, and when rotated, the top layer is removed using a special machine. In the production of veneer using the peeling method, soft and hard woods are used. With this treatment, the top layer is cut off spirally. The result is large sheets of veneer, but their pattern is not very clear and bright. Therefore, peeled veneer is most often glued to plywood.
- Planing method. With this method, the top layer of wood is cut in the transverse or longitudinal direction. This type of veneer is made only from hardwood. The result is a sheet of material of fairly high density with a bright and beautiful pattern. Therefore, sliced veneer is used in the production of furniture and doors.
- Sawing method. In this case, veneer is obtained by sawing sheets with a minimum thickness from a prepared log. The material obtained by this method is the most expensive, since a large amount of waste is generated during production.
When producing veneer, it is important to pay attention to the quality of the wood itself. The tree must have a straight trunk with a minimum number of twigs and branches. The prepared log is inspected by a specialist and determined by him for one or another processing method.