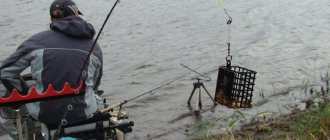
Fishing enthusiasts can find a wide range of fishing products at retail outlets. And some fishermen prefer to use homemade gear.
By making such a thing on your own, you can realize your own desires. And using your imagination, it is possible to make fishing floats from the materials at hand.
This article contains information on what can be used as a basic tool for different types of floats.
Which float to choose
Float fishing is perhaps the most ancient method of fishing. Over the years, float fishing has changed and improved. Along with these innovations, new designs and types of floats appeared.
The materials and design features of the elements were improved. Even the original task itself - the bite alarm - has also undergone changes, and, for example, an underwater float appeared - which is not at all visible on the surface.
Before getting down to business, you need to decide in what conditions and for fishing, what kind of fish it will be used. Choosing the right float is just as important as finding a catchable bait or attachment, finding a “parking spot” or hunting trail for fish, choosing bait and properly feeding the fishing area.
Harmoniously assembled and balanced tackle will not only increase the chances of catching a trophy, but will also bring great pleasure from the fishing process. And the float in the equipment is one of the main components, so fishing with a float without it is impossible.
Sliding float
Used in several cases:
- For fishing at great depths.
- Float for casting bait over long distances.
- When fishing with live bait.
Expert opinion
Vladimir Poltoranin
Fisherman - expert
In the first option , the use of such equipment is justified if the distance from the hook to the float exceeds the length of the rod. Such cases occur when fishing in the bottom layer, in places with significant depth.
Throwing a tackle with a float located near the tip of the rod is quite problematic, but if you move it towards the sinker, it’s a completely different matter. But we need the bait to reach the bottom layers, and the float to be on the surface. For this purpose it is made sliding.
There are two types: with internal line passage and external. The external one comes with one passage ring at the base (for standing water) and with two (for flow).
After casting and splashing down the bait, the load pulls the fishing line behind it through the float (or guide rings), and the bite alarm itself, due to its buoyancy, is on the surface.
The lowering of the hook with bait to the required depth is regulated by a stopper placed on the fishing line above the float (this may be a silicone float stopper, a cambric of a suitable size, or a stopper knot made of fishing line or thread). By moving it, you can measure any depth to which the bait will fall.
The stopper passes freely through the rod rings, but rests against the hole in the float of a smaller diameter. Accordingly, the “bleeding” of the line stops, the bait remains at the depth set by the stop.
In the second case, the float shifted to the weights allows you to “weight” the bait being thrown and reduce the overall windage of the equipment, thereby making the most accurate and far-throw casting possible.
When hunting for a predator with live bait, the use of a sliding float gives “freedom” to the live bait. The fry moves most naturally, retains mobility longer, which attracts a predator.
And also, when biting in the first seconds, the predator does not feel the resistance that the float creates and does not spit out the prey. Having swallowed the prey, the hunter begins to move away, pulling the fishing line through the float, until the moment the stopper comes into contact with the body of the float. At the moment of a sharp stop of the fishing line, the trophy self-notching occurs.
There are many options for such products in stores, but made with your own hands, to suit your “wants” is the best. Below we will look at an example of self-production.
Flat float for current
Designed exclusively for fishing in strong currents. Due to the specific shape of the “body” it has little resistance to flow, resulting in less drift.
Such floats are completely controllable in the current, and with proper wiring they can even remain in one place, allowing the hook with the nozzle to “hover” over the bait spot.
The leader in the production of such floats is Cralusso. But these are not budget products, and taking into account that the fisherman’s arsenal must have several of them of different carrying capacity, the “pleasure” becomes expensive.
But even such a seemingly complicated float can be made independently, significantly reducing your expenses on equipment. How to do this is described below.
Match float
In principle, this float belongs to the sliding options described above, but has its own certain nuances.
The match float is designed for long casts. Everything in him is subordinated to this goal. It has different options for replaceable antennas, some even with feathers like arrows.
Replaceable antennas allow you to use this element of equipment for different fishing conditions:
- For calm water - thinner and more sensitive.
- For long distances – bright and noticeable.
- At night – with the ability to insert a firefly.
The design allows you to adjust the float, changing the load capacity of the float and changing its weight. By removing or adding weights, we get floats of different weights (which indirectly affects the casting distance).
Underwater (submersible) float
To tell the truth, this type is not a float as a bite alarm. It is not visible on the surface of the water and it will not show a bite. But it can be safely classified as a tool for increasing the buoyancy of some equipment elements.
The underwater float is located in the bottom layer and serves to raise the bait above the bottom to a certain height. This is necessary when the bait becomes invisible due to the peculiar structure of the bottom in the fishing area.
Some application options:
- A muddy bottom in which the load sinks, pulling the hook with the nozzle along with it. In this case, a sliding weight and a bottom float are used, which “pulls” the fishing line with a hook from the weight that has sunk in the silt.
- A large layer of bottom vegetation. In this case, the bait rises above the grass, becoming accessible to aquatic inhabitants.
- In “clean” water, this method allows you to fish different horizons.
There are many options for such products. There are also enough materials and homemade designs. Below we will look at the simplest one, made from an anti-twist tube from feeders and a champagne cork.
Special design
The outcome of the fishing depends on how well the tackle is assembled. One of its key elements is the float. Today, the fishing market surprises with a huge variety of floats, differing in size and shape. Each of them works under certain conditions. The “needle” and “goose feather” are considered the most effective, but on a body of water with current they will be of little use. The rolling wave rolls them over to the side, while the equipment is pulled into a line almost parallel to the bottom surface.
For such conditions, specially designed floats are needed, designed to minimize the negative influence of the current. As a rule, they are ovoid in shape, have a long thin shaft and two and sometimes three attachment points. The body of such a float, located closer to the upper edge of the rod, serves as a control element. The keel is much longer than the antenna, which allows the float to remain upright no matter how fast the water is moving. It is fixed on the main line with pieces of nipple rubber. If you pass the line through the body, handling the tackle will become much easier.
So, the current float has the shape of an egg or a pear, but this pear can be upside down. What is the difference?
Both options are quite applicable in calm water, but only in calm weather. If a breeze blows and ripples appear on the surface, they will begin to bounce, and the nozzle will repeat these movements. Therefore, for fishing on ponds and lakes, it is better to give preference to thin floats like a goose feather.
Materials for homemade floats
First of all, floats are made from materials that do not sink in water and are easy to process.
For the float body choose:
- Styrofoam;
- wine corks;
- medical syringe;
- balsa;
- wood.
For antenna:
- geese or duck feathers;
- cane;
- plastic tube.
To work, you will need a knife, glue, degreaser, sandpaper, a drill with a small drill or an awl, a vice for fixing, pliers, and multi-colored varnishes for painting.
DIY match float
Fans of long-distance fishing will need:
- For the body: 6mm heat shrink tube;
- For the fastening loop: a piece of steel wire;
- For attaching antenna parts: 3.2 mm heat-shrink tube;
- For the antenna: – ear sticks 4 pcs.
Let's start with the antenna:
- Remove cotton wool from ear sticks.
- We cut two pieces of heat shrink with a diameter of 3.2 mm, length - 20 millimeters.
- With their help (heating) we connect the tubes from the ear sticks together. The antenna parts must form a single whole.
- We put a piece of bright-colored heat shrink on one end of the antenna, heat it and crimp it, securing it to the tip.
- Fill the hole at the end with Secunda gel glue.
Shaping the body:
- We take heat shrink with a diameter of 6 mm and a length of 80 mm.
- We insert the antenna on one side and heat the joint so that the heat shrink loosely wraps around the ear stick and can be removed.
- We take out the antenna, coat the formed joint with glue, insert it back, let the glue dry.
We prepare the fastening unit from wire and a piece of tube from an ear stick, 20 millimeters long:
- Pour a drop of glue into the tube and insert the wire.
- We cut off the ends.
- Glue it into the second hole in the body. Having previously formed the seat as described above.
- Strengthen with layers of glue.
- Ready! The result was a float with a carrying capacity of approximately 2 grams.
If you increase the diameter of the body (take a heat-shrinkable tube with a diameter of 8-10 millimeters), its load-carrying capacity will also increase.
Second attachment point
An additional attachment point for large floats of this type is required. In a bolo, a thin wire outlet is located at an angle of 45 degrees relative to the plane of the float.
So, when the fishing line is pulled, the float turns to a certain position (in our case, the float is made for the current coming from the right side). “Bubble” is simpler: a wire 15-20 mm long extends clearly along the axis, perpendicular to the keel.
Material: paper clip. We glue it with hot glue.
DIY flat float
Fans of current fishing will need:
- extruded foam plastic, thickness – 8-13 mm;
- knife;
- sandpaper;
- bamboo skewer;
- wire (stainless steel), diameter – 0.8-1.2 mm, length 35-40 cm;
- heat shrink;
- plastic tube;
- varnish
Let's start making:
- We use a hacksaw to cut out the “body” blank from foam plastic; as a sample, you can use a purchased float or a template taken from the “spaces of the net,” i.e. in the Internet.
- We leave a small allowance on each side, which will be removed in the next step when sanding.
- We process the product with sandpaper. The body should become smooth for greater streamlining and, accordingly, less resistance to water flow.
- We make a puncture exactly in the center of the workpiece (on the flat side) using a steel knitting needle. The keel of our product will be inserted into this hole.
- At an angle of 35 degrees from the axis of the flat side of the float (see figure), using a thin drill we make a recess into which we insert a plastic tube (like a Chupa Chups stick, you can also use it). This will be our holder for replacement antennas.
- Carefully glue the keel and antenna holder. To do this, you can use a heat gun or waterproof glue.
- While everything is being glued, we move on to making the antennas. To do this, take the above-mentioned Chupa Chups tubes and bamboo skewers. We insert a piece of a skewer into the tube; this is an element connecting the antenna and the tube previously glued into the body of the float, similar to the plug connection of fishing rods.
- Paint the float. You can prepare antennas of different colors and sizes.
- We put cambrics on the keel, like on ordinary floats, to pass the fishing line.
- The flat float is ready!
Universal form
Every floater dreams of a float suitable for fishing in different conditions. Such a dream is, in principle, unrealizable, but there is a compromise option that can satisfy any request. This is a so-called sports float, which has increased sensitivity and good stability.
The latter characteristic is achieved thanks to the low center of gravity. This alarm consists of a teardrop-shaped body, a thin keel and a shorter antenna. It also has a ring at the top and a cambric on the keel for attaching to the main line. The ring is adjustable, by changing its location you can control the angle of inclination of the float itself. This allows it to be used on all rivers, both quiet and fast.
Homemade sliding float with axial line pass
To make it you will need:
- a piece of foam or cork;
- an empty plastic tube (you can use an empty ballpoint pen);
- awl;
- drill;
- glue;
- nail.
Let's get started:
- We drill the plug through.
- Insert a nail into the resulting hole.
- We take a drill, clamp the nail and give the body the desired shape.
- We take out the nail and glue the rod from the handle in its place. The length of the keel should be about 4 cm, the antenna should rise no more than 5 cm.
- We attach a small foam ball to the top of the antenna.
- The float body is coated with either colorless varnish or dark paint.
- We paint the antenna and the ball with bright varnish.
- A sliding float for point casting, deep reservoirs and predatory fish is ready!
The simplest homemade underwater float
For this product we will need:
- Anti-twist tube (suitable for feeder feeders or you can make it yourself from a cocktail tube, bending it over a low flame).
- Champagne cork.
- Drill.
- Waterproof glue.
So let's get started:
- We drill a hole in the plug with a drill with a diameter slightly smaller than the diameter of the anti-twist tube.
- We put the stopper on the long end of the tube.
- Glue the stopper to the tube.
- The float is ready!
We thread the fishing line into the tube from the side opposite the glued cork, string the stopper onto the fishing line, and tie a carabiner for the leash with a hook. We fasten the necessary weight to the lower carabiner. At the top there is a leash with a hook. Using the stopper, we set the line to “free play”. The gear is collected!
The most ancient version of the float
Feather floats have been used since ancient times. This is the most sensitive type of float due to its lightness and shape. They can record even light touches of fish.
To make this float you will need geese or duck feathers and a little time.
- The feather needs to be cleared of the fan; only the bare rod is needed - it will be the body of the float.
The fan must not be torn off by hand. It is recommended to cut it with a razor or knife against the direction of growth. Otherwise, water will get into the barely noticeable holes and the float will lose its buoyancy.
- After trimming, you need to singe the rod and remove the smallest fibers.
- Then paint the thick end of the feather with bright paint.
- All that remains is to put two rubber nipple rings on the feather for fastening to the fishing line.
- Ready!
Making a float with your own hands is not difficult. The main thing is that it has the necessary properties: water-resistant, moisture-resistant, durable, brightly colored and made from cheap materials. Otherwise there will be no point in making it.
Homemade tube for storing floats
You can also make a box for storing floats with your own hands. A polyethylene sewer pipe with a diameter of 50 mm is suitable for this.
The length of the pipe is selected based on the size of the floats. One side of the pipe must be sealed with a plug. The tube cover is made from a coupling with a glued plug.
As you can see, making a float yourself is not so difficult. The materials are available, the process does not take much time and it can bring a lot of pleasure from making a product with your own hands. A homemade float can become a source of pride for the owner, meet all the angler’s requirements and significantly reduce the cost of preparing for fishing.
Why make it yourself
So, why make your own float? Here are some good reasons:
Full compliance with the requirements of the fisherman. In stores it is often not possible to select equipment for specific fishing conditions. For example, most of the floats offered for purchase are medium or heavy. But they don't always fit
So, for fishing in conditions where there is no intense current or for catching bleak and other small and cautious fish, you need a light and very sensitive one. Saving. Materials from which a float can be made are found in every home.
These are wine corks, polystyrene foam, and pen refills. There is no need to purchase anything separately. This allows the fisherman to save money. This is especially true if fishing often takes place on banks overgrown with trees and bushes, snags, when very often a complete loss of equipment occurs.