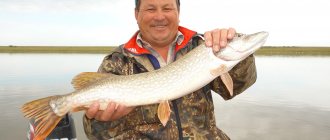
In specialized “Amateur Fisherman” stores you can buy simple tackle with a hook and with bells and whistles. And for any fishing trip: winter, summer. Below are textual, schematic and video tips on how to make a fishing rod.
But skilled anglers do not spend money on purchasing German or Swedish fishing rods, but willingly make their own. Then you will quickly learn the basics of a generally simple matter.
It is enough to fish for a dozen days, and your fishing rod will only have time to hook the caught fish. And you will begin to make devices for hand fishing using any method. For example, how to make a fishing rod for a balance beam with your own hands.
Problems that can be solved using the game
Your child will be able to formulate ideas about the size, shape and color of objects, which is very useful in his development. The development of research activity is also a necessary skill for a child. Play with a fishing rod and fish to practice counting to ten. Ask your child to count how many fish he caught and how many are left, and he will be able to solve simple examples in a short amount of time. The game also promotes the development of fine motor skills and spatial orientation (up-down, left-right). You will interest your child in learning about the characteristics of the inhabitants of the underwater world, and will also be able to develop a spirit of healthy competition.
The Amber Room has been restored, but will the original that was removed be returned? A baggy sweater with a skinny and other warming images for a cool spring The Dying Light 2 project was left without a chief screenwriter and art director
Determining the length of the leash
The leash is the line that connects the sinker to the hook. Its standard length is from 10 to 20 cm. It is necessary to leave a small piece of fishing line to tie the hook.
If you are planning to catch predatory fish, then be sure to take care of protecting the leash.
Note!
- How to crochet slippers? TOP 8 best ideas from craftswomen. Step-by-step instructions on how to knit beautiful and warm slippers with your own hands
- Washing secrets: how to preserve clothes
- What is the difference between a steam generator and a steamer?
Patterns
In order for the fish to turn out smooth and beautiful, I drew templates on paper. I found the sketch on the Internet, there are many different shapes and sizes. You can cut out a template from cardboard and then trace the outline directly onto the fabric.
Or make as many fish out of paper as you need at once, and then glue the fabric onto the paper. Both options are convenient, so choose the one that suits you best. It is worth adding that before work I washed and dried all the scraps. And when they were dry, I smoothed them out with an iron.
Resident Evil Village will be released on all supported platforms on May 7, 2022. Joseph Prigogine defended talented “star” children. 10 spectacular manicure ideas for long nails in a fashionable “ballerina” shape.
You need to remember that each fish must consist of at least two layers of fabric. Therefore, you can either make two identical figures (then the fish will be the same color), or add an upper part without a head, fins and tail to them. Having cut out all the parts, you can proceed to the next process.
Which sinker to choose?
At first glance, attaching a sinker to a fishing line may seem unnecessary. It is important to understand this issue correctly, so you need to indicate what this element is used for.
The function of the sinker is to weigh down the float. For this element you need to select the weight correctly. The heavy sinker will fall to the bottom of the reservoir and pull the float along with it.
Note!
- Features of choosing a camera for outdoor video surveillance
How to choose meals for a week for weight loss: choosing quality products
- Quality in every detail: what to look for when choosing a watch
When the sinker is too light, the float simply lies on the water surface. If the weight of the sinker was selected correctly, the float will be in a vertical position.
The conclusion suggests itself. It is necessary that the gravity force of the sinker be commensurate with the Archimedes force acting on the float.
This element is attached almost to the end of the fishing line. If a fisherman needs a fishing rod for crucian carp, then a small piece of metal or a pebble can be used as a sinker.
Main criteria
Before you get interested in how to make a winter fishing rod, you need to figure out what properties and characteristics the optimal tackle should have, otherwise all your efforts may be in vain. Experienced fishermen note that homemade winter fishing rods and a homemade reel must meet the following criteria:
- be as strong as possible. All elements of the product must also be made of high-quality materials;
- The lighter the product, the more convenient it will be to use. That is why during production preference should be given to parts with low mass;
- quality and speed of braking. If a fishing reel is made incorrectly, it will not only significantly complicate the process of reeling in fish, but can also contribute to rapid wear of the braid;
- a good reel should rotate smoothly and almost silently;
- it should have a large line capacity for reserve.
Reels with self-hooking hooks are in particular demand today, as they help not only not to miss a bite on the fishing rod, but also to hook the fish and securely fix it on the hook.
We attach the fishing line
This element connects the rod and hook. Instead of classic fishing line, you can use strong rope. As for the fishing line, it should be quite thin, elastic and strong.
If you have one at hand, you can use it. Otherwise, you will have to make the fishing line yourself. But even in this case it is necessary that it meets the stated criteria.
It is impossible to find a ready-made rope in nature; it must be woven from available materials. To prepare a strong thread, take hair, nettle, and willow bark.
For weaving, the braiding method is usually used. It takes a lot of time to do the manual work, but all the effort will pay off.
Rod equipment
After preparing the base, a homemade fishing rod should be properly equipped with equipment that will allow you to supply bait to the fishing zone, see the contact of the fish with the bait and help remove fish caught on the rod from the reservoir. Installation of equipment depends on its components. The classic equipment of a fly rod looks like this.
The fundamental element of this design is the main cord, which can be made of monofilament or braided fishing line. If you don’t have these special fishing accessories at hand, you can use ordinary weaving thread, the veins of an unbraided nylon cord; in extreme cases, you can also adapt bundles of thin laces or clothing garters for this purpose. The main feature of the main cord should be its length, which exceeds the size of the fishing rod by half a meter.
Another important component of the equipment is the float. To make it, you need a material that has a low density, guaranteed water permeability and the ability to float on water. A bird feather, a piece of polystyrene foam or foam rubber, a thin stick or a piece of processed bark, a wine cork - these are all the materials from which you can successfully make a high-quality and effective float by making a fishing rod at home.
To load the float and deliver the bait to depth, you will need to equip the installation with a sinker. The best option is to have lead pellets of various diameters on hand, but this accessory is not always found in the field. Any small metal object can be used as a sinker. For example, metal nuts, washers or small screws are perfect for this role. You can also twist a spring from scraps of thin wire and use this structure as a load, stringing it onto a fishing line or thread.
Making a fishing rod without a hook is absolutely useless. In the absence of a factory option, you can make a hook from a needle, bending it in a heated state, or even an ordinary paper clip. The main condition is the strength of the product in bending and a sharpened tip.
Important! You can sharpen the edge of a wire or paper clip directly on a pond, using any stone as emery.
What should the fishing rod be like?
Fishing gear allows a fisherman to fish from a boat or while sitting on the shore.
There are several main parts:
- Rod;
- Fishing line or rope;
- Float;
- Sinker;
- Leash;
- Hook.
A simple stand is considered to be an ordinary spear made from a tree branch.
Tags
with your own hands with your own hands with your own hands with your own hands with your own hands Furniture with your own hands Shoes with your own hands Clothes with your own hands Candles with your own hands Bags with your own hands Packaging with your own hands about your huge ones tend to break. and toys and toys big toys look for toys
master classes toys for children's room we make comments menu and group crafts homemade here threads glue any decor home colored all glue we give simple tips at home read you will need to play fishing thread opportunity tape miscellaneous wooden rings day new site
Float selection
A summer fishing rod must be equipped with a float. It gives an unmistakable signal if there is a bite.
Note!
- Lamp for disinfection of coronavirus (COVID-19) - an overview of the best options, as well as instructions for use
How to make a medical mask: instructions for making simple and complex masks to protect against coronavirus (COVID-19)
How to learn to knit and crochet: detailed instructions for beginners
A light float should be above the surface of the water. The fisherman constantly monitors how he swims. When exactly to hook depends on the breed of fish. If a bream bites, the float takes a horizontal position.
It is better to choose a brightly colored option that is impossible not to notice. A do-it-yourself float is made from wood or the stem of a large feather.
A small stick with a length of 10 to 15 cm is made from natural materials. Ideally, if the wooden float is made in the form of a small barrel, this is the shape that is necessary for buoyancy.
To attach it to the fishing line, you can use any fasteners.
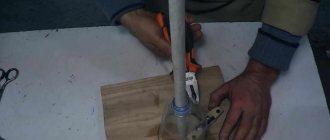
Materials and tools
Before starting the job, I had everything I needed to complete it. I previously bought the magnets at the store, everything else was at home. These were multi-colored pieces of flannel, calico and other fabrics that were pleasant to the touch. Also, I needed a round stick, string, glue, sandpaper, scissors, double-sided tape, iron and drill. I used wooden round balls, but you can use buttons (there are some that fit the shape). You also need paper (cardboard), a pencil or a marker to draw the template.
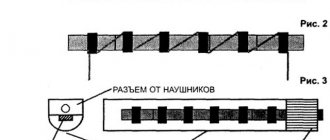
Tyrolean stick tackle, key features
Modern fishing equipment is not a new invention. Anglers have been using this convenient device for hundreds of years, and the only thing that distinguishes the device in the 21st century from its outdated counterparts is the use of innovative materials and a wider range of uses in deep water. The Tyrolean wand is incredibly productive and will prove most useful in areas where snags are likely.
The equipment is a polypropylene or rubber, hollow, sealed tube. A weight is attached to the device on one side, and a small hole on the other end is used as a fishing line attachment. The angler’s simple device is especially convenient for drop-shotting, Carolina rigging, or fishing with a retractable leash. In shallow water, it can surprise the fisherman with unexpected but pleasant results, however, this method of fishing is very specific and is a purely individual choice.
This stick is made mainly of plastic, hollow inside
Gluing
My magnet was on part of the head, so I prudently left two layers of fabric there (you can make a paper layer instead of fabric). So, while gluing one piece to the other, I placed some masking tape (double-sided tape) between them, leaving the head area unglued.
It was convenient for me to fold them together and iron them with a hot iron (you can coat them with PVA glue and also iron them on top). The decorative part and cut out numbers were attached using the same principle. Then I took the magnet, placed it between the layers of fabric, and then coated the edges with glue and gently ironed it. The fish, in my opinion, turned out beautiful.
We fasten the last element - the hook
In the photo of the fishing rod you can see a sharp hook with a sharp sting. The success of fishing largely depends on this element.
A factory hook is a quality product. If you don’t have it, you’ll have to start making it yourself.
To do this you will need to get metal, wire, a pin or a used beer can.
The hook must be firmly attached to the end of the fishing line. A fisherman will need the ability to knit fishing knots. After attaching the hook, the fishing rod is ready for use.
We looked in detail at how to make a fishing rod with your own hands. All that remains is to consolidate what has been accomplished.
First we make a fishing rod, attach a fishing line to it, on which you need to attach a float, sinker and hook.
Have a nice catch!
Store models of whips
| Name | Peculiarities | Price |
| DELFIN SORSA | With a metallic nod. Suitable for catching pike or zander | 120 rub. |
| DELFIN KILPA | Hard whip with adjustable nod | 120 rub. |
| GRIFON | Durable sixes in different sizes | 20 rub |
| AKARA | Whip with a metal ring on the ring | 70 rub |
| AKARA equipped | Equipped with a silicone nod | 77 RUR |
| Six 120 mm | Mass domestic release | 5 rub |
| Six 220 mm | Plastic product for “balalaikas” | 8 rub |
As you can see, the choice of such products is quite wide, and you can even get by with quite budget models, which, of course, do not differ in high technical characteristics, but have the ability to be quickly replaced in case of breakdown or icing.
Non-standard models
We have already talked about traditional nods, which are usually used for this type of fishing. Such models are simply put on the whip and serve as its continuation. But there are also more original and complex models.
Crossbow guard
The attractiveness of the design is that it creates virtually no resistance when biting. but creates a certain game for the bait.
The guard consists of a triangular wire structure with a twisted rubber band, onto which a silicone tube is placed. A regular nod is inserted into the cut into the tubes.
Shcherbakov's nod
It is called a balancer, but when fishing with a balancer it is practically not used, since it does not provide the action of the bait. The essence of the gear is unusual. The nod itself is mounted across the main rod on a bearing, the upper part of which is equipped with a tulip and fishing line, and a small weight or signaling device remains on the lower part. When biting, the upper part of the nod smoothly lowers with the assistance of the bearing.
Winter fishing gear
If there is a sufficient amount of equipment for winter fishing on the market, each fisherman selects equipment for himself. Winter fishing rod equipment is selected based on:
- The selection of the carrying capacity of the gear is carried out depending on the depth, as well as the current;
- The selection of the float also depends on the current (if the current is strong, then a diversion float is selected).
- Equipping a fishing rod for winter fishing and changing it is a matter of technology; literally after several fishing trips, changing the equipment of a fishing rod can be done with your eyes closed.
- One of the types of gear designed for fishing in winter is an electronic winter fishing rod. The advantage of this gear is that it does not make any noise or vibration, with the exception of minor clicks of the whip. It runs on two standard AA batteries, and the consumption is so low that it lasts a long time.
The action of an electronic fishing rod is to twitch the tackle, thereby luring fish to the bait. The bait is taken in such a way that it looks lively and cheerful, attracting fish with its various movements.
Requirements for nods
To make the gatehouse, elastic materials are used that do not change their structure under loads and low temperatures in winter.
A fisherman should always have several spare nods so that he can change or replace a damaged one.
A homemade nod for a winter fishing rod or a nod purchased at a fishing store should be well tuned.
When going fishing, you need to check the angle of deflection of the guard; it is usually 30–45 degrees. This is done using a school protractor.
Pay special attention to the sensitivity of the nod. It is directly dependent on its shape and length. If the guard is insignificantly susceptible to biting, it may not be noticed.
The average length of a purchased nod is 6 cm, depending on the manufacturer.
Gear purchased in specialized stores does not always meet the needs of fishermen. They are poorly attached to the whip, the material on the rings is inelastic and thick. Often, fishing enthusiasts improve the ones they bought or make a homemade nod for a winter fishing rod from scrap material.