Scarlet poppies attract craftswomen with their simple beauty and enchanting color. They are made from different materials: paper, polymer clay, and this DIY master class by Maki presents in detail the process of making these wildflowers from red material.
How to make a fabric poppy with your own hands
Flowers made from fabric turn out to be especially delicate and realistic, so I present to your attention a master class on making poppies with your own hands from gelatin fabric. You will be presented with a detailed description and a step-by-step pattern with photos.
- To make a flower we will need:
- - any light fabric (satin, silk, satin, chiffon, etc.);
- - instant gelatin;
- - water;
- - scissors;
- - dark threads;
- - a piece of organza;
- - green satin ribbon;
- - cotton wool;
- - glue gun.
First we need to gelatinize the fabric. To do this, combine 2 teaspoons of gelatin with a glass of cold water and leave for 30 minutes. After the gelatin swells, you need to dissolve it in a water bath, but do not bring it to a boil.
Now you can dip pieces of fabric into the cooled gelatin solution, carefully remove excess gelatin with your fingers and leave, for example, on a clothesline to dry. When the fabric is completely dry, it is ready to use.
Now we take the blanks of our petals, trace them onto the fabric and cut them out.
Now we need to create the texture of the petals, for this we will use cold corrugation. Take a piece of organza and put a petal folded in half into it, so that the folds touch.
We press the petal with our right hand, and with our left hand we take the free edge of the organza, pull it tightly and, without allowing pressure from the right hand, twist the organza counterclockwise!
These are the textured petals we got.
Now we make the middle of the poppy. To do this, take a green ribbon and cut out a small circle.
We sew it in a circle, fill it with cotton wool, tighten the thread well and tie a knot. Then we make an imitation of a poppy box with threads!
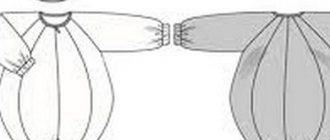
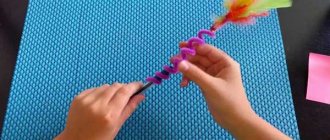
In addition, you need to make stamens. To do this, you just need to wind the threads around your fingers; the more turns, the more magnificent the stamens will be. But, in general, you need to make at least 50–60 turns of thread.
- When the threads are wound, carefully remove them from your fingers and tie them in the middle.
- Now let's glue the poppy box and stamens together.
After this, you can start gluing the petals, starting with the smallest ones. This poppy can be attached to a hairpin or headband. Or you can add a wire stem and use it for decoration.
Source: https://do-crafts.ru/kak-sdelat-mak-iz-tkani-svoimi-rukami/
Sepal
We make it in the same way as a bud petal, only from green beads and wire. At the same time, in each row we add just a couple of beads to make the sepals convex. This one needs to perform 5 pairs of arcs.
You can use several shades of green beads, then the leaves will look more natural. In total you need to make 2 sepals.
How to make a poppy from fabric with your own hands: we use unnecessary materials for the product
Today it is not new to see a flower made with your own hands from scrap materials. Let's look at how to make a poppy out of fabric with your own hands. Today we will present you two options for making this flower. So, let's go.
Lesson #1
To make a poppy we will need the following materials and tools:
- Red chiffon fabric;
- Black floss thread (for embroidery);
- Candle or lighter (matches);
- Scissors;
- Velcro buttons.
Let's move on to step-by-step instructions.
Cut out small circles from the prepared fabric. We will need three to four pieces.
The cut pieces need to be slightly scorched. We do this carefully. As you can see in the photo, we only singe the edges. Thus, the edges of the fabric begin to melt and curl very beautifully.
If you are afraid of ruining your workpieces, then we recommend that you first try it on a small piece of fabric, so to speak, practice a little.
Then we take embroidery threads. We will use them to make the middle of the flower - the stamen. To do this, we wrap threads around several fingers, there should be several layers, and then we tie them in the middle. But we cut it from the ends, and we get this mini-bump.
Read this: Pipe Pants Pattern: An Elegant Look for the Office
After all the preparatory steps, we sew all the details of the petals together, and then we sew on the middle of the flower.
After the flower is assembled, glue a Velcro button to the back side of it.
The red poppy flower made from fabric is completely ready. This product can serve as a decoration for clothing, and it can also be attached in honor of a holiday, for example, on May 9th.
Second way
For work we will need the following tools and materials:
- A piece of satin, silk or satin. You can decide for yourself which color you like best;
- Edible gelatin;
- Regular filtered water;
- Scissors;
- Black embroidery threads;
- A small piece of organza;
- Green satin ribbon;
- Ordinary cotton wool;
- Glue or glue gun.
Let's move on to step-by-step instructions.
First, let's gel the fabric. To do this, take 20 grams of gelatin and fill them with 200 grams of cold water. We put it out of the reach of children and leave it for half an hour. After the time has expired, it is necessary to melt the swollen gelatin in a water bath.
Just don’t boil it under any circumstances, otherwise it will lose all its gelling properties.
Let this mixture cool. After which you can lower the purchased pieces of fabric. Next, you need to remove excess gelatin. This can be done in the following way - simply leave the soaked cloth on the clothesline to dry. We are waiting for it to dry completely. Once this happens, you can use it.
While the fabric is drying, you can make paper blanks like those shown in the photo. Then we make a pattern on the fabric and cut it out.
Materials for creating 1 branch
- Green floral ribbon,
- Green wire 0.5 and 0.4 mm,
- Red wire 0.4 mm,
- Wire for stems 2.5 and 1 mm,
- Gold wire 0.2 mm,
- Cotton thread or beading thread,
- Orange color – 30 grams,
- Green, preferably three different shades – 30 grams,
- Black – 10 grams,
- Red – 10 grams,
- Floral ribbon,
- Bead with a diameter of 5 mm.
Our branch will consist of a large flower with petals of two sizes, a pistil and stamens, an unopened bud with sepals and several leaves. Let's look at the weaving of each element separately.
DIY paper poppy
How to make a poppy from corrugated paper?
First I want to show photographs of poppies, these flowers of incredible beauty.
Let's start now???? Real poppy flowers in nature can have from 6 to 10 petals, but we will make a poppy from 6 petals.
We will need corrugated paper:
- red No. 580,
- black No. 602,
- green No. 562.
We cut out rectangular blanks for petals measuring 5x7 cm from red corrugated paper. For one flower we will need 6 pieces. From black paper we cut out one square with sides of 7 centimeters.
The next step is to cut the black square along the folds, not reaching the edge by about 1 centimeter. Then you can twist our resulting “stamens” into thin tubes. If desired, you can use green paper instead of black.
We cut out red rectangles in the shape of petals as in the photo.
Then we stretch the top edge.
We crumple and crumple our petals. This paper is of very high quality, it practically does not tear, so you can crumple it without sparing any effort.
Carefully straighten the crumpled petals. Thus, they turned out to be “alive”.
- Using nail scissors, make neat cuts along the edges, about 2-3 pieces per petal.
- Take green paper and cut out a rectangle with sides 3 and 11 centimeters.
- Right in the middle, scroll once.
- And we hide our sweet candy.
- We make a stem from wire, then we take our stamens and attach them to the center with the help of threads.
- We also attach the petals, one at a time, using threads.
- This is what a poppy with three petals looks like.
- Attach the remaining three petals in the same way.
- Our paper poppy is ready!
- But you can go further, add a little “naturalism”, although this step is not for everybody and you can skip it.
- So, take nail scissors and make cuts in the green bud in the center.
- Then prepare black acrylic paint and brush No. 1 or No. 0.
- And we tint our cut “tails”.
- It turns out this is a poppy flower for a bouquet of sweets.
How to make a poppy bud out of paper with your own hands?
I will show you two options for making a poppy bud from paper. Let's get started.
We will need corrugated paper:
- red paper No. 580,
- green paper No. 562 (I took pistachio, you can take any other shade of green) And also, wire for the stem, candy and pliers.
- We prepare the stem by twisting the end of the wire so as not to accidentally pierce the candy in the future.
- Cut out one red rectangle measuring 11 by 3 cm, and two green rectangles measuring 8 by 3 cm.
- We scroll the red rectangle in the middle twice, we get a blank in the form of a bow.
- We hide the candy.
- We attach the wire to the bud with the candy and tie it with thread.
- We round the top edge of the green rectangles.
- Then we visually divide it into three parts, scroll one upper part once and bend it inward.
We give it a boat shape, slightly stretching the paper. We attach the red unopened bud between the green “boats” with threads.
- Next, we wrap the entire stem from the base of the bud with green corrugated paper.
- We ended up with a poppy flower with an unopened bud.
The second version of a paper poppy bud
- Cut out two green rectangles measuring 10 cm by 3 cm and two red rectangles measuring 7 cm by 3 cm.
- Use scissors to shape the red petals into droplets.
Stretch the top edge. Then the petals need to be crumpled, as they did for the poppy flower itself.
- We round the green rectangular blanks at one edge using scissors.
- Rotate the green rectangles 180 degrees and bend them inward, as in the first option.
- We straighten the petals and hide the candy between them.
- We pull out the green petals in the shape of “boats” and secure them with threads around the bud with the candy.
- Our poppy bud is ready!
From the resulting poppy flowers and buds you can assemble a real bouquet of candies that will decorate your interior. I decorated the composition in a wicker basket.
We recommend reading bouquets of candies and all kinds of candy compositions that you can assemble yourself.
Source: https://bukety-iz-konfet.ru/mak-iz-bumagi-svoimi-rukami
Flower assembly
- We cut a piece of thick wire 45 cm long. We wrap the end of it with floral tape.
- We apply a pestle to the other end and screw it so that this end rests against the bead.
- Take the green wire and wrap it around the base of the pestle.
- We wrap a ribbon of stamens, like a fringe, around the pistil in several turns. Bend the stamens upward.
- Give all the petals a slightly convex shape. We take a smaller petal and screw it closer to the stamens.
- Opposite it is a second small petal. Around them, in a checkerboard pattern, are 2 large petals.
- We cover the place where the petals are attached with floral tape, passing it also under the large petals to cover the wire.
How to make a poppy from fabric?
Entertainment
07.06.2015
- 582
- 390
- 4 min.
Poppy is not only a source of drug addiction, as many believe, but also an amazingly beautiful and delicate flower in appearance. Poppy seeds are used for many purposes - powder for flour products, base for kuti at Christmas, base for pies and pies.
The surprisingly delicate red color of the petals of this flower has long become an integral part of creativity among many peoples of the world. Poppy is mentioned in songs, poems, it is embroidered on fabric, filmed in films, and so on. Any craftsman or craftsman who loves nature and creativity has probably used this flower more than once in one way or another in his work.
Therefore, now we will provide you with a master class on how to make a poppy from fabric in different ways.
Take a piece of synthetic stretch satin fabric in red or pink (any other type of fabric will do, as long as it contains synthetics).
Now prepare a pattern for the future flower.
Cut out the petals and backing along the contours of the pattern.
Lightly scorch the edges of the blanks with a match or candle and stretch them while the fabric is hot.
The result will be a wavy edge.
As a result, your workpieces should look like the one shown in the figure below.
Take a wire, the diameter of which should not be more than four millimeters, and wrap it with strips of corrugated paper, smeared with glue.
Now carefully glue the paper-wrapped pieces of wire onto the underside of the petal blanks, or you can sew them on, but this work will take more time and effort.
There is no need to glue wires to the smallest petals.
Then cook the middle of the flower. To do this, string red beads onto one piece of wire. You perform the same operation with four more wires and wind threads around them as shown below.
- Cut the threads and carefully, slowly, glue them together, giving them the shape of a broom.
- Tie the resulting panicles around the bead so that the threads are arranged in even layers around the entire perimeter of the bead.
Take a brush and carefully lubricate the threads and lower them into a scattering of decorative sparkles. That's it, the pestles are ready.
- Now you assemble the poppy, arranging the petals in a checkerboard pattern and gluing them together.
The final stage is to fasten the craft to the base of the flower. So you have studied the master class on creating this beautiful flower. See other manufacturing options below.
- Pieces of fabric in red and black.
- The needle and thread are black.
- A piece of cotton wool and a cotton pad
- Scissors.
- Any type of glue
- A little semolina.
- Matches.
- A pin or hair clip.
- Divide the cotton wool disk into two equal parts.
- Now take a piece of cotton wool and roll it into a ball with a diameter of one centimeter.
- Using half a disk of cotton wool, wrap the ball and tie it with thread.
- Cut out a circle equal to the diameter of a cotton pad from a piece of black fabric, wrap the previously prepared craft and tie it again with thread to give the product strength.
Using a thread, divide the resulting ball into small slices and secure it at the base of the ball. Trim off the excess pieces and hem the edges.
- That's all, the center of the fabric poppy is ready, let's move on.
- Next, make the pestles.
Take the thread and wind it around three fingers. Please note that the fluffiness of the stamens depends on the number of turns. Carefully remove the skein from your fingers and tie it with thread in the center, then sew the skein to the core. Smooth the threads evenly and glue them.
While you wait for the glue to dry, cut out the petals. To do this, make patterns from red paper, the dimensions of which should be approximately equal to the core. Cut out the shapes and place them on the fabric, then cut out eight or nine petals.
Lightly melt the edges of the fabric over the fire of a candle, match or lighter. Be careful when performing this operation because the fabric may catch fire. During melting, stretch the edges of the fabric to give the edges relief.
At the points of attachment to the flower itself, form a fold using your fingers (to do this, bring its edge to the fire and squeeze it after heating). As a result, you should have the blanks shown in the figure below.
After the glue has dried, trim the tips of the pestles and align them. Lubricate their edges with glue and dip them in semolina. To prevent them from sticking together, comb the stamens with a toothpick or needle.
Now sew the petals to the middle to make a fabric flower and attach a brooch or hair clip to it. As a result, after going through this master class step by step, you will get such a beautiful product.
- Black and red satin ribbons are four or five centimeters wide.
- Threads are black.
- Ruler.
- A simple pencil.
- A piece of cotton wool.
- Scissors.
- Matches or lighter.
- Glue.
- A piece of cardboard.
- You draw on cardboard and then cut out petals of different sizes, then lay these templates on red fabric and trace their outlines.
- Please note that for one flower you need to cut out six large, six medium and six small petals.
- Singe the edges with a match or lighter.
- You will get the following blanks.
Now you create the middle. Take a black ribbon and cut it into square shapes. Then fluff each side to create a fluffy fringe.
Making a poppy box. To do this, wrap a piece of cotton wool using flexible wire.
- Sew a small pocket from two prepared squares of black ribbon.
- Place a piece of cotton wool in it so that the pieces of wire come out, and tighten the pocket into a ball.
Pestle
- Take a needle and thread 0.5 m long in 2 folds and thread it through the green bead 3 times to secure it.
- Next, we pass it through the bead and collect 8-9 green beads.
- We bend the bead next to the beads and thread a needle through it on the other side.
- We do this 7-8 more times, covering the entire bead with rows of beads.
- We thread the needle through one of the outer beads, fixing the last row.
- We tie the ends of the thread together and cut them off.
- We pass a piece of wire under several beads on the same side and twist the ends of the wire together.
How to make a poppy from fabric. Author Svetlana Kotkina
Home ← Master classes ←
03.05.2012
Administrator
- Svetlana Kotkina (Kirov, Russia) has reached a high professional level in making flowers from fabric and shares with us her master class on how to make a poppy from fabric.
- Master class by Svetlana Kotkina “ How to make a poppy from fabric .”
- Photo 1. Take synthetic stretch satin fabric of any color. You can use any fabric, as long as it is synthetic.
- Photo 2. Pattern of our future poppy flower.
- Photo 3. Cut out the petals and gluing according to the patterns.
- Photo 4. We process our blanks with a candle, melt the edge by 1.5 cm and stretch it to the sides. First we melt it, and then while the fabric is hot, we pull it.
- Photo 5. We should get a wavy edge.
- Photo 6. This is what happened after processing.
- Photo 7. We prepare the letons (we wrap a wire with a diameter of 3-4 mm in corrugated paper, cut into strips no more than 5 mm wide), coat the finished letons with PVA glue.
To read the rest of the article, go to the next page below
Share the link to the post on social networks ↓
Source: https://kollekcija.com/kak-sdelat-mak-iz-tkani-avtor-svetlana-kotkina/
Stamens
- Take golden wire and cut a piece 1.5 m long.
- The length of the stamens should match the length of the black centers of the petals - this is a little more than 2 cm.
- We string the appropriate amount of beads onto the wire.
- We bend the end of the wire around the last bead, thread it into the penultimate one and then into all the previous ones - the first stamen is ready.
- We make the remaining stamens in the same way until the wire runs out - you should get 18-20 pieces.
Where flower crafts come in handy
Crafts in the form of these flowers will be appropriate in the design of thematic cards:
- on birthday;
- on March 8;
- for various anniversaries and memorable dates.
Do-it-yourself poppies will perfectly complement a congratulatory poster or decorate a wrapped gift. They can be safely used when styling rooms as decor (for any celebration, wedding, graduation from school, university, dinner party, etc.). Flowers will serve as a wonderful original addition to a photo shoot.