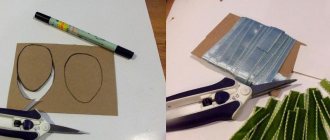
With the onset of the golden season of leaf fall and harvest, preparations for the autumn holiday are in full swing in kindergartens. Typically, parents and children are encouraged to take part in craft competitions. One of the most popular is the autumn hat exhibition. Probably, every participating parent would like to create a unique and inimitable headdress together with their child for the Golden Autumn holiday. We will tell you in detail how to do this in a master class about a DIY autumn hat craft for kindergarten. Here you will find creative ideas and detailed instructions for making a craft hat for the fall holiday.
A headdress for a creative task can be made from a variety of materials, such as: leaves, straw, colored cardboard, fabric, threads, plastic containers, foamiran and others. It can also be knitted or crocheted.
Materials for creative work
Today it is customary to create homemade hats from paper, cardboard or fabric, depending on the skills and experience of the master.
To work, you will need to prepare a workplace, including a table, lighting and the following set of materials:
- Thick cardboard and colored paper. For individual performances or creative exhibitions, you can use illustrated paper and foil.
- If you plan to work on sewing doll clothes, it is better to prepare fabrics (felt, guipure, satin) in advance.
- To decorate finished crafts, you can use satin ribbons, a veil or any mesh fabric, bows or flowers made of corrugated paper.
- Hats for boys can be decorated with paper fringe, ribbon or border (for example, a pirate model); brooches, cockades, and other insignia can be placed on the cap.
- For most types of work, you need scissors or a sharp stationery knife, glue, thread and a needle.
- For textile crafts, it is better to prepare patterns or templates according to which the main parts will be cut out.
For inexperienced craftsmen, it is better to familiarize yourself with video lessons on preparing parts, as well as the final assembly of the craft. Detailed instructions for making fashion accessories or decorative elements will come in handy.
Cap
- Landscape sheets
- A little perseverance and attentiveness
- We take two sheets and lay them on top of each other.
- Their location should be horizontal.
- It is necessary to bend the top edge by about 2-3 cm.
- The right and left edges must be bent so that they touch each other in the center.
- The part of the sheet that remains bends upward.
- We fix the upper part on the sides, on both sides.
- Then we wrap the part of the bottom sheet that remains.
- Straighten the product and the hat is ready.
DIY top hat
For a hussar costume (in kindergartens), it is often necessary to make a hat in the shape of a cylinder. This model, despite its complex shape, does not present any particular difficulties.
To work you will need a compass, a sheet of cardboard of sufficient size, glue, templates, textiles and ribbon for decoration.
Sometimes a large feather and a bright buckle are used instead of a ribbon. Instructions on how to make a paper hat with your own hands:
- On a prepared sheet of cardboard, draw a circle with a compass. The diameter of the circle should correspond to the size of the hat (basic size).
- A second circle is drawn around the first figure, which should have a larger diameter. This part is a blank for the bottom of the future hat.
- On the second sheet of cardboard, the pattern is repeated, but a third circle is added in the center.
- The first blank is cut out with scissors, and then the surface from the first ring to the second is cut in the form of wide strips. Set the part aside until final assembly.
- Next, continue working with the second sheet of cardboard. Cut out the drawn part according to the outlines of the outer circle. Then the central figure is cut out, thus obtaining the brim of the hat. For subsequent fixation, it is necessary to cut a section of cardboard in the form of strips or fringes.
- The walls of the cylinder are rolled up from the third sheet of cardboard, fixing the free edges with glue.
- The very first circle is glued to the top of the resulting cylinder, using paper strips for fastening.
- The second ring is “put on” the cylinder, and then fixed to the base using strips of paper.
For the simplest model, it will be enough to paint the craft in bright colors. To bring a more complex idea to life, you will need to cover the walls of the cylinder and the brim of the hat with textiles, on top of which a feather or edging in the form of a satin ribbon is attached.
Original headdress
For the competition, hats for girls are made with their own hands in a variety of shapes. A headdress in the shape of cones bent in different directions, with pom-poms attached to the tops, will look funny.
The most convenient way is to cut them out of the same felt, sewing both elements from fabric of different colors. All that remains is to process the edges of the pattern with threads. Fill the middle of the cones with padding polyester so that the details of the product are voluminous. Separately, create pom-poms from bright contrasting yarn and sew them onto the tops. Hide the bottom hole of each part with a matching circle, attaching it with threads around the circumference. Finally, hot glue the hat to the hoop or sew it with thread.
As you can see, if you wish, you can make your child the most original and effective at the competition, the main thing is to try and use our advice!
Pirate hat
For children's matinees or New Year's parties in kindergarten, a pirate hat is often required.
For such themed celebrations, there is no point in purchasing a new accessory; just arm yourself with scissors, glue and black cardboard.
As an additional decor, you can use a golden edging and a skull design (you can find ready-made stickers in stores).
Step-by-step making of crafts:
- First of all, draw a perfectly even circle on a sheet of cardboard (black).
- Cut the workpiece with scissors.
- The edges of the circle are brought together upward to form the outline of a triangle.
- The free edges are securely fixed with glue.
- Feathers are cut out of paper or real feathers are attached for decoration.
- A skull and crossbones are drawn on the hat itself, or ready-made thematic stickers are used.
As a final step, an elastic band is laid along the base of the craft, which will hold the hat on the young pirate’s head.
Paper hat
Making a handmade hat at home will not cause much trouble. In addition, the product can be made from various materials that are found in your home.
Children of preschool and school age have matinees, for which special hats are required. Realizing that buying for one day is expensive and makes no sense, parents use their wits and begin to create masterpieces at home with their own hands.
Accessories for dolls and toys
Another fun creative challenge is making clothes for dolls. Original ideas and templates for paper hats can always be found in the public domain.
Also, some models can be made from various types of textiles.
- You can use plastic cups, yogurt lids, and many other available materials as a rigid frame.
- The selected frame is cut to give the desired shape.
- Then a fabric is glued to the degreased surface or a small cover is sewn.
- You can decorate such models with feathers, a guipure veil, or a beautiful beaded brooch.
- Doll clothes can be made from ordinary colored paper, for example, using the origami technique.
In the photo of similar paper hats you can see how many models a craftsman can make with his own hands.
Creation schemes
For convenience, we offer you schemes for creating hats, choose the style you like and have fun creating your own accessories for a children's party.
You will learn how to make a hat from leaves by studying the master class presented below.
Excellent options are obtained by knitting and crocheting.
Photo of a homemade hat
Decor options
There are many ways to decorate such a headdress. It is important that the design of the product and its color scheme do not fall out of the general style of clothing, but complement it.
You can decorate such a hat with lace or braid, corrugated paper or fabric.
The product can be complemented with paper flowers, a buckle or a brooch.
To prevent the headdress from moving off the head, it can be glued to an elastic band or hairband.
Crafts “Gifts of Autumn” for school and kindergarten, photo 2018-2019
Are you now also making crafts on the theme “Gifts of Autumn” for school or kindergarten ? After all, soon competitions and exhibitions of crafts made from natural materials (branches, cones, leaves, straws, shells, pebbles, vegetables and fruits) will begin in schools and kindergartens.
Many parents immediately have a question about what they could do with their own hands that would be so beautiful and original. See photos sent by our readers in 2022, get ideas and come up with something of your own.
Send photos of your autumn crafts made from nature materials, vegetables and fruits (more details here), and we will be happy to publish all the new items. A big request to all participants of the competition: do not send copies of works already available here.
Hedgehogs made from seeds, deer made from cones, caterpillars made from apples and other crafts that are repeated from year to year are no longer accepted! Send your new and original crafts, show your imagination!
New crafts “Gifts of Autumn - 2019”
"Dragonfly and Ant". Kulikov Kirill Andreevich. The work is made from natural materials (cones, leaves, acorns, branches, bark). Also used: a candy box, acrylic paints and hot glue.
"Autumn Umbrella". Zyulyaeva Ulyana. The umbrella is made of cardboard, decorated with flowers from maple leaves, pine cones, rowan berries, dead wood, and spruce branches.
Source: https://podelki-doma.ru/podelki/iz-prirodnyih-materialov/podelki-daryi-oseni
