Snow figures are a long-standing pastime of the inhabitants of Rus'. As soon as winter came, everyone waited for the moment when the snow would begin to fall. They made everything out of snowballs: castles, animals, sculptures; entire cities were built in certain areas. They were doused with water, three-dimensional images were carved out and left like that until spring. As the weather warmed, the figures melted and floated away on a long journey until the next winter. This tradition has survived to this day. Snow figures are sculpted in kindergartens, schools, and, yes, in ordinary courtyards. We will consider options for figures and methods for their construction in our article below.
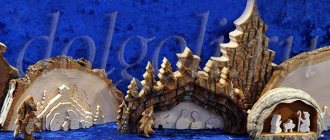
Snow figures pictures
How to make figures from snow, what kind of snow is good to sculpt from
To create snow figures, you first need to wait for a good snowfall. It is desirable that the snow is clean, without dirt. With ideal timing, a few days of snowfall is just the thing for creating snow heroes. But these are not all the conditions. If the quantitative requirement is met, then it is also necessary to wait for the temperature regime. Snow forms at temperatures not lower than 0 ºC.
Sometimes weather disasters occur and when there is a sharp change in cold temperature, excess air humidity appears. For example, the air rose from -13 ºC to -2 ºC. At this moment, you can start sculpting various figures, since the moisture will settle on the snow and its top layer will be wet. In other words, to create snow figures you need wet snow. It is convenient to work with it, combine separately sculpted parts and create a single whole. You can check the quality of the snow yourself; if a handful of snow instantly takes the form of a lump, then the consistency is ideal.
Light snow figures, ideas with photos
Undoubtedly, the simplest and most quickly erected figure is a snowman. Even children can sculpt it. Three round balls placed on top of each other, a ready-made composition. The rest is a matter of fantasy. If desired, you can decorate the round one with rowan berries, branches, stick a carrot and even put a bucket or hat on your head.
Hedgehog is also ideal for both children and adults sculpting. Small raised tubercles are molded onto the finished oblong lump, imitating countless needles. A triangular muzzle is attached to the body, which is completed by a small ball - the nose. Don't forget about the small recesses for the eyes and mouth. We decorate the sculpture, and the snow hedgehog is ready.
How to make an ice ball with fresh flowers ideas, instructions, photos
A very unusual and cute option is to make balloons with flowers and various decorative elements inside. To do this, place a small flower bud inside the ball, then fill it with water. Please note that when filling the ball with water, a flower or any decorative element will rise up. Therefore, the composition will turn out mainly from above. It is best to use small flowers. The ideal option would be rose buds. Try to use flowers without thorns or sharp tips so as not to puncture the ball when filling it with water.
After this, the ball is tied in the standard way. Often, instead of flowers, use thuja twigs, rowan seeds and citrus slices. Such compositions look very impressive and unusual. Ice balls with flowers and various decor are used not only to decorate the area near the house. This is a great option to decorate the New Year's table. Place these balls in several places on the New Year's table.
ice ball with fresh flowers
ice ball with fresh flowers
Snow figures step by step:
Since childhood, we have become accustomed to making figures out of snow at the behest of our souls; if we wanted, we made a snowman, if we wanted, we wanted to make a turtle or a horse. But if it came to competitions in kindergarten, in the yard or at school, where entire families took part, then it was not easy. The plot, color, and size of the craft were thought through. We will look at ready-made solutions; perhaps these are the options that will be useful for your craft.
Father Frost
With the first snow falling, we begin to anticipate the approach of the New Year. The streets are filled with snowflakes, decorations, beautiful lights, and in addition to all this beauty, snow figures are sculpted in courtyards and squares. One of the most popular is the figure of Santa Claus. It is not so easy to fashion it, but if you follow a certain order, the exhibit will be ready after a couple of hours of painstaking work.
The complexity of the work will depend on one factor - the height of the exhibit. The taller Santa Claus is, the more difficult it will be to make a life-size sculpture. For stability, experienced craftsmen place a metal support in the snow structure. But we will not complicate the composition and will make a medium-sized Santa Claus, without support. We select snow and roll up a medium-sized snow ball. We sculpt a body on top of it, align the sides, and add snowballs - arms. Using plywood, we level the torso and limbs, and begin to design the head.
We need a new portion of snow, we form a hat, headband, beard. We pay special attention to the face, make indentations for the eyes, attach a strip of snow to the nose, and smoothly align the beard. For believability, you can stick a bag near the figure or decorate it with a magic staff.
As a staff, you will need a straight stick that will serve as a support. We paint Santa Claus in red shades and the figure is ready.
Snow Maiden
The Snow Maiden is made by analogy with Father Frost. The body is formed from a large oblong lump.
Snow hands are attached to the sides of the hewn block. In order to spend less time on the Snow Maiden’s delicate hands, we suggest decorating the snowy beauty’s hands with mittens. The body of Santa Claus's granddaughter should have a thin waist, and her head should be decorated with a long braid. If you remember the plot of New Year's fairy tales, then on the Snow Maiden's head there is a crown, kokoshnik or a beautiful hat with bells.
After decorating the body, we sculpt a small snow globe that imitates the head of a young beauty. We attach a strip of snow to the side to decorate the braid, and on the top we decorate a crown or kokoshnik. Finally, we carve out the recesses for the eyes on the figure, form the cheekbones, chin, highlight parts of the body and paint the Snow Maiden.
snowman
The simplest and most beloved folk snow figure is the snowman. All you have to do is roll three balls of different sizes. Place them in a vertical row, starting with the largest.
Next, the following additions can be sculpted on the body: make snow boots, attach limbs from branches, attach a bucket to the head, and put a rowan smile on the face, eyes, and the completion of the snow figure will be a bright carrot, symbolizing the nose of a cute little round one.
pig
The piglet is not only one of the simplest figures for snow modeling, but also a symbol of the year. Popularly, such a figure was called Khryukhryukovich. It is formed from an oblong coma. The lump is fixed on a free area, with paws-hooves attached to the sides. The 4 limbs of the pig should be sculpted in the shape of logs, they are pointed at the end.
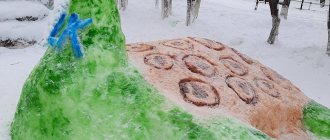
The head is formed directly from the lying coma. A pig, in principle, is an animal that is not distinguished by any special forms and the head and body are one. Using a shovel or a paper clip, several notches are made, showing the presence of a transition from the head to the body. A snout and beads for eyes are attached to the muzzle. At the request of Khryukhryukovich, you can paint it pink. And by the way, the pig can be sculpted not from completely pure snow, but with a little dirt mixed in. That's why she's a pig.
How to make an illuminated ice ball ideas, instructions, photos
If you wish, you can make illuminated New Year's ice balls. To do this, you will have to purchase LED light bulbs, as well as tablet batteries. You need to attach the battery between the antennae of the LEDs and tie them together. This can be done using tape. Next, this luminous element is placed in a plastic bag or in a spare parts bag, which is placed inside the ball. Next, the ball is filled with water and frozen.
In this state, the LED can burn for quite a long time. You will also receive additional lighting for your garden plot, and will also lift the spirits of everyone around you and guests.
Illuminated ice ball Illuminated ice ball
DIY snow figures for school, details
During school years, there are many competitions, including the snow figure competition. Such competitions are especially often held in regions where snow cover lasts almost until summer.
matryoshka
In the image of this wooden toy, you can sculpt a beautiful snow figure, and if you decorate it with bagels and Khokhloma paints, then the Matryoshka will fit into all the winter holidays. And the most suitable for her will be New Year and Maslenitsa.
The lady-matryoshka is made from sticky white snow. The figure is based on two balls. One larger at the base and one smaller. The second ball (smaller) is fixed on the first. The transitions between parts are covered with snow and smoothed out. The matryoshka is almost ready, all that remains is to align the edges and color it beautifully. To level the edge, it is recommended to use a wide wooden spatula or a piece of plywood. You can hang a bunch of large bagels between the tiers and the look will be completed.
lock
The castle is made based on the favorite children's game - fortress. A structure is built from several snowballs - fortifications. Large and small balls alternate, and windows are made between them. The top of the structure is decorated with spire-shaped peaks.
You can attach a bridge, towers, or make passages to the castle. They are also molded from snow. And, if you use your imagination, you can turn a beautiful castle into an ice road that turns into a slide. Most schools and kindergartens are located in spacious areas where there are uneven areas. Just one of the slopes can be adapted into a castle with an ice slide.
Russian stove
Based on Russian fairy tales, a pie oven would look appropriate in the school yard. It’s quite simple to fashion it, especially if you have several snow-making peers as assistants. A square structure with a superstructure is formed on a flat area.
The final step in creating a stove is painting to highlight the brickwork. If desired, you can place Emelya on the stove or place a dish with buns or pies. So, the stove will last until spring.
How to make a Christmas tree from multi-colored ice balls?
A variety of sculptures and products can be made from ice balls. Very often they are used to build a Christmas tree or make snowmen. To do this, you need to use green dyes. Pour a small amount of dye into the balloons and fill them with water, tie and stir. Freeze a few of these ice balls. After you remove the rubber from the surface of the balls, form them into a Christmas tree. This can be a pyramid-shaped tree or a flat Christmas tree that is laid out along the perimeter of the snow.
You can complement the Christmas tree made of green balls with multi-colored balls. This will be an imitation of Christmas tree decorations. This decor looks very organic and unusual. It will be an excellent addition to decorating the area near the house.
Christmas tree made of colorful ice balls
Figure of a dog made of snow, step by step with photo
A dog is a man's friend, even if it is made of snow. Bright gouache will bring the dog to life and make him the main decoration of the yard. First, to create the figure, we create a large snow pile. The dog will be lying down, in this position it will be much easier to sculpt the composition. Distribute the snow for the head and paws. What we leave most of all on the body is the dog’s torso.
Select the limbs, draw parts of the body. We color the figure and the dog is ready.
How to pour water into a balloon?
There are quite a lot of options for making such jewelry. It all depends on your imagination and desire to experiment. The fact is that water does not flow into the balls just like that, that is, from an ordinary plastic bottle you cannot pour water into the ball and fill it to the extent you need. Therefore, the only option to fill the balloon is to supply liquid under pressure. To do this you can use:
- Crane. To pour water into the ball, you need to put the neck of the ball on the faucet and turn on the water. After this, you need to tie the ball. There are some subtleties here too. The fact is that if you tie the balls with a thread, under pressure the water will still begin to flow out in small drops and sooner or later it will flow out completely. The best option is to tie a ball. That is, you need to pull the neck up and make a knot out of it.
- With a hose. The manipulation is identical to the tap. The neck of the ball is pulled onto the hose.
Pour water into the ball
How to cut a figure from snow
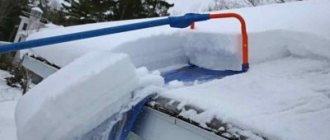
When working with snow, it is important to remember that the carved figure must be done right away. Otherwise, the snow will harden and it will be very difficult to highlight individual parts of the sculpture. In addition to gloves and clean snow, you will need a lot of tools for the job. They are necessary to highlight parts of the body, create a face, and carved elements. It is recommended to use durable metal tools as auxiliary tools. These include: screwdrivers, small spatulas, spatulas.
In fact, to create a snow figure one-time, it is not necessary to have a professional sculptor’s kit. Arm yourself with a chisel, a metal file or ruler, or, in extreme cases, a wide knife, and work on creating a snowy image. Places where snow does not yield easily can be sprinkled with boiling water. The snowball will melt in a second and you will have a new field for work.
How to decorate your yard with multi-colored ice balls: ideas, tips, photos
Decoration options:
- Place along the steps
- Make a separate ice area with sculptures
- Place along the porch
- Decorate flower beds
Yard decoration Yard decoration
Smeshariki snow figures, photo with explanation
Remembering the round cartoons from the numerous Smeshariki series, I just want to sculpt bright characters. In fact, nothing is impossible and, having devoted one evening to decorating a snowy cartoon picture, you will soon be able to enjoy your own yard work.
All characters are made from a large snow globe. We have all been able to do this since childhood, and the rest is a matter of technique. Let's add ears, stick two straight sticks into the head, stick snow on them, and the hare is ready. To make the hero look realistic, we’ll design a pair of teeth, a nose and eyes. Cut them out with a scraper or metal spatula.
Let's make needles for the hedgehog from snow triangles. Let's add a smile, glasses and a pair of skis. After all, it's winter outside.
Let's not forget about Elk with horns, Pina, Nyusha, Kar-Karych, Sovunya. We sculpt the features of each character onto the round body: beak, glasses, ears, etc. The most important thing about these heroes is not to forget to color them.
Decorating the street with multi-colored ice balls: ideas, tips, photos
To decorate the street you will need a huge number of balloons. There are several options:
- Droshky decor
- Decor of park areas
- Decoration of children's playgrounds
Street decoration Street decoration
New Year's figures made of snow for the street, photo
- Christmas tree. It is made on the basis of flattened lumps like a snowman, additionally spruce branches are cut out of snow;
- Hut. A square should be made from a compressed pile of snow. During processing, log thresholds and windows are cut out. In our version there is a clock, and a fabulous owl sits on top;
- Snake. Refers to year symbols. The snow snake can be sculpted in any position.
How to paint a figure made of snow
Snow figures look much more impressive if they are painted in different colors. To highlight your craft, you need to stock up on paints. Spray paint cans, which are sold in paint stores, or regular paint for drawing lessons will help us with this. The first option is a little expensive, but almost everyone has watercolor or gouache paints.
The snow figures turn out to be quite voluminous; simple brushes are not enough, and in severe frost they can freeze to the sculpture. What to do? First, let's find a suitable container and dilute the paint in it. Gouache or watercolor, the main thing is to get a rich color. A suitable container would be a jar, glass or, better yet, a clean plastic bottle.
Mix the colors thoroughly. Shake the container until the lumps of paint dissolve. Pour into a spray gun and spray paint. The snow figure will be evenly colored, and the figurine will be covered with a thin crust of ice, which will give the sculpture additional protection from wind and additional precipitation.
Instead of a spray bottle, you can use a wide container of diluted paint and a paint brush. A bucket is suitable as such a container. You can simplify the task by using a bottle and holes made in the cork. Children especially like this coloring. The paint pours onto the figure directly from the holes in the cork.
When working with paint it is worth remembering:
- The water in the bottle should be ice-cold, not warm, otherwise melted holes will appear in the figure;
- Each paint color is mixed separately;
- When diluting colors, you can use food coloring instead of paints. With them it will be easier to achieve the desired color;
- Saturated colors can be obtained from home pharmaceutical products: pink-red, burgundy - from potassium permanganate, green - from a tube of brilliant green, orange - from a bottle of iodine.
What tools will a master need for work?
If we sculpt figures from snow with our own hands, which require careful elaboration of details and small elements, we need to prepare certain tools.
The home handyman will definitely need the following accessories, which you don’t have to buy in advance, but use those that the housewife always has on hand:
- several buckets and a special sprinkler for caring for plants;
- children's spatulas or kitchen knives, they can be replaced with construction spatulas;
- Dishes and bowls are suitable for making individual elements with rounded shapes.
For subsequent decoration and dyeing of finished figurines, you can use pieces of fabric and natural materials torn off in the fall.
To make the sculpture bright and eye-catching, multicolor paints (watercolors or food colorings), brushes and other accessories, beads and buttons, foil and threads are used.