September 1 (Knowledge Day) is the beginning of a new stage for every student, it is a meeting with classmates, teachers, and the home walls of their school.
For this significant day, to create a special mood for the approaching days filled with gaining knowledge, we propose to make bright and interesting crafts with your own hands, which will not only develop children’s arts and crafts abilities, but will also become useful in their school life.
DIY pen jewelry
A ballpoint pen can rightfully be considered the most important attribute of any schoolchild. And to make the handle original and beautiful, we suggest you make decorative accessories for them with your own hands.
The first option is juicy apples!
Print the finished apple template onto colored double-sided paper and carefully cut it out. Using a hole punch, make two holes in the paper apple - one at the top and one at the bottom. Now insert a pen or pencil into these holes. Agree, this pen is much more interesting.
The second option is a feather!
Photo: krokotak
A long time ago, there were no ballpoint pens, because people wrote with a feather that had to be dipped into an inkwell. Why not decorate a modern pen with a beautiful feather, because then it will look much more original.
Print out the finished pen template. You can use white paper or colored paper. Then decorate the feather to your liking.
Apply glue to the bottom of the paper pen and glue it to a pen or pencil.
Bath bombs
For such an original gift you need only 3 basic components:
- 200 g soda
- 100 g citric acid
- 5-10 ml essential or aromatic oil of your choice
- 2 ml of simple oil (this can be sunflower, olive, grape, sweet almond, jojoba oil or others, to choose from)
- food coloring in desired color
Grind citric acid in a coffee grinder. Mix with soda, add oils. We measure the oils using a syringe without a needle. Add dye. If it is water-based, then add a little at a time so that the bomb does not fizz ahead of time. To get a bright color, it is better to first color the soda without citric acid and dry it. Only then introduce the remaining components. Knead until the mixture becomes like wet sand. You can knead with your hands. It’s just better to wear gloves, as it may “pinch” the skin.
Press into shape and leave to dry for several hours.
The composition may include milk powder and cream, as well as sea salt or potato starch, which additionally care for the skin.
Garland for September 1st to decorate a room
These funny apples with pictures and letters can decorate a room or window in a children's room.
To make it you will need the following materials: wooden ice cream sticks, double-sided colored paper, tape, glue, rope.
Cut out circles from colored paper and cut them in half - these will be halves of an apple.
Glue the wooden sticks together using tape. Then glue the halves of colored paper circles to them.
Decorate each apple with a letter cut out of colored paper.
Attach the finished elements to the rope. Now you can decorate your room or school classroom.
From nuts
A bouquet of nuts is considered a composition for men - it looks strict, ascetic and at the same time luxurious. This composition is quite simple to put together.
Creating a composition of their nuts in stages:
- Prepare different types of nuts: walnuts of different sizes, hazelnuts, Brazil nuts, pine cones and other options.
- Use glue to secure the walnuts on the skewers. To do this, you can make small holes in the fruits. Do the same with the cones.
- Wrap the remaining nuts in corrugated paper, after moistening them with a small drop of glue. After this, also attach the nuts to a skewer or wire.
- Make a composition of nuts. You can place a pine cone in the center, place small nuts around it, and decorate the edge with large walnuts.
- Secure the skewers together and wrap the entire bouquet in sisal or corrugated paper.
It is better to take fresh hazelnuts from the latest harvest. Such fruits are usually sold with green leaves, 2-3 pieces in one rosette. Attaching them to skewers is much easier. They look much more romantic than dried nuts.
DIY craft for September 1
Photo: krokotak
This funny book lover can be made from the most ordinary colored paper and glue.
Cut out all the necessary parts and glue the accordion legs.
And don’t forget to give the book lover the most interesting book in your opinion, the cover of which you make yourself, armed with colored pencils.
Candlestick
Choose the material for the candlestick. This will depend on the age and capabilities of the baby.
- For example, for older children it is not difficult to carve a structure out of wood.
- For small ones, you can simply fill the mold with plaster. And the form can be anything. This is an autumn leaf, a feather and a balloon.
- You can choose polymer clay. There are also many different options from it. For example, a house. We make the walls; when dry, we glue and mask the seams.
- Large shells are also a great material with lots of options. In order for the shells to become candlesticks, they need to be filled with melted wax and supplemented with a wick. You can take both wax and wick from an ordinary small round candle.
- Or we glue shells onto the base. The base can be made of cardboard, and the relief can be given with plaster, plaster, texture paste, papier mache or other material.
- Glassware, glasses and bottles. Jars can be decorated with paints (we paint the inside or draw a picture, decoupage with a napkin, rope, knitted lace napkin)
- From a jar and sea salt. Prepare the salt, if you want to give your candle holders a tint, mix the salt with a small amount of dry food or cosmetic coloring. Thickly coat the jar with PVA glue and roll in salt.
- From coffee. The principle is the same as with shells - we make a base and glue coffee.
DIY owl
Photo: krokotak
A very interesting and multifunctional craft - Owl. This charming owl can serve as a miniature notepad, notebook, invitation card to a school function, greeting card on Knowledge Day, etc.
To make this craft you will need the following materials: colored paper, a sheet of notebook paper, glue, scissors and a black marker.
Make an even square from any sheet of colored paper. Then fold it as shown in the photo, making the necessary cuts to form the silhouette of an owl.
Cut out a beak, two eyes and paws from white paper. Draw the eyes using a black marker. Glue the finished parts to the base of the craft.
Photo: krokotak
Insert a sheet from a notebook and decorate the craft with a tree branch cut out of colored paper. Your owl appears to be sitting on a branch.
Photo: krokotak
Variety of bouquets
What kind of bouquets are not given to teachers on September 1st? Of course, many of them are made from flowers. Parents from the parent committee buy them in specialized stores. It’s easier this way - buy a ready-made composition compiled by a professional florist. But students have the right to show their imagination and give the teacher an original bouquet of their own “production”. In recent years, people have often given bouquets and bouquet arrangements from:
- just sweets. They include chocolate, candies, and lollipops;
- sweets and stationery;
- fresh flowers and stationery;
- themed homemade gingerbread or cookies;
- fruits and dried fruits;
- coffee and tea sets.
A separate article is bouquets with photographs of graduating students. This is probably so that the teacher does not forget who he taught all these years. Although I must say that the teachers’ memory for faces is simply phenomenal! But such a gift is also great, and most importantly, it’s very easy to make it yourself.
- Prepare a vessel in which to place an unusual bouquet. This could be a beautiful flower pot or other suitable container.
- From ordinary polystyrene foam or floral sponge, cut out a base that would fit inside the container.
- Decorate the base with either artificial moss or “grass” cut from corrugated paper. To keep it firmly, glue it with PVA glue.
- Cut out flowers from white and colored cardboard. The white ones are larger, and the colored ones are smaller in size. Glue them together.
- From the school general photograph, cut out small photos of students and teachers. They are glued inside the “daisy”.
- Make a stem from thin wire. Wrap a green strip of corrugated paper around it and secure it with glue. From the same paper you make leaves and form a flower stem. You will need to make as many of them as there are students in the class plus the teacher.
- Attach the improvised flower to the wire using a glue gun and stick all the flowers into the foam base. A bouquet of photographs is ready.
By the way, in the video below, watch how a bouquet of sweets is made.
Cotton fabric
A child can easily make a cat pillow from cotton fabric. To do this, you need to create a template of a square pillow with characteristic “ears”. For sewing you will need fabric of 2 colors - for the base of the pillow and for the eyes of the cat.
It is better to fill the pillow with padding polyester or hypoallergenic holofiber, and embroider small decor in the form of a mouth, nose and mustache with floss threads.
Master class - a surprise for the teacher
To bring your original idea to life you will need:
- paper tube;
- oblong or oval chocolates;
- glue, beads, beads, ribbons.
You need to start making it by designing a tube, which will serve as the basis for regular school supplies.
Stage No. 2
We attach treats to the tube, and decorate the gaps between them with beads or beads.
Stage No. 3
At the tip of the tube pen we attach a small “drop” of blue paper - this is how ink is indicated.
Stage No. 4
We wrap the entire structure with corrugated sheets and decorate with ribbons.
Candy handle - ready! You can present a “working tool” with humor, accompanied by the words: “You can not only give two marks, but also have a snack while drinking a cup of coffee.”
Stencils for Knowledge Day on school windows
Well, then I would like to demonstrate the faces of the children who are going to school, as well as the names of the classes.
Pupils
Name of classes
Photo zone design
In the modern world, even for young children, a photo zone is an integral part. On September 1, parents often invite photographers, but simply photographing children in the moment is the right, but not an original, decision.
A photo zone is an excellent solution where each child can get an individual shot related to the current event.
The theme of the photo zone can be absolutely anything. We advise you to be sure to display in the decor the date or reason for the event, as well as the number of the educational institution.
Gifts for the occasion
Among the most common reasons for presenting crafts to a teacher are the following dates:
- September 1;
- professional holiday – October 5th;
- birthday;
- March 8;
- New Year holidays;
- end of the school year.
Each of these significant events has its own specifics and therefore requires a special approach to selecting a souvenir.
Children's skills and choice of techniques
It's no secret that the skills of children of different ages differ significantly. This depends both on the development of fine motor skills and on the maturity of the child’s nervous system. This is why crafts for 4th grade become much more difficult than for younger children.
A ten-year-old child already works well with scissors, needles, stencils and small parts, which allows him to increase the range of techniques that can be used when creating crafts.
Crafts can be made using techniques such as sewing, mosaic, beading, quilling, modeling, or sculpting.
Current topics
It would be strange to make snowflakes and snowmen if it’s summer, and it would probably be stupid to give crafts in the form of flowers to dad on February 23rd. Schoolchildren already consciously approach the matter, understand what and when to do, but still this issue must remain under control. Therefore, the teacher sets the theme according to the season or the upcoming holiday.
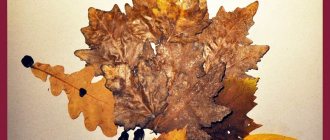
The autumn theme is very rich in ideas, and the variety of natural materials allows you to create unimaginable compositions. For work, they use almost everything that can be collected or picked up underfoot - these are leaves, cones, flowers, vegetables, twigs, seeds and much more. Also, cereals, almost all types, and seeds remain a favorite material for crafts. Let's consider one of these options.
"Hedgehog made from seeds"
To make such a hedgehog you will need a small piece of plasticine and seeds. Everything original is simple.
Operating technique:
- The first step is to make a base from plasticine. Plasticine, as a rule, is taken in light shades (beige or white) so that the hedgehog’s head does not merge with the spines.
- Then from the same plasticine, only black, we make eyes and a nose.
- And finally, decorate the back of the hedgehog with spines, using seeds so that the sharp edge is on the outside.
Such hedgehogs are made not only from sunflower seeds; you can also use pine nuts, pumpkin seeds, pine needles and anything else you can imagine as thorns. And when difficulties arise with choosing a material or topic, you always have the right to turn to the Internet for help, where you will find thousands of photos and videos with hints.
Inventiveness and imagination in working with children are something that no creative process can do without. If you create all the comfortable conditions for the child, give him the right to choose, tell him how to simplify the craft and help with the theme, then your “little master” will certainly create a real masterpiece.
Figures
You can make small figures from salt dough, which can later become refrigerator magnets - these can be vegetables, mushrooms, miniature dishes and cutlery.
From this material you can fashion an entire miniature village with small houses, bridges, animals and people. The main thing is to use your imagination.
