Children can please the birthday boy with a very simple card made by them personally. A DIY 3D birthday card is beautiful, original and interesting. My daughter carefully watched the whole process and literally in 10 minutes she made a similar voluminous card for her dad. Fortunately, it just happened to be his birthday.
For birthday
Balloons
“To decorate voluminous birthday cards that you collect yourself, you can use flags and pictures of gifts.”
A card with the constant attributes of the holiday will impress and add the right notes to the mood. To create this miracle you will need to prepare threads, pieces of colored paper, and a piece of A3 cardboard. To fix the elements we will use double-sided tape and transparent glue.
The cardboard, which is the base in this case, is folded in half. The choice of its color is, in principle, arbitrary, however, if you choose blue, you can realize the idea of balls floating in the sky. By the way, to decorate voluminous birthday cards that you collect yourself, you can use flags and pictures of gifts. But first things first.
Let's get back to making balls. They need to be cut out of colored paper in different shapes and diameters. Our elements will consist of two parts: a circle and a triangle. We glue the latter onto the circle so that we get an imitation of a ponytail. We fix the thread on top with double-sided tape. In total we will need 35 such blanks.
Prepare 35 balls
In parallel with the paper circles, you need to cut diamonds, from which flags will then be made. They are often used to write wishes. 1 checkbox = 1 letter. The rhombus is bent in half to form a triangle, folded onto the thread and its parts are glued together. In this way, the necessary words and phrases are composed.
Attach the flags to the base
Let's start laying out the base. We glue 20 balls to it in random order, making sure that the threads do not get tangled. The remaining 15 will be supplemented with small accordion linings before being included in the postcard. You can make a part from a 2x7 cm strip of paper. Just cut it out and bend it several times.
Accordion lining on the back of the balls
You need to glue the element to the ball from the wrong side, fixing it with the center and leaving springy edges. With these paws we will attach the ball to the card.
Now all that remains is to weave the threads into the tree and attach the garlands of flags.
Ready-made three-dimensional birthday card
Do-it-yourself voluminous postcards made of paper
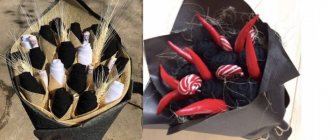
This gift can be created in literally 15 minutes. We will need striped wrapping paper and a cardboard base.
We cut several strips of paper and give them the shape of a tube, winding them around a pencil. Secure the edge with glue and set the pieces aside to dry. During this time, we will cut out flames from red or orange (or maybe both) paper. Together we will assemble the parts on cardboard. You can include a glass of champagne, drawn or made in the form of an applique, into the composition. Candles can be “stuck” into a beaded cake. Scatterings of shiny stars are also suitable as decoration.
Volumetric card with birthday cake
To dad
A DIY birthday card for dad is always very touching and sweet. Choosing a particular “papal” theme is not too easy, but there is a wonderful straw to grab onto: style. If you make a stylish card, then the father will undoubtedly be happy to receive it, even if it does not contain the usual symbols of “masculinity,” which in our country often include cars, weapons and fishing.
Naturally, if the father is celebrating the anniversary of his driving experience, then a car on a postcard is quite appropriate, but on dad’s birthday it is better to present a neutral and beautiful greeting card.
What kind of cards do men like:
- not too colorful;
- in a calm, slightly muted palette;
- with clean lines;
- in which a lot of effort has been visually invested.
I would like to say especially about the last point. If your mom liked a card made from a piece of lace, a bow and a beautiful chipboard, then dad will appreciate a hand-made poster from paper with an elegant, lacy cutout - painstaking and graceful.
Men admire the process, so before you make a nice card using the scrapbooking technique, think about how you can put your work into the card? This can be working with threads or embroidery, spirography and paper cutting, pyrography and much more.
Incorporate a few elements of hard work and love into your work and your dad's birthday card will be stunning.
So, we make paper cards with our own hands for our beloved daddy. Start by choosing a subject - this could be some element of a male portrait - a stylish beard and glasses in the spirit of hipsters, or the silhouette of dad's favorite pipe, you can also make some kind of heraldic flag or symbol.
Choose colors - they should be calm and beautiful, and also look good in harmony with each other.
Make a pattern for the future postcard and get to work - if this is a regular applique, then cut out all the elements and carefully lay out the future composition. And in the case of artistic cutting, it is better to spend time on the pattern and drawing. By the way, for this work you will need a good breadboard knife.
After all the main elements have been cut out, assemble the card - if you planned it using the scrapbooking technique, then you can simply glue the composition, and if you are trying to create a thin openwork product from cardboard and paper, then select shading colors for each layer - so that the work looked really delicate, you will need to choose shades that will highlight all the slits.
Make a central element on your card, and then put it under a press - this will help prevent the paper from deforming from the moisture contained in the glue.
DIY birthday card
You can make a birthday card this way even with a small child. Leave the sheet to dry and proceed to the main drawing. Fold the second sheet in half. Make blue streaks on the outside, it’s better if they are translucent.
You can make a beautiful card with this background if you add more water to the paint. Try using a large brush or even a smooth sponge. When the background is dry, draw a tree branch with thin pencil lines.
Let there be very few small side branches on it, create only contours. Once you have the desired shape, paint the branch with a thin brush using different shades of brown.
To make your greeting card pop, you'll need to grab that first sheet of flower splashes. On it, draw the outlines of butterflies according to the template, and then cut them out. Choose a butterfly template that has a pronounced middle, body. Bend the wings of the blanks upward, apply glue to the middle and glue them to the branches of your tree.
This is a great way to make a card with flowers, balloons and other “holiday” symbols. Experiment with different coloring techniques: try applying a pattern to paper with a wax candle, use a toothbrush to create splashes, create a gradient with soft foam and your card will turn out unforgettable.
You can make a postcard with your own hands using a more complex technique. In any craft or arts and crafts store you can find unusual products that you have probably never even heard of. If you make a birthday card with such details, the birthday person will certainly appreciate the effort and originality. Try to master several modern techniques at once.
Unusual technique for a beautiful bouquet
A postcard with flowers made using the quilling technique looks very interesting. It's not at all difficult to do.
You don’t need to buy anything special for this craft. Perhaps you can add some beads and a beautiful ribbon to the standard set indicated above.
For all occasions
Bouquet in a vase
To create a three-dimensional postcard, you will need a package of colored cardboard and a glue stick. If this is not available, it is permissible to use ordinary PVA glue.
If you choose the latter option, then work with liquid glue very carefully, apply it little by little so that the paper does not become limp or lumpy. The highest quality products are obtained by using double-sided tape to assemble parts.
The postcard with 3D flowers with your own hands is assembled according to the following algorithm:
- Let's choose cardboard sheets for the title side of the postcard and the inside. The second one should be slightly smaller than the base, so we measure 2 cm on each side, draw a new rectangle and cut it along the resulting perimeter.
- We fold the smaller piece in half and begin drawing 7 lines from the fold side. We do this according to the following scheme. The length of the lowest line should be 2 cm. Set aside the specified size from the fold and draw with a pencil. The next line will appear a centimeter higher than the first and will be equal to 2.5 cm. Each subsequent line after it will also increase by 0.5 cm. The step distance of 1 cm is maintained for all seven levels.
Draw 7 lines on the fold side
Cut the folded cardboard along the resulting lines. We bend the strips to one side and press the folds well. This will simplify the work later.
Bend the strips to one side
- Unbend the strips and open the cardboard sheet. The cutting turns out to be concave inward. We'll have to fix them and take them outside. Remove each strip by folding it inward at the edges and bending it outward in the middle. Close the workpiece and place it under the weight. The paper must “settle down” so that it can open and fold easily.
- Now let’s reveal the main secret of how to make a three-dimensional postcard. Let's move on to the title part. We bend it in half and glue the inner part with the cut strips. This must be done so that the folds of both pieces of cardboard meet with pinpoint precision. Take your time. Fix one half first, and then work on the second. This will reduce the risk of displacement.
Glue the cut strips onto the inside
The main work has been done. All that remains is to fill the vase with flowers. You need to cut out stems with leaves from green paper, and several flowers from paper of a different color. Don't chase after curiosities, draw what you can. Plant two buds on the stems and leave one as is.
Cut out stems and flowers
We are trying to put the bouquet in a vase. We glue one flower on a stem on the left side of the card, the second on the right. We coat only the lower third of the stem with glue. This will allow the element to remain movable and take a standing position when opening the postcard. The bud without a stem is glued to the top strip of the vase.
Popular articles Poems for the holiday of April 1
Place the bouquet in a vase
We check the quality of work. We close the postcard. If everything is done correctly, then decorative elements will not peek out from it and its doors will open and close with ease.
There is another interesting option on how to make a 3D card with flowers.
Flower glade
To create this masterpiece, you will need green and orange cardboard, a package of colored paper and a few sheets of pure white paper.
Stages of work:
Let's take cardboard sheets. We will leave the orange in its original form and use it for the cover, and adjust the green a little. It will need to be reduced somewhat. Let's shorten it on the sides by one and a half centimeters. Let's make the top edge wavy.
Make the top edge of the green leaf wavy
- Fold the piece of paper in half and draw 5 stripes on it, a little more than one centimeter long. The starting point should be the fold.
- We cut out the strips, bend them slightly upward, and then return them to their previous position.
Fold the stripes up
- We open the workpiece and bend the strips outward, making a bend in the middle of the cut section.
- Glue the part onto the base. The entire surface area must be coated with adhesive, leaving only the areas of the cut strips untouched.
Glue the part onto the base
It's time to start working on the flowerbed. Let's decorate it with flowers. We will make blanks of various shapes and sizes from colored paper of different shades. Let's plant them on stems with leaves. Let's place the finished parts in the clearing. You can complement the composition with butterflies or place a wasp on a flower.
Place the finished parts in the clearing
How to make birthday cards with balloons
YouTube channel Crafting Hours
What do you need
- Thick gray paper;
- double-sided paper of different colors;
- ruler;
- a simple pencil;
- scissors;
- double sided tape;
- compass;
- regular glue and/or glue stick;
- glue gun;
- twine or other thick threads;
- White paper;
- felt-tip pen;
- glue stick;
- colored tape.
How to do
1. Fold gray construction paper in half crosswise. Cut a rectangle with sides 20 and 14 cm from a pink sheet. Cut a rectangle measuring 16 x 10 cm from gray construction paper.
Using double-sided tape, glue the small gray part onto the pink one, and secure the latter onto the cover of the future card.
YouTube channel Crafting Hours
2. Cut many strips of colored paper of different thicknesses, but the same length. These are blanks for balls. Conditionally divide one strip into three parts and bend it twice along the lines.
Draw a circle on the resulting part using a compass. Cut along the contour - you will have three circles.
YouTube channel Crafting Hours
3. Prepare circles from the remaining colored stripes in the same way.
YouTube channel Crafting Hours
4. Cut small triangles from the remaining folded paper. Glue them to the bottom of each circle.
YouTube channel Crafting Hours
5. Fold a small strip of paper in half. Unfold and fold each side like an accordion, as shown in the photo and video below.
YouTube channel Crafting Hours
6. Make as many of the same parts as you have balls. Glue them to the circles so that the accordions are on top.
YouTube channel Crafting Hours
7. Using a glue gun, attach a piece of twine or other thick thread to each ball.
YouTube channel Crafting Hours
8. Fold the long edges of the white paper about 2 cm and cut along the contour so that you get two strips folded lengthwise. Fold each one in half crosswise three times. Cut out identical triangles from them so that the bases of the shapes are on the fold. Details are in the video below.
YouTube channel Crafting Hours
9. Write one letter from the phrase “Happy Birthday” on each triangle. Lubricate the inside of the flags with glue, put them on two pieces of rope and glue them together. Tie the ends of these two strings together.
YouTube channel Crafting Hours
10. Lubricate the accordions with glue on the back of the balls and distribute them beautifully inside the card. Save a few for the cover.
YouTube channel Crafting Hours
11. Tie the ends of the twine, twist and cut off the excess. Using a glue gun, attach the letter flags to the card.
YouTube channel Crafting Hours
12. Write a congratulatory message at the bottom of the cover. Glue a few balls at the top. Cut off the excess twine and tie it with ribbon.
What other options are there?
You can make a three-dimensional postcard with balls flying out of the box:
Here's a similar option:
Here's how to make balls using the quilling technique:
And this is a simple postcard made using the appliqué technique:
What do you need for work?
- Blue and white cardboard. You can take thick white paper for painting with watercolors.
- Since the cake on the card will be three-layered, you need colored paper in 3 desired colors, as well as red cardboard and yellow paper for candles.
- Scissors, glue stick, ruler, simple pencil.
As a rule, on a regular cake the number of candles is equal to the age of the birthday person. And, if a child is making a card for an adult, there can be quite a lot of candles, and there is a risk that they won’t fit on the cake. Therefore, they can be replaced with drawn and cut out numbers - candles, which also have a light on top. Or celebrate in dozens, where one candle means 10 years (my daughter did this). As a last resort, do without candles altogether.
General instructions using the example of 3 postcards
In order to move on to more complex paper products, you need to practice on the simplest ones. To do this, three options for creating a paper postcard will be outlined below. After practicing with these examples, you can move on to more complex instructions for making them.
For the first option you will need the following set of tools and materials:
- Colored cardboard.
- Colored paper.
- Scissors or utility knife.
- Regular writing pen.
- PVA glue or glue stick.
Production time is no more than 15 minutes.
Ready-made postcard
The first thing you need to do is cut out the base in the form of a frame. Thick cardboard is used for this. The color can be any depending on the preferences of the master himself. The edges of the postcard frame can be made curly, as in the example, using scissors or a stationery knife.
To create even shaped frames, it is better to use markings made using a pattern or ruler.
A second layer of colored paper is applied on top of the prepared cardboard base. Instead, you can use an image printed on a printer as the main background.
Now the most important task remains - making holiday candles and lights. To do this you need to use a pen
A thin sheet of colored paper must be wrapped around the handle. The edge where the paper joins is glued. In this position, you need to maintain the shape for 30 seconds. After that, remove the handle. Repeat the action depending on how many candles you need to place on the card.
Lights are cut out separately from colored paper and then attached to the candles. The resulting design is glued onto a postcard. After this, you need to sign it and write a wish for the birthday person.
The second card will have an award medal with the age of the hero of the occasion.
General view of a postcard with a medal
To create it you will need:
- Cardboard as a base.
- Set of colored paper.
- Threads.
- Stationery knife or scissors.
- Glue stick.
You can make such a postcard following the instructions in just half an hour. In order to do everything correctly, the instructions will be described step by step.
Instructions
- Preparation of all necessary materials.
- Prepare a base in the form of cardboard of any color at the user’s request.
- Decorate the cardboard with different paper elements.
- Take a thin colored sheet of paper and fold it like an accordion.
- Using thread, tie the folded accordion in the middle.
- Spread the accordion so that it has the shape of a circle.
- To fix the edges of the straightened accordion, secure it with glue.
- Cut a circle with a smaller radius than the accordion.
- Draw the age of the birthday person or cut and glue numbers from paper.
- Glue the circle onto the accordion.
- Glue the finished medal onto the base.
Now that's it, the postcard is ready.
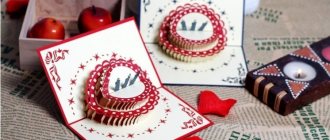
The last postcard for training will have three-dimensional elements.
Ready-made postcard
It will also take a maximum of 30 minutes to create. To make a postcard you will need:
- Thick colored cardboard as the main background.
- Colored patterned paper or real gift wrapping paper.
- Ribbons for dressing.
- Scissors.
- Glue stick.
The process of making such a postcard consists of the following steps:
- Prepare a cardboard base. The background can be painted or additional elements can be glued.
- At the top of the cardboard write the word “Congratulations!”
- Take colored paper or gift wrapping paper and cut it into squares in the shape of wrapped gifts.
- Glue the squares at the bottom of the picture.
- Make ribbon bows and ties for each of the stick-on gifts and attach them to them.
Popular articles Good congratulations on March 8
Instead of ribbons, you can also use colored threads or twine.
All is ready. The card looks quite bright and interesting and has voluminous elements in the form of gifts and bows.
How to assemble boxes from postcards with your own hands in a step-by-step master class
In order to make a box you need to prepare the following tools:
- Scissors
- Old postcards
- Threads and needles.
Having prepared everything you need, you can proceed directly to making the box. To do this you need:
- Choose the shape of the box. In our master class it is square and rectangular.
- Next, using the existing pattern, you need to cut out all the necessary parts: case, lid, sides.
- After all the parts have been prepared, you can start sewing all the parts with the main seam. This must be done carefully so that it is even.
- After covering, you can safely merge them together using a hidden seam. Again, very carefully, following the attached diagram.
This is how we got such a wonderful box that you can give for a birthday or any other holiday, or even keep for yourself as interior attributes.
If this work is performed with children, then you need to strictly follow safety precautions when working with a needle. Overall a very beautiful box!
The next master class tells you how to make a box in the shape of a sofa.
The layout of this box is somewhat different from the previous one in its simplicity. But that didn't make her any less beautiful. To make such a box we need:
- Beautiful and bright cards
- Multi-colored cardboard
- Colored paper
- Threads and needles
- Button or lingonberry to make fasteners.
Now you can start manufacturing, guided by the attached photos:
- According to the existing pattern, patterns of the box are made, three pieces for each part. Two parts will be made from the outside and one from the inside. The third will be made of cardboard and inserted between them to make the box rigid.
- After all the parts are cut out and prepared, we begin to connect them together in this way: face - cardboard - face. First, they need to be secured to each other using paper clips, and then we begin to make holes around the perimeter with an awl, and then sew them with threads around the perimeter.
- Now that all the holes have been made, take a needle and thread and sew each part separately with an “over the edge” seam. The seam should be smooth and neat.
- According to the postcard diagram, all the sheathed parts are assembled together.
- To make the edges beautiful, you can trim them with braid.
- The box should now have a lock. It will be a button or a bead that needs to be sewn on.
The result is a very beautiful box that you can give to someone for the upcoming holidays. And to make it even more enjoyable, you can fill it with candies or any other sweets.
To make the body of the box you need: postcards and cardboard with the following dimensions:
- on the walls
- 6×8 cm – 2 pcs
- 6×4 cm – 2 pcs
- bottom and cover
- 4×8 cm – 2 pieces
- cover
3×8 cm – 2 pcs
- triangle on the sides (you can make an oval instead of a corner)
3x3x4 cm – 2 pcs
All parts are sewn with a buttonhole stitch. This seam is made like this: from right to left. You need to step back 3 - 4 mm from the edge, pierce the needle away from you, bend the end of the needle with thread and tighten the stitch. The next stitch is also done after 4 mm. The stitches are located at an equal distance from the edge and each other. The thread also needs to be tightened equally. At the end of the line, the seam is secured with two or three puffs of thread in the same place. On rounded areas it is better to make smaller stitches.
After all the parts are sheathed, all parts are connected to each other. They are sewn together as follows: a needle grabs the thread from the seam on top with the threads of another part and fastens it. First of all, you need to assemble the walls, and then sew on the bottom. The lid is made separately and only then sewn onto the body.
Ideas and step-by-step making of crafts for a labor lesson for primary schoolchildren
Elementary school students are able to perform more complex crafts than preschool children. However, they also need templates for tracing shapes and details, especially for first and second grade students.
Elephant
Crafts made from paper and cardboard in the shape of animals most attract primary school children. And this is not just like that: you can play with the made figures: ride in a car or write an interesting fairy tale with their participation.
To make an elephant, you will need the following materials and tools:
- colored paper or cardboard;
- marker;
- scissors;
- “live” eyes;
- glue stick.
The process of creating an elephant figurine:
- It is necessary to draw the following shapes on a sheet of paper of the same color:
- 5 rectangles with sides 8 and 10 cm (legs and head);
- 1 rectangle measuring 1.5 and 9 cm (trunk);
- 2 circles with a diameter of 5 cm (ears);
- 6 small ovals measuring 1*2 cm (nails);
- 3 strips measuring 6 and 2 cm (connecting parts).
- Large rectangles should be rolled into cylinders, gluing their edges. There should be 5 such parts.
- Each oval needs to be cut in half to make 12 pieces.
- Now you need to take 2 cylinders, glue 3 semi-ovals at the base of each - you get a pair of elephant legs. This pair should be connected to each other from above using one of the strips and glue. The bottom also needs to be coated with glue, connecting the legs to each other. Do the same with the second pair of cylinders.
- Two pairs of elephant legs need to be connected to each other by a third strip. To do this, it must be glued under the first and second strips, which fasten each pair of legs. For better strength, the legs can be additionally fastened with strips from below, gluing them inside the cylinder.
- You need to glue the elephant's head to the strip connecting the first pair of legs, after which you should attach the ears inside it on both sides, the trunk in the middle, and the eyes on the sides of it.
This is another example of an elephant made from paper rolls.
Crocodiles
Materials and tools:
- colored paper;
- scissors;
- black felt-tip marker;
- PVA glue.
Crafts from paper and cardboard: crocodile
Manufacturing process:
- It is necessary to draw and cut 4 strips along the width of the ruler. The length of the strips should correspond to the length of the paper sheet. The color of the stripes can be any.
- Next you need to take 3 strips and cut them into 4 parts. The body of a crocodile will be assembled from 10 such parts.
- First you need to roll one quarter of the strip into a ring and glue its edges. After this, you should insert another piece of the strip inside the resulting ring and glue the edges. Thus, you need to use 10 quarters of paper strips.
- One whole strip should be cut into 3 parts, one of which should be folded in half and an elongated triangle should be drawn on one of the halves, slightly departing from the fold line. The triangle must be cut out, leaving it folded and without touching the fold line - you will get the mouth of a crocodile.
- Next, you need to bend the crocodile’s nose, stepping back a little from the top of the folded triangle-mouth. After this, you need to cut out 2 small white elongated triangles, which should then be glued inside the mouth. The fangs are drawn on the white parts with a felt-tip pen.
- The crocodile's head and mouth must be inserted through the outer ring of the body and glued with PVA.
- One of the pieces of the strip should be cut horizontally into 3 parts, making cuts every 1 cm. One of these thin strips should be rounded at the edges, inserted inside the triangle-head and glued under the bottom - you will get eyes that need to be completed with a felt-tip pen.
- Other thin strips need to be turned into paws, which need to be attached with glue under the crocodile's belly.
- Another piece of the strip should be inserted into the ring at the end of the body, folded into a loop, glued the ends and cut a corner on them - you get a crocodile tail.
Popular articles Making and decoupaging candles
Gift with love
Only handmade postcards can convey your feelings towards the recipient. Buying a regular cardboard card is easy, but making one yourself means putting a part of yourself into it. After all, when making such a gift, you imagine the person for whom it will be intended.
Remember, we all tried as children, in kindergarten or school, to make holiday cards for our parents - carefully cutting them out, folding them, and gluing them. Then they handed it over. Remember how carefully mom and dad accepted the gift, kept it, and many still keep it with your children's drawings and crafts.
Today, handmade products are becoming more and more popular. Embroidered pillows decorate the home, knitted items are worn with pride. Only the very lazy don’t sew, knit or glue.
Scrapbooking is gaining more and more admirers - photo albums, paper cards, made with love, made in a single copy - become a unique gift for various holiday events.
For anyone who has mastered at least the basics of scrapbooking, there is no question of what to give to a loved one, and these gifts evoke admiration.
Other occasions and recipients
Rest assured, handmade cards for a birthday or New Year will delight the recipients - after all, this is not just a DIY postcard made in a master class, it is a real man-made miracle that keeps a piece of the soul.
You can make cards for mom and dad with your own hands, or you can delight your friends before each holiday with an original greeting - all you need is free time, good master classes and a little patience.
3D postcards look especially impressive. How to make a three-dimensional postcard? Come up with (or look at experienced authors) an idea on how you can shape it so that you get voluminous postcards. You may want to use more decorative elements, or you may decide to make a simple DIY birthday card with 3D elements.
By the way, if you are wondering how to make a postcard for your mother or friend with voluminous paper elements, take a closer look at children's books. Surely you still have several copies, when opened, carriages and castles, trees and horses appeared between the pages.
Take a close look at how these elements are made and glued together - you may be able to reproduce this in your sketch.
Or try to do something in the style of shabby chic and scrapbooking with your own hands - it’s not as difficult as it seems, the entire main effect of volume is created by layering elements. By the way, flat cards are also good.