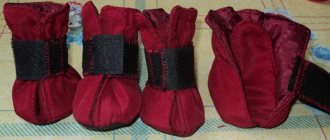
We usually buy our shoes in various stores. But now the making of these things has become very popular, especially among women. Women with children have this hobby. You always want to do something especially beautiful and unusual for them.
In this article we will talk about DIY house boots. They are reminiscent of street ugg boots, which have been quite popular for more than the first winter season.
Where to start
Before starting work, you need to acquire the necessary materials. You will need:
- any fabric
- leather base for insole
- threads
Nowadays many styles of such boots have been invented. Each pair stands out somehow and is decorated with bright stones and sequins. No less popular are slippers made to resemble animals.
First you need to make a pattern for your future shoes. On the Internet or special books you can find ready-made patterns for do-it-yourself boots. You can print them or draw them yourself. The most important thing is to draw clearly according to the size of your foot, even two or three centimeters larger.
The fragment must be carefully cut out and applied to the fabric. Using soap, trace the stencil onto the fabric and cut out the desired bases. When selecting fabric, renowned seamstresses recommend fleece, terry, wool, plush.
The easiest way to make boots is from denim and felt fabric, but using, for example, fleece or terry, the slippers will be very cozy.
If you don't want to fuss with the pattern, take your old house shoes, place them on the fabric and trace the outline.
Remember that the key to a quality product is, first of all, strong threads that ensure the durability of your shoes.
Product assembly
The main fabric of this model is fleece with a brown pattern, the lining is the same, only gray. Insulation – thin padding polyester. The sole is anti-slip “foot” fabric.
- Connect the toe and shaft, then sew the back seam.
- The lining piece is assembled in the same way, but leave a hole in the back seam for turning out, 8 - 10 cm long.
- Place one part inside another – face to face.
- Stitch along the top edge.
Sole assembly
Fold the layers of the sole in the following order: fleece, insulation, leather or anti-slip fabric. Stitch them together.
There are two ways to connect the sole to the main product: with seams outward or seams inward.
Processing with seams inside
The advantage of this treatment is a very neat appearance. Nothing is visible from the outside.
Negative aspects: due to the fact that thick seams are located on the inside, there is a decrease in space in the shoes and their size decreases. They can interfere with the foot when walking if the boot is not large enough.
The parts are connected as follows:
- Attach the sole to the lining piece.
- Connect to the outer part in the sequence as in the photo.
- Sew along the outline and turn through the hole left.
- Sew the hole by hand using blind stitches.
- Turn the product right side out and straighten it.
Important: the thickness of the sole layer is quite significant, so it is advisable to stitch this area manually or using an industrial sewing machine. A household machine may not be able to handle it.
Processing with seams facing out
The advantage of this treatment is that the foot in the boot is very comfortable, the thickness of the seams does not interfere with it.
- The assembly sequence in stages is shown in the photo.
- Finish the outer edge with edging tape.
How to sew boots
Now we will figure out how to sew boots with your own hands if you are doing this for the first time. Your kit should include:
- scissors
- needle and thread
- any high-quality and fresh glue suitable for fabrics
- soap and cloth
Make a pattern according to the above rules. Take this extremely seriously, because then the shoes may be too small and uncomfortable for you.
Then you need to make the bases of the slippers, the top and the sole. Fold in half and sew a seam. Then we sew the base of the boots with the insole.
If you are making slippers from fleece, sew padding polyester to the base. When your boots are almost ready, you can start decorating them.
Always needed, needed everywhere
Humanity invented shoes 30 thousand years ago. With the approach of cold weather, ancient people wrapped their legs with pieces of leather or animal skins.
In hot countries, hunters protected the soles of their feet from hot sand with the help of dense tree bark.
Since then, the materials for the production of shoes have changed, the style and cut have been improved, but this item of clothing has been and will be necessary at all times.
How to knit slippers
Knitting boots with your own hands is quite easy. You need a little skill and imagination. If you are just starting to knit, use books and instructions. Usually everything is written there in as much detail as possible.
Things made with your own hands always carry positive energy, and knitted ones even more so. Most often boots are crocheted.
You need to purchase a soft felt insole. You need to make small holes in it and thread a hook through it.
In each of these holes you need to make three yarn overs. This way we will completely tie the thread around the insole. To work with the base of the boot, use more detailed instructions.
Once the slippers are ready, you can improve the shoes. Make it warmer and more beautiful by knitting in the boot area. Here your imagination can use any types and techniques of knitting.
In ancient Rus'
The nobility wore such shoes, and the peasants were content with bast shoes both in summer and winter. These products became the prototypes of modern boots and slippers.Russian boots had sharp, raised toes. These boots were called ostrogs. They were made from morocco, chrome, and yuft. They were embroidered with pearls and other precious stones.
Types of home boots
For children, and not only others, they have come up with many varieties of hand-made slippers and boots.
The first option is slippers that are similar to socks. They fit snugly to the foot and keep them warm at all times. The manufacturing technique is not particularly different from others.
You will need at least four rubber bands. Elastic bands must be attached to the boot top area, maintaining equal intervals between them.
Shoes with animals are especially popular now. You need to make not only patterns for slippers, but decorated ears. After sewing the shoes, carefully sew on the ears.
Material selection
The way you feel when wearing shoes is largely influenced by the material from which they are made. In addition to the convenience and presentation of products, it is necessary to take into account such criteria as hygiene, thermal conductivity and strength.
In order to sew warm house slippers with your own hands, you can use the following blanks:
- An old sheepskin coat or sheepskin coat. Sheepskin has high thermal insulation properties, softness and stretchability. It is better to make slippers from a sheepskin coat from sleeves or floors, since the back and chest parts can later be used to make a vest.
- Tops of winter leather boots. Natural material has high strength and wear resistance. The downside is that it has too thin a layer of fur, which is not enough to provide reliable protection from the cold.
- Artificial fur. Synthetic products look good, are not afraid of dampness, and can be machine washed without problems. It’s not difficult to sew slippers, but the prospects for such work are questionable - synthetics do not absorb moisture and cause a lot of steam on your feet. There is a high probability of developing fungus and allergic reactions.
After choosing the material, you need to decide on the model of slippers. Depending on individual preferences, the pair of shoes produced may have an open or closed toe, heel counter or cuff.
Old sheepskin coat
Faux fur Tops of old winter boots
This is interesting: Pattern of ballet slippers for children
Photos of DIY boots
Stages of pattern construction
The pattern is ready-made, as in the photo below.
If the leg is not standard, for example, a wide foot, a high arch, a protruding bone, then the patterns can be built independently, according to individual measurements.
To construct the sole, you can outline the foot, the insole, or a finished slipper that fits the size.
Attention: if the foot or insole was outlined, then add an additional 1 cm around the circumference. There is no need to increase the sole around the slipper - it is already large.
- Draw a center line and make a cut along it almost to the very top.
- Separate the halves at a distance equal to the lifting height. For this measurement, you need to measure the width of the foot at the base - the green line, plus 3 cm for freedom of fit.
- Mark the distance from the tip of the thumb to the instep - the blue line. This will be the length of the toe of the boot. Usually it is 12 - 14 cm.
- Draw a smooth arc - pink color. The toe is ready.
- Boot top. It is necessary to measure the circumference of the shin in the place where the boot ends, and the circumference of the ankle. Add 3 - 4 cm to these measurements for a loose fit. When using stretch fabric, such as fleece, and without insulation, a small increase of 2–3 cm can be made. If you want to sew the product looser, then add 4–5 cm.
- Mark the lifting point on the pattern. Draw the heel with a convex arc. Its height is usually 5 cm.
- Draw a semicircle where the toe and boot meet.
We knit exclusive soft shoes
If you have knitting skills, you can create airy soft ugg boots that will definitely be unique at a holiday party.
To do this, you will need yarn to match the suit, knitting supplies and inspiration. And with the help of our diagrams, the creation process will be easy and flawless.
According to the presented pattern, we knit 4 identical parts.
Then, using connecting posts, we combine 2 parts together.
We continue to knit the product according to the detailed pattern shown in the photo.
You can also use auxiliary materials, such as paper clips, for ease of operation and correct execution of the diagram.
This is the beauty you will get in the end.
These boots look incredibly airy and delicate. They will look especially neat on little children's feet.
Of course, the options presented in the article can be freely interpreted to suit your taste. For example, you can safely experiment with types of fabric, color palette and decorative methods.
Ugg boots for baby
Making home boots is easy. To do this, you only need a little skill in working with a needle. The only condition is to strictly follow the instructions on how to sew boots from fabric. The pattern is offered for sizes 24-27. If necessary, it can be adjusted to any leg, but it is worth considering that when changing the size, the pattern changes more in length than in width.
For UGG you will need:
- Artificial sheepskin 20 cm with a width of 140 cm: all 2 pcs.
- Square piece of artificial leather with a side of 20 cm: sole 2 pcs.
- Decor if desired.
