How to make your own steering wheel from candy.
Those who own a car or just want to buy one can be given such a creative gift as a hand-made candy steering wheel. Such a sweet gift can both lift your spirits and leave a cheerful memory of yourself, like an unusual souvenir. And such a steering wheel can be eaten at any time with delicious tea, which is also very nice. It has always been believed that it is pleasant to receive a gift made with your own hands; the love and warmth of a person are invested in the gift. And this will be a unique gift, there will be no other like it.
Heated steering wheel designed independently
One of the design options for the steering wheel is its heating. Let's take a closer look at how to make your own heated steering wheel. It is done primarily on mid-segment cars. Some modern premium models have this feature built-in.
But heating can also be done independently with the help of specialists by visiting a car workshop, or you can purchase a ready-made heating system and install it.
There is also the option of heating yourself. To operate, you will need a heating system with automatic heating mode.
The steering wheel must first be removed and then updated. First of all, you need to outline the installation location of the system. Then, in the marked places, recesses are made for the elements.
Experts suggest attaching the elements with glue and sealing them with sealant. Then its surface is puttied and leveled with a knife.
You can connect the system using a cigarette lighter, through special wiring, or use unused wires.The safest connection option is to connect using special wiring. Using this connection option, you can simply arrange a heated steering wheel.
Wood steering wheel trim
The purpose of this project is to improve the steering wheel of my 1996 Toyota Land Cruiser. The original steering wheel is covered with leather and painted with a special gray paint. Unfortunately, after 150,000 km, the paint begins to deteriorate.
The first idea was to replace the entire steering wheel with a custom wood trim steering wheel offered on the markets. But the EU doesn't allow airbags to be removed (and I prefer to leave them in), and custom solutions generally don't provide airbag support. And yet, removing the airbag leads to a constant annoying warning in the cabin.
So I decided to replace the leather and rubber with wood myself and keep my original airbag.
With the right tools this can be an easy job, but I didn't have specialized tools.
I just used a hacksaw, a couple of scrapers, sandpaper, a gauge, a hammer, clamps and a drill.
I won't be able to cut the wood accurately enough, so I won't be able to use thick pads and build a wheel from those pieces.
So I decided to use thin strips of Samba (aka Ayous) wood measuring (5x30x2500 mm) and make trims around the iron steering wheel core.
Patiently, ring by ring, I coated the iron core and sculpted the wood into the original shape.
Step 1: Remove old leather and rubber.
The job begins by removing any covering on the handlebars before reaching the iron rim.
My steering wheel isn't actually in that bad of shape, so I bought another used steering wheel so I could work without the fear of ruining anything.
Step 2: Bend the samba bar.
Let's prepare our raw materials.
Samba is a soft wood without veins. A 250 cm long plank can be easily bent and rolled into a ring using only warm water in the following sequence:
1. Wet the bar 2. Begin to bend it carefully. Start by simply connecting the two ends. 3. Secure the ends with Velcro and leave for a while. 4. Moisten again with warm water and try to close the ring by sliding one end against the other. 5.Repeat until the ring is slightly smaller than the steering wheel.
In order for the bar to keep the shape of the ring close to the desired size, let it dry completely and only then remove the fasteners.
I used 4 strips of 250 cm in length for my work.
Step 3: First rim.
Now you have the material you need to restore your steering wheel.
My rim has some thick parts where the spokes meet. And I decided to make recesses there.
Now it's time to fix the first rim.
First we find the approximate length for cutting the curved plank, and then cut it in small pieces, getting closer and closer to the correct size. Don't be afraid if there is a small gap left. This will be fixed in the future.
To make it easier to work, the planks overlap slightly at the connection point. This will be completely scraped off later during the finishing touch.
In the next step we will add another strip to the rim. You can make the connection point be in a different position. This will result in a more reliable connection. But this will be an unsightly connection in some places around the edge. Due to the fact that the wood strip is curved, it will actually be stationary.
So I preferred to have all connections at the same point. At the end of the job, if I don't like the end result, I will cover the connection point with a small wooden ring. I'll clean up this ring at rim level and it will look great and integrate into the overall picture.
Step 4: Add Rings Inside
To avoid breaking the large strip, I cut one into 2 parts and inserted it inside the first ring. Insert 1 half ring on one side. Use clamps to hold the planks together.
If any gap appears after removing the clips, prepare a mixture of sawdust, water and vinyl glue. Use it as putty to close the gap. Or leave it: at the end you can use wood paste to fill that gap.
Step 5: Add a half ring on the other side.
Repeat the same operation with the other half of the plank on the other side.
Step 6: Start stitching.
Let's start grinding now because we have half covered the iron ring.
At this time I can grind the wood as close as possible to the final size and be sure that the iron ring remains perfectly centered in the wood covering.
Another option is to grind after completely covering the iron ring, but this makes it more difficult to keep the iron rim centered.
If desired, you can change the size of the original steering wheel. I prefer to keep it. To leave room for final adjustment, I ground the strips down to the size of the original rubber, plus 1mm in height and width.
Step 7: Add the inner ring.
Add an inner ring to complete the shape. I cut out the places for the spokes and then simply fixed the strip with glue.
Step 8: Adjust the shape between the knitting needles.
Now we are working on an internal profile.
Step 9: Wood covering the spokes.
To cover the metal spokes, you need to glue small pieces of strips.
Of course, the inside of the crown is curved, so some pressure is required. To make this easier, use curved parts of the plank.
After four or five layers, depending on your requirements, you can get the thickness you want and start grinding away the excess wood.
Step 10: Adjusting the wooden spoke.
You can shape your wooden steering wheel according to your preference. So there are no rules at this stage.
I tried to reproduce the original. So, once again I chose to take things step by step and trim the shape while referencing some reference points.
Of course, the first cut is far from the final form: there is still room to correct mistakes.
Step 11: Back of the spoke.
After the first pass, we adjust closer to the final shape. I put the back cover back in place so I could see where to cut and where not to cut.
Step 12: Front side of the spoke.
We do the same on the front side.
To get a perfect surface fit, I installed an airbag pad. This will give me a starting point.
Most of the work was done with sandpaper and some shaped things.
You can see my tools in the photo. For example, to get a nice curve I used a fiberglass stick covered with sandpaper.
Step 13: Finishing touches.
Now we put the airbag and back cover in place to refine the shape.
I cut indentations for the fingers on the back of the rim to ensure perfect grip even on painted wood.
Step 14: Coloring.
Samba wood is almost white.
I prefer my handlebars to be more like oak or walnut.
I used aniline dyes and water-based finishing dyes.
At some point you will see some cracks. This is fine. The wood is still alive and will continue to change slightly depending on humidity and temperature.
Step 15: Installation.
In the first photo you can see the result before and after. I actually bought a used wheel so I could work without fear of my original one. Hope you enjoyed it.
And I also want to note one point, especially for Ukraine, if you need to make a new license plate for a car, then this is not a problem. There is an excellent company that produces rooms, quickly, efficiently and not expensively.
← Previous post
Next entry →
Leave a comment Cancel reply
Braid the steering wheel yourself
Next, we will consider the option of how to braid the steering wheel yourself. There are many materials available for steering wheel trim.
The most relevant of them are braids made of leather materials, fur, silicone, and foam rubber covers. To create a braid yourself, you need to think about what material is best to use for the future cover.
Before you start creating the braid, you need to measure the steering wheel - the length of its circumference, as well as the rim. Cut out the required strips from the required material.
Then you should sew the parts on both sides, leaving a few millimeters from the edges. To refine the knitting needles, you must first make patterns for the future model. Wrap the steering wheel well with stretch film and glue several layers of tape on top.
Carefully winding the knitting needles. In the center you need to draw a line from the inside of the workpiece. This will be the place for the seam. Then you need to divide the steering wheel into fragments along the spokes.
Cut the tape with a knife - this will be the basis for the future braid. Using chalk, you need to transfer all the contours to the material, carefully drawing each resulting bend.
Afterwards, you should cut out the part, stepping back from the edges by a millimeter. This action will further contribute to a greater density of the stretched braid on the steering wheel.
Next, you should either stitch on a typewriter or manually arrange the parts together. The edges of the future cover need to be greased with glue and secured to the steering wheel. The joints should be invisible. Thus, you get a steering wheel cover yourself.
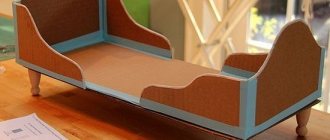
How to make a steering wheel from cardboard and candy with your own hands step by step?
Before you start making a steering wheel from candies, prepare everything you will need in the process: scissors and cardboard, foam rubber and a pencil, glue and a special gun, foil of different colors and, of course, the main material - candies, of which you will need about 1 kg.
Once you have everything you need at hand, let’s start creating:
- Step 1. Draw a steering wheel on a sheet of thick cardboard (by the way, you can use a cardboard box if you don’t have regular cardboard sheets). You can use a compass, and if your steering wheel is supposed to be large, then simply take a thick “gypsy” needle and tie a pencil at the end of the thread threaded through it. The needle will act as a compass needle, and with a pencil, pulling the thread, you can draw a circle. If you are bad at drawing, then download a template from the Internet, print it and transfer it to cardboard. If the brand of the car matters, draw a logo or, again, print it and stick it on. You can also use ready-made stickers that are sold in stores.
- Step 2. Using scissors, cut out the outline of the steering wheel.
- Step 3. If your steering wheel will have internal cutouts, mark them with a pencil and cut them out using a utility knife.
- Step 4. We wrap our cardboard blank with foam rubber (you can use synthetic padding instead) - this will make the steering wheel soft and voluminous. To make the foam stick better, attach it with glue (PVA is suitable). Now set the workpiece aside and let it dry.
Turning the steering wheel
- Step 5. It's time to decorate the gift. Attach foil of different colors to the future steering wheel with a glue gun - this will make it festive.
Candy steering wheel: step-by-step photos
- Step 6. We also glue the main contents of the steering wheel - candies - using hot glue. It goes without saying that the candies are in wrappers, but you still need to apply the glue carefully so that the contents do not melt.
All you need to do is package it beautifully.
That's all, your candy sweet steering wheel is ready. You can paste candies only on the outer side, or on the inside. If you want to make the design brighter and more festive, add beads or rhinestones.
Option to design a sports steering wheel yourself
We'll look at how to make a sports steering wheel yourself below. For it, you need to take material for the future case - leather is better.
You should measure the exact dimensions of the steering wheel. For more convenient work, it is better to remove it. Wrap with film, then tape. Mark future seams with a pencil. Divide the workpiece into several parts, then label each of them with numbers.
Transfer the dimensions of the blanks onto paper, then onto the material. Sew with thread yourself or using a sewing machine.Then you should pull it onto the steering wheel, it should be pulled tight. The seams that tighten both sides are called sports seams.
The entire steering wheel is tightened using these seams, then the necessary places are glued with glue. Thus, we get a sports steering wheel.
How to make a steering wheel from candies and polystyrene foam with your own hands?
- Instead of cardboard, you can use foam for the candy steering wheel base. A square with a side of 24 cm and about 3 cm in thickness will do. By the way, polystyrene foam can be replaced with penoplex.
- The remaining materials for work are similar to those described in the previous method: a ruler and a pencil, scissors and a glue gun, sheets of corrugated paper, a sticker for the brand of car you need and about half a kilogram of flat-bottomed candies.
- Use appropriately sized plate, pan, or lid Make another circle inside it, a couple of centimeters smaller in diameter. To make the steering wheel look like a real one, use 3-4 spokes 3 cm wide. All this should be cut out and trimmed around the edges.
- Corrugated paper is needed to cover the steering wheel. To do this, you need to cut out a square larger than the steering wheel and glue it to the workpiece so that you have about a centimeter left to bend the paper. Do this on both sides of the steering wheel and glue along the edges, covering the joints with either a strip of paper or ribbon.
- Now we glue the chocolates. Attach each one with double-sided tape to a cardboard square, which will prevent it from melting when you use the glue gun to stick the candies to the steering wheel. That's all, stick the logo in the center of your steering wheel and hand it over!
DIY candy steering wheel: photo
Lazy steering wheel made by yourself
We’ll look at how to make a lazy steering wheel yourself below. To mount the lazy bar on the steering wheel, you need to choose a place to mount it.
Then, using a clamp, you should select the diameter of the car's steering wheel. In this case, seals will come to the rescue. Basically, it is installed in places at ten and two o'clock, at eight and four o'clock, and also on top.
If you use it every day, the second option is perfect. It will be more convenient to drive and change gears.
It is important to secure it correctly so that it does not slip. It is also worth choosing the thickness of the seal correctly, then the handle will not have deviations.
Craft product Crafts for boys Emergency situation Painting Game steering wheels for kindergarten Wood
reverse side of the steering wheels
I’ll be glad if someone finds this idea useful))
Well done! And most importantly, it’s educational.
Thank you, exactly))
Thank you) the boys are happy!
Hello! what a great idea. )
Can you tell me more about making the steering wheels? What and how did you paint them?
Good evening, sorry for not answering right away. First I sanded it, primed it, then painted it with white acrylic paint after drying. I already painted those steering wheels that needed color (for the military, taxi, fire), then I made a drawing and signed it, and for the ambulance, police and fire, I found suitable stickers from the child, stuck them on and varnished everything. If something is not clear, ask. Glad to help! Thank you!
The steering wheels turned out great!
Thank you