Our world is amazing in itself, but sometimes you want to bring a little more magic and enchantment into it! Few people know that you can make a real magic wand yourself!!! So how? Do you want to know how to make a magic wand, following all the magical rules and secrets, how to handle and store it? Follow our instructions exactly, and you will have a personal magic wand that will certainly lift your spirits, serve as an excellent attribute for photo shoots, and help you feel like Harry Potter or an excellent student, Hermione.
Wooden magic wand
A variety of pictures of a magic wand can be found on the Internet, and the most popular among them are magic wands made of wood. A magic wand must be original, highlight the taste of its owner and fully meet his expectations. That is why the choice of material must be taken responsibly.
A wand is a real conductor of miracles, and the best material for such a thing is wood, which reflects the elements and absorbs everything that has happened around it for centuries.
Finding a branch for a wand will not be difficult; to do this, you just need to go to a park or forest, choose a tree you like and take a dense branch from it to make your magical relic.
To make a real magic wand with magic, you need to take the material for it on the waxing Moon and believe that it will bring you many miracles and positive emotions. A magic wand made of wood maintains a strong connection with the spirits of the forest and has a special power that lies within it.
From a magical wood item
The most important aspect is the type of wood. The magical properties of the wishing wand depend on it. Therefore, you should choose depending on the desired effect.
- Oak is great for using force; you can use it to punish an offender.
- For love witchcraft, you can use jasmine, ash, and acacia. Rowan is not used in love witchcraft, as it is a husband-growing plant.
- For simple material desires, birch and poplar are suitable.
The tree must “accept” the person and give him “consent.” This can be easily felt next to a tree. Problems usually do not arise at this stage.
It is important to pay attention to the following:
- You can go to the tree only in clean, light-colored clothes.
- Be sure to be in a good mood and with good thoughts.
- Before going for a branch, you need to take a small bag of salt with you. Throw it away on the way home.
- Under no circumstances should you talk to people on the way to the tree and back.
You should simply carry the extracted branch with you for a couple of days. So she will decide whether her holder is suitable for the role of a good wizard.
You should put the preparation under your pillow for one night. This will help you make sure whether a given tree is suitable or not. If you have nightmares at night, it is better to choose another branch, otherwise there is nothing to worry about.
After this, all you need is an empty room, a glass of sweet water (just water with 1-2 teaspoons of sugar) and following the following instructions:
- Stand in the center of the room, do not slouch or bend your head.
- Place the future wishing stick on your head and hold a glass of water in front of you.
- Close your eyes and say in a loud voice: “Wand, become magic!” Help me bring good to this world, become my companion for many years to come!” Say the words three times. Moreover, it is prohibited to change the order of words or distort them. Otherwise the spell will not work.
- After this, take the stick and put it in a glass for a couple of hours. It should be half immersed in water.
- Then take out the wand and put it in a dark, closed place for several days, and pour water on the tree from whose branch the magic item is made.
In this simple way and in the shortest possible time, you can get a real classic magic assistant for use. It will retain its magical properties for a very long time if you handle it with care and precision.
Materials for production
To make the wand beautiful and stylish, you need to prepare all the necessary materials for making this relic. It is best to think in advance about how it should look and what materials the stick will be made of.
The following elements are taken as materials:
- Tree
- Plastic
- Glitter
- Lace
- Dye
- Beads or rhinestones
- Glue
- Colored paper or confetti
The second way to create a pencil stick
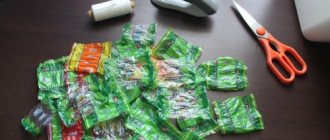
- Cover the future magic wand with wrapping paper or foil. If you use strong enough glue, you can use bright shiny candy wrappers.
- After everything has dried well, apply glue to the top of the pencil and attach New Year's rain and other bright multi-colored ribbons to it.
- Take thick cardboard, draw any shape (geometric, heart, star), cut out and attach the decoration to the top of the pencil.
These are only approximate instructions for creating magical accessories. You are encouraged to use your imagination when making a magical product, which can be varnished with glitter, painted with acrylic paints, decorated with a bow or lace, as well as many other decorations.
Magic rituals for making wands
Obviously, making a magic wand with your own hands is not difficult, but there are special magic techniques that will allow you to turn an ordinary wand into a real magic thing. To do this, you need to say the magic words out loud:
“I conjure you with the powers of the four elements - Fire, Water, Earth and Air! Endow me with their magical powers, becoming my faithful and reliable assistant!”
It is necessary to place an internal component into the stick; it must be special and have a certain meaning. If you remember the magic wand from Harry Potter, you will notice that the young wizard’s wand contained a core made of a phoenix feather.
Note!
- DIY gifts for February 23rd - a large selection of ideas for creating unusual gifts for Defender of the Fatherland Day
What to give a 2-year-old boy - a list of the best options for an interesting and useful gift (120 photo ideas)
- Papier-mâché - TOP 120 photo reviews of original products. Detailed instructions for beginners on creating beautiful crafts
You can also put a magical core in the wand - it could be a bird feather, some pebble, the hair of an animal, or field herbs. In order for the wand to absorb fiery energy, a small piece of coal should be placed inside it.
Choosing the right tree
To find your tree and understand that it is ready to share its power with you, you need to spend a lot of time wandering in the forest or park in search of the right place. You decide on a tree, you need to ask it to give you part of its power and respectfully bow to it.
You can use a branch of any tree you like - birch, beech, oak, spruce, and so on. You can use the Celtic horoscope and find out which tree relates to you according to this horoscope in order to make a magic wand out of it.
Harry Potter: The Young Wizard's Artifact
Many children dream of getting the same wand as the most famous wizard from JK Rowling's wonderful fairy tale. Many magicians dreamed of getting his artifact, but the power of this wand was very great and served only its owner.
To please your child and give him exactly the same wand as Harry himself, you need to prepare the following materials:
- Tree branch;
- Brown paint;
- Clear nail polish;
There is no need to decorate the wand, since it had the simplest possible design and did not particularly stand out in appearance. Its power was contained within the wand itself, since the core made of the feather of the magical phoenix bird made this artifact special and extremely powerful.
The paint should be dark brown so that it looks like the natural color of dark wood. You can find many photos of a magic wand on the Internet, choose a suitable design and turn it into reality.
Features of use
We have already learned what a magic wand is to make at home, but how to use this magical attribute correctly? First of all, you should know that she must constantly be close to her owner and regularly be saturated with his energy.
Note!
- Kinusaiga technique - TOP-140 photos of the best ways to create crafts using the Kinusaiga technique with your own hands + instructions for beginners
- Do-it-yourself passe-partout - a master class with step-by-step do-it-yourself schemes. Making tips + photos of the best examples
- Decoupage with napkins: TOP-150 photos of ways to decorate with napkins. Simple instructions for beginners at home
Being with you in different situations, she is imbued with your emotions and feelings, is born like a magic wand and begins to turn into your irreplaceable assistant.
You need to take her in your hands as often as possible, share your experiences and feelings with her, talk and establish close contact. It is with the help of a wand that one must perform magical rites and rituals, using it only for good.
Activating a Magic Item
Correct activation will allow you to use the wand to fulfill wishes, to transform and move objects. Young sorcerers are curiously looking for new ways to use:
Witches and good fairies do not give their magic wand into the wrong hands. The wand of a real magician should not contain negative energy from outsiders. It is enough to leave the pencil in the freezer for 20 minutes to clean the stationery item from foreign touches.- After the cooling procedure, the pencil is sharpened using a stationery knife. On a blank sheet of paper, which will then be hidden from prying eyes, they write: “Magic wand, work!”
- The last stage of turning a stationery item into a magical one is filling it with strength and energy. Sunlight serves as a power source for the pencil. It is necessary to leave the stick for 2-3 hours in a well-lit place.
The main point in activating the tool is faith in the power of magic. A magic wand filled with positive energy will fulfill the cherished wishes of young sorceresses.
How to make a glowing magic wand?
All Harry Potter fans remember how after the magic words “Lumus” the magic wand lit up and glowed. Having such a wand is the dream of most fans of this wonderful fairy tale, and making it at home will not be difficult. In order to make such a stick, you need to use:
- Soldering lamp;
- Wires:
- Flashlight with ice lamp;
- Glue gun;
From the flashlight you need to get a light bulb with a switch, you need to use a flashlight and put the ice lamp, wires and switch into a stick, which should be empty inside. Only someone who knows how to solder and understands electrical circuits can make such a stick.
Fairy magic wand
Fairies are wonderful fairy tale characters that little girls really like. They are beautiful and skillfully use magic, wielding magic wands and helping people in difficult situations.
If a little princess wants to transform into a fairy, then making a magic wand out of a pencil like a fairy’s will not be difficult. To do this, you need to take a long pencil, which should not be sharpened. You can wrap it with ribbons, stick various stones or beads on it, or sprinkle it with gold.
At the end of the stick you can make a pink or gold star, which is made from cardboard. The witch's fairy wand should be cute and cute, in white, pink, silver and gold colors.
But here you can experiment and make the stick a rainbow color, make it green, purple or blue. Even a child can create a fairy wand, so enlist the child’s support and create a wonderful artifact, putting your love and a piece of your soul into it.
The best tree species for a magic wand
- Acacia;
- Linden;
- Oak;
- Elder;
- Beech;
- Vine;
- Cherry;
- Juniper;
- Birch;
- Walnut;
- Cherry;
- Willow;
- Chestnut;
- Cedar;
- Maple:
- Laurel;
Lesson #3
Now let's make a magic wand for the girl. To do this we will need thin satin ribbons, a wooden stick and an affordable mounting option.
It's very simple, look at the step-by-step photos.
Ready!
What should the form be?
It is believed that the shape, size and color of a magic wand are not as important as it seems, since it must correspond to the desires and inner state of its owner.
The stick does not have to be perfectly smooth - it can be crooked, rough and knotty, or, on the contrary, perfectly smooth.
All decorative elements need to be carefully thought out, the stick should be comfortable to hold, it should not leave splinters, so the wood must be treated, varnished, painted or soaked in various essential oils or sea salt.
Beginning of work
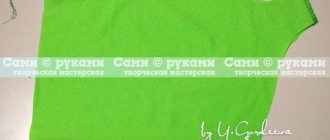
The paper needs to be rolled into a tight tube, and it needs to be rolled at an angle. You need to stick double-sided tape in the middle or diagonally of the sheet. As a result, your tube will not unfold, and it will be securely glued together with adhesive tape. The remaining free end of the sheet should be coated with PVA glue and glued to the stick. Now you need to leave it for twenty to thirty minutes until it dries. As a result, you will get a cone-shaped figure. Now the stick needs to be trimmed with scissors so that the edges are even.
Magic Wand Processing
- The surface of the stick must be sanded with special sandpaper.
- The end of the stick can be made more elongated and narrower; this can also be done using sandpaper.
- The stick is then polished and coated with paint or varnish.
There are many answers to the question of how to make your own magic wand. Making a magic wand will not be difficult, as this process is very simple, exciting and interesting.
You need to approach it with all responsibility, carefully select the tree and find exactly what you want to make your magical artifact from. A well-made wand is one that you put your soul into.
Making a wand for a child is also not difficult; it could be the wand of Harry Potter himself or a beautiful fairy sorceress. Initially, you should immediately decide what your wand should look like, what it should be made of and what magical powers it should have.
The main thing is to believe in miracles and hope that the wand will truly become your faithful and reliable assistant.
The first way to create a pencil stick
- Draw (or print ready-made images) stars of different sizes (large, medium, small). For each size you need 1 template (pattern, stencil). They need to be carefully cut with scissors. If the children are small, then in this case the help of parents will be required, but if the children already have basic skills in working with sharp objects, then this is an additional opportunity to practice.
- Each stencil must be traced 2 times on fabric (such as felt) - for example, 2 large blue stars. The operation is repeated for each template size on textiles of different colors. Carefully cut out each fabric star blank.
- On the front side of the large star, glue a medium-sized piece (of a different color), and then the smallest star. Those. You should get a three-layer star, in which the parts are glued to one another and differ in colors.
Repeat the algorithm in the same way with another star (gluing one on top of the other), in the end you will get 2 identical blanks, which must dry well so that the elements are securely fastened.
- Take a pencil (or another wooden stick), grease it with a small amount of glue and secure the end of a satin ribbon at the top, which you then carefully wrap the object from top to bottom and secure at the other end.
- Now grease the top of the pencil with glue and secure there the remains of multi-colored satin ribbons, which need to be glued one by one, adjusting the required length with scissors. All layers of glue must dry well.
- Now take 2 pre-prepared three-layer stars and glue them on the top of the pencil, on top of the ribbons. Glue is applied to the underside of a large fabric star and pressed onto the future magic wand so that the 2 stars are neatly connected to each other, and you get a single product attached to the top of the pencil.
- Decorate your magic wand with beads, beads and other decorative items, sparkles and sparkling stones to give the attribute a magical appearance.
Initially, under a large star on a pencil, instead of satin ones, you can glue ribbons used in floristry to decorate bouquets. If you stretch such a strip, fixing it with your finger and, for example, the flat side of scissors, then the strip will curl in “curls,” complementing the texture of the product and giving it a cheerful mood.