Most often, the question of how to make a spring yourself, using improvised means, does not arise. However, there are situations when a spring of the required diameter is not at hand. It is in such cases that the need arises to make this element with your own hands.
Making a small spring is quite possible
Of course, springs for critical mechanisms operating under intensive conditions are best manufactured in production conditions, where it is possible not only to select correctly, but also to comply with all the parameters of the technological process. If you need a non-standard spring for use in a mechanism that will be operated in a gentle mode, then you can make it at home.
Step-by-step instruction
Step 1
The first thing you need to do if you are going to make a spring with your own hands is to select the material for such a product. The optimal material in this case is another spring (the main thing is that the diameter of the wire from which it is made matches the cross-section of the coils of the spring that you need to make).
Step 2
Annealing the wire for the spring, as mentioned above, will allow you to make it more flexible, and you can easily align it and wind it on the mandrel. To perform this procedure, it is best to use a special stove, but if you do not have one at your disposal, then you can use any other device that heats wood.
In such a stove you need to light birch wood and, when it burns down to coals, put a spring in it, the wire from which you are going to use. After the spring is red-hot, the coals must be moved to the side and the heated product allowed to cool along with the stove. After cooling, the wire will become much more flexible, and you can easily work with it at home.
Step 3
The wire that has become soft should be carefully aligned and begin to be wound onto a mandrel of the required diameter.
When performing this procedure, it is important to ensure that the turns are located close to each other. If you have never winded springs before, you can first watch a training video, which is easy to find on the Internet
Step 4
In order for your new spring to have the required elasticity, it must be hardened. Heat treatment such as hardening will make the material harder and more durable. To perform hardening, the finished spring must be heated to a temperature of 830–870°, for which you can use a gas burner. You can determine that the required hardening temperature has been reached by the color of the hot spring: it should turn light red. To accurately determine this color, also rely on the video. After heating to the required temperature, the spring must be cooled in transformer or spindle oil.
Step 5
After hardening, the spring should be kept in a compressed state for 20–40 hours, and then its ends should be processed on a sharpening machine to make a product of the required size.
Throw it into the fire, throw it into water/oil - it’s better to throw it in the trash straight away. Not all metal is iron, and not all iron is steel. Counting turns is a waste of time. Springs require special steel (spring), heat treatment (hardenability) depends on the chemical composition, if it’s in the wrong direction, it will either fail, or it will burst, or it will stretch like an elastic band. By the way, spring steels are heat treated in molten salts, according to a complex regime with stepwise exposure at certain temperatures to form the desired structure and grain size in the metal. Throwing it into a fire and then into a river will not work. A fire with adjustable flame temperature is the smallest problem.
Look for a ready one. By the way, forget about the advice to heat it with gas and bend the coils if the spring does not fit or is too large. - guaranteed to break at the heating point. Maybe not right away, but definitely. The advice to rummage through scrap metal purchases is no longer very suitable even for Russia (although it is still possible). But in the Czech Republic... as I understand it, the author of the topic lives in Prague.
It is 100% easier to buy a ready-made machine. The Chinese ones cost nothing, and are made very well.
OFF complete - just now I saw a Ural motorcycle in Paris, with a sidecar. With French numbers, all in good order. Judging by his combat yellow parrot paint, he's a former cop or something. Although it was painted too well. Probably, the Irbit plant now makes export marketable products in this way. It definitely looks cooler than snotty Harley-Davidsons. There are fans!
How to harden a spring
Useful recommendations for masters
When creating such products with your own hands, it is enough to follow the simplest recommendations from professionals:
- The wire must be straight. If the spring is made from old material, the wire must be aligned.
- The rod must be clean from rust and other dirt. A solution of soda or store-bought substances (household chemicals for removing rust and dissolving oils) are suitable for this.
- It is recommended to wipe the wire after cleaning not with a cloth, but with sawdust.
- Steel with a diameter of more than a couple of millimeters must be burned red-hot (around 400 degrees Celsius) before being wound, and then cooled in the open air.
- During winding, it is necessary to carefully monitor the location of the turns in relation to each other.
- You can harden springs at home in several ways: in the stove, using a gas burner, and over a fire. The steel should heat up to almost 900 degrees.
The desired temperature can be determined by the color of the metal - it becomes almost white. Afterwards, the wire must be placed in oil or other liquid medium that can cool sufficiently slowly. Alternatively, you can use a soap solution.
- It is worth recalling that due to too rapid cooling the metal may crack.
- It is recommended to keep the spring created at home compressed for a certain time. Typically this period ranges up to 40 hours. But no less than 20.
Properly performed heat treatment can reduce residual deformation and increase the percentage of elasticity. Hardening makes it possible to obtain increased quality indicators, thanks to which the spring can be used in any product.
How to make a spring at home with your own hands
Why oil appears in the distributor and what to do to eliminate it
Most often, the question of how to make a spring yourself, using improvised means, does not arise. However, there are situations when a spring of the required diameter is not at hand. It is in such cases that the need arises to make this element with your own hands.
Making a small spring is quite possible
Of course, springs for critical mechanisms operating under intensive conditions are best manufactured in production conditions, where it is possible not only to select correctly, but also to comply with all the parameters of the technological process. If you need a non-standard spring for use in a mechanism that will be operated in a gentle mode, then you can make it at home.
What you need
To make your own spring, prepare the following supplies and equipment:
- steel wire, the diameter of which should correspond to the cross-sectional size of the turns of your future spring product;
- a regular gas burner;
- a tool that every locksmith workshop must have;
- bench vice;
- a stove, which can also be used as a heating device for household purposes.
It is easier to wind a spiral using devices, the design of which depends on the size and stiffness of the spring
The wire, if its diameter does not exceed 2 mm, does not need to be subjected to preliminary heat treatment, since it is easy to bend without it. Before winding such wire onto a mandrel of the required diameter, it must be unbent and carefully aligned along the entire length of the winding.
When choosing the diameter of the mandrel, you should take into account the size of the spring that you are going to make at home. To compensate for the elastic deformation of the wire, the diameter of the mandrel is chosen slightly smaller than the required size of the internal cross-section of the future product.
Coil spring winding device
If the diameter of the wire from which you are going to make a spring with your own hands is more than 2 mm, it must first be annealed, since without such a procedure it will be difficult to align it and wind it onto the mandrel.
Step-by-step instruction
Step 1
The first thing you need to do if you are going to make a spring with your own hands is to select the material for such a product. The optimal material in this case is another spring (the main thing is that the diameter of the wire from which it is made matches the cross-section of the coils of the spring that you need to make).
By selecting material from an old spring, you will be sure that the wire is made of hardened high carbon steel
Step 2
Annealing the wire for the spring, as mentioned above, will allow you to make it more flexible, and you can easily align it and wind it on the mandrel. To perform this procedure, it is best to use a special stove, but if you do not have one at your disposal, then you can use any other device that heats wood.
Step 3
The wire that has become soft should be carefully aligned and begin to be wound onto a mandrel of the required diameter.
When performing this procedure, it is important to ensure that the turns are located close to each other. If you have never winded springs before, you can first watch a training video, which is easy to find on the Internet
You can use a screwdriver to wind a small spring.
Step 4
In order for your new spring to have the required elasticity, it must be hardened. Heat treatment such as hardening will make the material harder and more durable. To perform hardening, the finished spring must be heated to a temperature of 830–870°, for which you can use a gas burner.
You can determine that the required hardening temperature has been reached by the color of the hot spring: it should turn light red. To accurately determine this color, also rely on the video.
After heating to the required temperature, the spring must be cooled in transformer or spindle oil.
Heated steel colors
Step 5
After hardening, the spring should be kept in a compressed state for 20–40 hours, and then its ends should be processed on a sharpening machine to make a product of the required size.
After completing all the above procedures, you can begin to use the spring you made with your own hands for its intended purpose.
Material requirements
The strength parameters and fault tolerance of a product are largely determined by the material from which it was decided to be made. Metallurgists distinguish special spring steels in the classification of steels. They have a specific crystal structure, determined both by the chemical composition and the heat treatment of the products. Highly alloyed alloys of increased purity and high metallurgical quality provide high elasticity and ductility, and are able to retain their physical and mechanical properties after repeated deformations.
Steel 60S2A
Spring alloys 60S2A, 50HFA and stainless steel 12Х18Н10Т have gained popularity among mechanism designers.
Hardening steel over an open fire
Shock absorber support
It is possible to harden metal at home. For an easy and useful hardening process, you need to light a fire and prepare two large containers. There should be a lot of hot coals in the fire.
Diesel or motor oil is poured into one container, clean water, preferably from a well, is poured into the other. You should first prepare a tool with which you will need to hold the hot product.
It is advisable to find blacksmith pliers, but if they are not among the tools, you can arm yourself with something else similar to pliers.
When the preliminary work is done, metal drills or other objects are placed in the very center of the flame, that is, on hot coals.
Rich white coals are hotter than others
It is important to watch the hardening process - the flame should be crimson, not white. If the fire is painted in the last color, then there is a threat of overheating and even burning of the metal
It is necessary that the color is distributed evenly across the entire area of the fire. Black spots should not appear on the edge of the product that is being hardened.
And if the metal turns blue in places, this indicates that the material has softened too much and become too plastic. This should not be allowed under any circumstances.
Therefore, the process requires increased care, because you can overdo it and heat the ax blade white-hot.
When the metal equipment is heated in the fire, it is time to remove it from the high heat.
A hot object must be lowered into a container of oil many times with a frequency of 3 seconds, gradually increasing this period of time.
You cannot hesitate with these actions; you need to carry out operations to harden the metal edge quickly and sharply.
Next, the object is immersed in a bucket filled with water, which will have to be shaken a little.
At this stage, do not forget to be careful, as oil droplets on a knife or ax may burst into flames if they end up in water. The table shows how to correctly and incorrectly immerse various parts, including drills and disc cutters, in water:
The table shows how to correctly and incorrectly immerse various parts, including drills and disc cutters, in water:
Very often there is a need to harden drills. It is not recommended to immerse thin long elements flat into water, otherwise the lower layer of metal, cooled first, will shrink.
Video:
Drills should be lowered into the liquid with the thicker end.
If you follow all the rules and precautions, then hardening yourself will not seem like a complicated and dangerous procedure. It will bring the desired guaranteed effect
But sometimes at home you have to harden steel equipment or melt non-ferrous metal. Such operations require extremely high temperatures, 700-900 degrees.
And only a muffle furnace or an electric furnace can heat metal objects to this level. You can make a muffle furnace yourself. It is unlikely that you can make an electric oven at home.
Stretched spring
Why autobuffers do more harm than good
The stretched springs 39, connected to the lever 20 by means of a spring holder 19 and the earring 24, as well as the compressed spring 17, connected to the spring winding lever 14 by means of a guide 15, rotate the intermediate shaft 10 counterclockwise. Lever 14, turning together with shaft 10, with finger 8 moves lever / / connected to the free release mechanism. The latter, through a rocker arm 13 and a rod 6, is connected to a lever 52, rigidly mounted on a shaft 49, and turns this shaft clockwise. Since shaft 49 is connected by a lever transmission to the switch shaft, the switch is turned on. ON appears in the drive housing window.
A stretched spring can lift a load to a height.
The stretched spring AC presses the brake pad C to the wheel rim so that the angle AC B is equal to a. The coefficient of friction of the pad on the rim is equal to / g. Find the friction force when the wheel rotates counterclockwise.
Let a stretched spring be fixed at one end, and let the other end, moving, do work. It must be taken into account that the force with which the spring acts does not remain constant, but changes in proportion to the stretch. If the initial tension of the spring, counting from the unstretched state, was equal to /, then the initial value of the elastic force was Fkl, where k is the proportionality coefficient, which is called the spring stiffness. As the spring contracts, this force decreases linearly from the value N to zero.
Potential energy of a stretched spring or rod.
| Schematic diagram of an electromagnetic drive.| Spring drive PP-61. |
The stored energy from the stretched springs and the lifted weight is used to activate the switch when the retaining latch is released. Manual switching on and off is carried out using buttons 4, and remote and automatic switching is carried out by supplying current to the switching and switching electromagnets, respectively.
| Flow switch. |
The bellows is compressed until the stretched spring balances the force of the pressure difference. The movement of the bellows is transmitted to the plunger, which changes the inductance of the coil.
In this case, the force of the stretched spring directed upward is equal to the weight of the load.
The movement of lever 5 is prevented by stretched springs 6, which tend to keep the lever in the extreme right position. Thus, lever 5 is under the action of two forces: the pressure force of the balls on the flat plate Psh and the force of the stretched springs Rpr.
Let, for example, a stretched spring be fixed at one end, and the other end, moving, do work. When finding work, we must take into account that the force exerted by the spring does not remain constant as the tension changes. We have seen (§ 37) that the elastic force of a spring is proportional to its extension. If the initial tension of the spring, counting from its unstretched state, was equal to /, then the initial value of the elastic force was Fkl, where k is the proportionality coefficient, which is called the elasticity coefficient of the spring. As the spring contracts, this force decreases uniformly from the value N to zero.
| On to the exercise. |
Let, for example, a stretched spring be fixed at one end, and the other end, moving, do work. When finding work, we must take into account that the force exerted by the spring does not remain constant as the tension changes. We have seen (§ 37) that the elastic force of a spring is proportional to its extension. If the initial tension of the spring, counting from its unstretched state, was equal to /, then the initial value of the elastic force was F kl, where k is the proportionality coefficient, which is called the elasticity coefficient of the spring. As the spring contracts, this force decreases uniformly from the value N to zero.
Let, for example, a stretched spring be fixed at one end, and the other end, moving, do work. When finding work, we must take into account that the force exerted by the spring does not remain constant as the tension changes. We have seen (§ 37) that the elastic force of a spring is proportional to its extension. If the initial tension of the spring, counting from its unstretched state, was equal to /, then the initial value of the elastic force was Fkl, where k is the proportionality coefficient, which is called the elasticity coefficient of the spring. As the spring contracts, this force decreases uniformly from the kl value to zero.
Homerpalooza
School bus driver Otto is awarded an award for the safest bus driving... but in reality, he just fell asleep at the wheel and the bus full of children ran over.
- There are special levers that move the cushion and spring away from the tape. Even further, between the spring and the coils, there is a magnetic screen that prevents
- The accelerator also has a neutral mode. If you loosen the pressure on the pedal without releasing it, the electric motor goes into idle mode, and the car just
- 2015, eased sanctions against Russia in the missile industry, allowing limited supplies of rocket fuel components such as hydrazine to Russia
This website uses cookies. Cookies remember you so we can improve your online experience.
Heating - spring
The springs are heated in a flame or muffle furnace.
To heat the springs for hardening, any unit (furnace, forge or gas burner) that provides a temperature of at least 1000 C can be used.
When heating springs for normalization and hardening, it is necessary to take measures to prevent changes in the shape and size of the springs during the heating and cooling process. Springs need to be heated in a lying position, since a spring placed on its end will shrink under its own weight and change its shape. Under the furnace, where the springs are heated, it must certainly be even and smooth. Springs with dense winding (without gaps between the turns) should be tightly tied with wire along their entire length before being placed in the oven, so that they do not spread apart when heated.
When heating springs made of manganese steels, which are very sensitive to overheating, it is necessary to especially carefully monitor the furnace temperature, since even with relatively slight overheating, strong growth of the steel grain occurs.
When heating springs for hardening, measures must be taken to prevent changes in size and shape. To do this, it is necessary, first of all, for the springs to be heated in a lying position, since a spring placed on its end can shrink when heated under the influence of its own weight. The area under the stove on which the springs are placed must be smooth and even so that the springs do not bend. To avoid bending, it is recommended to put long thin springs on a mandrel made from a piece of thin-walled pipe. Springs with dense winding (without gaps between the turns) should be tightly tied with wire along the generatrix of the cylinder for the entire length so that they do not spread apart when heated.
When heating springs for hardening, it should be borne in mind that all steels alloyed with silicon are very prone to decarburization. Therefore, you need to limit yourself to holding them for the shortest possible time at the hardening temperature at the rate of 1 minute. In addition, measures must be taken to prevent decarbonization, at least the most basic: sprinkle charcoal or used carburizer on the stove.
| Heat treatment modes for springs. |
When heating springs in muffle or flame furnaces, to prevent decarbonization of the surface layer of steel, coal powder mixed with 10% soda is periodically poured under the furnace.
The described phenomenon manifests itself when the springs are heated after winding. During this heating, the spring first unwinds somewhat, and then, especially as the temperature rises, springs, for example made from 50HFA steel, begin to twist with an increase in the number of turns. The phenomena of thermoplastic aftereffect can manifest themselves to one degree or another in all cases of heating of parts after cold plastic deformation. When tempering parts after straightening, the possibility of additional deformation should be taken into account.
Light isothermal hardening of springs made of steel 50HFA: heating of springs in a salt bath (KS1) to 860 10; shutter speed 2 5 U3 min. NaOH 5 8 Na2CO3) at 330 5 with intensive stirring of the alkali with a mechanical stirrer or compressed air; exposure 20 - 30 min.
Sometimes, to speed up stabilization and more uniformly distribute internal stresses, heating the spring is used. As a result of this operation, residual bending deformations occur in the spring and it acquires a shape close to the Archimedes spiral. This operation is called spring capping. It ensures that the counteracting moment of the spring is almost constant over time. When forced, the material of the metal tape receives hardening, which strengthens the spring, as it reduces the bending stresses that arise during its operation.
Soldering cracks in the spring should be done with silver solder, which is associated with heating the spring at the soldering points to a high temperature. High heating of the spring can lead to a change in its mechanical properties, which can only be restored by heat treatment.
| Designs of springs for tensioning directly heated cathodes. |
Already at dark red heat, the elasticity of the springs drops significantly compared to the cold state, and therefore, in order to avoid heating the spring by the cathode filament current passing through it, the diameter of the wire for it must significantly (in any case, no less than 3 times) exceed the diameter of the cathode filament.
Examples of heat treatment technology for springs: light hardening of cold-winding springs from wire with a diameter of up to 6 mm from steel 60C2A i 1 ]; heating the springs for hardening in an electrode salt bath (NaCl) to 820; quenching in an alkaline bath (63% KOH and 37% NaOH) at 270 for 20 minutes.
Features of the technology
Depending on the intended purpose of such parts and their specifications, it is appropriate to talk about the features of their production technology. The manufacture of products from materials with a round cross-section can be done by cold or hot winding. The first method usually produces small/medium springs (from wire up to 8 mm in diameter), and the second - large ones.
In addition, the difference is determined by the use of different types of heat treatment, which is associated with the need to give the products certain characteristics.
Technology of cold coiling of springs without hardening
The coiling of the blanks is made from wire, which was previously patented by the manufacturer. This process involves heating to a temperature above the transformation range, which perfectly prepares the material for subsequent cold plastic deformation.
The blanks formed by coiling ensure compliance with such mandatory parameters as:
- Diameter (this parameter can be internal, middle or external).
- Number of turns provided (working and general).
- Step and height dimension of the manufactured part (changes possible as a result of subsequent processing are taken into account).
- The correctness of the compression of the outer turns.
The next stage is mechanical finishing (facing), during which the end turns (non-working) are processed until a surface is formed perpendicular to the axis. After this, heat treatment is carried out - in this case - only low-temperature tempering. This imparts permanent elastic properties and eliminates the stresses created during winding. An important technological point is to correctly determine the temperature and exposure time, focusing on the diameter of the selected material and the requirements of the standards. Heat-treated springs are subject to control and testing to ensure that the parameters comply with the requirements of the drawings.
If, according to operational requirements, an anti-corrosion coating is provided, its application becomes the last stage in the production of such parts. Only if galvanization was used are the parts heated to dehydrate them.
Technology of cold coiling of springs with quenching and tempering
The difference between this technology and the previously described one begins only at the heat treatment stage. Previous steps: winding and the necessary mechanical processing are performed in exactly the same way.
The first stage of heat treatment is hardening: heating to a certain temperature (depending on the material used), holding the part for a specified time and forced (rapid) cooling in a special environment, mainly in oil (sometimes in water, saline solution, etc.)
Important: to heat the springs for hardening, they are placed horizontally to avoid subsidence under their own weight
The heat treatment is completed by tempering - heating to a relatively low temperature and holding for a strictly defined time to impart the necessary qualities.
After this, parameters such as hardness and correct compression/recovery are monitored. If provided for by the manufacturing technology of a specific part, sandblasting, shot hardening, and application of a corrosion-preventing protective coating are used.
Technology of hot coiling of springs with quenching and tempering
Hot winding involves preheating the material in an electric or gas oven (a possible option is the use of high-frequency currents).
The workpiece prepared in this way is subjected to winding according to the requirements of the technical specifications, layout, as well as trimming and finishing of geometric values using tools. After this, the part is submitted for hardening, the parameters of which are determined by the material used, and then for tempering.
At the end of the heat treatment, parameters are monitored and, if necessary, crimping, capping, other additional operations and surface treatment are carried out. The production process ends with dyeing and drying.
How to harden steel over an open fire
As mentioned above, you can harden steel at home, using an open fire for heating. Naturally, such a process should begin by starting a fire, in which a lot of hot coals should form. You will also need two containers. You need to pour mineral or synthetic oil into one of them, and ordinary cold water into the other.
In order to remove hot iron from a fire, you will need blacksmith tongs, which can be replaced with any other tool of a similar purpose. After all the preparatory work has been completed, and a sufficient number of hot coals have formed in the fire, objects that need to be hardened can be placed on them.
The color of the formed coals can be used to judge the temperature of their heating. Thus, coals whose surface has a bright white color are hotter.
It is also important to monitor the color of the fire’s flame, which indicates the temperature regime in its interior. It is best if the fire flame is colored crimson rather than white.
In the latter case, indicating that the flame temperature is too high, there is a risk of not only overheating, but even burning the metal that needs to be hardened.
Heated steel colors
The color of the heated metal must also be carefully monitored. In particular, black spots must not be allowed to appear on the cutting edges of the tool being processed. Blue discoloration of the metal indicates that it has softened greatly and become too flexible. It cannot be brought to such a state.
After the product has been calcined to the required degree, you can proceed to the next stage - cooling. First of all, it is lowered into a container with oil, and this is done often (every 3 seconds) and as sharply as possible. Gradually the intervals between these dives increase. As soon as the hot steel loses its brightness, you can begin to cool it in water.
Steel tarnish colors
There are certain subtleties when cooling hardenable drills. So, they cannot be lowered flat into a container with coolant. If you do this, then the lower part of the drill or any other metal object that has an elongated shape will cool sharply first, which will lead to its compression. That is why it is necessary to immerse such products in coolant from the wider end.
For heat treatment of special grades of steel and smelting non-ferrous metals, the capabilities of an open fire are not enough, since it will not be able to heat the metal to a temperature of 700–9000. For such purposes, it is necessary to use special furnaces, which can be muffle or electric. If it is quite difficult and expensive to make an electric furnace at home, then with muffle-type heating equipment this is quite feasible.
Equipment and fixtures used
To make an elastic element, specialized equipment is required. These are winding machines. You can make a part on a regular lathe, but it will require additional equipment with special equipment. Medium and large series are produced on semi-automatic machines that operate with minimal operator intervention. You can also make a spring from wire by hand. This will also require special equipment.
At the next stage of machining, the ends are ground on face grinding machines. For single production or small series, this can be done with a grinding wheel.
Heat treatment is carried out using mandrels that prevent product deformation in specialized furnaces for hardening and tempering. Both operations can be done in a universal oven.
Equipment and fixtures used
For quality control, load installations and measuring systems are used. In case of single production, measurements can be made with a universal tool.
Hardening technique
Simply put, hardening technology consists of two actions - heating the sample to a high temperature and cooling it.
Just don’t assume that everything is elementary, because groups of metals differ in their unique structure and characteristics.
Do-it-yourself heat treatment of metal is justified if:
The price of professional hardening of 1 kg is 100-200 rubles. Hardening small parts will cost less. The price for this service ranges from 6 to 20 rubles.
If you harden equipment at home, it is important to know some of the subtleties of this process. Heating requires uniformity, it must occur without the appearance of black or blue spots on the object
Under no circumstances should the sample be heated to extreme levels.
Heating requires uniformity; it must occur without the appearance of black or blue spots on the object. Under no circumstances should the sample be heated to extreme levels.
The fact that the product is heating up correctly will be indicated by its coloring in a bright red color.
Video:
For hardening a metal object such as a drill, equipment such as an electric furnace or thermal oven, as well as a blowtorch and a large fire are suitable.
What is more suitable - a furnace, an electric furnace or an open fire depends on the temperature required by the type of metal being processed.
When it is necessary to harden not the entire surface of a metal object, but only a certain place, jet hardening is used. It assumes that a stream of cold water is directed at the object pointwise.
The cooling method for a drill, screwdriver, chisel or crimp may vary. It can be carried out in several stages, one-time and abruptly, or gradually. It all depends on the type of metal.
If you plan to carry out an operation with one cooler, then special equipment, such as a bucket or barrel, is prepared. Even a bath is suitable for this.
When a two-stage cooling scheme is needed to lower the temperature of a metal object, two different media are used. This procedure also ensures the tempering of the metal.
So, first, drills or disk parts are cooled with water, then with oil, which can be machine or mineral.
Cooling with oil is carried out secondarily, since there is a risk of ignition due to high temperature.
Temperature conditions and other hardening indicators are reflected in the table below.
How much does a rainbow toy cost?
Rainbow spring
“
Toy
”, MIX colors (451639) - Buy at a price of 32.00 rub.
Interesting materials:
How to remove all passwords on Android? How to remove all passwords from Google Chrome? How to remove all line breaks in Word? How to delete all songs from iPhone via iTunes? How to delete all emails from a specific sender? How to delete all emails from Google Mail? How to delete all emails from gmail? How to delete all letters from mail? How to delete all letters from Rambler mail? How to delete all emails in gmail?
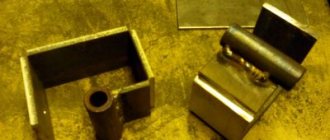
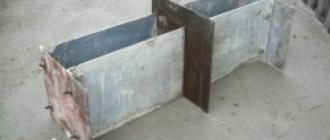
Self-production of a chamber for hardening metal
A muffle furnace, which is quite possible to make yourself at home, allows you to harden various grades of steel. The main component that is required to make this heating device is refractory clay. The layer of such clay that will cover the inside of the oven should be no more than 1 cm.
Diagram of a chamber for hardening metal: 1 - nichrome wire; 2 - inner part of the chamber; 3 — outer part of the chamber; 4 - rear wall with spiral leads
In order to give the future furnace the required configuration and desired dimensions, it is best to make a mold from cardboard impregnated with paraffin, onto which fireproof clay will be applied. Clay, mixed with water to a thick, homogeneous mass, is applied to the wrong side of the cardboard form, from which it will peel off after complete drying. Metal products heated in such a device are placed into it through a special door, which is also made of refractory clay.
After drying in the open air, the chamber and door of the device are additionally dried at a temperature of 100°. After this, they are fired in a furnace, the temperature in the chamber of which is gradually raised to 900°. When they have cooled after firing, they must be carefully connected to each other using metalworking tools and emery cloth.
Clay heater with a walled nichrome spiral
Nichrome wire is wound onto the surface of the fully formed chamber, the diameter of which should be 0.75 mm. The first and last layers of such winding must be twisted together. When winding the wire around the camera, you should leave a certain distance between its turns, which also needs to be filled with fireproof clay to eliminate the possibility of a short circuit. After the layer of clay applied to provide insulation between the turns of nichrome wire has dried, another layer of clay is applied to the surface of the chamber, the thickness of which should be approximately 12 cm.
After complete drying, the finished camera is placed in a metal case, and the gaps between them are filled with asbestos chips. In order to provide access to the inner chamber, doors, lined with ceramic tiles on the inside, are hung on the metal body of the oven. All existing gaps between structural elements are sealed using refractory clay and asbestos chips.
Ready homemade camera
The ends of the nichrome winding of the camera, to which electrical power must be supplied, are brought out from the rear side of its metal frame. In order to control the processes occurring in the inside of the muffle furnace, as well as measure the temperature in it using a thermocouple, two holes must be made in its front part, the diameters of which should be 1 and 2 cm, respectively. From the front part of the frame, such holes will be closed with special steel curtains. The homemade design, the manufacture of which is described above, allows you to harden metalworking and cutting tools, working elements of stamping equipment, etc. at home.
https://youtube.com/watch?v=9jQTzpBa8MQ
Instructions for making a spring
The device you will be making will allow you to make turns on the wire, turning it into a spring. You need to start by preparing the boards. To do this you will need a nail and a drill.
- Look and evaluate the size, or rather, the diameter of the rod at the cut. This is exactly the size of the hole made in the planks with a drill. You can attach the edge of the spring to the board (on the side), mark the diameter with a pencil and make the hole a few millimeters smaller, because when the wire is wound, turning into a spring, the rod will make the hole a little larger.
- Take both planks, knock them down with a nail or tie them and fasten them with thread, make a hole with a drill. If you don’t know how to make a spring with your own hands, you need to follow step-by-step steps, and then everything will work out. Now you need to make another hole to insert a rod into it, secure it in order to start winding the spring.
- Before you start tightening the spring, you need to prepare the rod. It is necessary to make a handle at the end of the rod, bending the workpiece slightly to the side. This will help make coils on the wire and turn it into a spring. You can attach a plastic or wooden block to the iron handle to make it more convenient to hold.
- Now place the rod in the hole, see where the intersection of it and the upper hole will be. You will need some wire which you will place in the hole made for the rod to secure it. Now place a mark on the rod where it intersects with the top hole. You can paint it and then file it to form a cell. Make room for the wire to fit.
- You need to place the wooden blanks in a vice and secure them there. Then you should insert an iron rod into the holes made, into which you place the wire so that it ends up in the cell prepared in advance. You need to insert the edge of the wire into the hole and secure it in the hole on the rod. When everything is prepared, you can begin to invent the spring itself.
- Start making rotational movements with the rod, holding it by the prepared handle. Twist the wire in a circle to make turns. Rotate the handle of the rod along its axis, the spring blank will be wound. When the wire is completely wound around the rod, it will pass through the other side of the wooden device, but in the form of a spring. That is, the spring itself will come out at the bottom, so place the vice on the edge of the table. Carefully remove the spring without removing the rod from the vice. Now the spring is ready!