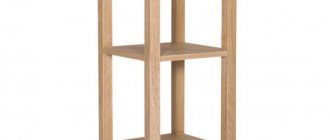
When you prepare cookies, you will probably want to make molds for baking this very dessert. In this case, you can quickly and easily make your own molds rather than buying them from the store. It only takes a few household items to meet your needs. For more traditional, reusable ramekins, you can use an empty soda can. If you want to cut out unusual shapes from the dough, it is best to use durable photo paper and make your own cookie stencil from it.
Preparing the Tin Can
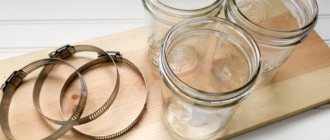
First you need to prepare a tin can. How to do it? Very easy. It needs to be cleaned with detergent and water. The water must be hot. Do not force-dry the jar; it is better to let it dry on its own. Place the jar, hole side down, to dry for at least two or three hours before starting to make the cookie cutter.
If you don't have bottle cleaner, you can roll up a paper towel to clean the inside of the jar. However, be careful in the area around the hole as the edges may be sharp.
Cutting off unnecessary parts
Cut off the top and bottom of the tin using sharp scissors or a knife, whichever works best for you. Press one of the blades of the scissors into the jar about two millimeters from the lip on the top of the jar, and then work the jar around the blade to remove the top. Then do the same with the bottom of the can so that you have an aluminum cylinder that is open at the top and bottom.
If your scissors are not sharp enough to cut into the can, try using a knife to pierce the metal and then finish cutting with scissors.
If you don't have a tin can, use a sheet of tin if you have one.
Warning: The edges of the can can be very sharp once you start cutting them. It's best to wear a pair of thick rubber gloves or work gloves while you're cutting and processing metal.
Cut the jar into strips
Use scissors to cut strips from the remaining can. Cut along the straight side of the cylinder so that the aluminum can lie on the table like a sheet. Then carefully cut strips at least five millimeters wide. You can use a marker to start by drawing neat stripes and then cut them off. But if you can do a similar procedure by eye, then go for it.
A student at the Vietnam Police Academy shared how she takes care of her facial skin.
Women's jeans: before you buy them, you need to pay attention to one detail
“We are still friends”: Derevianko commented on the breakup with his wife
For larger cookie cutters, cut the strips horizontally on the aluminum sheet so they are as long as possible. For small cookie cutters, trim the strips vertically to make them shorter.
Bend the strips into shapes
Bend the strips into the shapes you like. Carefully take the strips into your hands and shape them into the desired shape. Remember that they don't have to be perfect, as you will be able to bend them slightly as needed if they don't produce the results you want.
If you have a more complex shape, such as a mustache, try drawing the template on a piece of cardboard. Then cut out a shape from cardboard and bend the aluminum around the perimeter to make a cookie cutter.
For some simple shapes you can make, try wrapping strips around a cup to make a circle. You can bend different parts of the circle to make a heart or cloud shape. You can also easily make a triangle, square or crescent.
Preparing materials
To make a beautiful gingerbread mold with your own hands, you need to prepare the appropriate tools and materials, as well as take care of certain safety.
It is advisable to stock up on everything you need in advance, so that once you start work, you don’t have to interrupt it to look for the missing tools. So, for production you will need:
- metal tape (steel or tin, mounting tape will also work);
- pliers;
- metal scissors;
- ruler;
- thick gloves.
As you can see, the set is quite small - almost any home has one. Having everything listed above, you can safely get to work.
Glue the ends together
Glue the ends of the cookies together using edible glue. Once the mold is ready, cut off the excess aluminum and fasten the two ends of the strip together. Seal them with a food-safe adhesive such as Permabond or Hot Melt and let the adhesive dry for at least 6 hours before using the cookie cutters.
It’s good to wash often: myths about shampoo and hair care that only harm
Rare shot: Viktoria Isakova showed her grown-up daughter from Yuri Moroz (new photo)
A Brazilian travels 36 km by bike every day to take his loved one home.
If you don't have edible glue, you can use regular tape to secure the edges. If you use tape, the cookie cutters will be more delicate, so be careful when using them.
After you use the cookie cutters, you can wash them by hand with dish gel and water to reuse them. Be sure to let them dry completely before storing them to prevent rust.
Can I use glue?
Sometimes experts recommend not racking your brains over choosing a lock for the mold, but simply using glue. However, this is actually not a good idea. To begin with, not all types of glue are waterproof. But the mold will have to be washed - if water gets in, the glue may simply become soggy.
In addition, there are very few adhesives that are completely safe from an environmental point of view. It is unlikely that anyone would want to treat their children to cookies who have been in contact with toxic substances. Therefore, mechanical connection of forms is still the safest and most reliable.
Making a stencil for cookies. Printing a figure on a sheet of photo paper
Print the shape you like on a piece of photo paper. This method is ideal for unusual shapes such as logos, animals or even silhouettes. Find a simple picture with a clear, easy-to-understand outline and choose durable photo paper that is at least 8.5 millimeters thick. Once the image is printed, allow the ink to dry for 2-3 minutes before handling the paper.
If you don't have photo paper, you can print the image on regular paper and then trace the outline of the shape onto a piece of cardstock.
Smooth and fresh skin: dermaplaning, or why a woman needs to shave her face
The money tree pleases with lush flowering: my secret is in caring for the leaves
Why French children behave well: eight ways to raise them
The best quality lock
Now let's move on to the last type of locks. It is only slightly more complex than those described above, but at the same time it can boast of high quality clutch and the absence of shortcomings.
Here, as in the previous case, you need to leave a margin of about 10-15 millimeters. After this, you need to cut a corner at one end - half the length of the stock and the width of the tape. At the other end, make a vertical slit - about 1-2 millimeters deeper than the width of the tape remaining after cutting. You need to step back from the edge by 4-6 millimeters.
All that remains is to insert the remaining “tail” into the slot made, bend it in the opposite direction and firmly clamp it with pliers. This castle really has many advantages. On the one hand, there are no thickenings in the form of four layers of metal. On the other hand, the form can be used to prepare mirror images. There are no sharp protrusions or edges that could cause you to cut or scratch yourself when working.
Cutting the shape
Carefully trim the pan to remove any excess paper. Use a pair of sharp scissors to cut out the shape from the paper. Make sure you get as close to the outline of the image as possible. If you're having trouble with a complex shape, try working on small sections at a time to make sure you get the shape as accurate as possible.
If you are making an alphabet cookie cutter, use a sharp tool, such as a knife, to carefully cut out any inner shapes.
Place the mold on top of the dough
Place the pan on top of the rolled out dough on the baking sheet. Once you have made the stencil, roll out a sheet of chilled dough and place the stencil on top of the dough. Try to position the stencil so that you can make as many cookies as possible from the sheet of dough.
If you plan to bake the cookies immediately, place the dough on top of a sheet of parchment paper on a baking sheet to prevent them from sticking to the metal.
Tip: If you've just made the dough, store it in the refrigerator or freezer while you make the stencil so it stays chilled when you're ready to cut out the shapes.
New Year's treat recipe
To try out new stencils right away, there is a simple classic recipe for gingerbread:
- Mix three tablespoons of soft butter in a saucepan with half a glass of sand, a glass of honey and heat slightly until dissolved.
- Add spices to the cooled mixture: a teaspoon each of ginger and cinnamon, a pinch of cloves and coriander, salt to taste and a teaspoon of cocoa.
- Add two glasses of flour and an egg, knead the dough. Cool.
- Roll out the dough and cut out gingerbread cookies and cookies using cutters.
- Bake at 200 degrees for 10-15 minutes.
- Cover with glaze.
Separate excess dough from the molds
Remove excess dough to reveal the shapes you have made. Once you have cut out as many shapes as possible on the sheet, pull out the excess dough and set it aside. If you have internal cutouts, use a knife or your fingers to carefully pull them out of the mold. Place cookies on sheet as needed before baking.
Remember that you can reuse the dough you scrape off the sheet. Simply form it into a ball and roll the dough again to form a smaller sheet of dough.
Once you have prepared the cookies for baking, you can throw away your stencil as it is made of paper and will not be reusable. If you even try to clean your stencil, you will only ruin it. It cannot be cleaned, so it is better to make a new stencil before you decide to pamper your family and friends with homemade cookies again.
Found a violation? Report content
The most secure lock
Now we’ll tell you about another do-it-yourself gingerbread mold lock. Here it is also very important to leave a margin on the metal tape. Moreover, its length should be maximum - about 15-20 millimeters. It is necessary to carefully fold the ends overlapping and, holding them in this position with pliers, carefully make an incision 3-5 millimeters deep, and another 10-20 millimeters deep, parallel to the first one. In this case, it is very important that the ends of the tape do not move, but maintain their original position - that is why you need to use pliers as a clamp.
Now you need to carefully use pliers (or if you have it on hand, it’s better to use round-nose pliers) to take the cut section and bend it, pressing it tightly to the main surface of the tape. After this, use pliers to press it firmly so that it does not protrude. It is almost impossible to disconnect such a lock - rather, the metal of the tape itself will simply break.
But there is a serious drawback - the form can only be used on one side. Turning it over to get a gingerbread with a mirror image will no longer work. In addition, there are sharp edges here - it is advisable to process them with a fine file so as not to get hurt.