creativecommons.org
On long autumn and winter evenings, each of us dreams of a home that is cozy and warm. To preserve heat, doors are insulated and plastic windows are installed, but no design can protect you 100% from drafts.
This function can well be performed by a draft roller. With its help you can protect yourself from drafts from under a door or window. In addition, it will add zest to your home, being an element of decor, and children will like it. This is understandable, because such draft toys, when not used for their intended purpose, can be additional entertainment for your child. These crafts (rollers, toys, pillows) can reliably block access to cold air.
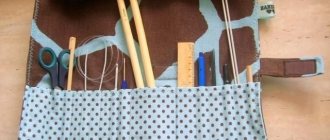
How to make anti-draft pillows with your own hands? According to the technique of execution, they can be sewn from fabric, from old ties or other pieces of fabric connected to each other using the patchwork technique, and can be crocheted or knitted. But all the crafts have one thing in common - they are all so cute, homemade and original!!!
The simplest anti-draft pillow - the pattern is simple.
- We cut out 2 elongated rectangles from the fabric (we take the length according to the size of the window or door).
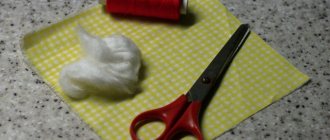
- We sew it together, leaving one end open, fill the tube with holofiber or foam rubber and sew the end together.
- We decorate as our imagination dictates - with embroidery or appliqué (we sew on various figures).
We will devote the continuation of the article to how to make knitted toys from drafts. You can knit and crochet. Let's consider both options.
creativecommons.org
Cute anti-draft pillows with your own hands, patterns
The time of cold weather is coming, and this means that there will be constant drafts in the apartment, regardless of whether you have plastic windows or not. You can, of course, throw an old blanket or special insulation from the store under the door, but it’s much more beautiful to make toys like these, because they will not only save you from a draft, but will also add creativity and comfort to the interior of your home. And children will simply be delighted with such pillows!
You can take patterns from any toy and simply make the body of the toy in the shape of a bolster, so you will get a fairly long pillow.
cpykami.ru
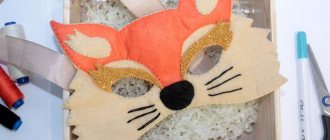
Anti-draft cat. Master class with step-by-step photos
Autumn, wind, drafts. Well, who is not familiar with this problem? Especially if there are small children in the house who love to play on the floor. You can, of course, get rid of the cracks under the door using the old-fashioned method, namely, plug them with a rag.
Well, you can approach the issue creatively and make a fun toy with your own hands . So, get acquainted: Anti-draft Cat - a sewing master class, we’ll look at it now!
The cat needs to be sewn from dense, durable fabric; after all, it should not let the “breeze through the door.” An old, out-of-fashion coat is perfect for this. Like me, for example.
If you don’t have anything like that lying around in your closet, you can use a piece of any thick fabric (drape, tweed, jeans, etc.) In addition, you will need: white flannel, a small piece of red fleece, 2 black buttons, red ribbon, cardboard. First of all, we draw a pattern.
Funny pillows under the door and on the window to prevent draftsto bookmarks 186
Someone will definitely need these toys from drafts. A draft may come from a crack in a window or door.
You can, of course, throw an old blanket or pillows under the door, but it’s much more beautiful to make toys like these, cute and useful.
They are not just long, but also durable (made of dense materials), heavy (often with sand inside) and stable. Go for it!
A modern door seal, sewn from scraps of your favorite fabrics, will not only retain heat, but also decorate the room. Use ready-made fabrics with a pattern or create a pattern to your own taste. Materials: • scraps of different fabrics for patchwork (we used plain, floral, teak, embroidered and monogrammed); • Thick cotton fabric 40×100 cm (for the back side); • White cotton fabric 80 x 100 cm (for lining); • Scissors for fabric and paper; • Large sheet of paper and pencil; • Tape measure; • Sewing thread and needle; • Large button; • Cotton floss; • Embroidery needle; • Polyester stuffing for soft toys. Size. Along the bottom edge – 85 cm. Creating a pattern.
Enlarge the pattern by 200% using a copy machine. Cut and cut along the dotted line.
1. Fold the flaps into a rectangle. Change their size and location. When you like the design, cut the flaps into pieces of the desired size. In total you will need a piece measuring 40 x 100 cm.
2. Place the pieces face up, pin them together, and sew by folding the pieces right side in and leaving a 0.6cm seam allowance. Then press the seams.
3. Place the pattern halves on a thick cotton cloth. Attach the paper with pins, cut the fabric along the contours, leaving a 1 cm seam allowance. Using this fabric pattern, cut out the dog from the patchwork piece.
4. Place both pieces right sides together and pin them together. Sew along the outer edge, leaving a 1 cm seam allowance. Do not sew the bottom edges so that the dog can be turned inside out.
5. Trim the seam at a distance of 0.5 cm from the stitching. Trim the corners. Turn the product inside out and straighten it out. Iron.
6. Using a paper pattern, cut two pieces from the lining fabric and sew them together in the same way.
7. Cut out the ear pieces from the remnants of both fabrics, leaving a 1 cm seam allowance on all sides. Place both pieces face to face and sew them together, leaving an opening. Trim the seam, turn the ear inside out and close the hole with a blind stitch. Iron.
8. Sew the ear to the patch (front) side of the dog. Sew on the eye button. Cut and sew a piece of fabric in a contrasting color to the tip of the nose.
9. Prepare cotton floss in three folds, thread it through an embroidery needle and embroider the claws.
10. Fill the lining with stuffing and sew it closed with a blind stitch. Insert the pillow into the decorative cover and also sew it with a hidden seam.
Feb 26, 2016Galinka
delaemrukami.info
How to sew a pillow?
If you have never tried to make a draft pillow toy with your own hands before, start with simpler options.
To sew such a pillow, a special pattern is not required. You can take the pattern of any toy as a basis, and make the body (or legs) longer, in the shape of a roller, adding the centimeters you need (as a rule, the final length is determined by the width of your window or door - it depends on where you are going to put the toy).
We suggest you sew a dachshund dog using this pattern.
Don't forget to enlarge the pattern to your desired size before printing!
This is perhaps the easiest option for creating a textile toy, which even a beginner can handle.
Unusual and beautiful rollers against drafts
When a piercing wind is blowing outside, and the frost is increasing in degrees every day, it’s time to take care of the warmth in the house. The eternal enemy of comfort is drafts. They not only cause discomfort, but can also cause diseases. A whole guard of brave warm rollers came out to fight the nasty drafts. Santa Clauses and Snowmen, Cats and Dogs, Donkeys and Sheep... Individually and in whole groups, they stood as a barrier in the way of the cold. Comfortable, cute cushions not only prevent cold air from penetrating into the room, but also decorate the interior. Adding such charming insulation to your home is beneficial for health and beauty.
www.livemaster.ru
And a toy, and a candy, and a little animal
The idea of creating a special pillow against drafts in itself is very interesting. And if you decorate such a pillow in a non-standard way, for example, as a toy or “candy,” then it has every chance of becoming not only a very useful thing, but also an excellent interior decoration.
All you need to do is turn part of a simple design - a roller - into a face and add a few touches (eyes, tongue, etc.) - and here you have a funny little animal. Place such a pillow on the windowsill - a cute textile cat (or even two) will be especially relevant here, because we all know how charming pets love to sit and lie on the window. And a funny dachshund will come in handy near the door (balcony or in front of the exit to the vestibule) - this is a real guard and protector of the hearth!
We work with glass
The glass on Soviet windows was not glued, but was only fixed with a wooden bead on the inside or outside (depending on the design of the window). Therefore, there is a gap between the glass and the window frame, through which cold air safely penetrates.
Accordingly, in order to insulate the windows with your own hands, you need to get rid of this gap. For this:
- Carefully, using several spatulas or flat-head screwdrivers, remove all the glazing beads from the window.
- We remove the glass.
- Wash the area where the glass is adjacent to the wood with warm water and soap and let it dry.
- After complete drying, we apply transparent silicone there, install the glass and nail the glazing beads.
- Immediately remove any remaining silicone sealant that has fallen on the glass and wooden profile with a rag.
If the glazing beads are very worn, then it makes sense to replace them with new ones, which can be bought at a hardware store. They are cheap.
Removing other gaps
When insulating wooden windows with your own hands, the above two steps are usually sufficient. But on some windows the wood dries out so much that cracks appear in the joints of the window profile.
They will also blow cold air, so they need to be sealed. This can be done the old-fashioned way using putty or tape (the putty is stuffed into the gap, the tape is glued over the gap).
But it’s better to seal the gaps with transparent silicone sealant, especially since it will remain after gluing the glass and you won’t have to buy anything extra.
Advantages of combined window insulation
The method of insulating windows with your own hands, which is described above, is the most effective and practical. It will significantly increase the thermal insulation of the window and reduce the level of noise coming from the street.
It is also equally important that it will last for 3-4 years, or even more, that is, you will not have to insulate the windows every fall. Plus, there will be no restrictions on opening the sashes, as is the case with the use of window putty or special window tape.
So don’t use old-fashioned methods, because modern ones are much simpler and better!
Did you like the homemade product? Share it on social networks
We ensure tight closure of the sashes
Another place for cold air to penetrate is the cracks between the window frame and the sash. They can be removed during window restoration using putty, but this is very, very difficult (the result is not worth the effort). It is much more effective to use a regular rubber seal on a self-adhesive base.
It is glued along the entire perimeter of the sash in the place where it comes into contact with the frame. The purpose of the seal is to shrink when the sash is closed, thereby closing the existing gap and making the window much warmer.
Before gluing, you need to wash the window with soapy water, let it dry and degrease the area where gluing will be done with a cloth soaked in alcohol. It is better not to use acetone; it can easily damage the paintwork.
When insulating windows with your own hands, you can also use a mortise seal. It is more durable and efficient, but is more expensive and much more difficult to install. For it, you need to mill a groove around the perimeter of the frame or sash, which most likely will not be possible to do efficiently without woodworking experience. You can ruin the window.
What you need for creative window insulation
Let's look at two “creatures” that can be made according to the instructions, having before your eyes illustrations of ready-made animals. You can be creative and come up with something of your own, unusual.
Snake insulation
- striped women's or children's tights (preferably without a pronounced heel);
- rice (any, the cheapest, you will need 2-3 kg);
- needle and thread;
- glue;
- drape or other thick red fabric for the tongue;
- special “running eyes” for crafts (or large buttons);
- scissors.
Dog for insulating a window in a nursery
- tights;
- rice;
- needle and thread;
- fabric glue;
- thin drape or felt for ears, paws and tail;
- scissors;
- paper clips (for fixing when gluing the tail);
- decorative button for the nose;
- old leather/fabric belt or bracelet.
Useful crafts for children: “animals” that protect from the cold
Despite the fact that it is hot and scorching outside, you can also think about how it will be in the children's room when the cold weather arrives.
Although plastic windows protect from the wind, they are not yet installed in all apartments. In the old days, grandmothers laid rolls made of cotton wool and old rags between the frames. These “gaskets” were covered with clean cloth or paper on top, and then decorated (author’s note: for example, our grandmother liked to put bunches of rowan berries between the frames). Now there is no such thing, and the frames are “double”, you can’t put anything between them.
To keep the room comfortable and warm in winter, most families simply seal the “gaps” in the frames. But for a children’s room, you can play it safe: combine benefits with creativity and make special funny “insulations.”
You can make these crafts yourself, or you can involve children in making them. It will take you no more than a couple of hours.
"Insulation" can be placed on the window sill close to the frame. Due to their heaviness and density, they will prevent cold air from entering the room from the street.
Step-by-step instruction
- Cut out the pattern along the outline and cut along the dotted line. Attach two parts of the pattern (head and back) to the fabric you have chosen for sewing toys at the distance you need from each other. Outline them with a pencil and draw the body. Cut out the resulting dog part and make another one of the same kind. Place the pieces right sides together, stitch and iron. Remember to leave a small part unsewn (about 5-10 cm in the rear lower part of the dog). Then carefully turn the dog out.
- Cut out two ear pieces. Pin them to the fabric, trace them with a pencil, cut them out and stitch, leaving a hole so you can turn them inside out later. We turn the ear inside out (you can stuff it a little with filler) and sew up the hole with a hidden stitch. We do the second ear in the same way. Sew the ironed ears to the dog's head.
- Eyes can be made in different ways. The easiest way is to attach