Luntik and his friends made of paper: diagrams with templates for cutting
Many children love cartoons, and toddlers are no exception.
If your child loves the cartoon “Luntik” with all his heart, then most likely he has asked you more than once to make a craft from the children’s cartoon. Next, we will provide a variety of techniques and master classes on how to make a luntik from paper. However, even if he didn’t ask, he probably won’t refuse to make such a paper craft with his own hands, because it will look 100% like the cartoon characters. In addition, the craft can become both a wonderful decoration for a room, be it a room or a kindergarten, and a toy for further games with the baby. This craft is easy to make, but it will delight your child for a long time.
Felt fox mask - master class, examples of animal masks
A mask is an essential accessory for any theme party. Today, with your own hands, in just a couple of hours, you can make an absolutely amazing and unique mask that will decorate your image and make you and your baby stand out at any party. Based on this master class, you can easily make any felt mask: fox, owl, fawn, wolf and others.
You can easily find all the materials we have listed in art and craft stores.
Necessary materials
For a mask measuring 20*9 cm we will need:
- Sheet felt for the base of the mask - 1 sheet (size 2030; for a mask for an adult size 2511 cm - 2 sheets of felt for the base) For the base, we recommend using thick felt so that it does not bend or lose its shape - Chinese felt does an excellent job of this function ;
- Decorative felt for small parts – 3 pcs. (white, black, bright orange colors). To decorate small elements in the mask, you can use Korean soft felt - it stretches moderately and is easy and pleasant to work with. In addition, Koreans have a huge selection of colors and shades, so you are sure to find one that suits you;
- Shiny foamiran – 1 sheet (size 20*30, gold);
- Threads in felt color (orange, black, white), black floss threads, needle;
- Scissors, pencil (marker) for working on fabric, tracing paper (paper) for patterns;
- Glue gun, glue sticks;
- Tape in the color of the product 0.5-1 m. Be sure to pay attention to a very important point.
- A cup of your favorite tea and a creative mood are required)).
If everything is ready, we will begin our creativity - we will sew a “Fox” mask. Your Fox can have any color scheme; our work is presented as an example.
Required materials and tools
In order to make a craft we will need:
If the child has not previously worked with dangerous tools (scissors, glue, stapler), then first of all it is necessary to have a conversation with the child on this topic. This can be either a form of regular instruction or a game form.
Step-by-step assembly of a three-dimensional model with step-by-step photos
The first step is to create Luntik's torso. Since in the cartoon the main character is purple, we take purple colored paper as the main color, preferably the paper is thick. It is also advisable to use double-sided paper; it can be replaced with half-cardboard.
Next, cut a rectangle measuring 14 by 10 cm from the whole sheet.
The next step is to roll the rectangle into a tube, and secure the edges of the resulting cylinder with a stapler; in the absence of a stapler, you can fasten the edges with glue.
An interesting solution would be to use toilet paper rolls or paper towels as a base, so the craft becomes denser and will stand better on the surface. Accordingly, it is enough to cover the blank in the form of a sleeve with colored paper.
The third step is to make the hero's ears. Again, take thick double-sided blue paper and cut out rectangles with sides of 12 and 5 cm.
We bend the workpiece in half horizontally and draw ears on one of them. In order to make the ears similar, you can take a picture or the toy itself and redraw it. However, if it is not possible to redraw, then it is worth paying attention to the fact that Luntik’s ears are very similar to the fin of a whale.
We cut this blank along the contour. Next, open it and secure it using the cut made on the main workpiece (bushing).
Just like in the cartoon, Luntik’s craft will have spots. For this stage you will need double-sided blue paper, from which we cut out seven circles of different sizes.
We do not glue the smallest circles (them last after the image of the muzzle).
The next step is to make eyes from white paper and draw pupils on them using a marker, after which we glue the eyes to the blank. You can find out in detail how to make eyes with your own hands here.
Next, using a marker, draw small details such as eyebrows, nose and mouth. We attach the remaining blue circles to the sides of the smile.
The next step is to make palms for Luntik from purple cardboard to match the workpiece. We cut out a rectangle with rounded corners, bend them and glue them on the inside.
Similar blanks will also become hands, but they should be a little longer and more closely resemble an elongated oval.
Thus, we have a wonderful Luntik who can participate in your child’s games.
In addition to Luntik, you can make other cartoon characters.
The base will not differ from the base of Luntik. In order to make other characters, you just need to change the colors under the original cartoon characters.
Source
Overalls
Another option for a costume is to make it based on overalls. To do this, choose a jumpsuit pattern with a breast or sleeves. To create a pattern, you can use factory fabrics by turning them inside out and folding them in half. Don't forget to leave a seam allowance of at least 1.5-2 cm on the side. The sleeveless option is easier to make and will require less material costs. Under the overalls you can wear a white or lilac jacket with sleeves. An applique is also sewn on the front.
For a little girl, you can make a sundress and small pants in the same way. This will make a very cute costume that you can wear for a walk in the summer.
The ears can be sewn not on the hood, but placed on the headband. In this case, the ears will look good, and the child will not be hot and comfortable. It is better to insert wire or thick foam rubber inside the ears so that they keep their shape.
When all the elements are ready, you can go to the masquerade. The child will be happy and very grateful to you. After all, we all expected miracles in childhood. You have the power to become a real wizard for your child!
DIY Luntik craft made from balls and felt with photos and videos
Nowadays, DIY crafts are very popular. They help develop fine motor skills, attention and patience. In this article we propose to consider creating a Luntik craft with your own hands. This friendly character is a favorite among all preschool children.
Using origami technique
The process of making Luntik using the origami technique from paper can be traced using the example of a master class. For work we need paper and glue.
In total we will need 1269 modules: only 166 of them are pink, the rest are lilac. Module size – 1/16 of an A4 sheet.
We assemble four rows of 32 purple modules, as shown in the photo.
We close the rows in a circle.
Now you need to turn the part over.
Every 8 modules you need to make an increase of 4 modules. For complete perception, the increase is shown in yellow, but we make it purple.
We put the modules on only 1 edge.
This is what should happen.
In the middle we add three pink modules.
In the next row there are three pink, three purple, then 6 pink, then three purple, three pink and we finish the row with 18 purple modules.
7 – a pair of pink, three purple, 7 pink, 3 purple, again a pair of pink and 19 purple.
Eight pink, 28 purple.
We change one pink to a purple module.
10 – a pair of one-offs, a pair of purples, six pinks, a pair of purples, a pair of pinks and 22 purples.
11 – alternate three modules at a time, ending with 22 purple modules.
Pair of pink, 10 purple, pair of pink, 22 purple.
In the 13th row we remove six modules.
Four pink, 26 purple modules.
A decrease of five modules: three pink, 22 purple.
16 – 18. Only purple modules.
Making a pullover
You can find a pattern for a pullover with a hood in any sewing magazine or on the Internet. According to these recommendations, we sew a pullover with an elongated bottom in order to subsequently add volume. You can also take a ready-made long lilac sweater. At the bottom of the pullover we make a drawstring and insert an elastic band.
We make Luntik's ears in the shape of a diamond. The back should be made of faux fur, and the front should be made of satin. Sew the blanks to the hood. We complement the hood with an applique of lilac velvet. From the inside of the pullover, from the side of the stomach and buttocks, we sew small synthetic pillows.
Another variant
To create such a Luntik from balls, you needed double-sided tape, gouache with a brush and balls. First, we inflate four balloons that are 10 inches in diameter. Let's connect them together.
Next, take a large 18-inch balloon, inflate it and attach it to the previous part.
We inflate a couple of long balloons and glue them together as shown in the photo. We attach it to the body with double-sided tape.
Inflate another balloon for the head. Glue it to the neck.
Again, take the long balls, inflate them, and then twist them into a figure eight.
We make the handles as shown in the photo. We attach the finished part to the main craft and draw the face and spots with gouache.
The balloon luntik is ready!
How to sew a fairy from felt?
Tools and materials Time: 2 hours • Difficulty: 5/10
- blue wire;
- thread and needle;
- beads or crystals;
- felt made from natural wool;
- small wooden balls;
- white felt balls with a diameter of 2 cm;
- straight brown wool;
- decorative butterflies;
- scissors;
- universal glue.
Step-by-step instructions with photos
Decorate your interior with charming fairies made of felt and wool, created by yourself! Don't hesitate, this little felt fairy will definitely bring a piece of spring and warm sun to your home!
Materials:
There is a big difference between cheap synthetic felt and high quality 100% organic wool felt. We recommend that you do not save money and purchase only the best materials and, believe me, in this case the result will be much more beautiful, and your felt fairy will look bright and neat!
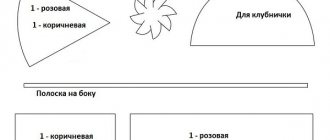
Step 1: Transfer the template to the fabric
Initially you need to draw a template. To do this, draw a pattern on paper according to the diagram provided below.
Felt fairy pattern
Our felt fairy will be 5 cm wide and 5 cm long. When drawing the pattern, fold the paper in half so that you have a double stencil for the front and back of the doll's dress.
Step 2: Cut out the dress pieces
Place the template on the felt and pin them together. Trace the pattern with a pencil, then cut out the shape from felt.
Peel off the paper, leaving the felt dress.
Step 3: Make Handles
- Fold the dress in half. Using the tips of the scissors, make a small hole in the middle of the dress for the neck.
- Fold the blue wire as shown in the photo. Each fairy's arm should be approximately 2.5 cm long.
- Place the wire inside the dress and thread it, open ends up, into the neck slit.
Step 4: Shape the Palms and Head
- Using a needle and thread, sew the sleeves of the dress together. Sew stitches approximately halfway down the length of the dress.
- Using the sharp ends of scissors, carefully make a hole in the white felt ball.
- Place a little glue on the top of the neck of the blue wire and insert it into the hole on the felt ball. The doll's head is now in place. Using glue, attach small wooden beads to the sides in the shape of palms.
Two ideas at once
We draw blanks on paper.
Transfer the drawing to felt. Cut out the details.
We glue them together. This is how Luntik came out of felt very quickly.
You can also redraw the design onto plastic bottles. Then you should color the resulting parts and you will get a cute little Luntik from plastic bottles.
Interesting job
We propose to consider a scheme for creating a figurine from beads.
Arms 6, 12, 18, again 18, 12 (do 7 more times), 6, 1. Legs 2, 8, 16, 24, 28 (two more times), 24, 20, 18, (a couple more rows). Ears 6, 9, 12, 15 (4 more rows); 18 (3 times) then bend it into a “C” shape at the bottom. Next you need to fasten the part. Spots 2, 8, 16, 24 - 1 piece; 2, 8 - 4 pieces; 6, 12 - 3 pieces; 2, 8, 16 – 1 workpiece. Tail 5, 7.
We knit the head, neck, and torso together in this toy. 2, 8, 16, 24, 30, 34, 39 (a couple of times), 42, 45, 46. We begin to decrease by six loops in each next row: 48, 42, 36, 30, 24 (17 rows). Continue: 24, 30, 36, 42, 42, 36, 30 (7 rows). Next 30, three rows of 33, two of 36, 39, 42, 45, two of 48, 42, 35, 28, 21, 14, 7 close in a circle (17 - 19 rows).
Using the same pattern, you can crochet a Luntik toy.