Learn to sew clothes for Barbie and Monster High. The article contains ideas, patterns, tips, master classes.
Dressing up a doll is one of the components of role-playing and director's games for children. Barbie and Monster High, beloved by girls, which come with a change of clothes, are very expensive. And the dresses for fake dolls are of the same type and of poor quality. If you have a daughter, sooner or later you will hear from her a request to sew backgammon for her doll. The master classes from this article will help you cope with the task and please your baby.
How to sew a dress for a Barbie and Monster High doll with your own hands for beginners: master class
If you do not have cutting and sewing skills, it will be difficult for you to sew a dress for Barbie or Monster High using a pattern. Don't expect it to be truly elegant, stylish and unusual. First, try something simple, get your hands on it. Later, move on to sewing more complex outfits.
DIY outfits for Barbie.
IMPORTANT: If you want to trim a Barbie doll, you should know its parameters. And they are as follows: height (excluding hairstyle) - 290 cm; chest circumference - 13 cm; chest width - 7.5 cm; back width - 5.5 cm; waist circumference - 8 cm; hip circumference - 13.0 cm; neck circumference - 6 cm. If you do not have the original, do not be lazy to measure it with a measuring tape, the parameters may differ slightly.
Monster High dolls in homemade dresses.
Dress for Barbie and Monster High from a sock
For example, you can sew different beautiful outfits for dolls from an ordinary baby sock! You will only need:
- baby socks
- scissors
- thread
- needle
- marker
- lace or ribbon
Simple dresses made from socks for dolls.
If you decide to give your doll an outfit and a sock, the sock itself should be new and beautiful. The good news is that socks come in different fabrics: from terry, you can make Barbie a cozy winter sweater, from thin cotton, you can make a light summer dress.
Outfit for Barbie made from a sock: manufacturing diagram.
- Lay the sock on the table, take a marker. Look at the picture to see how you will need to mark it.
- If you decide to make a set of a T-shirt and a skirt for the doll, you will need to cut off the elastic band (the one on the lapel) and the toe from the sock.
- If the sock does not fray, you will only need to take care that the skirt stays on the thin doll's waist. Make several cuts in the elastic and pull a lace or ribbon through them to create a belt.
- If the sock is fraying, you will need to seam the bottom edge of the skirt.
- Cut the shirt according to the pattern from the toe of the sock. If necessary, finish all cuts with stitches.
Scheme for making an outfit for Barbie from a sock.
And using this pattern, you can make a swimsuit or a set of underwear for the doll from a sock.
Scheme for making a swimsuit for a doll from a sock.
IMPORTANT: If your daughter is still small, but really wants to make clothes for Barbie or a monster girl herself, offer her a simple option - a seamless dress made from a sock. Just make a couple of cuts in the right places and use a hair elastic as a belt. The dress will turn out quite cute, the girl will probably be pleased with her first creation.
Vintage dress for Barbie
You can sew a simple dress for Barbie using the pattern in the picture below. Pay attention to the scale! You take the square circled in red as 1 cm, and accordingly increase the entire pattern. Prepare:
- paper
- pencil
- scissors
- soap
- tailor's pins
- scrap of fabric
- lace
- braid
- threads
- a needle
- Velcro
Dress pattern for Barbie.
- Cut out the pattern and attach it to the wrong side of the piece of fabric. Circle the details.
- Leave seam allowances.
- Cut out the pieces from the fabric.
- Make the skirt: fold the bottom edge and finish with a seam. Sew on lace if desired.
- Process both side cuts. Finish the top edge with a crisscross stitch.
- Proceed to processing the shelf. Sew the neckline with double thread. Make undercuts.
- Fold the fabric as shown in the picture and pin it together. The width of the shelf between the grooves should be 3.5 cm, at the bottom - 1 cm. Sew the grooves. Remove the pins and zigzag the grooves.
- Process two parts of the back. Sew the neckline with double thread.
- Make the straps: cut the lace (details are 2 by 8 cm). Sew them along the armhole of the front sleeve and the corresponding back piece. If you don't want lace, make straps from braid or thin satin ribbon.
- Sew the front and back pieces along the side edges.
- Sew the bodice and skirt of the dress.
- Attach a strip of Velcro to the back of one side of the dress and to the front of the other side.
- Make the Velcro long enough so that the doll's buttocks are not visible. As an alternative to Velcro, you can use hooks or buttons.
- This is the kind of cute vintage dress your doll should get.
Simple dress for Barbie: steps 1-2. Simple dress for Barbie: steps 3-5. Simple dress for Barbie: steps 6-8.
Simple dress for Barbie: steps 9-10. Simple dress for Barbie.
Simple dress for Monster High doll
IMPORTANT: Monster High dolls are fundamentally different from Barbie-type dolls. Most of them have a standard teloid with the following parameters: height - 21.5 cm; chest circumference - 7.5 cm; girth under the chest - 5.5 cm; waist circumference - 5-6 cm; hip circumference is about 10 cm. Monster dolls have an unnaturally large head, narrow shoulders, long arms and legs. Their waistline is not clearly defined, their back has a complex curve. Therefore, it is very difficult to sew something “to fit” for them.
Also don't forget about the monster-glamorous style of the dolls. Choose flowing fabrics in rich colors for them, such as satin or jacquard. Prepare:
- scrap of fabric
- threads to match
- satin ribbons in contrasting color
- igloo
- scissors
- paper
- pencil
Basic dress patterns for Monster High dolls. Dress pattern for Monster High.
- You can’t sew a dress for a student at the School of Monsters without a pattern and fittings. Therefore, choose the pattern that you like the most and that you “pull”.
- Cut out the pattern pieces and transfer them onto the fabric, not forgetting the seam allowances.
- Sew the back pieces to the front. Process the top and bottom cuts.
- Also process the cuts on both back pieces.
- Consider the clasp. Use Velcro, hooks or buttons. It will turn out very beautiful if you make the bodice of the dress look like a corset. Then sew satin ribbons on top of the right and left parts of the back. Make holes in the pieces and pass ribbons through them so that the corset can be laced.
- Sew the bottom of the bodice on the back by 1 cm.
- To make a multi-layered full skirt, cut out several petals from the same fabric. Fold each of them in half lengthwise and gather with thread.
- Sew the petals to the bodice in a random pattern to make the dress look like a rose.
- Place the dress on the doll, lace up the corset and place ribbons around the doll's waist. It will turn out very beautiful.
Dress for Monster High: pattern. Dress for Monster High: step 1. Dress for Monster High: step 2. Dress for Monster High: step 3. Dress for Monster High: step 4.
Dress for Monster High: step 5. Dress for Monster High: step 6.
Dress for Monster High: step 7. Dress for Monster High: step 8.
Dresses for Monster High.
Making doll shoes
The final ooak, as we decided above, should be done by clothing. No matter what class the girl goes to, she knows how to make dresses, skirts and blouses for her Monster High. Difficulties always begin when you need to make shoes.
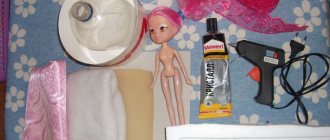
Making shoes begins with preparing the raw materials: PVA glue, napkins, eraser, scissors, thick threads or thin braid.
- Cover the doll's leg with wet pieces of napkin in 2 layers. Let dry. After smearing the PVA, stick on another 3-4 layers of napkin. Examples of the papier-mâché technique can be found on the Internet.
Yesterday I tried to draw only with watercolor pencils and pastels (I kept thinking about beginners and decided to try this technique on myself), well, to be honest, it’s the best for students, everything is very simple and clean. Here I described the result: but don’t take it to heart, I joked a lot there, in fact everything is very simple. Materials.
I’ll tell you honestly, OOAC is a costly business in terms of materials.
Their purchase, even on the most modest scale, will cost 1500-2000 rubles. I will list only the most necessary: - Clear (mr. super Clear)
- there is no Russian alternative (forget about the “Idea” spray - this is such a g...), Clear is a primer and fixative, it is a liquid polyurethane with additives, it is terribly harmful for health, cannot be used at home and without a respirator (though I don’t have a respirator, I just don’t breathe when I use it, I can not breathe for 6-7 minutes) - the cost of 1 can is 750-850 rubles;
Popular articles How to beautifully wrap gifts with your own hands
— pastel
, I have “Mungyo”, Chinese_))) soft and bright, I crumble it into a bowl with a designer knife, from where I pick it up with a soft brush and apply it to the doll’s face (sometimes I work with cotton swabs - depending on my mood) 64 colors - 500-600 rubles. ;—
watercolor pencils
, I have “mondeluz”, to be honest, I just took medium-priced pencils and they turned out to be good_))) — about 250-300 rubles.
(12 colors, regular cardboard packaging); - kneaded eraser (to erase mistakes) - 40 rubles, shading (can be done without it) - 100 rubles, brushes: soft, medium thickness and thick (these are pastel brushes), designer knife - 80-100 rubles, sharpeners (it’s better to have a couple of pieces). - white pencil for rubber, glass, plastic, metal, wood
- 32 rubles. sold in art stores.
— acrylic glossy varnish — 150. (I’m thinking of stopping using it altogether; it’s applied to dolls’ eyes and lips for a vibrant shine, but it sticks terribly to everything and collects dirt).
I forgot to post a photo of the result.
How to sew a wedding dress for Barbie and Monster High dolls
One day wearing a white wedding dress is the dream of many girls. When they are little, they often play at the wedding of Barbie and Ken; their dolls need formal outfits.
DIY wedding dress for Barbie.
You can sew a doll wedding dress using the pattern presented above. You can also use this one.
Wedding dress for Barbie.
This is the beauty they sew for Barbie.
A wedding dress pattern for Barbie from a magazine.
Wedding dress for Barbie using a pattern.
The heroines of Monster High are still school students. But why not get creative and “marry them off” in such beautiful dresses?
Monster High in a wedding dress. Elegant wedding dress for a Monster High doll.
Why is this necessary?
Masters of puppet transformations do not have a single answer to this question. Some people don’t like too bright makeup on toys - girls, in their opinion, should see an example of natural beauty with a minimum of makeup. For others, it's just a hobby, like painting or cross-stitching. As a rule, in the homes of such people you can see a whole collection of different modified dolls.
Still others make dolls to order based on a real prototype. These can be both celebrities and ordinary people for whom this product is intended.
The fourth decided, as they say, to combine business with pleasure and began to make money from their hobby by selling their skillful crafts. After all, it’s one thing to buy one of a million identical dolls in a store, and quite another to buy a handmade toy, being sure that no one will have a second one.
How to sew a dress with sleeves for Barbie and Monster High dolls
Again, from the upper part of the sock, you can make an unusual dress with long sleeves for Barbie or Monster High.
Long sleeve dress for a doll: steps 1-2. Long sleeve dress for a doll: steps 3-4.
- Cut the part you need. Its length will depend on the length you want for the doll's dress.
- Draw the lines of the sleeves. Try not to make a mistake with their length. But if the sleeve turns out to be short, don’t be discouraged, cut it to three-quarters. It will also turn out very beautiful.
- Cut the part of the sock along the lines you marked. Turn the sock inside out.
- Sew the edges of the sleeves and the dress itself using a buttonhole stitch. Finish the bottom cut of the dress.
- Fold the neckline of the dress to the right side and hem it with straight stitches.
Long sleeve dress pattern for Barbie.
Face painting
Facial features, eye expression, lip shape will make the image unique. But before you implement ideas with paints directly on the doll, it is better to sketch out several sketches. Without them, you can make both a OOAC beauty and a funny misunderstanding, especially for beginners.
When all the details are thought out, painting begins, for which you need:
- watercolor pencils;
- acrylic paints;
- eye shadow;
- brushes
It is better to choose water-based paints. In oil they run the risk of cracking over time. Brushes should be synthetic and as thin as possible. For convenience, excess hair is cut off. First, all contours, whites of the eyes and lips are drawn with pencils and opened with Clear. Only when it dries is acrylic used.
Redrawing, or repainting, is a place for flights of fancy. Eyebrows, eyelashes, tattoos, terrible scars and charming moles. Master doll makers are happy to share unusual solutions, telling in detail how to make OOAK “Monster High”, Barbie or “Minifi” make-up.
When the makeup is complete, apply a finishing layer of Clear spray. It will give a glossy shine to the lips and pupils, prevent the paint from washing off and fading, and protect it from ultraviolet radiation. The next step is creating the hairstyle.
How to sew a skirt for a Barbie and Monster High doll?
Barbie doll is a slender beauty; a skirt of any style and any length will fit perfectly on her. You can use the patterns below to sew something new for her.
Skirt pattern for Barbie with a blind vent.
Skirt pattern for Barbie. Barbie skirt pattern with a slit.
If a doll skirt is your first sewing experience, don’t bother with cutting. Prepare:
- 2 pieces of fabric (19 by 10 cm, 19 by 1 cm)
- elastic band for clothes
- threads to match
- igloo
- scissors
- pencil
- lace or ribbon optional
Place the pieces of fabric facing each other, sew them together, and finish the seam with a zigzag.
Skirt for Barbie: step 1.
Tuck and finish the bottom edge of the skirt.
Skirt for Barbie: step 2.
Sew or stitch the elastic to the waistband of the skirt, leaving 1.5 cm from the top edge. Do this so that the fabric gathers a little.
Skirt for Barbie: step 3.
Fold the top edge of the skirt up to cover the elastic. Hem it.
Skirt for Barbie: step 4.
Fold the skirt in half, step back 1 cm from the unsewn edge, and sew it. Process the resulting seam.
Skirt for Barbie: step 5. Skirt for Barbie.
Skirts for Barbie.
For a monster doll, you can sew a similar skirt, only multi-layered. Let the top layer be made of thick fabric, and the bottom layer - guipure, lace or mesh.
Sewing a skirt for Monster High.
The wrong side of the skirt for Monster High.
Multilayer skirt for Monster High.
Homemade crib
To make a doll bed you need to stock up on the following materials:
- plywood sheet;
- paper;
- foam;
- varnish;
- glue;
- cloth;
- acrylic paint;
- scissors.
On a piece of paper you need to draw the base and backrests for the future crib. We cut out the resulting parts. Using these blanks you need to cut out parts from plywood. We fasten them with glue. We glue foam rubber to the bed and cover everything with fabric. We paint the remaining parts and apply varnish.
How to sew a T-shirt for a Barbie and Monster High doll? How to sew a sweater for a Barbie and Monster High doll?
Sewing T-shirts and blouses for dolls like Barbie and monster dolls is the most difficult thing. First of all, these garments are not easy to cut. Secondly, the parameters of toy fashionistas are such that it is difficult to sew the top so that it fits “to the figure”, in some places it does not turn out to be small, and in others it does not bulge. But why don't you try your hand?
T-shirt pattern for Barbie.
Prepare:
- 2 pieces of fabric
- scissors
- threads
- igloo
- pencil
- pins
If you are using a pattern, transfer it to the fabric, add seam allowances, and cut out the details. If you haven't found a pattern or don't know how to fit it, just place the doll on your scraps and trace it.
T-shirt for a doll: step 1.
Carefully cut out the neckline and sleeve openings. Do not damage the pieces of fabric left after cutting out the armholes, they will still be needed.
T-shirt for a doll: step 2. T-shirt for a doll: step 3.
Fold and stitch the bottom of the T-shirt. Process the neck. Sew the T-shirt around the shoulders.
T-shirt for a doll: step 4.
T-shirt for a doll: step 5.
Process the remaining semicircular flaps along the lower edges, and stitch the upper edges to the armholes. Sew the sides of the T-shirt and sew the sleeves.
T-shirt for a doll: step 6.
T-shirt for a doll.
Shirt pattern for a doll.
Start of modification
After choosing and purchasing “Monster High”, Barbie, “Minifi”, their transformation begins. The first stage is changing your hairstyle. Factory-made hair is reluctant to style. Usually they prefer to puff up in the most inappropriate way. It is useless to fight them, so the puppeteers cut them off.
Before removal, the head must be separated from the body. To avoid damaging it when removing it, keep the toy in boiling water for several minutes until the plastic becomes elastic. Once the head is removed, the top of the wig is cut off.
The hair roots remaining inside are carefully removed with tweezers. But Monster High has difficulties with this. To completely remove hair, you will have to make a small hole in the head, which is then sealed. When the doll is completely “bald”, it is ready for the next stage.
How to sew velvet trousers for Barbie and Monster High dolls?
Use the ready-made pattern to sew Barbie or Monster High velvet trousers, leggings or jeans.
Simple jeans for a doll: pattern.
IMPORTANT: If you want your pants to look realistic, you'll have to work hard. You will need a machine to make the product look neat. But in hard-to-reach places you will have to work manually.
Pattern of trousers for a doll.
Cut out the details of the front and back halves, yoke, pockets, belt, belt loops.
Pants for a doll: step 1.
Sew the yokes to the back halves of the trousers. Process the cuts immediately.
Pants for a doll: step 2.
If desired, add decorative stitching to the pockets. If you are not lazy, it will be very beautiful. Fold in their top edges and stitch.
Pants for a doll: step 3.
On the pockets, fold the bottom and side allowances under and iron them. Then sew the pockets to the back halves of the trousers.
Pants for a doll: step 4.
Pants for a doll: step 5.
Place the back rugs of the trousers right sides together, sew the seat seam and finish the cut.
Pants for a doll: step 6. Pants for a doll: step 7.
Pants for a doll: step 8.
When working with the front halves, sew in the burlap pockets first. Topstitch the seam from the front side. Sew the barrels to the burlap.
Pants for a doll: step 9.
Pants for a doll: step 10.
Sew the front seam down to where it meets the clasp.
Pants for a doll: step 11.
Turn back the seam allowances and stitch them as well. Topstitch the clasp and front seam.
Pants for a doll: step 12.
Place the front and back halves of the trousers right sides together, sew along the crotch, and finish the seam. Unfold the pants and stitch the seam along the back half.
Pants for a doll: step 13.
Now sew the trousers along the side seams. Treat the seams. At this stage there is the last opportunity to adjust the outfit to the doll’s figure.
Pants for a doll: step 14.
Sew a belt to the trousers, and belt loops to the belt.
Pants for a doll: step 15.
Try the pants on your doll one last time. Did you get on? Sew on the clasp, the job is finished.
Pants for a doll: belt.
Trousers for a doll.
Removing old makeup
Before applying new makeup, you need to remove the old factory one. To do this, in addition to the doll itself, you will need:
- solvent. Suitable product for removing artificial nails;
- degreaser. Both store-bought and regular diluted alcohol will do;
- watercolor pencils, pastels, acrylic paints;
- eraser. It will be better if one of its ends is narrow - for more jewelry work;
- brushes, palette;
- clear acrylic varnish;
- matte acrylic spray coating;
- cotton swabs or disks. Regular cotton wool will also work;
- cling film.
It makes sense to wear medical gloves on your hands that are suitable in size (if there are only larger ones, then it is better to do without them altogether, since large gloves will fall off during such precise work and can ruin the work). Lighting should be moderately bright and uniform; shadows from your hands should not disturb you.
Many materials are very easily soiled, so you should prepare your work area in advance. It is better to cover the table with newspaper. Now that the preparations are complete, you can begin to work directly.
- Wrap the toy in cling film so that only the face remains uncovered. Make sure that all hair is tucked under the film. Further steps will involve the use of chemicals, so be sure to ensure proper ventilation in the room where you will be creating.
- Use a solvent to remove all paint from your face. Doll heads are usually rubber, so it's best to test the solvent on an inconspicuous area of the head first. It will be very disappointing if you dissolve your face along with the paint.
- If necessary, rinse the surface to be treated with running water and then wipe dry.
- Next, the surface needs to be properly degreased. This is a very important stage, and if you do not approach it conscientiously enough, no matter how beautiful the final version of the makeup is, the paint will still fall off.
Popular articles Craft basket
How to sew a swimsuit for a Barbie and Monster High doll?
A swimsuit for a doll can be sewn one-piece or separate. Make it from old swimming trunks or a piece of elastic fabric. But if there is no such thing, any other one will do, because, most likely, the doll will bathe for fun.
One-piece swimsuit for a doll: pattern.
Two-piece swimsuit for a doll: pattern.
- Cut out the swimsuit pieces from paper. Transfer them to the fabric, leaving seam allowances.
- Sew the bra parts.
- Sew the swimsuit pieces along the side seam.
- If desired, sew straps to the swimsuit or decorate it.
Why is this necessary?
Masters of puppet transformations do not have a single answer to this question. Some people don’t like too bright makeup on toys - girls, in their opinion, should see an example of natural beauty with a minimum of makeup. For others, it's just a hobby, like painting or cross-stitching. As a rule, in the homes of such people you can see a whole collection of different modified dolls.
Still others make dolls to order based on a real prototype. These can be both celebrities and ordinary people for whom this product is intended.
The fourth decided, as they say, to combine business with pleasure and began to make money from their hobby by selling their skillful crafts. After all, it’s one thing to buy one of a million identical dolls in a store, and quite another to buy a handmade toy, being sure that no one will have a second one.
VIDEO: How to make an open swimsuit for a doll?
- Do-it-yourself amulets made of fabric and threads: step-by-step instructions, master class.
- Foamiran dolls: patterns, master class.
- How to sew a beautiful textile, interior, big-legged, Waldorf doll with your own hands: patterns, instructions, photos, videos.
- Amulet dolls - Herbalist, Podorozhnitsa, for health, Krupenichka, for family, Angel, Successful, for marriage, Well-being, for pregnancy
- Amulet dolls - for a child, Bereginya, Lovebirds, for luck, Bell, for the home, Desire
- How to make a Voodoo doll from paper, branches, felt
- Crocheted Lalalupsi dolls: master class, diagrams and description
- Do-it-yourself brownie amulet doll made from tights, burlap, thread and cardboard
- How to make a Barbie, Tilda, Motanka doll with your own hands?
- How to make a doll with clothes from cardboard with your own hands: diagrams, stencils, photos.
Available means
Monster High are popular dolls that almost all girls like. Every little girl wants to provide her pet with everything she needs: a dollhouse with furniture and clothes. Furniture, of course, can be found in the store, but you can save your family money and make it yourself. But how to make furniture for Monster High dolls? For beginning craftsmen, you can choose simpler options. These are the ones we will consider .
Whatever the furniture ends up being, the following materials must be prepared immediately before manufacturing:
- thick cardboard or small box;
- colored paper (matte or corrugated);
- stationery knife or scissors;
- paper clips or stapler;
- a simple pencil;
- ruler;
- colored markers;
- gouache or watercolor;
- tape or glue.
Coat or jacket
A checkered coat or a vanilla-colored jacket is made in the same way as a jumpsuit. The only difference is the decoration with buttons, zippers or adhesive tape. The lining under the coat or jacket must be worked out to make it as realistic as possible.
Coat pattern for Claudine Wolf
If you wish, you can even use cotton wool or padding polyester to make a real down jacket. The parts are sewn together according to the following instructions: first, the front and back of the product are sewn together, then the sleeves are sewn on. At the end, the product is decorated and decorated with a hood, if one is provided according to the scheme.
Jacket diagram
Accessories for dolls
It’s easy to make everything you need for a doll’s house and its owner with your own hands.
The doll has a lot of things, it's time to take care of their appearance. An iron will help her with this. To make such a useful electrical appliance you will need a plastic valve for juice or milk and a cap from a ballpoint pen. Cut off the plastic lid along the edges, leaving only the rounded inner part. With its shape it already resembles the sole of an iron; all that remains is to add details. Separate the narrow plastic part from the handle cap and shorten it so that the iron handle does not end up being very long. Glue the parts together and add a small heating control bead. Paint the bottom of the iron with silver varnish.
Travel suitcase. For such a cute craft, you will need a small box, four beads, a piece of fabric, narrow braid, a beautiful sticker and scissors with glue. Fix two rectangular narrow boxes in pairs with tape on one side and cover them with a beautiful fabric. Attach black braid to the other sides. Cover the top of the lids with beautiful paper and add stickers. Connect the suitcase with braid and attach bead wheels.
Barbie has a piano in her living room ; it needs to be decorated with candles or a table lamp. It is easy to make such an interior element from the cell of an egg tray. Cut one segment from the container and fix a stick or cocktail tube inside. Secure the lower part in a piece of salted dough. After hardening, paint and decorate with ribbons, braid or beads.