How to sew a cape for a child’s carnival with your own hands: basic rules, suitable fabric
- Choose a hero that the child will represent at the holiday.
- Decide on the length of the raincoat and the type (with a hood, with a collar or without one).
- Find a suitable pattern on the Internet. Don't forget to leave seam allowances.
- Be sure to process the bottom of the product by stitching the edge, tape, or using an overlock machine, or treating the edge with tape (a special tape that protects against damage).
- When sewing a cape, do not forget to periodically try it on so that the cape fits your figure.
When choosing a fabric, you need to focus on soft ones, the edges of which do not need to be processed. Suitable fabric for sewing: spandex, raincoat, cotton, flannel, corduroy, fleece, satin, tulle . We do not recommend sewing a raincoat from artificial leather, since abrasions will be visible in areas of movement.
Description and selection of material
A poncho is a traditional Latin American outerwear that is a large rectangular piece of fabric or knitted fabric with a hole in the middle for the head. For the first time, such a product was made by the Mapuche Indians.
The ethnic element of the wardrobe came into fashion in the middle of the last century and quickly won many fans. Ponchos were worn not only by women, but also by men. The original version of the product was supplemented with hoods, sleeves, collars, belts, fasteners and other details. The style also changed, which could no longer be called Indian or Mexican. Based on the basic model, today various types of capes are made, for which any types of materials are used.
A modern poncho is a comfortable thing that can be worn in any weather. This product is suitable for both slender girls and plump ladies. With these clothes you can create an elegant and sophisticated look. The poncho is comfortable to wear. In addition, it can hide various figure flaws.
You can save money if you sew the desired item yourself. The choice of material and style should take into account the season in which the cape will be used. For summer you should buy chiffon, silk or linen. Lace and sequins can become successful decorative elements for a product. Autumn and winter options are made from drape, cashmere, knitwear or wool. You can decorate the material with fur.
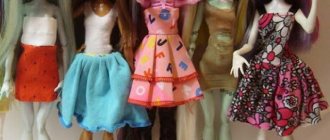
Types of capes: photos
How to cut and sew a children's cape with a hood: instructions with photos
Materials:
- Atlas
- Silk ribbon to match the color of the fabric
- Rubber
- Braid
- Velcro
- Sewing supplies
- Pins.
Progress:
- Fold the satin fabric in half. Trace the pattern with chalk.
- Save a couple of centimeters for the seams.
- Finish the hems of the raincoat with braid.
- Cut out the parts for the hood from fabric.
- Sew the hood, sew it to the neck of the cloak.
- Make a fastener from Velcro and red tape and sew it to the raincoat.
How to sew a carnival cape for a boy: pattern, diagram, photo
Materials:
- Fabric: satin or any other
- Scissors
- Threads
- Acrylic paints
- Paper
- Beika
- Clasp.
Progress:
- Fold the fabric in half along the cross thread.
- Cut out the neck, calculating the radius. To do this, divide the neck circumference by pi multiplied by 2.
- Cut the half of the cloak in the middle.
- Round the edges of the bottom and trim with trim.
- Print a stencil with a design on paper.
- Using acrylic paint, transfer the pattern onto the cape. Let dry.
- Sew the clasp onto the cloak.
Sewing a poncho without a pattern
How to sew a poncho with your own hands quickly and without a pattern? A poncho is a versatile, practical outfit, so you can sew a regular product without using a pattern or taking measurements. This can be done in 2 ways:
- If you have 2 similar scarves at home in size and type of fabric, you can sew a poncho in half an hour. To do this, just sew the parts together, leaving the neck intact.
You may be interested in this Instructions for Soviet sewing machines Chaika 132, 134 and 143
Additional Information! The model looks great with a bright scarf and fur trim. Such an original Russian image will attract the attention of others.
When duplicated with a dense lining of fur or wool, it can be worn in the fall.
Product made from a scarf with fur
- Cut a neckline from the center of a large scarf and finish the cut edge using bias tape.
When connecting 2 scarves, do not rush to cut the corners near the neckline. You can turn them inside out and get an unusual model with an asymmetrical collar. You can also use a scarf or stole.
Sewing pattern for a poncho from a scarf
How to sew a cape for a girl's matinee?
For a girl, a princess cloak would be more suitable. Materials:
- Flannel or felt, tulle, knitwear
- Sewing supplies
- Sewing machine
- Textile glue.
Progress:
- Measure the distance from the child's neck to the edge of the raincoat.
- Add 5-6 cm to this value and cut the fabric to the required size. The width can be any.
- Turn the fabric inside out towards you and make a 5 cm drawstring. Glue the edge that you turned in with special textile glue. Don't use hot glue!
- Next you will need some tape. It should be about twice as long as the drawstring.
- Insert the cut ribbon into the drawstring.
- The cape on the ribbon needs to be gathered up a little.
My secret to an easy chiffon cut
If you have ever worked with chiffon, silk and other very flexible fabrics in your life, you will never forget how excruciatingly difficult it is!
When laying out patterns on the fabric, choosing their best, compact placement (and, even more so, if adjustment is required, combining the pattern of the fabric), in order to comply with the grain threads and warp threads, when tracing the contours of the patterns, the chiffon threads become skewed. This is precisely the catastrophic mistake that, if it occurs and is not corrected immediately, at this first stage, will certainly manifest itself in the finished product as irreparable defects: a crooked hem of a skirt, an uneven hem of a dress or blouse, asymmetrical flounces, differently set sleeves and other defects in the appearance of the product.
The complexity of chiffon cutting, the distortion of the fabric that occurs at the very first, most difficult and most important stage of sewing the product, leads to the fact that many tailors, having once suffered with complex fabric and not receiving a quality product, begin to avoid and refuse such orders.
Of course, tailors were looking for ways to help them curb the “willful”, beautiful and complex fabric!
The first thing that comes to mind when a person is faced with such a problem is to lay something on the table to prevent distortions or to stabilize the fabric itself, to force it to lie flat, without shifting. In fact, to change its properties for the entire process of sewing the product, so that eliminate this unpleasant feature of it - the mobility of the fabric threads, their distortion. Then the finished item can be soaked, washed, and rinsed to remove the stabilizing agent.
What did I find on the Internet?
1. Spray the fabric with hairspray.
2. Soak in a weak gelatin solution. (I found a recipe: 3 teaspoons of gelatin per 1 glass of cold water, leave for 30 minutes. Heat on fire, but do not boil. Dilute with 3 liters of cold water in a basin. Soak the fabric, leave for an hour, then squeeze lightly and dry.)
3. Soak the chiffon in water and soap the fabric thickly. Lay out on a flat surface, dry, etc.
After all the manipulations, the resulting fabric is cut, completely different in its plastic properties.
Do you like these techniques? No to me! If the use of varnish does not change the fabric so much, then gelatin and soap do! And the worst thing is that they add another problem. How should you lay out or hang the fabric to dry to prevent the threads from skewing?
So how to cut chiffon easily and simply? Without changing its properties at all, be able to make the most precise cut? And already at the fitting you can see the fit, the appearance of the fabric, how it will look in its finished form, just as delicate, soft and flexible?
I’ll say right away that my secret only concerns the cut! Duplicating, basting, stitching, ironing - all these subsequent stages remain complex, labor-intensive, requiring great care and careful handling of the fabric.
First of all, you need a large cutting table on which you can lay out the fabric completely, facing out. I have two folding tables, placed with long sides facing each other and covered with a piece of linoleum. The total size of the resulting table is 160 cm by 180 cm.
To add mobility, wheels are screwed to the legs. When I want, for example, to move a table, I simply roll it to another place and just as easily and simply return it to its original place.
Pay attention to the linoleum pattern! This is a very important, necessary feature for the cut!
The side of the square is 25 cm. This is extremely convenient! Without measuring the fabric, I can simply lay it on the table and see how wide and long it is. I can easily find cutting lines at a 45 degree angle. I can, by laying out a set of patterns for a product, calculate how much fabric will be needed to sew the item.
So, you have ironed the fabric, laid it out on the table, aligned it on all 4 sides, focusing on the straight lines and corners of the linoleum pattern. Now you need to secure the material in this position!
The secret to an easy cut is that you simply secure the edges of the chiffon with masking tape, carefully laying it on top so that the tape extends about 1 cm onto the fabric.
Just please don't use tape!
I admit that I started these experiments with him! Of course, it holds the fabric perfectly, but after peeling off, traces of glue remain on the linoleum, which can only be removed with acetone. Let's not torment linoleum with acetone, since it turned out that masking tape does an excellent job of fixing the fabric!
And now, without changing the properties of the fabric in any way, you have complete freedom of action! You can choose as much as you like how to lay out the patterns more compactly, try several options, adjust the pattern if you have a check, stripe, ornament, trace the contours of the patterns (with chalk, soap, pencil, felt-tip pen - what suits you best?) and all this is perfectly accurate, no jambs! The fabric remains motionless!
By the way, if your table is smaller than a piece of fabric, figure out what size rectangles you need to cut the chiffon into (pulling out the threads of the fabric to mark the cutting line), and you can lay out patterns on these pieces, secured with tape.
Of course, it’s always better to cut all fabrics facing sideways! This is the most accurate, economical and correct method of cutting in all cases, and not only when it is necessary to adjust the pattern, checks, stripes, or when cutting an asymmetrical product! And you don’t need to lay any snares!
You need to cut the chiffon only according to a proven pattern; all adjustments to the pattern should be made before cutting! You also need to immediately draw all the necessary details for the product, since curvilinear interpatterns of the fabric after cutting cannot be used. Make more registration marks and place those parts that will need to be duplicated in the future (breasts, cuffs, collar, collar stand) close to the right corner of the fabric, leaving it as a guide for further correct laying out on the ironing board and duplicating.
I didn’t try to duplicate it right away, on the cutting table... Probably, linoleum will withstand such a harsh impact on it... but I hate to torture it!
I remember this feeling of indescribable delight when I glued the edges of the fabric to the table and realized that everything was fixed securely! You can even outline with chalk, and not just with a water-soluble felt-tip pen. (Chalk, with its hard particles, clings to thin fabric, and a felt-tip pen without pressure, even barely touching, gives a good line. But if you are cutting black chiffon, a felt-tip pen will not work, only soap or chalk.)
But every time, cutting out the chiffon took me several hours, the whole evening!
Pressing the fabric with my hand so that it moves as little as possible, folding my fingers in a “tick” (photo is only to demonstrate the technique) so that the edge of the pattern is between the index and middle fingers, I traced the contours of the parts, and after each small stroke I evened out the distortion of the fabric that appeared!
And here it is - the solution to the problem! This is my victory!
I’m sharing this, I’m not afraid to say, wonderful idea with you, my friends, in order to remove your fear of complex fabric, so that you don’t refuse to work with it for fear of ruining the delicate and beautiful material. And just to speed up the sewing process, save time - our most valuable and irreplaceable resource.
Here are some photos of the sewing process itself:
- for the correct, precise alignment of the sides of the dart, fix the pinched fabric with a machine needle and, slightly pulling, sweep it away;
— before sewing a buttonhole, strengthen the finest natural silk with a piece of adhesive water-soluble stabilizer (you cannot sew a buttonhole without it if you use a special foot);
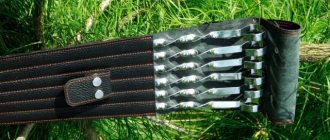
And this is how I straighten the bottom of chiffon dresses from the store that my clients sometimes bring me. As practice has shown, by placing the scissors at the desired height and moving them around the skirt, you can perfectly align the hem of the dress. This turns out to be much more accurate than, by rearranging the ruler, making marks of the desired height on the fabric!
In order not to crawl on my knees on the floor, I place a mannequin or a customer in a dress on the table.
And here are the products that I sewed before I started using the method of fixing chiffon on the table before cutting.
My most complex, most memorable chiffon dress. It is double, lined with the same fabric. The difficulty is that chiffon is finely corrugated, which makes the cutting and sewing process even more difficult, especially along the neckline, where the warp lines also run at an angle!
This is also a double dress, also lined with chiffon.
Brown chiffon blouse, sewn together with a lace skirt.
A short three and a half minute video on the topic of publication:
I wish you joyful creativity, inspiration and high-quality products!
With love and respect, Lyubov Komissarova.
www.livemaster.ru
How to sew a long cape with a collar?
- Print out the raincoat pattern.
- Choose the fabric of the desired length. Fold it in half, then fold it again.
- Cut out the neckline.
- Make a slit so that the raincoat can be put on.
- Finish the edges.
- Sew on the collar.
If the child at the carnival will be a prince or a musketeer, you can sew lace to the collar. If you are a vampire, you can “put on” a collar.
How to sew a short cape?
- Calculate your neck circumference. Then measure from shoulder to elbow.
- Divide the neck circumference in half. The result must be divided by 3.14. This way you find the radius. Round the number up.
- Fold the fabric in half twice, it will be folded into four layers.
- Knowing the radius, draw an arc using chalk and string. The rope should be placed in a corner with the central part of the folded fabric.
- Extend the rope and draw a bottom line.
- Cut out the pattern, allowing 1.5 cm on the seams.
- You should end up with a semicircle with a cutout at the neckline. It is necessary to make a cut from one edge to the neck.
- Fold in the cut areas and sew on a machine.
- Make ties from ribbons by sewing them to different ends of the cape.
A little history of the poncho, popular among fashionistas
The development of this clothing model began with the Araucano tribe, South America. They cut a hole in a wool blanket for their heads and put it on themselves. Then the fashion spread to the inhabitants of Patagonia. However, the products did not differ in the type of cut or size. Most often, they cut out a rectangle of 1.5x1.5 meters, which did not include sleeves or cuffs.
Girl in a poncho
Later the trend moved to Mexico, creating things was considered a craft. The clothes were of different colors and types of decoration. The color of the product reflected the characteristics of the area where it was made.
Additional Information! Women were assigned to work with dense materials, and men were assigned to work with thin fabrics.
Several hundred years later, the idea began to be used by the military. Waterproof material and ease of sewing made this item practical and affordable.
In the 60s, it became a mandatory attribute of hippies, since they drew the idea and style from the peoples of India and Central America. Loose fit, versatility - confirmed the hippie ideas about freedom, peace and love. It was also valued for the opportunity to express a person’s imagination and individuality, since they were sewn independently.
In the 70s, clothing began to gain popularity among needlewomen and housewives. They began to be knitted using various stitches and adding embellishments. So people moved away from the traditional rectangular, square shape and began to use them as household products. Afterwards, ponchos appeared at Couturier’s fashion show, paired with various things.
You might be interested in this: Features of Tilda doll patterns and sewing
In 2022, ponchos are becoming fashionable again. Dior, Moncler, Burberry are some of the many brands that have ponchos in their collection.
Poncho on a model at a fashion show
How to sew a cape for a Zorro carnival costume?
Materials:
- Double sided fabric
- Sewing accessories.
Progress:
- Fold the fabric in half and mark the middle.
- Place the fabric on the child so that the marked middle meets the cervical vertebra.
- Secure the fabric at the front with a pin. Also use pins to mark the excess fabric on the shoulders and the end points of the shoulder.
- Mark the neckline with chalk.
- Remove the cape and draw a chalk mark on the bottom of the cape.
- Sew the darts.
- Fold the raincoat along the fold and edge the neckline with ribbon.
- Sew a button on both sides and make a loop of cord for the fastener.
"Little Red Riding Hood"
In such a cape you will resemble Little Red Riding Hood. You definitely won't go unnoticed in it. It is best to wear it with simple, basic things.
You will need:
- Red fleece.
- Clasp.
- Rivets.
- Super glue.
- Scissors.
Master Class:
- Fold the material into three layers.
- Cut one corner in a semicircle.
- Then you need to turn the material inside out and cut out the neck.
- You need to cut a strip from the middle of the neck.
- Sew rivets along the edges of the product.
- The last step is to attach the clasp.
How to sew a wizard's cape?
Materials:
- Sewing supplies
- Textile
- Finishing
- Chalk.
Progress:
- Decide on the length. For a wizard, knee length or shorter is best. Multiply the length of the product by two and add seam allowances. This is your fabric consumption.
- Transfer the pattern from paper to fabric.
- Cut a semicircle for the throat and make a drawstring so you can thread the lace through it later.
- Cut out the parts using scissors. Fold in the edges and stitch.
- Hem the edges with trim.
- Thread the lace into the drawstring.
- If desired, you can sew various patterns onto the cloak, turning it into a magical one.
LiveInternetLiveInternet
—Categories
- ***VIDEO/ AUDIO (17)
- School - lessons (1)
- ***EMBROIDERY (329)
- bead embroidery, sequins (9)
- satin stitch embroidery (7)
- embroidery other techniques (8)
- cross stitch (277)
- ribbon embroidery (17)
- isothread (7)
- carpet embroidery (7)
- machine embroidery (5)
- mini (12)
- monochrome (64)
- miscellaneous (11)
- ***GENEALOGY (1)
- ***WE COOK TASTY AND FAST (202)
- second (2)
- baked goods (22)
- breakfast (13)
- winter preparations (6)
- from cottage cheese (1)
- drinks, desserts, ice cream (25)
- salads (1)
- sweets (11)
- sauces (2)
- spices, dyes, additives and flavorings (10)
- soups (1)
- ***MONEY (39)
- earnings on the Internet (13)
- ***CHILDREN (290)
- children. developer (125)
- exercise, massage, finger games (30)
- about children (90)
- education (9)
- create with children (44)
- things to do (40)
- ***PAPER (167)
- cut, fold, glue (23)
- cover. notebook book (40)
- origami (1)
- postcard. DIY paper (90)
- papier-mâché (4)
- parchment. embossing (3)
- ***ILLUSTRATIONS (96)
- gimp, photoshop, photo editing (28)
- b/w pictures, silhouette, monochrome, stencil (46)
- ***MY LIBRARY (191)
- money. business. new thinking (15)
- interior (13)
- books, magazines download (27)
- Love. sex. relationships (16)
- about children. upbringing. health, etc. (56)
- from conception to one year (29)
- relationships, psychology, etc. (6)
- developmental 1-3 years (15)
- developmental 3-5 years (5)
- developer different ages (7)
- needlework. various types (29)
- reading to kids (16)
- this is interesting. miscellaneous (8)
- ***SOAP, CANDLES, AROMAS. and so on. do it yourself (159)
- for bath and shower (4)
- oil (1)
- soap (40)
- candles (23)
- ***UNKNOWN (103)
- make wishes come true (30)
- simoronym money (15)
- ***HOME TOWN NEWS (21)
- relationships (13)
- ***HOLIDAYS (185)
- New Year (129)
- Easter (19)
- gifts (37)
- gifts for children (1)
- gifts for women (3)
- gifts for men (2)
- ***SUBURBAN HOUSE (45)
- ***HAND CRAFT (427)
- designer doll, soft toy (83)
- tags, labels (7)
- beads (22)
- bouquet of sweets (22)
- bottle, wine glass - decor (46)
- knitting (8)
- decoupage (10)
- wood (30)
- from threads (12)
- art studio create (21)
- coffee (4)
- sculpt (20)
- master class (74)
- weave (7)
- packaging, baskets, boxes, bags, etc. (99)
- DIY flowers, bows (65)
- ***SECRETS OF BEAUTY AND HEALTH (210)
- alternative medicine (53)
- aromatherapy (2)
- hair (10)
- health (77)
- manual therapy, etc. (13)
- beauty secrets (70)
- ***SEVEN (221)
- for home, home economics (27)
- apartment interior (33)
- dangerous (40)
- relationships (38)
- self-improvement (48)
- you are a woman (46)
- cleaning (29)
- ***POEMS, QUOTES, THOUGHTS (70)
- fairy tale therapy, parables (19)
- ***TEXT BOOK LI.RU, Internet (50)
- ***SEWING BASKET (373)
- applique, felt (25)
- hats, scarves (35)
- for games - for children (29)
- carnival (30)
- mitts, gloves, mittens, socks (6)
- fashion, style (21)
- We're going, going, going. (8)
- shoes (3)
- pillows (15)
- secrets of mastery (31)
- bags (47)
- cozy little things for the home (22)
- we sew for children (19)
- sew clothes (119)
- NOT DISASSEMBLED (5)
- USEFUL LINKS (36)
How to sew a Rain cape?
Materials:
- Fabric is waterproof
- Sewing accessories
- Lace
- Buttons (can be replaced with buttons) – 4 pieces
- Tips for lace.
Progress:
- Print or redraw the pattern.
- Cut out the pieces: 2 capes, 2 trims, 2 pockets, a flap and 2 hoods.
- Trace the pattern onto the fabric using chalk. Add allowances. A centimeter or one and a half will be enough.
- Cut out the pieces and baste them.
- Sew the hood to the base. Don't forget to make a fold into which you will then thread the lace.
- Make decorative stitches along the edges.
- Sew two pockets.
- Attach the clasp and buttons.
Cape - a fashionable replacement for the usual coat
To add variety to your wardrobe, you can sew a new fashion item with your own hands.
Compared to ordinary coats, sports jackets and raincoats, it looks so fresh and modern that you just want to quickly decorate your wardrobe with it.
Sewing it yourself is not difficult. The cape of the musketeer era still has a trapezoidal silhouette. It can be complemented with a stand-up collar, buttons, a supate clasp and other additions.
The length can also be any - from short to maximum length. And instead of sleeves there are slits for the arms. If you want to look extraordinary, then sew yourself a pretentious outfit.
What to wear with it? With skinny trousers, a sheath dress, a pencil skirt, tabernacle jeans, even with leggings. It will look elegant with an evening dress.
If you wear this type of clothing in the cold season as a coat, then wear a sweater with long warm sleeves, a sweatshirt or long gloves under it.
There is some inexplicable mystery and attractiveness in this wardrobe element, so start sewing immediately. Capes will help hide all the imperfections of the silhouette, so even a woman with curves will look luxurious.
How to sew Koshchei's cape?
Materials:
- Black fabric
- Sewing supplies.
Progress:
- According to the pattern, outline the details, first measuring the circumference of the neck.
- Cut a semicircle for the throat and sew on the collar. The collar should be high. In order for the collar to stand, you should stitch it onto the cardboard and connect it to the fabric that will cover the cardboard.
- The bottom can be made smooth, or it can be torn like Batman’s.
- Make a drawstring and thread a drawstring through it.
How to sew a cape for Halloween: ideas and photos
We discussed the main ways to sew a cape for a carnival for a child above. The only difference will be in the decor and materials used. Get ideas and let your little one be the most original at the party!