Who is the main symbol of the New Year? I believe this is Santa Claus. This old man pleases us with gifts and magic. What else do we expect from this holiday? Well, since we have already made Christmas trees, glued postcards, sewed a snowman, then we definitely need to make Morozko.
Moreover, there are also many ideas for this. We will select options for every taste and for any material. After all, what is the most important thing in this craft? That's right, red hat and white beard. And that’s it, a guest from Veliky Ustyug is coming to us for a holiday. Well, for those who are closer to Santa Claus, there will also be ideas.
In general, it’s time for us to create and be inspired!
How to make a craft from nylon tights, master class in video
There is a cool idea for creating dolls using the stocking technique. Unfortunately, I am not a master at this, so I am providing a master class in video format.
And here I’ll give you an idea from a sock
You can make a body without handles. The main thing is that it is sustainable.
Well, do you often find balloons in your house? They also make wonderful Santa Clauses.
That's not all. We can say that we are only at the very beginning of the journey!
New Year's napkin
Decorating the New Year's table depends not only on delicious dishes, but also on its decor: candles, napkins, a beautiful New Year's tablecloth. The entire New Year's situation will depend on each element. We suggest you fold a napkin in the shape of Santa Claus using step-by-step photos as an example. Take a couple of napkins for work, one of them is red, and the second is white.
After this, fold the napkins together, making sure their top corners are the same.
The lower, side corners are bent towards the central fold. We got a couple of triangles, and on top - one large triangle.
Connect the bottom corner to the top corner of the napkin.
After this, turn the napkin over with the front side facing you.
Bend the top corner down, not to the very bottom edge.
Then we bend a strip, the width of which is half a cm.
We wrap the right edge behind the base.
Related article: Treasure chest. Volumetric Pop-up card
Use the same method to fold the left edge.
Place Santa's napkin on the saucer. Draw eyes with a black marker.
Knitted Morozko and patterns
Now options for crafts for those craftswomen who knit. I liked these non-standard Morozushki. And it doesn’t matter that none of them is wearing a red hat; you still can’t confuse them with anyone else.
This selection shows how to knit such beauties.
Of course, there is a scheme.
The idea is the same, but here the crochet pattern is different.
You can also make a three-dimensional Santa.
Or just cross-stitch it.
We'll talk more about embroidery below. There will be enough diagrams there.
Santa Claus from a plate
You will need: paper plate, colored paper, scissors, glue, marker, printer, eyes, hole punch, rope.
Master Class
- Print the template and cut out the pieces.
- Fold the plate in half.
- Fold the cap and glue the parts as shown in the photo.
- Punch a hole in the top of the hat and attach string for hanging.
Santa Claus from the plate is ready! I recommend watching this video!
Simple paper crafts
Of course, we will now make crafts from paper and cardboard. There is simply nowhere without this. This is the most accessible material for us. Especially if the children make the crafts.
In addition to this Frost, you can decorate the windows. For example, using this stencil.
Cones make a lot of different ideas. In the photo below you will see a detailed master class on how to create such funny Frosts. This cone pattern can be used for any other crafts.
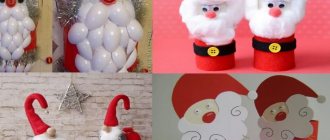
Well, here’s another great idea made from cardboard and paper. The main thing is what kind of beard turns out gorgeous with 0 rings!
And these little grandfathers can even be hung on the Christmas tree. I really loved the bow mustache idea.
Here are more cone blanks.
Based on them, such crafts are made.
Or you can simplify the task. And make the base yourself. The main thing is to secure the edges of the cone well so that they do not unravel.
Another fun craft and a master class for it.
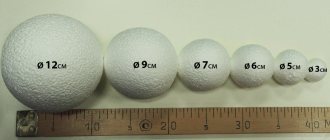
Now for a more complex idea. This Frost is made from two paper balls.
Such balls are made according to this scheme. By the way, you can also make a toy for the Christmas tree.
For those who are familiar with the quilling technique, here are some ideas.
You can make an individual gift for each party participant from corrugated paper and sweets.
I laughed at this craft. How funny Santa turned out.
The hat folded like an accordion is simply incomparable. Both volume and relief are created at once.
Another craft with a curly beard.
You can create such an interesting Frost from cardboard.
Idea for little kids! Use your own stencils for crafts.
This craft can be made from pieces of paper or plasticine balls.
Hello Santa from Peppa Pig!
Our parents keep making crafts and crafts. And we thank them and take them into service!
Now I’ll give you a few stencils for gift boxes with elements of Santa Claus.
And I almost forgot to show you these pendants.
You can also make them as postcards.
Paper Santa
You will need: red and white colored paper, scissors, glue, marker, pencil, wooden bead.
Master Class
- Make a cone out of red paper and secure with glue.
- Trim off any excess paper at the base.
- Draw a beard on white paper, then cut it out.
- Fold the beard in half and cut a hole as shown in the photo instructions.
- Make a flat cone shape where the beard is attached.
- Place the beard onto the cone, then glue on the nose and mustache.
- Attach a wooden bead to the top of the cone as a pom pom.
- Draw Santa's eyes and mouth.
Paper Santa is ready! I recommend watching the video master class!
Making crafts from cotton pads for kindergarten children
Of course, it’s very easy to make crafts from cotton pads. For example, like this Frost. You just need to prepare the materials in advance. So that there is enough for each child. and there are usually about 30 of them in kindergarten groups.
Idea for home creativity.
It is very easy to glue paper and cotton pads with PVA glue. Moreover, this is the safest type of glue. It can be used for creativity even by the smallest children.
This option was in the first section, but I decided to remind you.
Santa Claus's beard can be very useful at various matinees.
Put on a red cap and a red T-shirt and young Santa Claus is ready. Or Santa Claus.
Description of work
Let's start creating a small and cute Santa Claus with our own hands for the New Year. Such a grandfather will make every person happy: both a child and an adult. Don't forget that this model can also be made with crochet.
To make a New Year's guest, you need to prepare materials such as felt in several colors (white, black and red, cream). You will also need filler, glue, scissors, thread and needle, and a black marker.
The first step is to cut out a circle with a diameter of seven cm from red felt. Then take cream-colored felt and cut out a circle from it with a radius of two cm. If you understand that to make such a small toy for the New Year, you will need a small piece of felt. Then use a running stitch to walk around the perimeter of the circle, apply filler to the center, and then tighten the seam. Thus, we have a three-dimensional ball. We repeat such manipulations with another circle.
After this, sew both balls together, this will be the head and body of Santa Claus. Then we decorate the toy by adding an accessory - a black belt, a beard made of cotton wool and a small white button.
Take a black marker and draw two eyes, and then attach a hat to the top. This is the kind of toy we got. You can decorate the New Year tree or holiday table.
DIY Santa Claus made from felt
Of course, felt! They don’t make anything out of it! And definitely a lot of patterns and templates. Let's get started, please!
This is your first master class. This is a Christmas tree toy. You can, of course, play with it like that, but it’s too unstable.
Pattern for Santa Claus.
These crafts simply amaze with their thoroughness and presentability.
There may be several patterns for them. For example, this one.
It also turns out to be such a Morozushko.
For the cap, take this diagram.
The next pattern for the pendants.
Now for detailed instructions on how to sew such a boot for gifts.
The idea of a New Year's wreath is very unusual. You can use not only felt, but also fabric.
Another template for inspiration.
You can make a lot of wreaths. They are suitable as decor for any room.
This Frost will not leave anyone indifferent. It can also be used as a pendant, because the hat has a convenient hole for this.
For decoration, you can make several New Year's symbols: a Christmas tree, a star, a Christmas ball, deer, etc.
Fantasy is limitless. Therefore, based on one pattern, you can create many new ones.
What attracted me to this craft were the bells. How festive they ring!
You can also make three-dimensional and flat figures. I provide patterns for both.
This Frost is very similar to the New Year's gnome, but does not lose its relevance and charm at all!
In general, only your imagination is important. And we will provide you with the diagrams!
How do you like this craft using bushings?
There is nothing complicated here and you don’t even need to sew anything.
We sew and knit toys » How to sew a tilde “Santa Claus with a reindeer” in just 3 steps.
How to sew a tilde “Santa Claus with a reindeer” in just 3 steps.
Hello! I am Irina Demina. And today I will present to your attention a tutorial on sewing the tilde “Santa Claus with a deer”.
How does my MK differ from those already available on the network? Because I will show my version of sewing Santa and tell you little secrets that sometimes make sewing dolls much easier. We will sew the tilde in 3 stages: Santa himself, a costume for him and a deer.
Stage 1. Sew Santa Claus in 7 steps.
Just
7 simple steps
- and Santa is ready!
To sew Santa himself,
we will need the following
materials
:
1.
Fabric for the doll’s body: any thick cotton fabric in a flesh tone.
Mine is Korean cotton. If there is no bodily tissue, it doesn’t matter. You can dye white fabric with a solution of strong tea or coffee. I won’t dwell on fabric coloring options - there are a lot of them on the Internet. 2.
Striped fabric for legs.
3.
Threads for sewing to match the fabric and contrasting ones for basting.
4.
Acrylic paints (to paint the eyes), and blush - to rouge Santa’s cheeks.
You can take dry pastel. I most often blush my dolls with my blush. 5.
Wool for felting (for hair and beard).
Can be replaced with white yarn. 6.
Hollow fiber, padding polyester or padding polyester for stuffing the doll.
I use IKEA pillow filling - it is comfortable, holds its shape well, and does not bunch up when stuffed. And most importantly, it is several times cheaper than special holofiber for making dolls. much easier: 1.
Sewing machine.
If you don’t have a machine, you can sew the doll by hand. But, of course, it will be more difficult and time-consuming. 2.
Regular and zig-zag scissors (you can do without the second scissors, but they make the process easier).
3.
Needles for hand sewing.
4.
Pencil or disappearing marker.
5.
Sushi stick.
Step 1. Transfer the cut out pattern pieces onto the fabric.
The grain of the fabric is located vertically.
The author of all tildes, Tony Finnanger, suggests folding the fabric in half, pinning it with pins and transferring half of the necessary details onto it (in this case, circle the torso once, arms and legs twice each). Sew along the resulting lines - and immediately get ready-made stitched parts that can be cut out. I don’t use this method, because this type of sewing wastes fabric uneconomically. Yes, and I’m used to doing it the old fashioned way – tracing, cutting, basting and stitching. It's more comfortable for me. And there will certainly not be any distortion. But you can choose the method that you like best. It will not affect the final result. Just don’t forget that all paired parts are cut in a mirror image! Note: In the pattern, Santa's leg is cut from fabric of two colors: the top is a striped stocking, the bottom is a boot. I didn't like cutting it that way. In my case, the material, different in structure and density, gave an unpredictable result when stuffing - it stretched and wrinkled. On felt, the seam may come apart. In a word, I abandoned such experiments and decided to sew shoes (aka felt boots) separately. Step 2. Mark the place where Santa's legs (knees) will be stitched.
I simply stitch this area with a needle-forward stitch.
We sew the parts together with the same seam. We sew a stitch on the machine in increments of no more than 2 mm or manually stitch the outline of the parts using a “backstitch” seam. We leave the top of the legs and arms and the bottom of the torso unstitched. Step 3.
We take out the basting, smooth the parts, trim off the excess seam allowance with zig-zag scissors or make notches along all convex and concave areas of the parts - this will help us avoid wrinkles on the fabric when stuffing.
Step 4. Turn the parts inside out.
My assistant both in the process of turning out and in the process of stuffing is a sushi stick.
According to the applied markings, we bend the edges of the remaining unsewn holes for stuffing in the arms and body. We sweep the top of the legs along the markings. Step 5. Stuffing the torso.
We try to stuff the neck especially tightly.
Since the holofiber always tries to slip away from the neck into the wider part - the body - we fix it with a needle, piercing the neck right through, and only after that we continue stuffing. Stuff with small pieces so that the filling is distributed evenly and does not form lumps. We stuff the legs up to the knee bend. The book recommends stitching the knee and leaving the rest of the leg unstitched. I don't like empty legs at all. I sew the knee and add a little holofiber to the upper part. It will not interfere with Santa’s sitting, and will add volume to the upper part of the leg. We fill our arms up to the elbows. We fix the elbow with a couple of stitches. Leave the top unstuffed. This will help the doll calmly bend its arms. A common mistake made by beginning puppeteers is to stuff their hands too tightly. As a result, the finished doll sits with its stiff arms spread out. We don’t need this, so we don’t stuff the top of our hands! Step 6.
Pin the legs to the body. The reference point is a hint on them. I baste the legs along the front of the body. First one - from the side to the center, then the second - from the other side to the center. Now we sew on the legs, taking in the back of the body as well. You can sew the legs with a hidden seam. It’s more convenient for me to use this “line”. The place where the legs are attached under the pants will not be visible, so you can sew them in the way that is most convenient for you. Without finishing it a little to the edge, I fill the body with holofiber. If the torso is not padded tightly, the holofiber will sooner or later slip out of the neck and leave unsightly wrinkles. We don't need this. Therefore, we stuff the torso tightly. We sew to the end. We remove the needle from the neck.
Step 7. Pin the arms to the body.
We align their position. 4 needles help me. We sew the handles with a hidden seam. Well, our Santa is ready. While naked and bald. But already very cute.
The next stage is sewing a suit for Santa
.
Quoting and partial copying
of articles and stories is possible with indication of the source in the form of
an active link
to the corresponding page of the site.
You might also be interested in:
| Gimp Embroidery: Master Class Gimp (metallic thread) embroidery, commonly referred to as gold embroidery even when different colors of metallic thread are used, has been used for centuries for rich and dramatic embroidery. Let's find out how to embroider with gimp. |
Do you like to embroider miniature pictures? But you don’t know how to design such embroidery in an original way, and nothing else comes to mind other than a frame? Just sew a bag to store something and decorate it with a little embroidery.
Each needlewoman, during the time she embroiders, accumulates her own small but very useful tricks, which she cannot do without. I wanted to share my tricks. Perhaps for some this will not be a revelation. And this may help someone. So, let me begin.
| Category: We sew and knit toys | Date: 11/30/2015 | Author: Irina Demina | |
| Views: 8610 Tags: sewing toys, toys for the New Year, tildes, Santa Claus Rating: 5.0 / 1 |
| Total comments: 0 | |
Leave a comment:
Antispam is working! Please, no advertising or links to third-party resources. About this via Feedback.
How to quickly and easily make Santa Claus from a bottle
So, the bottles are different. Someone decorates the beauty with champagne. And someone creates something out of a plastic water container.
Of course, if we are talking about children, then we will take a closer look at the ideas. Here, for example, is a stand for office supplies or small toys.
Or just an interesting craft for decoration.
Santa can be the packaging for a child's sweet gift.
For inspiration, here are more options for oldies.
Cotton swabs come in handy too!
I think that a child can choose for himself what idea he wants to bring to life.
We crochet a festive Santa Claus on champagne using a crochet hook
What would New Year be without champagne? Everyone knows the answer - you can’t do without champagne. Why not decorate this indispensable attribute of the New Year holidays? We suggest crocheting a champagne bottle cover in the shape of Santa Claus. Of course, this option is not easy, but the result is worth spending time learning this type of needlework and knitting an unusual decorative element.
We will try to explain every step of the work so that it is clear to both beginners and experienced needlewomen.
We start knitting with Santa Claus's leg.
Take a black thread and start knitting the first row. We cast on a chain of 12 chain stitches, then 10 single crochets and 3 single crochets in the first loop of the chain. On the other side of the chain you need to knit 9 single crochets.
The next row consists of 9 single crochets, which we repeat three times, again 9 single crochets, but we repeat twice.
The third row is knitted with 9 single crochets, which we repeat three times, again with 9 single crochets, but repeat twice already.
Row 4 is knitted behind the back wall.
We knit the 5th row with single crochets.
The 6th row consists of 12 single crochets, we decrease, which we repeat 6 times, then we knit 12 single crochets.
The next row consists of 9 single crochets, again decreasing, repeated 6 times and 9 single crochets.
We knit the 8th row with 6 single crochets, decreasing, repeating 6 times and 6 single crochets.
From rows 9 to 11 we knit with a single crochet.
We knit the 12th row with a red thread behind the back wall of the knitting.
We knit rows 13 and 14 with a single crochet stitch.
Row 15 consists of 2 single crochets, repeated 6 times.
The 16th and 17th rows are knitted with single crochets.
The 18th row consists of 12 single crochets, 7 double crochets, a chain stitch and a turn.
The 19th row consists of 7 double crochet stitches, a chain stitch, and then a turn.
From rows 20 to 22 we knit with single crochets.
Row 23 consists of 3 single crochets, repeated 6 times.
From rows 24 to 28 we knit with a single crochet.
Now on the front walls you need to knit a row of single crochets with white yarn. Let's stuff the leg and sew it to the body.
We will tie the head of Santa Claus as shown in the picture with a detailed description.
Next we will tie the nose and hands of Santa Claus.
We will end the master class with interesting videos that will definitely help you in your work.
Product made from a cone
You can make Santa Claus using a base of paper cones. For this product you need to select:
- Felt in different shades.
- Thermal gun.
- Yarn.
- Thick paper.
- Threads.
- Decorations.
First, an oval is cut out of light felt, and a mustache, all parts of the face, and hair are cut out of white felt. Find matching buttons for the nose and eyes. All resulting parts must be glued together using hot glue.
It is necessary to form a cone from thick paper and completely wrap it with threads. Cut out the handles of the product from red and light felt and assemble the whole craft together. A cute and cute thing is ready!
