Hello readers of my blog! Today we will talk about how to make a microwave on the wall with your own hands. It would seem that the matter is not tricky, but when you are faced with this problem, you have to think about how to do it correctly, what preparation to do, what materials to choose. Thus, I decided that this article would be useful to someone, and I am devoting my efforts to this subject. In it, I will answer a number of questions that will arise immediately before How to make a microwave oven on the wall with your own hands, and some even after that. This topic is quite broad, because before work, thorough preparation is necessary, but how to do this? And this is a separate topic. You can learn about all this in great detail in the article below.
How to hang a microwave on a wall bracket
Kitchens in small-sized standard apartments do not always allow convenient placement of all the household appliances necessary for housewives. One of the options for a rational solution to the problem would be, for example, a microwave oven located in a suitable place on a hanging shelf. we will tell you how to hang it correctly and aesthetically.
Microwave oven: purpose and dimensions
The electric microwave oven is designed for quick heating, cooking and defrosting of food.
Its size and volume determine functionality and price. Pay attention to the type of heating element - quartz will save energy. In addition, it will ensure the formation of an appetizing crust on the meat.
The dimensions of microwave ovens are different. Therefore, immediately decide on the location of its installation.
If the depth of the device is 30 cm, it will fit in the kitchen cabinet. It is better to place the larger one on the countertop. The most popular model, with a volume of about 15 liters, has a width of up to 50 cm, a length and height of about 30 cm, and a depth of up to 40 cm.
Posting rules
When deciding on the location of the device, you should remember not to block the ventilation openings. If you attach it flush with a kitchen cabinet or other kitchen appliances, dust will accumulate behind them. This poses a risk of fire.
The microwave must be in a stable position.
Place it next to the outlet at a distance of at least 10 cm from the wall. You cannot place any objects on it, since there is often a ventilation outlet on the top panel. If water or small debris gets into the holes, the equipment may “burn out.”
Please note that a magnetic field is created during operation of the device. It can affect the SIM card of a mobile phone, laptop or their charge level.
It is also unfavorable if there are heating radiators or devices that produce steam nearby. It is better to remove electronically controlled equipment at a distance of at least 2 m.
Refrigerators and freezers are also not the best neighbors for her. High temperature will adversely affect their body and disrupt normal operation.
Microwave on the wall: how best to hang it
Such fasteners will immediately solve the issue of unfavorable proximity to the hob surface and other household appliances. A hanging shelf will protect you from small children and save space in the kitchen. Installation on it will provide more convenient access for loading, managing and monitoring the stove timer.
There are different ways to hang the device on the wall.
It all depends on imagination, desire, skill, availability of funds and necessary tools. You can mount it on brackets, on a shelf, above a dining table or work table, or in a corner of the room. You can make all this yourself or purchase it in a store.
These hangers are available in a variety of colors; it’s easy to choose to match the color of your microwave.
These are two steel holders; they are supplied with adhesive-backed rubber linings and plugs. When selecting them, do not forget about the dimensions of the device. The shelf on which the device is installed must support a weight of up to 75 kg.
First, make markings with a pencil along the horizontal line verified using a plumb line. Drive plastic plugs into the drilled holes into which screws are screwed.
Can also be hung on TV mounts. They are sold at any hardware store.
When purchasing in a store, carefully inspect all parts for damage. If you purchase a corner pendant, you should immediately assemble it and then hang it. Use a level when doing this.
DIY microwave shelf
You can make a shelf yourself. This will ensure good ventilation for the microwave, moving it to any place and not “tying it” to the kitchen furniture.
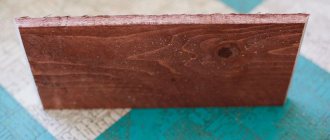
Choose plywood, board or hard plastic in a matching color. You will also need tubes 2.2 cm in diameter and 2.2 m long, 16 metal connectors.
On the horizontal, mark the fastenings of the 3x3 cm flange connectors at the corners. The holes to be drilled are equal to the diameter of the posts.
Rods are attached to them, to which flanges are screwed with self-tapping screws. A clamping screw is used for fixation. It is best to place it facing the wall, otherwise it will be conspicuous.
To maintain the exact shape, four identical pieces of 60–70 cm should be sawn off from the main rod. Then insert the rods into the base and connect the entire structure. Place a hanging mount on the back side.
Skill and imagination will help you make a stand, including a corner one.
Before hanging, it is worth painting your product with three layers of varnish, as it will constantly be exposed to temperature and moisture.
We think that the tips given in this article will convince you of the advantages of wall-mounting a microwave oven and will help you decide on the options for mounting it.
All the work can be done by an invited master. The choice depends on your skills and ability to pay.
How to hang a microwave on the wall
A microwave oven is an almost integral part of every kitchen, but not everyone knows the specifics of its installation. We’ll talk about the types of microwave mounts and the features of this process further.
Microwave shelf requirements
In modern kitchens, it is quite difficult to find a place for a microwave: you need a strong base, good ventilation, and space for the door to open freely. It is necessary to ensure a safe distance from the stove, sink, and heating radiator. You cannot place a teapot or coffee maker on the appliance. The optimal distance from the floor is about 85 cm. The socket should be no further than one and a half meters.
To ensure good ventilation for the appliance, do not cover it with napkins or towels. The space behind the back wall of the microwave oven should be at least 10 cm, above the top cover - about 20 cm, around the side walls - 5 cm.
It is good to place household appliances on the desktop: when the device is installed no higher than chest level, it is easier to get hot dishes.
Sometimes the stove is placed on the windowsill. It must have sufficient width. It is important to remember that the elements of the device become very hot - in winter this can lead to the formation of cracks in the glass.
You can place the microwave oven in a kitchen cabinet, providing ventilation holes in advance.
The best location for a microwave is a special shelf mounted on the wall.
You can simply purchase a shelf for the TV and install a microwave oven on it. But in this case, you won’t be able to do anything under the device—it’s unsafe.
The kitchen should be comfortable and safe. The microwave oven must be placed so that it is convenient to use.
In order to attach the product to the wall, you must follow certain requirements:
- There must be good ventilation. If the shelf covers the device from the top and sides, you need to drill holes for ventilation.
- The dimensions of the structure should not create inconvenience in the kitchen.
- The product must be made of durable material to support the weight of the microwave.
A shelf for these household appliances should be convenient, practical, reliable and safe.
Options for placing a microwave oven in the kitchen
For many people, a microwave oven is an indispensable assistant, with the help of which they can warm up or defrost food very quickly. Modern models of microwave ovens are equipped with a large number of functions that increase their popularity.
But it is precisely the owners of small kitchens who have a problem with where to place a rather large device in the form of a microwave oven.
The most common option is to install the microwave on the work surface. On the one hand, no fasteners are required, but on the other hand, the device takes up a decent part of the countertop, making it more difficult to cut and process food.
Another option for placing a microwave oven is a window sill. This is possible when it has a certain size and power to hold the microwave.
In addition, there should be a place for an outlet nearby. Among the disadvantages of this place is the formation of condensation in the winter season, since cold comes from the glass at this time, and heat comes from the microwave oven during operation. In addition, it will not be possible to install indoor plants on the windowsill due to the radiation that comes from the microwave.
If you have a refrigerator that is not too high, the microwave oven is installed directly on it. Although this is also inappropriate, because it heats up during operation, and the refrigerator emits heat.
The most successful option for placing a microwave oven is to hang it using brackets. In this case, the microwave oven is installed on any convenient section of the wall.
Using a hanging shelf is also an excellent option, which allows you to securely fix the microwave oven. The main condition for this type of installation is the presence of free air ventilation, which ensures the operation of the microwave. If this is not done, there is a risk of the device overheating.
In order to increase the free space in the kitchen, a microwave oven is built directly into the kitchen unit. But this option should be foreseen in advance, even at the furniture manufacturing stage.
Location
There are 5 main places to install a microwave in the kitchen:
- It is convenient to place it in one of the compartments of a pencil case or corner cabinet.
- In the opening of the floor cabinet with a hinged door under the work table plate.
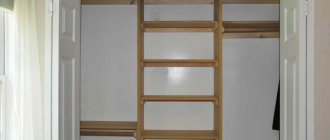
- One of the best solutions would be to place the microwave oven in a wall cabinet.
- A good option would also be to install a built-in microwave in an integrated furniture column above the oven.
- And finally, you can hang the stove on brackets under a corner cabinet in the corner of the kitchen, although this is no longer directly related to the topic of the article.
Remember that the stove is a source of heat, but it must be protected from high temperatures.
If it is not possible to avoid close proximity to the oven, then it is necessary to lay a layer of thermal insulation around the oven in the form of an asbestos sheet, a mineral basalt slab, a mullite-silica slab (Superizol) or a new environmentally friendly silicon-based material (Supersil or Vermoculite). This also applies to the TV and refrigerator.
Expert opinion Bashir Rabadanov Technologist at the furniture company Woodband
The oven must not be placed in a cabinet under the dishwasher. Moisture will definitely penetrate inside and cause a short circuit. This may destroy the device and may cause a fire.
Microwave on the wall - features of fixation
The main function of mounting a microwave on the wall is to increase free space in the kitchen. There are several options for mounting a microwave oven, which differ in color and decorative solutions.
The price for installation work on installing a microwave oven is quite high, so it is cheaper to install it yourself.
Please note that not all microwave ovens can be wall-mounted.
Oversized structures will not be able to fully support it. Special requirements apply to the wall on which the microwave oven is mounted. It must be durable, preferably made of concrete or brick.
There are several types of microwave mounts. In relation to the color scheme there are:
The most popular colors are white and silver, since these are the most common microwave ovens.
The main fastening element for a microwave oven is a bracket that has drilled holes through which it is fixed to the wall. Next, the sliding linings are fixed on plastic plugs and their holes.
In addition, do not forget about the electrical network, since the microwave oven must be mounted in a place where there is an outlet or its subsequent installation is possible.
Microwave wall mount and its choice
You should approach the issue of choosing fasteners for fixing a microwave oven on the wall with special responsibility, because the quality of fastening and the safety of people in the kitchen depend on the quality of the fasteners.
Among the main parameters that determine the type of fasteners are the dimensions of the furnace and the total weight of the structure. In relation to the dimensions, the brackets are variable in length, so they are adjusted depending on the length of the unit.
They are selected to a certain, pre-measured length. But when taking into account the weight of the microwave, you should compare it with the material from which the wall on which it will be mounted is made.
For example, when fixing a microwave on a concrete wall, no problems arise and it is possible to use less durable fasteners than when installing it on a wall made of plasterboard. But, first, it is recommended to read the instructions or technical parameters of the fastener, which must indicate the maximum weight of the device that it can withstand. It is preferable to choose fasteners with a small margin of 0.5-1 kg.
Pay due attention to such elements as clamps. They are designed to prevent the stove from accidentally falling. Most modern fasteners are equipped with them.
The last, but quite important parameter for choosing reliable and good fasteners is the attractiveness of the appearance. Although the fastener is almost invisible in the kitchen, manufacturers still offer a large selection of these parts in different colors and textures.
Most often they are plastic or steel. A combination of these materials is possible, which fits well into any interior style.
How to hang a microwave on the wall: procedure
The microwave oven is attached to the wall in two ways. It is fixed directly on the wall surface or built into a kitchen cabinet, in which it will also take up little space and can function normally.
The installation procedure begins with the selection of the element to which the fastening will be made. Most often it looks like two metal or plastic supporting parts parallel to each other, on which the fixation takes place.
It is possible to mount the supports on a beam for stronger mounting and support of a microwave oven with a large weight.
To select the type of fastening, you should compare the weight of the microwave with the technical parameters of the fastener on which it is installed.
To carry out installation work, you will need a drill or hammer drill, which will be used to drill holes for dowels. But, before that, it is recommended to take measurements of the product itself and the wall on which it will be installed. Draw a preliminary installation location with a pencil in order to attach the microwave evenly and efficiently.
Install the dowel into the base that is drilled for it.
When attaching a plastic dowel, use your hands; if it is metal, you will need special equipment in the form of a dowel gun. Next, place the part in the form of a microwave bracket on the wall and hammer it in with nails. Check the connection strength.
If you are concerned that these fasteners will not be able to support the weight of the microwave oven, it is better to replace the nails using anchor bolts.
If you plan to install a microwave oven in the design of a kitchen cabinet, you will need to purchase a special frame that can secure it in the cabinet.
To save on buying a frame, make it yourself using metal corners welded or bolted together. Paint the structure to match the color of the cabinet. Fix it to the wall surface using dowels or anchor bolts, as in the first option.
1. The first option for building a microwave shelf on the wall involves the use of purchased materials in the form of a furniture panel of the desired color and size.
For example, with a standard cabinet width of 60 cm, the bottom shelf is equipped on three sides. To provide additional space on which the microwave oven will be installed. Among the disadvantages of this type of construction, the following should be noted:
2. The second option is to install the microwave oven on a TV shelf. Their acquisition will not be difficult, and installation work is carried out very quickly.
3. The most optimal option for mounting a microwave oven is the installation and preliminary construction of a free-standing shelf. Among the advantages of this type of installation we highlight:
A standard microwave oven has a size of 50x41x30, we will focus on these numbers. If your microwave is larger or smaller, you may need to adjust the shelf size.
In the areas indicating the horizontal plane, mark the points at which the flange connectors will be attached: 3x3 cm from each corner. For the middle shelf, holes are drilled with a diameter of 2.2 cm. A rod will be installed in this hole.
But first you need to attach flanges to it. To do this, use self-tapping screws. To fix the rod on the surface of the panel, use the clamping screw, which should be turned towards the wall to avoid damaging the appearance of the shelf.
To obtain a shelf of the correct shape, you need to cut off four equal sections from the main rod, measuring from 60 to 70 cm. To assemble the shelf, just install the rods in the shield and connect all the other parts.
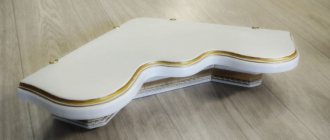
Shelf-shelf
Another type of microwave shelf that can be made at home. It is distinguished by its convenience and original design. The advantages of a shelf-shelf include the following:
- high-quality ventilation of the microwave, which is why there is virtually no chance of the mechanism overheating;
Shelf-shelf has its advantages
- the shelf fits perfectly into different interiors;
- it is great not only for the microwave, but also for other useful items in the kitchen;
- If desired, the finished structure can be rehanged at any time.
Metal corner
To make your own shelf-shelf, you need to prepare the following:
- small corners made of steel;
- steel flanges in the amount of 16 pieces;
- small metal rods;
- furniture boards, which can be found in hardware stores. A total of three standard boards are needed.
Tools need to be prepared in advance
The process of making such a shelf is simple. You just need to follow the instructions below:
- make markings on the surfaces of the furniture pieces, marking the places where the flanges will be attached. The recommended distance between the corner and the flange is 30 mm;
- Using an electric drill, drill large holes in the middle shelf. The diameter of each of them should be 22 mm;
- attach the flanges to the middle shelf by screwing in the screws using a Phillips screwdriver;
- cut 4 identical pieces from the rod. The length of each cut piece should be from 65 to 70 cm;
- secure the rods using a special clamping screw;
- attach the shelves to each other using wood glue and self-tapping screws;
- Attach metal corners to the back of the structure.
A shelf or small wall rack is also a good option for installing and storing a microwave oven
Stand with two shelves (above the microwave)
At this point, the process of making a shelf-shelf can be considered complete. All that remains is to coat the product with varnish and, after waiting for everything to dry, hang the finished shelf to the wall using self-tapping screws and dowels. Of course, the dimensions of the shelf and the number of shelves can be changed if desired.
Microwave stand on the wall: manufacturing instructions
To produce this type of supply you will need:
All the necessary elements are quite affordable, in addition, it is possible to replace the furniture panel with chipboard or MDF panels.
We suggest making a shelf with the following dimensions:
To cut parts into blanks, you will need to use a jigsaw. To carry out markings, you will need a ruler with one right angle, a pencil and a tape measure. Pay careful attention to the marking of parts, since lines or angles that are not too straight can significantly worsen the appearance of the structure.
When all the pieces have been cut, begin sanding them using a belt or vibrating sander. If this tool is not available, you should use regular fine sandpaper.
The final stage is the assembly of the entire structure. To do this, use wood screws and dowels.
Before you start screwing in the screws, pre-drill the holes for the dowels. This procedure will help prevent wood from cracking during operation. After assembling all the parts, attach a special mount to the back of the structure, with which it will be fixed to the wall.
Next, the shelf needs to be painted or varnished. If the second option is chosen, then the varnish must be applied in at least three layers, since the shelf is located in the kitchen and is constantly exposed to steam and moisture.
If necessary, the shelf is simply painted with a special paint designed for working with wooden surfaces. After drying, hang the shelf on the wall and install the microwave oven. Please note that when choosing a place to install a shelf, you should pay attention to the presence of an outlet or the possibility of installing it.
How to choose microwave brackets
A wall-mounted microwave bracket is a great opportunity to create an ergonomic design. But among all the diversity, it is very easy to make a mistake and make the wrong choice.
How to install
Installing a bracket under a microwave is an easy task. You can do it yourself, without resorting to the services of a master.
First, prepare the necessary materials and tools.
You will need:
- bracket;
- electric drill or hammer drill;
- plastic dowels and screws;
- hammer and screwdriver;
- pencil.
Before you begin attaching the bracket to the wall, you need to choose a suitable location. The wall itself must be made of concrete or brick, otherwise the fasteners will easily come out of the wall and your microwave oven will fall. In addition, the bracket for the microwave must be placed so that it is convenient for you to use it. If you have children in the house, then you need to install the microwave at such a height that they can reach it. After all, one of the advantages of a microwave is its ease of use. And it won’t be good if your schoolchild, when he comes home, cannot heat up his lunch.
Therefore, carefully consider where to attach the bracket to the wall. The microwave should be accessible to all your household members, but at the same time it should not interfere with free movement around the kitchen. In addition, you need to take into account that the microwave requires power, so there should be an electrical outlet nearby.
Once the location has been chosen, we get to work. Place the bracket against the wall and mark it with a pencil. Then drill holes at the marked points. Their depth should correspond (or be slightly larger) to the dimensions of the plastic dowels. Drive the dowels into the drilled holes, attach the bracket and secure it with self-tapping screws. If the design provides special plugs for the screw heads, then insert them.
Check the reliability of fastening the bracket to the wall; of course, there is no need to test it using your own weight. Still, the microwave oven does not weigh too much, so just tug on the fasteners to see if they are loose. You should also check whether the installed microwave will be horizontal and whether one of the edges is overhanging. That's it, the job is finished. All that remains is to install the microwave oven on the bracket and connect it to the power supply.
The microwave is an indispensable assistant, which, unfortunately, takes up a lot of space in the kitchen. This becomes a problem if you live in a small living space where every inch is valuable. Fortunately, there are different options for placing a microwave oven. The ideal solution to the problem for a small apartment is not to install the device, but to hang it on the wall. This way you can save valuable space and at the same time place this necessary device in your home. In this article we will look at how to hang a microwave in the kitchen correctly and what nuances will need to be taken into account.
- the microwave itself;
- two special brackets;
- fasteners;
- drill;
- screws;
- construction tape (useful if you are hanging the microwave on a tiled wall).
Operating principle of the bracket
A bracket is a device that holds objects on the wall. It is distinguished from ordinary hinges by its complex, durable design, capable of extension and tilt. True, the simplest brackets can be built without such luxury.
Microwave brackets are often curved angles that are attached to the wall and connected together for added strength. Complex models are panels with fastening strips and other structures.
The entire structure consists of different types of planks fixed to the wall. The principle of operation is to hold household appliances, in our case a microwave, in a place convenient for the owner.
What types of wall mounts are there for microwave ovens?
The whole variety of brackets comes in two main types - fixed and telescopic. The first is a static structure made of metal profiles and pipes that does not change its size.
The advantage of a fixed bracket is its strength: the absence of sliding units strengthens the connections. Often the fixed mount for a microwave on the wall is monolithic, which is good with maximum weight.
The telescopic one changes size, both vertically and horizontally. This fact allows you to adjust the dimensions within the permissible dimensions and load of the bracket. The solution allows us to obtain much less strength, which is definitely not good for the owner.
If you decide to buy a microwave for a long time, then it is more profitable to buy a fixed bracket without risking its strength and health. If you need to change your microwave in the near future, buy a telescopic one - preferably with universal fasteners.
Microwave bracket on the wall: what is it for, how to use it?
As already mentioned, the main purpose of the bracket is to secure the microwave to the wall. The bracket is also used as a shelf or a hanger for kitchen appliances: the possibilities completely depend on the model and installation location.
Its only use is to mount it on the wall and install the microwave. An important point is that brackets for microwave ovens are calculated only by their weight. Using a bracket for such a purpose harms both the object placed on it and the people around it, increasing the risk of injury due to breakage.
“Hide” under the countertop
Microwave shelf: DIY installation options
To prevent the microwave oven from taking up useful space on the work surfaces, it can be moved down and placed under the countertop. To do this, you need to replace one of the lower cabinets of the kitchen unit with a niche for a microwave.
It is best to initially include such a change in the project - then it will harmoniously fit into the overall design and will look neat and stylish. But you can also refurbish an existing space.
This placement also has its disadvantages. The microwave is located very low, which makes it difficult to use, especially for tall people. Be sure to think carefully about this option if there are small children in the house. Given their omnipresence and curiosity, this can be dangerous. In addition, frequent leaks and stains on the facade of the device cannot be avoided; it is necessary to more carefully monitor its appearance.
Choosing a location for installation
The installation location depends on the type of fastener. Fixed brackets are often installed flush against the rest of the furniture to create a unified space. Sliding ones require more or less space in the future, since the dimensions can change.
The task comes down to creating an additional surface. This parameter helps to place the microwave in a good place and create an ergonomic, interesting interior.
A great place to place a fixed bracket is next to a kitchen drawer. An option is possible when installing a bracket under a separate drawer where there is no table top.
The telescopic one serves well as a continuation of the kitchen set to the right and left of it. Using the space will allow you to change the size of the bracket in the future without spoiling the appearance of the kitchen.
Where is the best place to put a microwave?
The microwave device is involved in cooking food. Its ideal location is the kitchen. With the right approach, it will organically complement household appliances and will not become a hindrance.
Various placements of the stove are possible in the kitchen area:
- on the refrigerator;
- on the working surface of the tabletop;
- on the dining table, windowsill;
- in a cabinet, on the wall.
Such methods are suitable when the dimensions of the microwave are standard and it does not need to be built in. Each case has its own characteristics.
On the refrigerator
In small rooms with a low refrigerator, this is the only option.
Advantages:
- no installation required;
- the working area of the room is free.
Flaws:
- on a tall refrigerator the oven is inaccessible;
- inconvenient to use and clean;
- looks outdated.
It is not advisable to install equipment on top of each other. When the refrigerator is the only place, you should take care of insulation and ventilation. You can place a thick, stable cutting board under the microwave.
On the work surface
In rooms with kitchen units, a simple and common method of placement is used - on the countertop.
Advantages:
- ease of installation and maintenance;
- accessibility during operation.
Flaws:
- the useful working area is reduced;
- gets dirty quickly.
On the table, windowsill
Most kitchen spaces are places for eating. For this purpose, a table is installed there. You can free up space by placing a stove on it.
Positive sides:
- frees up useful countertop space;
- Suitable for kitchens without cabinets.
Negative sides:
- the space of the dining table is reduced;
- inconvenient to use (open, close the door).
In large families, you can place the microwave on a wide windowsill. This option is rarely suitable, as it requires a strong foundation. Damage to the frame or glass unit cannot be ruled out. Opening the window becomes more difficult.
Maximum permissible weight
The maximum permissible weight is based on the design of the bracket (bends, additional supports). The material of the product is also important. The maximum weight of fixed models is greater than telescopic ones, which is explained by the smaller number of vulnerable nodes in the circuit.
Look for the weight indicator on the bracket packaging. The number is theoretical and certified - the bracket will definitely not break under the specified weight. The mass above behaves unpredictably, even to the point of breakdown.
Choose the weight based on the weight of the microwave. In order not to be mistaken with the strength, take the weight of the microwave and add 3-5 kilograms to it, which will give you a margin of strength and allow you not to worry about the kitchen appliance.
Types of shelves
To make the stand, plywood, metal, wood or other types of materials with high strength can be used. All designs that can be made at home are divided into several types. Below are the most popular ones.
The main thing is to provide convenient access to it, because often the microwave is used more often than the oven, heating frozen foods, heating this or that dish
Table. Types of microwave shelves.
| Design name, photo | Description |
| Rack | These are standard floor-mounted structures. The rack consists of several shelves, on one of which you can place a microwave oven. |
| Hanging shelf | One of the most popular options for placing a microwave or other items. The dimensions of suspended structures can be selected individually at the planning stage. |
| bracket | There is no need to waste wood on making a shelf, because the microwave oven can be secured using a special bracket. As a rule, metal is used for its manufacture, but in the store such structures are sold from durable plastic and other materials. |
The shelf can be made open or closed, that is, with doors. The second option will allow you to hide the microwave from prying eyes, but this design is usually poorly ventilated, so the electrical appliance may overheat. To improve ventilation in closed shelves, craftsmen make special holes in the side walls. It is advisable to keep the cabinet doors open when using the microwave oven.
Hanging shelf for microwave oven
Dimensions
The fixed size corresponds to the size of the microwave oven. Otherwise, the microwave will stick out from the platform and may even fall due to careless movement. It is advisable to calculate the dimensions of the microwave when installing it so that it does not stand out too much from the overall interior of the room.
Take telescopic ones of the largest possible size so that they are no smaller than the size of the microwave. Telescopic brackets are purchased with a reserve for the future, so as not to replace the fasteners when purchasing a new stove.
Material of manufacture
Among the materials, various metals are most often used. There is no particular difference between them - the whole difference depends on the weight of the finished structure and the softness of the material used. The softer it is, the more complex the structure will have to be created; if it is tougher, the simpler it will be.
Eliminate all options where powder steel is used - it crumbles very quickly and breaks easily. Therefore, you cannot trust brackets with plastic casings: powdered iron is often hidden in them.
There are also wooden options, most often from chipboard, laminated chipboard, and less often from solid wood. They are made in the form of a shelf and are often sold together with kitchen sets. In this case, you should choose solid wood - it is much stronger than chipboard.
Brand and cost
The cost directly depends on the brand. Often, kitchen appliance manufacturers offer their own brands of brackets and produce them independently. Quality varies everywhere, but the more popular the brand, the higher its cost.
Branding here is similar to usual: there are expensive brands and cheap ones. But often the difference between them is very small. When purchasing, do not turn to “famous” brackets from Spain.
Therefore, pay more attention to the quality of the material and the indicators on the packaging and the company name. This advice will protect you from sudden troubles, such as a crack in the powdered metal in a plastic casing.
The cost ranges from 500 rubles to 4 thousand for fixed models and from 1000 to 5000-6000 for telescopic ones. The cost is greatly influenced by the presence of additional features - hangers and additional shelves.
DIY microwave bracket on the wall
This part of the article is devoted to how to make a microwave bracket for the wall with your own hands.
The easiest way to do this is with a jigsaw. The edges are rounded by marking the corner with a plate, giving a suitable shape. Using the resulting marking, a corner is cut out with a jigsaw. Sand the corners with sandpaper. Next comes the preparation of the bars to serve as the angle of support. A similar radius is made on the block using a plate in order to subsequently saw it. After preparation, begin to assemble the structure.
This is done using hexagon anchor screws. Drill holes in the side where the screws will be screwed in. Insert the screws and screw the self-tapping screws into them using a hex key.
It is important here that the screws fit into the end that is not covered with laminate. The corner fasteners are also screwed in. Corner fasteners must be secured on both sides. Next is cutting out the screed. This will bring the two corner support bars together.
First mark it according to the size obtained from the distance between the corner strips. Subsequently, the plank is sawn and inserted. Afterwards, all ends can be covered with trim tape to improve the appearance of the product. Attaches both to dowels and to other types of fasteners to the wall.
How to Make Corner Kitchen Cabinets
Here's a simple kitchen remodel project.
Look at the drawings on how to make wall and bottom corner cabinets for the kitchen with your own hands. The design includes an "L" shaped door. The doors don't have to be built the same way as shown in the photo - make them to suit your needs! The lower cabinet rests on adjustable legs. A list of required materials is on the author's website. Photo source: designsbystudioc.com/how-to-build-corner-kitchen-cabinets/
Kitchen open cabinet with shelves
To assemble such a structure, you need to carefully plan everything. In this case, the difficulty was that there was an air intake in the corner of this kitchen, exactly where the top of the kitchen cabinet was planned. So the decision was made to make the cabinet frame the same height as the ceiling so that the ductwork would be inside, but to make the face frame the same height as the adjacent cabinets. Since the cabinet is in a corner, they used 1x3 boards on the left edge to tie the adjacent cabinet at a 90 degree angle. To do this, we cut a hole in the back of the cabinet for the air duct and hung the structure in place. Then we covered the top with a strip and added the same ones for all the other cabinets. If you have a similar situation, then you can use this example to create a kitchen open cabinet with shelves in your kitchen. A few more tips. Drill forward facing pocket holes along all top, bottom and side edges for attaching the face frame in later steps. Secure fixed shelves with nails, do not make pocket holes, they will be visible from below. Hang the cabinet through the top stud support in the walls.
Detailed instructions with a list of materials can be read on the website, and below see step-by-step photos, with drawings and diagrams.
Photo source www.ana-white.com/2014/04/plans/open-wall-cabinet-36-wide-x-30-tall
Open shelf wall cabinet
This simple design can perform not only a practical, but also a decorative function. An open shelf on a kitchen wall cabinet gives your kitchen a more harmonious look and at the same time, you will be amazed at how easy it is to create open wall cabinets for your kitchen!
To do this, you will need one 1x8 board 2.5 m long, a 1x2 strip 120 cm long and plywood. For fastening, prepare glue and staples.
- The side panel must match the other cabinets, including the front and back panels.
- Just make sure to assemble the cabinet in the correct configuration. In this case it is open on the left.
- Secure the top and bottom shelves first with staples or nails, then with glue.
- Then install the remaining two shelves.
- Hang the cabinet by attaching it to the adjacent cabinet and studs in the wall. If studs are not available, use a drywall fastening system.
Master class on how to make a shelf for a hanging cabinet in the kitchen, see step-by-step photos below
Photo source: www.ana-white.com/2014/04/plans/open-shelf-end-wall-cabinet