Yarn jewelry
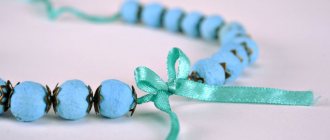
In general, various jewelry made from long threads of yarn, from earrings and pendants to decorative items, have recently become a real trend on Instagram and blogs of people who are interested in handicrafts. After looking at various ideas related to this technique on the Internet, my daughter also decided to play “do it yourself” and pulled out her very first hoop from the closet. When she explained what exactly she wanted to do, I was delighted and immediately got involved in the work. You can see the result of our efforts in the main photo of the article.
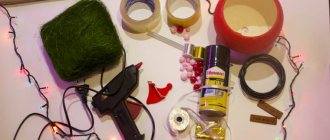
List of required tools
If you also want to decorate your interior with a piece of art made from a hoop and yarn, I offer simple step-by-step instructions. You may need to buy some of the things you need for the product, but we found everything you need at home. So, you will need:
- Hoop. A simple children's plastic or metal hoop, which will probably be found in the pantry or garage of anyone who has grown up children or who was fond of hula hoop spinning as a child. You can also make a miniature version of this decoration using any solid ring, such as a damaged hoop, as a base.
- Yarn. We used four skeins of cream yarn, left over from knitting a very long scarf in this delicate shade. You can buy yarn in the color that best suits your interior, or use what you have. But remember: if you strictly follow my instructions and want to dye the threads, it is better to choose yarn of lighter colors. The quantity, again, depends on the diameter of the round base you choose.
- Fabric paint. Choose colors that will suit one of your rooms. We had five varieties: black, tan, rose petal, tangerine and golden yellow.
- Additional tools: measuring tape, scissors, hammer, nail, paint tray, plastic tarp (an old shower curtain will do), rubber gloves, masking tape.
Dream catcher color meaning
The choice of tsat for making a talisman must be carefully thought out. For Indians, each shade is endowed with sacred meaning and meaning.
| Color | Meaning |
| White | Purification, chastity, success. It cleanses a person of negativity, charges him with positive energy, and keeps his thoughts pure. |
| Black | Symbol of the Absolute, mysterious forces, peace and tranquility. Strengthens intuition, helps to notice and understand the signs of fate. |
| Blue | Wisdom, intuition, spiritual renewal, inspiration, protection and stability, harmony of soul and body, spiritual balance. |
| Blue | Protection from confusion of mind, clairvoyance, extrasensory abilities. The blue tint attracts positive energies, fills you with lightness and makes your disposition peaceful. |
| Violet | Immortality of the soul, eternity, wisdom, intelligence, mentality, connection with the higher worlds. |
| Red | The power of fire, dynamics, passion, help in choosing the right direction, willpower, activity, courage. |
| Pink | The color of tenderness, kindness, pure love, lively emotions, love of life. Teaches you to appreciate every moment, helps in your personal life. |
| Yellow | Helps to comprehend the meaning of life, makes the mind flexible and receptive, heals the soul and body. |
| Orange | The color of joy, sensuality, harmony of the feminine and masculine. |
| Green | The color of the immortality of the human soul. Positivity, good emotions, the path to the intended goal, faith in yourself and your strengths. |
You need to choose those colors that correspond to your idea of the purpose of the amulet.
Tie all the cut threads to the first half of the hoop
Locate the center of the top half of your hoop, fold one of the strands in half and tie it there using a “blind loop” (also known as a “lark’s head.” This is where you loop the loop formed by folding the strand over your hoop with the two ends dangling pass through it and tighten the knot.When one thread is secured, continue tying the rest to the hoop until you have filled the entire upper half of the circle.
It is important that all your loops are directed in the same direction: this way, on the front side, the threads will fall beautifully outward, and on the wrong side, the knots will be visible.
Trim excess yarn
After you tie all the knots with your threads onto the hoop, you need to trim them, fitting them to the semicircle of the second, lower half of the ring. Be sure to leave the 10 cm that we initially selected hanging under the hoop - we should end up with a circle of yarn, under which the base will not be visible.
A Brazilian travels 36 km by bike every day to take his loved one home.
A student at the Vietnam Police Academy shared how she takes care of her facial skin.
If there is little snow, there will be no harvest: December 16 is Ivan the Silent Day
Play it safe by cutting a little less at first - it’s better to adjust and shorten a little more later than to do it all over again. Do not throw away the cut threads, they will still be needed.
Dye some of the threads
This is a dirty and difficult, but very fun stage. It's easiest to dye tied yarn while the hoop is hanging, but first protect your walls and floors from permanent fabric paint. If you are hanging the hoop on a wall for painting, first cover it with a prepared tarp - it should be lowered along the entire length of the wall and also cover the floor. Only then hang the craft on the wall.
In order to paint the lower part absolutely evenly, have someone slightly tighten the threads hanging loosely at the bottom, and glue a strip of masking tape yourself, separating the part to be painted from the part that will remain as is.
Following the instructions, dilute the paint you will use below in a special tray. We chose black, but you don't have to stick strictly to our color palette.
Don't forget to wear rubber gloves! And then start dyeing: you can dip the bottom threads directly into the tray and keep them there until they are dyed, or apply the dye with your hands for more intensity. Remember that the color will dry a little lighter, so paint with that in mind.
Women's jeans: before you buy them, you need to pay attention to one detail
It’s good to wash often: myths about shampoo and hair care that only harm
“We are still friends”: Derevianko commented on the breakup with his wife
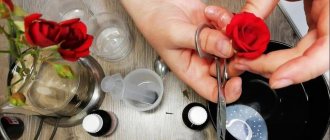
How to make a massage mat with your own hands from pebbles, chestnuts, or buttons?
Foot massage has a relaxing effect, relieves fatigue, and helps improve sleep. In addition, it has a general strengthening effect on the entire body. Since a large number of biologically active points are concentrated in the feet.
You can easily make massage mats with your own hands using available materials.
One of the available materials is sea or river pebbles. While walking along the river or seashore, collect several dozen small stones of approximately the same size.
Important: Choose rounded stones without sharp corners so as not to injure your limbs in the future.
When the stones are collected, wash them with water and laundry soap. It is also advisable to soak the stones for a couple of hours in a solution of water with potassium permanganate or in a soap solution.
Prepare a base for the mat: it can be a tarpaulin or other thick fabric. You will also need glue. Immediately take a good reliable glue, for example, moment. Hot silicone glue is not suitable for this purpose.
When the stones are dry, start gluing them onto the base. You can lay them out randomly or make some kind of pattern. There are two ways to glue stones:
- First apply glue to the base and then stick the stones on it.
- Apply glue to each individual stone and attach it to the base.
The second method will take longer, but it is more reliable. The stones will be firmly glued and will not fall off after a while. When all the stones are glued to the base, the rug should sit for about 24 hours. This way the glue will dry completely and the mat will be reliable and durable.
A rug made of stones can be placed in the bathroom or used only for massage. It is useful for adults and children to walk on stones. And if you preheat the stones, there will be double benefits for the body.
Massage mat made of stones
You can also make a rug from buttons of various sizes and shapes. It is very easy to do: sew many different buttons onto a fabric base. Any size rug is possible, but it is better to make it small. It can be easily rolled up and put away; after all, such a rug is not intended for constant walking on it. It is enough to walk on a massage mat for 5 to 15 minutes a day to engage active points.
DIY massage mat made from buttons
Another way to make a massage mat is to sew caps from felt-tip pens, plastic plugs onto a thick fabric base, stick chestnuts and other improvised materials of various shapes and textures. The result is a budget-friendly, and most importantly, useful massage mat.
DIY chestnut massage mat
Prepare threads for additional decor
Leave the wall part of the craft to dry, and in the meantime, start painting the threads that remain after cutting. If you have multi-colored yarn in the colors you need, but don't have any extra dye, you can use it. But since all the yarn we had was a solid color, we had fun with dyeing a little longer.
Divide the remaining pieces of yarn by length - they should be dyed in groups, each length a separate color. Prepare the selected colors and soak the threads in trays until the desired shade is obtained. After painting, they should be hung somewhere to dry and straighten.
Tip: If you want to get a gradient effect on these threads, dip them into trays of paint in sections, drying each colored section in turn.
Entrance door mat made of plastic bags: description, photo, diagram
The mat located at the front door should be made of washable materials. Every time you or your guests will wipe their feet on this rug, so you will have to wash it very often.
It is logical that the material for such a rug should be selected for practical reasons. Knitted or fabric rugs certainly look very beautiful, but they are completely unsuitable for these purposes.
One of the most suitable materials for making a door mat is plastic bags. This material has a number of advantages:
- A rug made from plastic bags is easy to care for. It is enough to rinse it in running water, after washing it with a brush and powder or soap.
- Plastic bags are inexpensive.
- In almost all houses there is an abundance of such material, and housewives simply do not know how to get rid of the accumulated bags.
- By making a rug, you will still save the environment, at least a little. After all, we know about the problem of environmental pollution with bags.
You can make a rug from plastic bags using a hook. First you need to make ribbons from plastic bags and wind them into balls. To do this, cut the plastic bags along the seams, roll them into ribbons about 1-1.5 cm wide. Then, using a thick hook, knit the rug according to the pattern you will see below.
Rug knitting pattern
Options for rugs made from crocheted bags can be seen below. In essence, these rugs are the same as those made from yarn. However, they are better suited for placement at the front door and are more wear-resistant.
DIY rug made from bags
Rugs made from plastic bags
If you don't know how to crochet, you can make pom poms from plastic bags. This rug will be less practical than the previous one. But it will look beautiful. If you take bags of different colors, you can make a rug with patterns.
make a pompom like this:
- Cut the bags into long strips of the same size and width.
- Wrap many strips onto a paper base.
- Use scissors to cut from opposite edges.
- Tie the strips in the center with strong thread.
- Fluff the pompom.
Then glue the pompoms onto the base. Polyethylene pompoms can be used to form flowers and other designs.
Rug made from garbage bags
We invite you to watch a master class on making a rug from plastic bags.
Tie the remaining threads to the hoop
When all the yarn is dry, you can finish the craft. You must be 100% sure that the short threads are completely dry and do not leave marks, otherwise, when you tie them in the center of the hoop, they may stain the main light color, completely ruining the decoration.
Separating the threads by length and color, tie them in the center in the same way as the main row of yarn. If necessary, you can trim them a little more to even out the line. We made an oblique cut of all the threads, but you can use your imagination and do it the way you want, for example, cut them straight, in a checkerboard pattern, or even make a “terry mess.”
Your product is ready! Now hang it on the wall in the most suitable place by simply driving a nail into the wall.
Found a violation? Report content
How to make a wicker rug with your own hands?
There are many patterns for weaving rugs. We will tell you about some of them so that you can choose the method that suits you best. Let's start with the simplest.
Braided rope rug
You will need: a rope about 70 m long, twine of a similar color.
Step-by-step production:
- Divide the rope into 3 equal parts, tie the resulting three ends into a knot.
- Braid your hair.
- Start twisting the braid in a spiral, try to do it tightly.
- Every 5 cm, secure the edges of the mat with twine on different sides so that the mat does not fall apart.
Weaving a rug from a rope
Weaving a rug from braids
A rug from shreds
You will need:
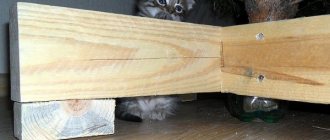
- Wooden frame measuring approximately 1x1 m
- Nails
- Hammer
- Ruler
- Knitted fabric in different colors
Step-by-step production:
- Drive nails into two opposite sides of the wooden frame at an equal distance of about 2-3 cm parallel to each other.
- Secure the fabric strips vertically to these nails. This will be the base of your rug.
- Now start braiding your hair horizontally, weave ribbons above and below the vertical ribbons.
- Pull the braids close to each other.
- At the end, secure the weaving with a knot so that the mat is durable.
- When everything is ready, remove the mat from the structure.
Weaving rugs with your own hands
You can not weave braids from strips of fabric, but pass a wide ribbon through the vertical stripes of the base. The main thing in such a rug is the contrast of colors. A one-color rug made in this way will not look original. In turn, a multi-colored rug can highlight the interesting weaving and skill of the designer.
The process of weaving a rug
Handmade braided rug
From ropes woven in a circle, you can make both ordinary round rugs and weave circles of different sizes into an interesting composition. Several circles of different sizes combined in one rug look very unusual.
Beautiful DIY rug
If desired, you can make an intricate binding of the rug, which will ultimately emphasize the elegance of your interior.
Braided rug
A stylish woven rug can be made from two thick ropes. First, twist the two ropes into a bundle. Then twist them in a spiral. You can glue a warm fleece base to the inside using super glue. The result is a laconic and fashionable rug that will suit almost any interior and room style.
How to make a rope rug