Last year's cross was found.
But since I promised to show a couple of options for quickly installing a Christmas tree, I’ll have to make a new one. This is a simple matter, but you never know, maybe it will be useful to someone. I’ll make a reservation right away. By Christmas tree I mean a coniferous tree at least two meters high. You can stick a meter-long stump into a bucket of sand and not have to worry about it. But, to be honest, this is not a Christmas tree. This is a potted plant. A Christmas tree is when the star is above your head, not under your armpit. I have nothing against artificial ones. Beautiful, practical, convenient. Just the sight of a plastic Christmas tree always brings me to the same thought. If the Christmas tree is artificial, then why isn’t Olivier made of papier-mâché? Logically, if the Christmas tree is plastic, then the herring under the fur coat should be synthetic. Plastic champagne, plastic caviar, dummies instead of gifts, inflatable latex guests. Convenient, practical, beautiful. No one falls face down on a salad, no one vomits vinaigrette in the toilet, no need to wash or finish anything, wipe it with a cloth in the morning and put it away. And that’s it, I forgot. Well, isn’t that great? In short, I’m a supporter of a living Christmas tree. Moreover, whenever possible, I try to go to the forest rather than to the market to get it. It’s not about money, it’s just strange somehow, living in the forest, to buy a Christmas tree at the market from Azerbaijanis. A Christmas tree is not a watermelon. But by and large, it doesn’t matter where the tree comes from, the main thing is that it exists. And when there is a Christmas tree, you need to put it up somehow. There are a million ways and options. You can stupidly buy a crosspiece like this at the market or Christmas tree market.
I won’t talk about the disadvantages of this method; anyone who has encountered it knows. If you don’t have the time, opportunity, or desire to do this, then there are several simple, practice-tested ways to install a Christmas tree carefully and reliably with your own hands. Option one. Cross.
In my understanding, the crosspiece should be of such a design that it would hold the tree in the presence of chaotically moving objects in the house, such as dogs, cats, children, drunken relatives. The only way to knock her down was to fall flat from the stool. You can make a reliable crosspiece in an hour with straight arms and a minimum of tools. With experience - half an hour maximum. In general, according to the mind, the cross is made each time for a specific tree. It is thrown away with it. Some kind of wooden base. Anything will do, a board, a block, a picket from a neighbor's fence. Last year I bombed a pallet that happened to turn up in the yard. It didn’t turn out particularly beautiful, but it was reliable.
This time the base will be a 5x4 block like this.
To be honest, it should be wider. The wider the beam, the more securely it holds the tree. But what it is is what it is. A tool. The maximum set is a tape measure, a hacksaw, a pencil, a square, a drill, a screwdriver, and a dozen self-tapping screws. The minimum set is a hacksaw, a tape measure, a hammer, a dozen nails.
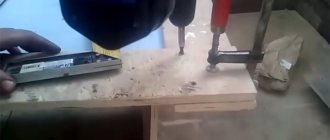
Then everything is simple. We measure four pieces of 30 cm each.
We cut off, trying to maintain a semblance of a right angle.
Let's figure out how it will all fit together.
We measure the thickness of the butt of the tree. (Since our hole is square, then the butt can, in principle, be cut and made square. But if you don’t have experience, it’s better not to. You can wear out the tree and be exhausted yourself)
We set aside this distance from the edge of each block. (It’s better to take a little less so that the butt grips well. My butt thickness is a little more than five centimeters. I set aside exactly five.)
I immediately set aside the second distance, the line along which the bars will join. This is half the thickness of the block. We drill a couple of holes along the line for the screws. Since my beam is thick, and the screws are not particularly long, the holes will have to be countersunk. This is what we ended up with. What is missing in this crosspiece? Just like those sold on the market. For a tree to stand longer, it needs moisture. The butt must be in the water. We cut four cubes from the same block. We drill, countersink, screw. Well, that’s all in principle. You can put up a Christmas tree. Having first placed some kind of saddle for water from below. If necessary, we level the barrel with wedges. Second way. Cup.
This option does not require any tools other than a screwdriver and a dozen screws. You also need some kind of massive base. On my balcony there are two scraps of kitchen countertops left over from installing the stove and sink. You still need three corners. There is an abundance of such corners in every household store. Everything is quite simple here. We find the center, draw a circle. We put the corners, screw them in. You can put up the Christmas tree and fasten it. Five minutes of time. If you wish, you can take a polypropylene plumbing pipe of a suitable diameter and cut a piece from it. You will get a glass. Having pulled a pair of condoms onto it from below, you can safely pour water. The not particularly aesthetic appearance can be easily draped with improvised means. Well, that seems to be all. All this homemade work took me three times less time than writing the post.
Crosspiece for small and medium-sized Christmas trees
The first project is a classic wooden cross. Its main difference is the absence of a half-tree connection, which eliminates the need for complex markings, work with a chisel and subsequent hassle with adjusting the connection.
A reliable and neat cross is made from four simple blanks - two boards (60x15x2.5 cm) and two square scraps (15x15x2.5 cm).
We determine the place where the boards will intersect. In our case, we measure 22.5 cm from the end of each board.
Using a square, we apply markings.
We do the same with the second board: measure 22.5 cm from the end and apply markings.
We lay the boards along the marking lines and check the accuracy of the fit using a square.
We connect the crosspiece with four screws or self-tapping screws.
We screw supports from square scraps along the edges of the top board.
We apply cross markings to determine the center into which the main rotor will be screwed in or a wide through hole will be drilled.
Drill a pilot hole.
For small trees, mounting with a 120 mm through screw will be sufficient. If desired, you can use a feather drill to make a wide through hole of the required diameter; a depth of 5 cm is enough for the tree trunk to be stably positioned in the cross.
Glue the felt pads. They will protect the floor from scratches and add stability to the cross.
Simple manufacturing option
The above-described design can be made in approximately 1-1.5 hours, but you don’t always have that much time. You can make a cross faster using the following technology.
For this, a wooden beam, board, picket, pallets, round beams, etc. are suitable as a base. In this case, the material should be approximately 50 mm thick (if the boards are thinner, then several can be combined into one).
It is worth noting that the thicker the beam and the wider it is, the more durable the structure will be. This will allow it to withstand the weight of the tree with toys and various loads on it. The tools you will need are marking kits (square, rulers, pencils), a drill, a screwdriver, a hacksaw and self-tapping screws (the latter can be replaced with nails).
The next stage is preparing the preparations. To do this, you need to saw off 4 identical bars, the length of which should be about 40-50 cm (at least 30 cm). They are cut using a hacksaw, and it is important to maintain the plane of the ends.
After this, the diameter of the pine/spruce trunk is measured from below (for installation). Next, the resulting size is calculated from the ends of each beam.
It should be noted that the hole in this cross will be square, since the joint of the beams-blanks is carried out as follows: the end of the other is applied to the marking (set aside diameter) of one beam so that the plane of the line and the plane of the edge of the beam coincide.
Similar procedures are performed with all bars. The result should be a cross with 4 beams and a square hole. Next, the beams are fastened with glue and self-tapping screws/nails (if there is no glue, then it can be omitted).
The assembly of the cross is completed by installing the legs, which are made from the same material as the main part. The only drawback of these designs (this one and the one described above) will be the lack of moisture, which will lead to rapid drying out of the tree, causing the needles to yellow and fall off. A design with a glass will help eliminate this problem.
Christmas tree stand with uncut edge
The next project is a simpler, but no less reliable version of the Christmas tree stand. A simple cross, assembled from four boards without unnecessary joints, will provide stable support for a tree of any size. Using a board with an uncut edge, the traditional question: how to cover the crosspiece will disappear by itself. The living edge will add decorativeness to this simple design, and make it a natural extension of the New Year's tree. After the holidays, the crosspiece elements can be easily disassembled and stored until next year.
From a pre-prepared board with one edge trimmed, we cut 4 pieces of the same length. We focus on the size of the tree: the larger it is, the longer the boards will be needed.
How can I close it?
To create a more festive atmosphere, the crosspiece needs to be decorated. There are some interesting ways to do this.
Weave a basket
This original solution will appeal to needlewomen. The basket is very easy to make from simple paper tubes. It can be woven to the size of the finished cross and painted in any color.
Baskets in shades of beige and brown look beautiful.
Finished products are sometimes decorated with lush bows or bright ribbons. After installing the spruce cross into the basket, it can be filled with artificial snow. The result will be a beautiful winter composition.
Hide behind the rug
This method will also help create a cozy homely atmosphere in the room. Bright textile rugs with a New Year's theme can be bought almost everywhere on the eve of the holidays. In addition, you can sew such a product with your own hands. A rug in a patchwork style, reminiscent of a knitted blanket or any other, will look beautiful.
Adjustable cross for Christmas trees of all sizes
The third project is a simple and stable wooden stand that can be adjusted to any trunk diameter. The crosspiece consists of three supporting elements. The optimal length of each part is 250 mm. Two parallel grooves are milled in the face of each of them. The ends of the boards are cut at an angle of 60°, and shallow guide holes for screws with wide washers are drilled into them. It is convenient to store the collapsible elements of the cross in a compact stack until the next holiday.
Drawing of an adjustable cross for a Christmas tree
Milling grooves according to pre-applied markings.
High stand for large Christmas trees
Four elements, cut with a jigsaw according to the template suggested below, will easily turn into a beautiful and stable stand that can support a Christmas tree 2.5 meters or more in height. The structure is tightened using screws screwed into pre-prepared holes, and can also be easily disassembled without taking up extra space during storage. You can place a reservoir of water under the stand so that the spruce stands even longer and continues to fill the house with its unique scent.
Drawing of the main element of a wooden stand
What are they?
Crosses for a Christmas tree are most often metal or wooden. Both options are equally reliable and durable. The dimensions of the structures can also be different and are selected for a specific tree. So, for a large spruce you need a large stand. But for a small one, a small and light wooden cross is enough. Some models are made with additional “legs” to make the tree appear taller.
For a live Christmas tree, it is best to choose a reliable container with water or sand. The tree will last longer in it, and the needles will not fall off. Especially if they are periodically sprayed with additional water.
Very often, crosspieces are decorated in different ways. Thus, an iron structure can be decorated with small forged parts. The stand, painted silver and consisting of twisted legs, looks so beautiful that it does not even need to be hidden, which cannot be said about simpler models.
The universal rotating design is interesting. It is suitable if the tree is installed in the center of the room. And those who don’t like to clutter up space with unnecessary things will like the lightweight folding model, which after the holidays can be easily hidden in a box with New Year’s decorations.
In general, the choice of crosspiece models is indeed very large, and everyone can find something suitable both in appearance and price.
Artificial tree stand
The simplest version of a spruce stand is made not only for artificial, but also for natural spruce. If you somehow lost a stand for an artificial fir tree, then you shouldn’t be upset, because making one is as easy as shelling pears.
We offer you an interesting option made from cut wood, using a drill or jigsaw.
To begin with, it is worth determining the thickness of the spruce trunk at the bottom, since the size of the hole will depend on this. The cut must weigh more than the spruce itself, otherwise it will simply fall.
After determining the diameter of the spruce tree, it is necessary to make a hole exactly according to it in the very center of the cut with the necessary tool.
Be sure to treat the cut with sandpaper and open it with varnish so as not to accidentally injure yourself on it afterwards.
Once the hole is ready, you need to check it for compatibility with spruce. If it fits exactly into the hole and does not wobble in it, then everything is matched perfectly.
Then you can freely and without problems use the cut as much as you need. Here's how to easily make a stand for an artificial Christmas tree with your own hands from a cut tree.
From a cut tree
If you have a small stump on your farm, you can quickly make an original stand for the Christmas tree from it. First you need to level the cut so that it is level with the floor. Otherwise, the structure may fall, tilting to the side. Then drill a hole in the center of the stump for the trunk of the holiday tree. The stand is ready. All that remains is to decorate it with varnish or shiny paint, and then decorate it with artificial snow from a spray can.
Stand for thick-trunked spruce
Natural spruce can have not only a thin trunk, but also a fairly voluminous one.
In this case, a stand is made that will practically hug the lower part of the trunk. For this option, you will need three identical strips, a screwdriver, connecting angles and screws.
It is best to make the stand when the tree is in a standing position. That's why someone has to hold it on top.
We place the boards one next to the other around the spruce trunk and first connect the first two with corners and screws to each other. Then we attach the third plank close to the spruce itself and screw it in the same way to the first two.
The planks must be massive enough to support the spruce. It is also better to take wide boards so that they are as tall as possible along the trunk. Think and you will definitely find what you can use to make a Christmas tree stand.
From a plastic bottle
Do not rush to throw away drinking water bottles. These would make a great Christmas tree stand. Simply cut the container and insert the top into the bottom. Make a cylinder from a small bottle or shampoo bottle and place it in the neck. It will hold the trunk of the spruce. This design is very light, so for stability you need to pour water into it before installing the tree.
Photo of Christmas tree stand
Source

