Comfortable shoes for the house are indoor slippers. They are soft and comfortable to wear. But you don’t always need to buy this thing in a store; you can make it yourself in 15 minutes. To do this, you will need to study the instructions on how to make a pattern and sew comfortable shoes for the house. You can make options for all family members.
Slipper models
There are several ways to sew slippers with your own hands. The sewing method depends on the chosen slipper model. They will definitely be on a sole, which is made of a tougher and more wear-resistant material. The sole is made of rough leather or leatherette, or even linoleum.
Children's UGG slippers are made with soft soles, for example, from thick suede material. Next, you need to decide on the design of the top part of the shoe. The top can be over the entire leg, then it will be closed slippers, or it can only reach the instep of the leg, then warm slippers will come out.
If you are going to sew slippers with your own hands, for the top you need to choose a fabric that will keep its shape. Ideally, also add an inner lining that will be in contact with the skin and will not irritate it like a rough outer fabric.
Master class on making different models
There are different models of indoor slippers that you can make with your own hands. Among them are bunny boots, ballet flats and mouse slippers. Making them is quite simple.
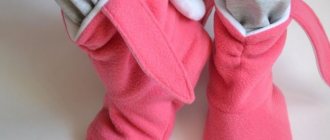
Bunny boots
Comfortable, very cute house boots can not only warm your feet, but also lift your spirits. At the same time, it is not difficult to sew such slippers from fleece; even a novice seamstress can do it. It is enough to follow the algorithm:
- The first step is to choose the right fabric. For such house shoes, soft, dense fabrics are used: plush, velor, fleece. The sole is covered with artificial or natural leather. The shape of the slippers is given at will, this is done using padding polyester.
- Next, you need to prepare the tools: paper for patterning slippers, a pencil, pins for chopping parts, scissors. You will also need a sewing machine.
- Afterwards, you should make a pattern for the house slippers, the main parts, ears and tail, leaving an allowance.
- Slippers require two or three layers of material. The top one is made of velor, the middle one is made of padding polyester (optional) and has an inner lining.
- The sole part is made of leather.
- The parts are chopped off and sewn together individually.
- The ears are cut and sewn in advance. They are inserted when stitching the main parts.
- The blanks are turned right side out and soft folds are formed along the bootleg.
- The boot is then connected to the sole.
- Next, the outer and inner layers are cleaved along the wrong side.
- The parts are stitched along the edge, leaving a small hole in order to turn the product right side out.
- When the boot is turned inside out, the hole is stitched.
- The tails are made separately. To do this, two circles are sewn together with the right sides facing inward. You should leave a hole for stuffing with padding polyester, then sew it up.
- The tails are sewn along the central part of the back seam.
It’s easy to make these slippers with your own hands from fleece. At the same time, they will suit everyone's taste. Children especially like this model.
Pattern of slippers on paper
Pattern of all parts from the main material. Pin together the parts. Sew all the parts. Sew the ears. Insert the ears. Make a finishing seam
The wrong side of the sneakers Make soft folds on the top of the boots Connect the boots to the insole
Inner layer
Insert the outer layer and pin it with the inner layer from the inside out. Sew along the edge. Turn right side out Hem the hole Make tails
Place the tails in the center of the back seam. Sew the tails.
Ballet shoes
Ballet flats are a fashionable and stylish solution for home shoes. To make these slippers you will need:
- thick fabric;
- cotton material for lining;
- interlining;
- artificial leather or thick felt for the sole;
- padding polyester;
- braid for processing the product along the upper edge;
- linen elastic.
Manufacturing instructions consist of the following steps:
- The first thing you need to do is cut out the necessary parts in two copies (for the right and left sneakers). The upper part is cut out from the main fabric, the sole and upper part from the lining, the sole and upper part from non-woven fabric, the sole from artificial leather or felt, and the sole from padding polyester. At the same time, an allowance of 1 cm is made for the main and lining fabrics, and 0.5 cm for artificial leather and padding polyester.
- The parts cut from the main material are reinforced with non-woven fabric on the reverse side.
- Next, you need to sew separately the back seams on the upper parts made of the base material and the lining. Iron the allowance parts.
- The upper elements from the main fabric must be folded wrong sides with similar elements from the lining. Baste the edges along the top.
- The upper parts are placed on the front leather soles with the lining side and swept away.
- Next you need to stitch the upper to the sole parts. The seams are laid around the perimeter of the sole.
- The parts left for the seams must be notched at the curved areas, pressed with an iron and manually attached with hidden stitches.
- On top of the sole made of leather or felt, it is necessary to stitch the sole part of the lining manually using hidden seams, tucking the edges inward. In advance, padding polyester should be laid between the parts of the lining and the main fabric. Next, turn the slippers onto your face and press the seams with an iron.
- The upper parts must be treated with bias tape, leaving a portion for placing the elastic. Thread a linen elastic band into the resulting drawstring.
The ballet slippers are ready. Such comfortable house shoes can be made both for independent use and for gifting.
Ballet slippers Slipper pattern
Finishing the top edge of the product with bias tape
Mouse slippers
These original slippers are easy and quick to sew. The material can be old felt boots, leather from unwanted products, suede or thick cloth.
If you make the ears of a different shape, you can create cat slippers.
For production you will need:
- fabric (jeans, felt, drape, etc.);
- leather for the sole;
- foam rubber, batting or padding polyester;
- needles and nylon threads;
- threads for embroidering a mouse's face;
- lining fabric (fleece or faux fur);
- paper, pencil;
- pins.
The manufacturing process includes the following steps:
- First you need to make a pattern - put the shoes on the fabric and trace the sole.
- Then the top of the slipper is cut out. To do this, wrap the top of the shoe and trace it, cut out the template. Please remember that the right and left patterns are different.
- The result should be a couple of pieces each from the main upper fabric, pieces from the lining for the inner parts, elements for the insole and sole. It also requires four pieces for the ears.
- The ears must be sewn with a small, neat seam using contrasting threads. Afterwards you need to embroider the muzzle, nose, and attach beads or buttons instead of eyes.
- Attach the ears with pins, make a fold at the bottom to add volume and maintain shape, then add seams.
- Next, fleece should be applied to the front part of this part and stitched, retreating a centimeter.
- Sew the insole in the same way and sew it to the upper part.
- On the part with the muzzle, you need to place the plantar part face to face and stitch it, retreating 0.7–1 cm. The bottom remains unstitched, foam rubber must be placed there.
- The products are turned inside out, and foam rubber, batting or padding polyester is placed inside.
- The parts are carefully pinned and stitched.
The slippers are ready. Children will be delighted with these shoes. Even adult fashionistas will not remain indifferent when they see this cute model.
Sewing house shoes yourself is not difficult, as long as you have the desire. The advantage of such products is that the design comes up with a craftswoman, so these can be unique men's slippers, products for guests or children's models. And if you use old unnecessary things for sewing, you can also save a lot.
Mouse slippers
Prepare a pattern for all the details Sew on the ears Embroider the “face” of the mouse, cut out the nose from fabric, sew on beads or buttons instead of eyes
Place the part with the embroidered muzzle up, place the mouse ears on it closer to the cut, secure with pins Sew the insole and upper together Sew on the sole
Leave the bottom unstitched to insert foam rubber
Insert foam rubber or batting inside the slippers. Holding the foam rubber, pin the heel and sew the remaining unstitched piece of the sole
Construction of a pattern
Before you start cutting fabric slippers with your own hands, you need to draw a pattern that you will apply to the fabric.
The easiest way to build a template yourself is to place your foot on cardboard or thick paper and trace the foot. Next, to make the flip-flops, you only need to outline half of the foot for the top of the shoe.
To make closed indoor slippers with your own hands, you need to put your foot sideways and outline it so that you get something similar to a child’s drawing of a boot. You can do otherwise and look for ready-made patterns on the Internet.
There will probably be more complex templates out there that you can print and use. In both cases, you need to leave allowances on all sides 5-10 cm wide so that the slippers do not end up being smaller after the seams are laid.
We sew and alter
For some reason, homemade fabric slippers are not so in demand, but we still managed to find some interesting ideas. The absolute favorites are easy-to-make one-seam models. It will take a few hours to create a pair. There are plenty of patterns on the Internet; if you wish, you can print them in full size. If you have a piece of felt or faux leather in stock, why not try it?
Express options For beginners in sewing, I advise you to take “non-flowing” materials, the cuts of which do not require additional processing - felt, fleece, felt. It’s convenient to work with them, and the likelihood of a fiasco is much lower (what a bad first experience can lead to, I don’t think it’s worth mentioning). Felt and felt are easy to work with. Of course, let’s not ignore the opportunity to transform unnecessary sweaters and vests into practical shoes. If you have fluffy coat liners in stock, get them too. How do you like the idea of putting the whole family in the same slippers? I think it’s very cute! Put the fur on the front side - it will be beautiful, on the inside it will be warmer. Or you can cheat - sew inside-out slippers! When it’s chilly, wear them with the fluffy side inward, and if guests come over, with a slight movement of the hand, turn them into fur splendor.
Slippers with fur Don't rush to throw away your worn-out sweaters: they used to protect your body from the cold, now let them warm your feet. Advice to those whose choice fell on a model with a lining: for the inside, take a knitted fabric (an old T-shirt, for example). Sewing shoes exactly to the shape of your foot so that they don’t fall off and don’t press anywhere will probably not work the first time. Elastic fabric will correct minor flaws in cutting and sewing.
Old sweaters in a new role And one more useful tip: make a drawstring along the top edge and pull in the elastic - you won’t regret it. Look at the model on the left: you can only take a photo in these slippers, but you shouldn’t walk or try - they’ll fall off. They need to be adjusted in size until the foot feels like it’s in a vice (this type of house shoe is clearly not for me!). Or, to maintain an attractive shape and ensure safe movement, sew an elastic band on the inside (along the upper edge). Well, those who value practicality are more likely to like simple ballet slippers: they are easy to sew and comfortable to walk in. In pursuit of beauty, not forget about practicality Slippers made from leftover fabric If desired, you can make them so beautiful that rare factory models will dare to compete with your exclusive product.
Beauty! There are a lot of slippers made of denim, and this is easily explained: material for alteration appears regularly, the fabric is good, modern - what else is needed? Denim masterpieces For those wishing to acquire unusual house shoes, I suggest you pay attention to Aladdin slippers. And for summer residents with a good sense of humor, consider the paws of a Neanderthal
It doesn’t matter what facial expression the guests will look at you with - as long as you feel warm and comfortable. Yes, not ordinary models
Uncover the soles
It is best to make a sole of several layers. In this case, it will be similar to the factory sole, will last longer and will not allow your feet to freeze from the cold floor.
In order to get your own slippers with soles, cut out patterns for the right and left feet from the following components:
- Lining material
- Cardboard
- Foam rubber
- Linoleum
Felt slippers
For this model you will need to cut out only 4 parts - 2 soles and 2 tops. You can make a pattern with your own hands - trace the foot on cardboard and cut it out. The second step is to place your foot on the resulting part, place a sheet of thick paper on top of the foot, pin together the places where they touch with pins, and cut off the excess.
You can use ready-made solutions.
From felt we cut out the details of future slippers, taking into account seam allowances. It is better to sew the material by hand using a buttonhole stitch. The density does not matter, since the felt holds its shape well, the seam can withstand serious loads, of course, provided that strong threads were used.
Felt slippers can be decorated with appliqué or you can choose a material with a pattern or ornament for their top. Threads are often used as decoration, with which the parts are sewn together - thick, in a contrasting color. It is better to reinforce the sole with denser and thicker felt or a cork sheet thicker than 3 mm.
Cutting the top
The upper part can be cut from one layer or doubled, it all depends on how pleasant the material used is to the body. If you decide to sew shoes from fur fabric, felt or an old sheepskin coat, such fabric does not need a lining layer.
Future slippers made of fabric or felt are drawn along the pattern on the wrong side. In the case of fur fabric, you will have to draw from the front side. If you plan to use double-sided fur, then the template for the upper part of the slippers must be pinned directly to the fur with sewing pins.
Then all that remains is to cut out the pattern of the future product.
Material selection
Before sewing slippers, you need to choose a fabric. The material for making house shoes should be selected based on your own preferences, as well as the season of use of the product. For sewing can be used:
- fleece;
- jeans;
- natural or artificial fur;
- felt;
- felt;
- dense durable cloth;
- leather.
To sew warm slippers for the winter, fur, felt, and felt are suitable. For the summer, you can make shoes from denim, cloth or leather. Demi-season slippers for children are made from jeans, flannel or leather with a fleece lining.
For the top
Before you sew slippers with your own hands, you should choose the right material. The upper of the shoe should be wear-resistant and breathable. At the same time, it is necessary that the material is pleasant to the touch, because house shoes are designed for maximum relaxation and rest. If the product is planned to be used in cool weather, then a warming material should be preferred. For summer, accordingly, the fabric should be well breathable.
For the upper part of the slippers, leather with a lining is best suited; in addition, you can duplicate the part with a soft filler (sintepon, batting), and then quilt it. If the top of the slipper is formed from two halves, then they must be stitched together and also connected with braid.
Summer slippers Winter option
For the sole
The sole material for indoor shoes must be selected as resistant to abrasion as possible. The following types are used:
- felt;
- skin;
- felt;
- linoleum;
- cork sheet;
- polyurethane.
You need to choose a suitable sole based on the upcoming degree, as well as the place of use. Linoleum does not wear out for a long time, but over time it can lose flexibility or even break. Thick leather is suitable for use on carpets or other fairly soft surfaces; such shoes are quite light and pleasant to use. Felt, felt - inexpensive, environmentally friendly materials, do not allow your feet to freeze, do not cause allergies, but are afraid of water and have low wear resistance. Polyurethane is lightweight, abrasion resistant, and quite flexible. However, it can quickly become deformed. Cork is great for the soles of slippers; it is light, durable, flexible, and wear-resistant. But this material is not so easy to find; it is found in specialized stores.
Indoor slippers require multi-layer soles. To do this, identical parts are cut out from different materials. The insole (top of the plantar part) is cut out of sawn wood, suede or cloth. Between the insole and the sole it is necessary to lay another layer of cardboard or thin foam rubber. All parts are connected with strapping or glued.
Decor
Decorating products depends on taste preferences. Traditionally used:
- ribbon bows;
- pom-poms;
- embroidery elements;
- decorative buttons;
- applications.
Housewives often prefer to use parts that can be cut from old unnecessary wardrobe items. Practical needlewomen, when throwing away worn-out items, leave behind what may be useful in the future. In such situations, decorative tassels from an old bag, beautiful buttons from a coat, bows from a child’s jacket, small metal decorations from a worn-out sweater, etc. can be used to decorate house shoes.
Accessories, threads and tools
To make durable slippers, you will need special threads. To stitch the sole part, strong nylon threads No. 470K, 565K are needed. For the remaining seams, cotton 6, 9, 12 folds No. 30, 40, 50 are suitable.
It is best to grind all shoe parts using nylon threads No. 65K, 95K.
You will also need special tools. The top parts and edging can be made using a sewing machine, but the top and bottom of the slipper will have to be joined by hand. For this purpose it is better to purchase a special awl. You can find it in hardware stores. With this tool you can quickly sew strong, high-quality house slippers from any material.
Nylon Cotton
Special awl
Sew the product
Next, you need to decide whether to sew the slippers yourself or use a sewing machine. If the thickness of the fabric or even fur is such that your sewing machine can sew it, feel free to sew the parts from the inside out. Thick fabric, fur and felt will have to be sewn by hand.
Note!
- DIY satin ribbon bows: photos of original design ideas, step-by-step DIY master class
- DIY hair bands - ideas for decorating homemade rubber bands + step-by-step instructions for making them yourself
- DIY shadow theater: step by step how to do it at home! 175 real photos
Boots made from an old sweater
You can make cozy home boots with your own hands in literally an hour from raglan sleeves from an old sweater and felt insoles purchased at the store.
Carefully remove the sleeves from the sweater and remove any remaining threads. We “try on” the insole to the cuff line of the sleeve and pin it with pins so that the fit of the top of the future boot is uniform.
We glue the parts together or sew them with a blind stitch. We reinforce the sole with another insole made of felt, leather or thin linoleum.
To glue reinforcement parts of the sole, it is better to use contact transparent glue. It is elastic, will ensure a high-quality connection of parts, and will not collapse under load when walking. You can use special glue marked “shoe glue.”
1
Homemade boots from an old sweater are ready. You can add originality to them using beading, decorate them with laces with pom-poms on the sides of the tops, or use embroidery, ready-made appliqués, and other solutions.
There are a lot of ideas for making house shoes with your own hands. Use your own imagination, come up with your own models or use the experience of experienced craftswomen. In just a couple of hours you can create a unique thing and please yourself or your loved ones with it.
Sew the top
After the sole is sewn and ready, you need to attach the upper parts to it. You can sew them in the same way as the sole. You can apply a simple seam or “over the top”, basting.
As a result, the threads will be in a visible place, so it is better to choose them in a color that will be in harmony with the product. You can take threads in the color of the material or vice versa in a contrasting shade.
Pattern of slippers with a backdrop
Products with backs are constructed in the same way as flip-flops, but you still need to add a back piece. The pattern of this part can be made in a similar way, by attaching a piece of paper to the leg, and outline it, taking into account the height of the backdrop.
It's easy to make a pattern of the part by taking measurements. To do this you need to measure your foot:
- attach the beginning of the meter to the inside of the foot at the very bottom to the place where the upper part of the slipper will go;
- grab the back of your foot with a meter;
- fix the length on the outside of the foot, where the top of the product passes.
The height of the backdrop should be no more than 7 cm, then the slippers will be comfortable. Using the obtained dimensions, you need to draw the part on cardboard, not forgetting to add extra seams. The resulting pattern is applied to the material, the details are outlined and cut out. The upper parts are sewn together first and then attached to the sole. For one slipper with a back, 6 parts are cut out (with insulation for the sole there will be 7 of them).
Features of working with sheepskin coats
If you decide to sew sheepskin slippers with your own hands, the patterns should be sewn together only using the special tools mentioned above. The sole of such slippers can be made exclusively from the main fabric or attached to linoleum. All parts are sewn with fur inside.
From an old sheepskin coat you can make various models of indoor slippers, but the most comfortable indoor shoes made from such fabric are made in the form of boots. These indoor “ugg boots” can be made for adults, but most of all they will delight children.
Shearling boots will be pleasant when touching the delicate baby skin and will protect little feet from the cold.
Note!
- DIY bracelets | Selection of the best models and master class on making beautiful bracelets
- DIY bird feeder - interesting ideas on how to make it quickly and easily from scrap materials
- Do-it-yourself cold porcelain: the best options for porcelain products, step-by-step instructions and recipes for making it yourself (photo + video)
Useful tips for caring for your product
In order for your handmade leather slippers to last a long time and not lose their appearance, they must be properly cared for:
- First try to remove any dirt with a damp sponge. If the stain is old, you can use a soap solution, but it is not advisable to do this often.
- After wet cleaning, the product should be wiped dry with a soft cloth.
- To protect the skin from cracks, it is necessary to periodically lubricate it with a nourishing composition - special creams or improvised means (for example, castor oil).
You cannot wash hand-sewn leather slippers in a washing machine; it is also undesirable to completely wet them.
To make leather slippers yourself, you need to choose the right material, take accurate measurements and strictly adhere to the work technology. This is the only way to create beautiful and comfortable indoor shoes without breaking the bank.
Felt slippers
Above was described a method for creating slippers from finished felt, which is used as fabric. As it turned out, sewing slippers with your own hands is quick and easy, and the pattern is easy to create even for novice needlewomen. However, those craftswomen who master the skill of dry or wet felting can make a product using this technique.
Whatever method you choose, felt slippers will be warm and cozy in any case. You can decorate them with ribbons or a pattern. An ornament or a funny picture can be made using the felting technique or embroidered; you can also sew on a ready-made factory themed patch.
Felt is easy to sew and wears well, for a long time. This sets slippers made from this material apart from other house shoes.
Rules for sewing chuni from fur and sheepskin
Natural sheepskin fur is a universal material that is perfect for sewing outdoor and indoor warm boots. Sheep fur retains heat well. In winter, your feet will not freeze even outside if you make a chuni with a sole (you can buy it in sewing and hardware stores). Homemade chuni will come in handy during the off-season, when the heating in apartments has already been turned off or has not yet been turned on.
Chuni is also a good shoe for babies who are just learning to take their first steps. The sole of the shoe will not slide on the floor, and the child’s feet will not sweat.
Chuni is sewn by hand, without using a sewing machine. You can decorate the product with colored threads, which will be used to sew the parts together. During the cutting process, you need to monitor the position of the pile. On all parts it should look in one direction, preferably towards the toe. You can sew by turning the product inside out. In this case, you need to make the seams flat so that they do not cause discomfort when worn. After sewing, chuns need to be properly cared for.
How to wash a natural sheepskin product by hand:
- Before washing, brush off heavy dirt with a soft brush. There is no need to rub the material too hard. Enough to remove dust and stuck debris.
- Fill a basin with warm water (45 degrees).
- Dissolve wool cleaner in water. You cannot clean sheepskin with powder or gel for regular washing. The wool will mat and become coarse.
- Soak chuni in a basin for 35 minutes.
- Wash the chuni like regular socks.
- Rinse off chemicals. It is better to change the water 3-4 times. The water for rinsing must be at least 40 degrees, otherwise the wool will become matted due to a sudden change in temperature.
- Without screwing, gently squeeze out the chuni.
- Straighten the products and place them on a terry towel.
- Absorb excess moisture on top with another towel.
- Leave to dry at room temperature. Do not dry sheepskin on a heater or radiators. The wool will deteriorate. It will become rough and lose its shine.
How to wash in a washing machine:
- Clean the chuni with a soft brush.
- Pour wool cleaner into the washing machine.
- Place the chuni in the drum. It is not recommended to mix products of different colors. Artificially dyed wool may fade.
- Select a mode on the control panel for washing wool or cashmere items. If such a function is missing, then it is better not to risk it and wash your boots by hand in a basin.
- The water temperature in the machine should not exceed 45 degrees. The spin speed also needs to be adjusted. The drum should rotate no more than 600 revolutions per minute.
- After finishing washing, the chuni should be straightened and laid out on a towel to dry.
When the products are dry, you need to comb the fur with a grooming comb. If you use an old sheepskin coat for sewing, then perhaps the condition of the wool on the lining leaves much to be desired.
In what ways can you restore the former beauty of fur:
- Moisten a cotton pad with walnut oil and wipe the wool. This technique will help restore its shine and silkiness. You can also chop the nuts and put them in cheesecloth. Rub the fur with a bag of nuts.
- 3 tbsp. l. baking soda and 2-3 drops of any essential oil will help get rid of the unpleasant odor. The ingredients need to be mixed and distributed evenly over the fur. After a day, the soda needs to be knocked out of the wool.
- Glycerin mixed in equal parts with water will help restore the elasticity of the leather part of the sheepskin. Rub the solution onto the smooth side of the material and leave for 12 hours.
- 1 tbsp. l. Vaseline, 1 chicken egg yolk and 450 ml of warm water will help restore softness to the wool. This mixture should be applied to the skin, not the fur.
Important: all these manipulations are carried out before washing.
Decoration of finished products
We figured out how to make slippers with our own hands, now it’s worth thinking about the decor. Of course, you can always make the product in a minimalist style and not decorate them in any way.
For some types of slippers, for example fur ones, this option is quite suitable; they already look attractive. Also, don’t over-decorate men’s shoes. Slippers for lovely ladies and especially for children can and should be further decorated.
Ladies' slippers can be decorated with flowers, ribbons, lace, and beads. In decorating, craftswomen can use any techniques they know.
The decoration can be crocheted or knitted, felted, embroidered with ribbons, satin stitch or cross stitch. Having figured out how to sew slippers with your own hands, you can give free rein to your imagination.
Facts from history
Felting is considered the most ancient technique for making fabrics. They find items that are 8,000 years old! We used natural wool, since only it has the property of curling during processing. This method arose pointwise, all over the earth. It was used especially often among northern peoples. A good example of this is our Russian felt boots. They covered yurts with felt, made hats from it, and sewed clothes.
There is a beautiful legend that the first felted carpet originated in Noah's Ark. There was very little space and the sheep were kept in cramped quarters. When they shed the wool, it became wet, and then the sheep trampled it under their hooves. When the animals came out, carpets remained on the floors of the pens.
Decoration for kids
For children, you can even make slippers in the shape of funny animals. To do this, you can attach an animal’s head or a car to ready-made slippers. To do this, a soft toy is made from the same material as the house shoes themselves, which is filled with padding polyester or other filling for soft toys.
It will also be interesting to make slippers in patchwork style. Slippers made from different bright details will look funny and will probably please your child more than plain gray or brown ones. The parts can be made into square, triangular or hexagonal shapes.
In the latter case, the product will look like a honeycomb (an excellent reason to make “honey” slippers and attach soft bees on top) and sew them with a seam “through the top”.
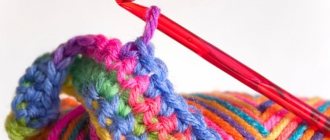
How to knit indoor slippers
If suddenly you don’t have a craving for sewing or don’t have the necessary materials at hand, you can always knit indoor slippers with your own hands. To do this, you don’t even need to make a pattern of fabric slippers with your own hands.
Knitted slippers can be crocheted or knitted. Depending on the level of the craftswoman, slippers can be extremely simple or complex, openwork with beautiful decor. Knitted slippers can be ordinary closed ones, in the form of slippers or boots, it all depends on the desire of the master.
The sole of such shoes can be made simply of yarn or reinforced with dense material, as described above.
Also, an excellent economical option would be to use ready-made soles from indoor slippers, the tops of which have already worn out and become unusable. Then the upper part is sewn to the finished sole, which is knitted from yarn. You can also decorate knitted slippers with your own hands at your own discretion.
Production problems
Not all is well in my home business. There are many nuances - I’ll share the main subtleties.
- Sales specifics. Slippers are sold very unevenly: one day not a single pair, the next several. Therefore, it is impossible to plan anything or keep statistics.
- Model and style. The soles of my slippers are made of drape, which scares off some buyers. In the future, I plan to try installing a felt insole instead of a drape.
- Miracles of technology. The problem is with the machine, or more precisely with the lifting height of the presser foot. It is problematic to sew a layer that is too thick. Now I'm waiting for a package with a roller foot, I hope everything works out.
- Range. In the near future there are plans to expand the range. Add homemade fleece boots.
Startup idea
As it turned out, all you need to do is arm yourself with the tools and write in the search bar of your browser: “make slippers with your own hands patterns”, download slipper patterns and you can start creating
But what to do if your hands are just drawn to work, and the whole family and relatives are already walking in your beautiful slippers? That's right, then they need to be sewn for sale.
In general, making thematically decorated house slippers, and even handmade ones, can be the start of a small business. Almost everyone will like such a gift.
A great idea would be to offer customers entire sets of gift slippers, for example tank-shaped slippers for work colleagues or slippers with decorative flowers for teachers for March 8th.
Sets of guest slippers will sell well, which will come in handy when many family and friends gather in one house for a holiday. The number of ideas on how to present customers with beautiful and warm handmade slippers is simply endless.
Sewing UGG boots
The ideal choice of material would be fleece. The slippers will be warm and pleasant to the touch.
Prepare three types of fabric. It is advisable to select them according to color compatibility:
- fleece – 1 m;
- suede fabric – 0.5 m;
- leather – 0.5 m.
In addition to the fabric you will need:
- nylon threads to match the material used;
- large needle;
- seamstress scissors;
- glue;
- cardboard;
- ruler for precise measurements;
- pencil for drawing a pattern;
- decorative pins.
Since the work is done with your own hands, it is important to follow the instructions and do the patterns for the details of UGG house boots step by step:
- the boot is 2 rectangles measuring 38x20 cm;
- transfer the pattern to fleece with an allowance of 1 cm;
- Insoles about 23 cm are cut from suede fabric;
- the sole of future slippers, 24 cm long, is cut out of leather;
- The upper parts of the model are connected with pins, so that the fabric lies right side to each other;
- the back sections of the boot model are connected to each other;
- along the connection line from the foot to the edge from above you need to walk with an even seam;
- In the area of the bend of the leg, notches are made on the bootleg. This will ensure a tight fit of the elements that are stitched together;
- the finished model is turned inside out onto the right side of the fabric;
- a suede insole is inserted inside;
- a sole pattern cut from leather is coated with glue and fits onto the foot.
A girl, mother, or grandmother will be delighted with boots like the one in the photo, made with her own hands. If you sew on white fur, you will get boots for the little Snow Maiden, sewn by yourself.
The technique of making house shoes is the answer to the question of how to make your own boots for gifts for family and friends.
For the New Year's boot, you can use the same material as for sewing slippers. The work algorithm is divided into stages: patterning the product, transferring it to fabric, cutting out parts, stitching into a single whole.