What kind of miracle?
The traditional piñata is a structure made of papier-mâché with sweets inside. On the outside it is covered with multi-colored paper fringe.
The first surprise toys were made in the shape of a star. The pinata is made in such a way that when hit with a special stick, the structure breaks and gifts fall out of it.
Modern analogues can be made in absolutely any form. You can also fill the product not only with sweets, but inside you can put light toys (keychains or soft ones), stationery and whatever else you want.
The main thing is that the filling weight should not exceed half a kilogram. You can add glitter or confetti to the filling, then when you break the show it will be even more colorful.
For Christmas and New Year
For such holidays, it is worth making a piñata that displays the New Year's attribute. It can be in the form of Christmas tree balls with bright confetti inside, snowflakes, in the shape of a snowman, or a unicorn. The filling is made with predictions; small gifts for the whole family and guests, holiday cards are also suitable. Try to convey the festive mood in every detail.
It will take about a day to dry, after which the product is ready for decoration.
For a New Year's piñata, you will need materials identical to the usual one, the only condition is that the decoration must be made in accordance with the theme. It is better to take an oblong ball. When all the papier-mâché layers are dry, remove the ball. Cover the top part with colored foil and tie ribbon bows on top. Then use corrugated paper to make decor - snowflakes.
Depending on the purpose, it can be supplemented with eyes, buttons, scarves.
Classic star
A standard piñata is made using the papier-mâché technique. Do you remember how in elementary school they tore pieces of paper from newspaper, dipped them in glue and pasted them over a mold in several layers? So, this toy is made in exactly the same way.
Most shapes can be made from a ball. For example, the Mexican star is made from a ball to which cones are attached. By the way, this form is also good because filler can be added not only to the central part, but also to each ray.
The finished product is covered with crepe paper fringe. If you don’t have it on hand, you can simply glue multi-colored pieces of paper overlapping each other to make the craft “fluffy.”
Halloween pinata
It's hard to imagine planning a fun Halloween without some fun. You can make a piñata in the shape of a pumpkin or a bat, and a small figurine of a ghost will add a special atmosphere. To make a bat you will need two balls, glue, tape, and black paper. The first step is to inflate the balloons, one should be small, it will serve as the head. Then secure them with tape. Then glue layers of paper on them, letting each one dry well.
The idea of such fun entertainment belongs to Mexico, although, according to some sources, the piñata is the prototype of Chinese lanterns.
Once you have achieved the strength of the mouse's body, you can pierce the ball and pull it out. Next, fill the piñata with the necessary elements. To create the wings, use black cardboard. After cutting them out, secure them. Eyes, teeth and ears need to be glued to the head. The finished version can be hung in the room.
The classic decoration option is corrugated or crepe paper. Paste the toy in a circle downwards with fringe, making each strip overlap.
Sphere
The simplest and most accessible form for making a piñata is an ordinary balloon. You can inflate it completely and make a Kinder Surprise piñata from an oval, or you can inflate it to the shape of a sphere and use it to make many crafts.
A do-it-yourself piñata at home begins with the fact that, in addition to the ball, you need to prepare the usual set for a school labor lesson:
- Old newspaper or magazine
- PVA glue or paste (whichever you prefer)
- Scissors
Next we proceed according to the standard:
- Tear or cut the press into pieces
- We glue the first layer to the ball with just water (to be sure, you can wrap the ball with cling film, so it will definitely come away from the papier-mâché)
- Subsequent layers are glued with glue
- Each subsequent layer is applied after the previous one has completely dried.
- After the craft has completely dried, pierce the ball and throw it away.
The finished craft can be painted with white gouache or acrylic paint so that the pieces of newspaper do not show through from under the colored decoration. You can also make the last layer of papier-mâché from white paper, then it is not necessary to paint our semi-finished product.
How to decorate a piñata
Most often, the piñata is decorated with corrugated paper in bright colors. It is cut into strips, circles or flowers and glued to the base with PVA glue or double-sided tape. Small parts are used because at the moment when the piñata breaks, nothing should prevent the contents from spilling out easily. Pieces of crumpled paper, thin strips of paper and confetti are also used as decoration.
More complex shapes
The beauty of a piñata is that it can look like anything you want. Beginning craftsmen can make it from a ball or in the shape of a “hat box”.
- Cut out two circles with a diameter the size of the finished craft.
- Cut strips of thick cardboard as wide as you want the depth of the craft to be.
- Make notches along the connecting strips
- Glue two circles together with pieces of tape, placing stripes between them
- Don't forget to leave a hole where you can add candy.
If you suddenly fail to build a structure, you can always watch the corresponding video on the Internet on the topic “do-it-yourself piñata video.”
Note!
- Do-it-yourself easel - types of designs, choice of materials for creation + step-by-step instructions and simple diagrams for beginners
- DIY wedding glasses: a detailed master class for DIY decoration, selection of decorative elements and materials (photo + video)
- DIY phone stand | Dimensions, features and beautiful options for telephone stands
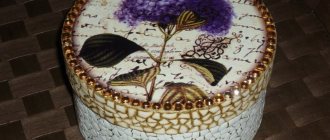
Based on such a round box, a piñata can be made with your own hands at home in a variety of themes. Cover the box with paper and place a portrait of your favorite cartoon character on a circle, draw a cute face and glue a cone on the edge of the structure and get a unicorn, and a bunch of other things.
Using the same technology, you can create entertainment for a holiday of absolutely any form. It is enough to cut out the main outline from thick cardboard in two copies and connect them with strips of the required width.
How to fill a piñata
You can come up with a variety of fillings if you make your own piñata. Videos and photos will turn out to be very impressive if, at the moment when the piñata breaks, many bright objects fly out of it.
The most important thing is that the main content should be valuable for children or other party participants. These could be sweets, toys, small gifts. In order to add brightness to the moment, you can add confetti, sparkles, and streamers to the main content.
For the laziest
If you don’t have the desire or time to bother with cutting out shapes, you can take a ready-made cardboard box. A piñata can be made from any box you have at home. It is enough to put the gifts inside, tie the boxes crosswise with a rope (don’t forget to leave a loop for hanging) and cover the craft with colored paper.
And so that no one finds out that the piñata was made at the last moment, design it as if the square shape was conceived from the very beginning. Boys will certainly appreciate the “punching boxes” in the shape of Minecraft heroes. And what? Everything there is square, even a person, even a sword.
If you can't make a piñata
If you can’t quickly make a piñata and time is very limited, try organizing an alternative game for the holiday. You will need a lot of balloons and darts. Fill some balloons with confetti and glitter and the other half with candy.
Attach the balls to a wall or other surface in a chaotic manner and invite your guests to hit the balls with darts. You can also hide notes with the names of gifts in the balloons, which will become prizes for the participants.
Making your own piñata is quite easy. The most important resource you will need is time. If you have more than one day to prepare a piñata, you can make a beautiful toy with a classic spherical shape.
If you only have a few hours, you can make a piñata in the shape of some cartoon character or animal. If you don’t have any time to make and guests are already on the doorstep, the idea of a game with balloons will come in handy. This game has a similar principle and meaning and is sure to please your guests.
Filling the piñata
You can fill the piñata with candies in bright wrappers, nuts, fruits, kinder surprises, small toys, and small stationery. Add something shiny to the filling. These can be store-bought sparkles or circle stripes cut from foil or candy wrappers.
Nowadays, parties where future parents find out the sex of the child have become popular. Often at such events they use a cake whose filling is colored blue or pink, balloons with colored smoke, and smoke bombs.
A piñata in the shape of a pacifier, bottle or stroller can also be used for these purposes. You can fill it with pink or blue confetti and give expectant parents and party guests a surprise.
Decorating a piñata
Decorating a piñata is a creative process. You can apply any colorful palette or paint with acrylic paints. Pictures depicting popular fairy-tale characters that are easy to paste look original.
Nuts and candies, small toys or even notes with wishes can also be used as surprise filling.
If you are planning a friendly party, use colorful decoration using corrugated paper in different shades. Brightly colored foil will also work. From these materials you can create a disco ball or a bright star.
It all depends on the celebration for which the piñata game is intended.
For a birthday, it is better to decorate the piñata with the numbers of the upcoming festive event. Little princesses will love toys decorated with flowers and a stylized sun.
Space for imagination
Do-it-yourself piñata at home, the manufacturing instructions for which are given above, can be made in absolutely any form. It all depends on your imagination and skills.
If you used the balloon method, think about which characters might be round in shape. Children will surely love a live kinder, a smesharik or one of the angry birds. Don't want cartoons? You can always make a star, a sun, or even all seven planets of our solar system.
If you decide to use a cardboard structure, you can make a piñata of any shape, from a dinosaur to a kitten. The main thing is that the birthday person likes the form.
The most popular shape of piñata
The most common shape of a piñata in Mexico is a kind of sun or star. This piñata has a round base made of a balloon.
To this base, in a chaotic manner, a kind of rays are attached, folded into cone-shaped sheets of cardboard. A piñata of this shape is not so easy to break, but it only adds interest to the competition.
Rules of the game
Typically, breaking the piñata is reserved for the end of the birthday party. It is better to take the birthday person away from the place of entertainment and hang up the form with gifts to arrange a surprise.
You can do the opposite, hang the piñata from the very beginning to feed the curiosity of the guests. But this option is not suitable for the little ones; most likely the toy simply will not survive until the end of the party.
It is also worth considering the physical shape of the guests. The game involves participants taking turns taking a stick and hitting the piñata until it breaks.
If among the guests there are people of different ages and sizes, the weaker ones should try their hand first. Otherwise, not everyone will be able to try their hand.
In Mexico, people traditionally try to break a piñata with their eyes closed. If the event is open-age and the participants are old enough, you can blindfold them with a scarf. It’s better not to take risks indoors and leave guests’ eyes open so as not to accidentally damage furniture and valuable items.
What can you put in a piñata?
Depending on the theme, the piñata can be filled with the following elements:
- mini candies, lollipops;
- serpentine tape;
- confetti of any configuration;
- souvenir money;
- notes with wishes and predictions;
- small toys;
- bracelets, keychains, hairpins;
- rose petals.
You don’t need to fill the toy completely, but about halfway, so that there is empty space left.
It is not recommended to fill with heavy objects with sharp edges.
DIY piñata photo
Pinata paste
The paste must be used immediately after cooling, so it must be boiled just before starting work. It does not keep ready for long. Can be applied with a narrow paint brush. To prepare you will need:
- wheat flour - ¼ tbsp.;
- starch - 2 tbsp;
- cool water – 1 tbsp.;
- boiling water – 0.5 l.
Although this method is called cooking, the paste is prepared a little differently. The instructions for this include the following simple steps:
- Combine flour with starch.
- Next, pour in cold water and stir.
- Add the resulting solution to boiling water, stir until smooth and cool.
Pinata: original decoration and entertainment
Not a single Mexican holiday is complete without a piñata, and if the party is organized in a different style, guests will love this craft. It is believed that this entertainment owes its origin to Chinese lanterns; they were filled with gifts, but today this tradition has captured the whole world.
A large and bright toy is filled with tasty or pleasant gifts and hung from a tree branch or a special mount. The guests or the hero of the occasion are faced with a completely understandable and simple task: they need to hit the toy with a stick and get its contents.
Pinata - content, ideas
Any child is interested in finding out what is hidden inside the piñata. And its content may be different. Most often it is filled with bright glitter and sweets.
We would like to present you with a list of what can be placed inside:
- Chocolates.
- Lollipops on a stick or in packages.
- Real coins.
- Small toys so that each guest leaves the party with some gifts.
- Nuts.
- Confetti.
- Glitter.
- Cookie.
- Key rings.
- Wishes in the form of notes.
All these things can be placed in one piñata at once, so you don’t have to choose one option. The main thing to remember is that they should not harm the child if they fall! Therefore, do not place anything heavy or large inside the toy. Edible surprises must be well packaged.
If you don’t want to worry about what to put inside the toys, then buy ready-made sweet sets for children at any supermarket or eco-friendly store.
Pinata shape, photo
As already mentioned, the piñata can have different shapes. We have selected for you several photos with options so that you can clearly see what beautiful toys you can make with your own hands for your child’s birthday.
Easy option
First, we'll look at how you can make a piñata quite quickly and easily.
We will need the following materials:
- five types of corrugated paper (different colors);
- balloon
- lace;
- needle;
- scissors;
- glue;
- glue brush;
- newsprint;
- thread;
- sweets.
Inflate the balloon and tie it with thread.
We take newsprint, or just newspaper, and tear it into pieces. We apply glue to each and paste it over our balloon like papier-mâché, not forgetting to leave space for the tail of the balloon. Apply three layers of newsprint to the ball and leave it for the glue to dry.
When everything is dry, take a needle and pierce the ball with it in the place where there is a hole in the paper.
When the balloon deflates, you need to carefully remove it. Now through the hole we can place all kinds of sweets inside.
We cut out a circle from paper, make two holes in it, through which we insert a string.
We apply it to the place where there is a hole in our future piñata. Glue it to the ball as shown in the photo.
We take corrugated paper, cut it into strips, on each of which we make small cuts on one side.
It should look like the photo below.
We paste the cut strips over the ball in such a way that if we take hold of the string glued to its base, turning the ball upside down, then all the cut places will “look” down.
This way you will get the following result quite quickly:
Design and shape of the piñata, choice of decor and internal filling
You can make a piñata at home in different ways; you must first choose the design of the future holiday decoration, here you can completely rely on your taste and the theme of the upcoming celebration:
Piñata in the shape of a ball. The spherical geometry is ideal for children's and adult parties; decorating it is quite simple; the wedding decoration is decorated with fresh or artificial flowers.
For a friendly party, you can use multi-colored decoration with corrugated colored paper and bright foil imitating a disco ball; a children's party will be decorated with a piñata with combinations of bright colors and shades.
Bright star or Christmas tree. Perfect for New Year's holidays, such themed decorations will perfectly complement the compositions used in interior decor and corresponding to the upcoming celebrations.
For birthdays, you can make a piñata in the shape of a congratulatory cake, the numbers of the upcoming anniversary, or the first letter of the name of the hero of the occasion, which will be a great gift for adults and children.
Favorite children's character. Perky birds and pigs from Angry Bird, treasure chests for boys and a voluminous heart for girls, a bright flower with decorative petals, and a stylized sun will set a great mood.
Focusing on the preferences of children, you can choose the heroes of Smeshariki; lovers of the rainbow will be pleased with cute ponies, voluminous stars, or use other geometric shapes to embody all creative ideas.
To fill the piñata, delicious surprises and sweets are often chosen; you can add confetti and finely chopped colored paper, small souvenirs that match the theme of the holiday.
DIY piñata in Ladybug style
Games for children will become much more exciting if their favorite characters participate in them. Let's “invite” Lady Bug herself to the competition! Maybe she will “give” some goodies to our kids if they win?!
But to make the competition fair, let's make our piñata durable:
- Cut out 2 circles and a wide strip, the length of which corresponds to the circumference.
- Glue a strip along the contour of one circle.
- Let's attach a small tube in the middle of our workpiece (length of the tube = width of the strip). This will make the structure stronger.
- And, before we glue the second circle, let’s fill the inside of our “box” with candies/fruits/confetti.
- We will definitely strengthen the structure at the seams.
- Now we will cover the workpiece in 3 layers with newspapers.
- All that remains is to decorate. Let's cut out strips from napkins or corrugated paper, one side is flat and the other is wavy.
- Black stripes are suitable for gluing the side.
- Decorate the outer part of the circle with red.
- We will cover the inside of the workpiece with white stripes.
- We will do this on one and the other side of the workpiece.
- All that remains is to find a suitable picture on the Internet to download it.
And one more little touch: we cut out little black circles and place them on the red part of our piñata. Now we can begin our competition. The enemy is ready!!!
DIY piñata at home in 1 day from cardboard
What to do if there is a party tomorrow and you urgently need a piñata, or even worse, guests will arrive in three hours, and you have nothing to surprise them with? It turns out that a piñata can be made in such a short time and you don’t need to bother with papier mache! All you need is any cardboard (equipment boxes or even cereal boxes), tape, scissors and crepe paper, which can be bought at the nearest stationery store.
If you have a solid piece of cardboard - great, if not, then glue several pieces together with tape to get a sheet of the desired size.
Draw the desired shape, for example a shark.
We need two such parts. Between them, for strength, we attach supports, for example, paper tubes or cups or rolled cardboard. Secure with tape. All that remains is to cover the side parts with strips of cardboard. It's not difficult, we cut out strips of the required width and fix them with tape. Cardboard bends great!
Don't forget to add filling.
Decorate with paper. You can take colored paper, newspapers (for a vintage piñata), magazines, crepe paper (ideally). We cut off the strip, make cuts on it, twist it a little and glue the strips overlapping until we fill the entire cardboard. You can cut small rectangles, but gluing them into strips will be faster. Some of it can be simply covered with paper. If you made it from white paper, then use a spray can or regular paints to tint it to the desired color.
Author MK
For example, a dinosaur was made using the same method, but covered with corrugated paper.
Author MK
Pinata in the shape of an ice cream cone.
We roll a cone from a sheet of paper, secure it with tape, and immediately wrap it in plastic cling film. We cut the newspaper into strips and paste them over the cone wrapped in film. You need to glue the newspaper pieces in a crisscrossing manner, tightly joining each other, one lengthwise, the other across. Glue or paste must be applied to the strip itself and to the surface to be pasted. To apply glue, use a narrow paint brush. According to this scheme, you need to paste over the entire outer part of the cone. We leave it to dry for 1.5 hours, during which time the product will not dry out, but it will dry out a little. Ideally, you need to create at least two such layers. Remove the cone from the cone and insert an inflated balloon into it. We cover the ball and the horn with strips of newspaper. Leave to dry.
After drying, use a stationery knife to cut out the door from the side, burst the ball and remove it, fill the product with sweets, confetti and chocolates. From above, using scissors, we create a small round hole into which we insert a string, from below, we tie a large knot so that the piñata holds tightly. We seal the “door” with paper tape. We cut out a long ribbon from crepe paper and fold it like an accordion, it looks like a ruffle. The beige ruffle should be glued to the cone area, and the pink one, along the top of the “ice cream” itself. That's all, the product is ready!
Piñata - “Ice cream”.
Mickey Mouse pinata.
You need to draw the outline of Mika's head on the cardboard; you need to prepare two such parts. We cut them out with scissors. Then we cut the cardboard into wide, long strips and glue them along the side of the “head”, securing them with paper tape. Don't forget to put candy inside. Next, the “head” needs to be sealed with a layer of crepe paper, and a thread should be secured on top. After which the product must be covered with multi-colored stripes of crepe paper. When the toy is completely covered with colored stripes, each of them needs to be cut along the edge with scissors, creating a fringe effect.
Piñata - Mickey Mouse.
Pinata in the form of a Pony.
From cardboard we cut out two parts in the form of the outline of a pony. We create side parts from the same cardboard and glue everything together with tape. Don't forget to place candy inside and also create holes in the body for hanging. The pony must be completely covered with strips of crepe paper with fringe, glue them overlapping. You can create a mane and tail from colored paper, and use a marker to draw a mouth and eyes.
Pinata - "Pony".
Pinata in the form of a number.
Draw the outline of the desired number on cardboard, let’s say the number five. We cut out the blank and outline it on another sheet of cardboard, we also cut out this figure. Then we measure the length of the side and top parts and cut out of cardboard sections identical to the data obtained. We glue the number into a single whole using paper tape. We take a strip of riveted paper and cut it into fringe, and with it we paste over the number on both sides and on the sides.
Piñata - “Number”.
Pinata in the shape of a snowman.
Let's come up with three balloons of different sizes. We fix them together using double-sided tape, in the following order: the largest ball on the bottom, the middle one in the center, and the small one on top. We cover all the balls with newspaper strips crosswise in several layers and leave to dry. We encircle the length of the snowman with a rope, securing it from below, in the side depressions, and also from above, using tape. We cut the corrugated paper into wide strips, fold them in half along the length, and cut the fringe on one side, in this form we glue it to the body of the snowman. Finally, we cut out circles from black paper and glue them on the front of the product to imitate buttons, as well as on the head, as eyes and a smile. If desired, you can tie a scarf to the snowman.
Pinata "Unicorn"
Children especially loved the animal-shaped piñatas. Most girls just dream of seeing a “unicorn” on their birthday. And we can give this to them by creating a piñata.
We will need:
- cardboard;
- corrugated paper (white, blue, pink and purple);
- white sheets of paper;
- pencil;
- ruler;
- PVA glue;
- finger glue;
- glitter;
- glue gun;
- glue brush;
- scotch;
- rope;
- scissors;
- black marker.
On a large sheet of cardboard we draw a silhouette of a unicorn measuring 60 by 70 cm.
Cut along the contour.
We attach the cut out figure to another piece of cardboard and trace it along the silhouette.
We cut out the second part, we get two identical halves.
Piñata game
Now we’ll tell you how to play with a piñata:
- The toy is placed in the prepared place.
- The birthday boy is blindfolded.
- He takes a stick or bat in his hands and starts swinging it, trying to hit the piñata. The guests stand in a round dance and clap their hands.
- When he “gropes” for it, he makes a strong blow, and the toy breaks, delighting all the guests with a real fountain of emotions.