The modern printing industry includes a large number of industries. Using the services of companies operating in this area, each of us can receive a personalized mug, a T-shirt with a unique inscription, a designer photo album or a colored portrait frame. The list of such consumer goods is replenished with stickers - a variety of stickers that serve both informational, entertainment, or even design purposes.
Modern printing teams offer their clients a large number of different stickers of all shapes, sizes and contents. However, contacting a specialized company is not the only way to obtain stickers.
There are many ways and techniques that allow you to start making stickers yourself. The work does not require any specialized tools, equipment or outstanding printing skills. Everything you need to make stickers with your own hands is sold at your nearest store or supermarket.
Purpose of stickers
Stickers are used in various areas of life and carry several functions:
- Decorate the interior. With the help of adhesive images, you can update a boring room design without much investment.
- Perform the function of pointers and warning signs with corresponding images.
- Can be used as advertising if you put your company logo and contact information on them.
- Used in the food, chemical and pharmaceutical industries. They usually indicate all the information about the product, including composition, shelf life and methods of using the product.
- To remind you of important tasks. In this case, sticky notes are used on which short notes are written.
- For highlighting important information in notebooks, as well as simply for decorating office equipment and creating original designer notebooks.
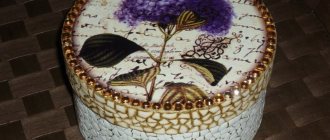
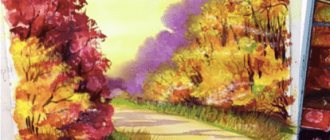
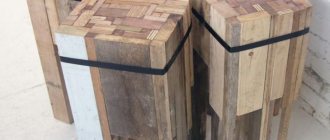
Photo ideas for homemade stickers
Sources- https://FB.ru/article/370960/kak-narisovat-stiker-sovetyi
- https://VseProKley.ru/podelki/kak-sdelat-naklejki-doma
- https://Shtamp102.ru/kak-sdelat-naklejki-svoimi-rukami/
- https://fin-az.ru/459487a-kak-delat-nakleyki-dlya-odejdyi-i-interera-v-domashnih-usloviyah
- https://SamoDelino.ru/kak-skleit/kak-sdelat-naklejki-bez-dvuhstoronnego-skotcha.html
- https://svoimirykami.guru/naklejki-svoimi-rukami/
- https://senao-spb.ru/samodelki-drugoe/kak-sdelat-stikery-svoimi-rukami.html
- https://freebiz.su/podelki/krasivye-naklejki-svoimi-rukami.html
- https://dnevnikmastera.ru/kak-sdelat-stikery
[collapse]
Types of stickers
Before you start making stickers, you need to decide what kind of products you need to get in the end. Stickers come in the following types:
Small in size and shape, used to decorate notebooks and notebooks. The image and size can be any. Most often they highlight important events or news.
Stencils. Used for applying unusual patterns on surfaces. For example, to decorate windows for the New Year.
Glowing. These stickers are coated with special fluorescent paint and glow in the dark. Most often used to decorate children's rooms.
Stickers for notes. They are small sheets of paper of different shapes (usually square), the upper part of which is covered with an adhesive composition. Information is written down on them with a pen or pencil. Typically used in offices.
Large voluminous stickers. Often used to decorate furniture and children's toys. But they can also be used for design in other rooms, for example, to decorate a refrigerator.
Basic requirements for a sticker pack
Before you start making stickers, you should familiarize yourself with some requirements for a standard set:
- PNG format;
- Resolution 512 by 512;
- Transparent background;
- At least five stickers;
- Compliance with copyright.
So, everything is ready, and you have five or more unusual stickers with your hero. Now your creativity must pass a special test.
Making your own stickers
Of course, if you need to produce a large number of stickers, it is better to contact a printing house, where, using special machines, they will print out the required number of any images with an adhesive base in a short time.
In this case, the stickers will have good color rendition, a completely identical design, and a neat, even shape. However, if you need to make just a few stickers with an original design, you can easily handle this task yourself.
Ideas and templates
Use your imagination or select ready-made prints on the Internet. The main thing is that the resulting image is not washed off with water.
To create a picture, use these ideas:
- Cut out or printed images will do.
- The plot can be drawn with pencils, felt-tip pens, crayons, or translated using transfer paper.
- Ready-made templates can be found on the Internet, in thematic groups on social networks.
- Use emoticons and stickers from instant messengers.
- There are interesting fonts and symbols in Word. There you can also type announcements, warning signs, and signs.
- Make pictures using special stamps and glitter.
- To create a raised edge, use scissors with curly blades.
Pros of homemade stickers
Before moving on to the description of how to make stickers with your own hands, let’s look at the advantages of such stickers:
The main advantage is low cost. It is much cheaper to make a sticker yourself using available materials than to contact special printing companies.
Originality. You can come up with a design and an unusual sticker template yourself. It will have a unique exclusive design. Even one author will not be able to make an identical picture. The image can be absolutely anything. The choice is very wide, including images of animals and people, emoticons, gestures, motivational inscriptions, etc.
Resistant to environmental influences. If a handmade sticker is laminated, it is not afraid of moisture, sunlight and mechanical impact. Which will allow you to serve for a long time.
Such illustrations can be glued to any type of surface, including iron or wood.
A great addition to a gift. You can make a greeting card in the form of an original sticker, writing your wishes on it, as well as placing interesting images and sticking it to a gift box.
Allows you to create an exclusive apartment design. Stickers will organically fit into the design of your rooms and give it originality and charm.
Note!
Do-it-yourself easel - types of designs, choice of materials for creation + step-by-step instructions and simple diagrams for beginnersDIY wedding glasses: a detailed master class for DIY decoration, selection of decorative elements and materials (photo + video)
- DIY phone stand | Dimensions, features and beautiful options for telephone stands
History of origin and methods of use
First, let's talk about printed stickers.
They appeared in America in the 80s. The first homemade stickers were made from postal labels, which had just enough blank space to draw a design or write on. After which they were cut out and pasted. In the modern world, stickers are used for different purposes. They are printed and used for branding goods or simply for those who like to paste colored pictures everywhere.
They are mainly made on a vinyl base. This makes them quite resistant to environmental influences. Stickers do not fade or become wet. This is especially convenient when they are used for advertising or information purposes, for example for car branding.
The themes of stickers can be very diverse, from popular memes, characters from films, TV series or video games to pictures expressing emotions, a person’s condition or some kind of information message. One way or another, beautifully drawn stickers definitely attract attention.
Sticker art
By the way, there is artistic gluing, the so-called sticker art, or sticker bombing. The point is to cover (or “bomb”) a gaming joystick, laptop, or even a car with stickers. Perhaps at first this was done to disguise something, but later it grew into a whole movement in art.
In European cities there is also street sticker art, where poles, walls of houses, and so on are covered with colored pictures. Pictures can be thematic, topical, or not carry any semantic meaning at all, but simply be successfully combined in color. Usually they are accompanied by catchy inscriptions in large letters.
The most unusual way to use stickers is to create pictures from them. Some artists use them as a material instead of paints. In this way, for example, portraits are created, which are a collage of many stickers.
Sticker on self-adhesive paper
The easiest way to make stickers with your own hands is to print the desired image using a laser printer on self-adhesive paper. You can buy special paper at a hardware and computer store.
Carefully cut out the printed pictures using scissors. Such illustrations will delight you for a long time, because... special paper will protect them from fading and moisture.
General recommendations
- high level of performance and originality. Try to come up with something unusual: simple drawings generally do not pass muster;
- do not get carried away with drawing small details, the abundance of which can spoil the entire composition;
- come up with your own unique character. Sets with famous characters were ordered from experienced artists;
- your images must convey some kind of emotion, otherwise the whole point of others using them is lost.
Sticker based on regular tape
To make this sticker you will need:
- Laser printer
- Transparent adhesive tape of maximum width
- Plain paper
- Hairdryer
- Warm water
Preparation method:
First of all, find designs for your own stickers on the World Wide Web or make them yourself, and then digitize them using a printer or digital camera. Then print these illustrations on your printer. Glue wide tape on top.
Place the product in a bowl of warm water for 3-5 minutes. Turn on warm water and completely rinse the paper off the tape. Dry the adhesive part with a hair dryer. Place the sticker on a flat, clean surface.
The advantage of this DIY sticker idea is durability and environmental sustainability. The downside is the size restrictions, because the image must correspond to the width of the tape.
Nail stickers at home
When the traditional manicure is so boring that it seems boring, you can liven it up with original stickers. With their help, you can not only create beautiful decor for your nails, but also convey your mood, ideas, life position, or even plans for the coming week.
Thanks to stickers, you can transfer literally any pictures to your nails. You don't have to draw. In addition, the glued pictures will not smudge, and you do not need to wait until they dry.
To work you will need:
- base;
- varnish and liquid for removing it;
- nailfile.
Apply stickers on your nails step by step:
- Take a plastic bag and paint ten rectangles on it with varnish. They should be of such a size that they completely cover the nails. After waiting 5 minutes, cover the rectangles with another layer of varnish.
- Draw pictures to your liking. The advantage of this method is that you will draw all ten drawings with your right hand. You can create an abstraction by splashing 2-3 or more colors of varnish onto the created background. The pattern should consist of small spots. You can make streaks using a needle or brush.
- The next layer of varnish is applied after the previous one has completely dried. Leave the stickers to dry for 1-2 hours.
- Remove the finished elements from the plastic film with tweezers.
- Apply base coat to prepared nails and then apply stickers to them. Don’t wait for the base to dry—press the sticker straight away, then it will stick well.
- Use nail scissors to trim the decals to fit your nails exactly.
- Secure the pictures with a finishing coat.
Important!
Pictures on polyethylene must dry completely, otherwise they will be damaged when torn off.
Sticker that sticks with homemade glue
This method will require more effort and time, since you need to make the glue yourself.
To work you will need:
- Paper
- Printer or pencils and markers
- Scissors
- 12 grams gelatin
- 1 tsp Sahara
- Brush
First of all, decide how to draw stickers with your own hands. You can, for example, come up with an image yourself, copy a picture from the Internet or a book, and also print a ready-made illustration on a printer. Then the image must be cut along the contour.
Next, the glue is made. To do this, mix gelatin and sugar in a small bowl. Then add a little boiling water. The liquid should cover the components completely. After 3-4 hours you will get a jelly-like adhesive substance.
Glue should be applied to the back of the drawings and left to dry for a few minutes.
To stick a sticker, simply moisten it with saliva or water and apply it to the desired location.
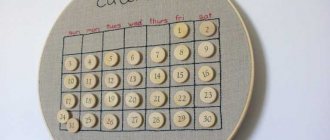
This method is also suitable for making diary stickers, on which you can make necessary notes and reminders. In this case, it is better to refuse any images or make them small only for decoration. And the glue needs to be applied only to the upper part of the leaf.
In order for a self-adhesive picture to serve you for a long time, it can be laminated on top using ordinary transparent tape (adhesive tape is glued to the outside of the picture; if the picture is wider, then adhesive tape can be applied in several stages, aligning the strips of tape butt-to-end with each other) or a special laminating film (can be purchased at an office supply or computer store).
Ways to create with glue
Since decorative stickers are often used in activities with children, it is necessary that the adhesive composition is as safe as possible. You can make this glue yourself from gelatin (1 packet), boiling water (40 ml), sugar (1 tsp), you can add 1-2 drops of aromatic extracts, for example, vanilla. Mix all ingredients until smooth. Store the glue in a bottle with a tightly closed lid in the refrigerator.
If the mixture becomes too thick, place the container in hot water. This will return the previous consistency.
Cut out the print you like and place it on a piece of paper. Using a brush, coat the back with glue. Let the stickers dry completely. Make sure the adhesive layer is dry before use. Store finished products in a plastic container or bag.
Paper sticker with protective film.
A frequently asked question is how to make a sticker that cannot be used immediately. This process is also simple. To make it you will need: a picture, transparent tape, baking paper (parchment), scissors.
First of all, you need to cut out the design, stepping back from the outline by about 3 mm. Then cut a piece from the parchment, which will be slightly larger in size than the picture. Glue a piece of adhesive tape onto baking paper (if the width of the adhesive tape is narrower, then glue several pieces overlapping).
Combine the drawing and baking paper. Glue another piece of tape on top of the picture. Cut out the illustration with a margin of 4 mm using tape. The product is ready!
Making your own stickers is quite simple. It is enough to have wide tape, scissors or glue at home. Drawings can be created using a printer or with your own hands. And the number of stickers and the originality of the image will depend only on your imagination and the amount of time you are willing to devote to implementing such an interesting task!
Checking stickers by the administration
You need to join the official group https://vk.com/vkstickers and upload your set here using the “suggest news” function. In the field provided, you need to describe your stickers and the character who inspired you to create them.
DIY photo stickers
How to Create a Personal Emoji on Snapchat
Snapchat actually has a built-in tool to help you create your own personalized stickers! This way, you don't need to download third-party apps.
4.1. Create your own personalized stickers on Snapchat
While Bitmoji stickers are great, they aren't very customizable. Snapchat also lets you create your own stickers right within the app. Here's how to do it.
Launch Snapchat and click a photo of what you want to create a sticker with (you can also create a sticker from an image in your memories by swiping up on the camera screen and selecting the image).
Now click the Cut button (scissors) on the right panel. Trace the outline of the object you want to turn into a sticker. When you're done, lift your finger. You will notice that a smaller version of the sticker automatically appears on the snap.
Now go to the conversation page and open the chat where you want to send the sticker. Click the Emoji button next to the text field.
Now click the Scissors button on the bottom bar to open the stickers you created. Click on the sticker you want to send to the chat.
4.2 Create your own Snapchat cameo
Yes, Snapchat already has its own set of personalized stickers that use your Bitmoji avatar. These stickers can be used in chats and can also be added to pictures. While you can use the search feature when adding a Bitmoji sticker to your snap, stickers are created by simply typing a word in the chat window.
►How to Create a Snapchat Cameo Using Bitmoji
4.3 How to Use Personal Emoji on Snapchat
Here are two ways to use personal emoji in the Snapchat app: firstly, in a chat and secondly, in the blink of an eye.
4.3.1 Using personal emoticons in chat on Snapchat
Open the chat in which you want to use your customized Bitmoji sticker. Now use the text box to search for your sticker. For example, type "Hello" to view stickers with that theme.
Now click the "Emoji" button next to the text field. You should see all related Bitmoji stickers at the top of the list. Click on the one you like to immediately send it to the crap.
4.3.2 Adding personal emoji to Snaps
To add a custom Bitmoji sticker to your snaps, first tap on the snap using your Snapchat camera. Now click the Stickers button on the right panel.
Use the search function at the top to find the sticker you're looking for. Bitmoji stickers appear below Giphy.
Related: How to Get Verified on Snapchat
What tools will you need to make stickers?
As mentioned earlier, making stickers is a simple process that does not require any advanced knowledge and skills from the master. The work will use the simplest tools, which can be purchased in every major shopping center. However, you should understand that if you want to receive a large circulation of stickers made with professional precision, you will have to contact a company that provides printing services.
If the volume of the batch of stickers does not exceed reasonable limits, or you need the stickers for personal use, you can try to do all the work yourself. The main tools will be used:
- Scissors with the sharpest, pre-sharpened blade. A craftsman who has not bothered to prepare the document risks getting an uneven product with crooked and torn edges.
- Adhesive tape, the width of which is selected depending on the size of the stickers.
- A picture drawn with your own hands or an image printed on a printer. Here the master must show all his creativity, because the picture is the main part that carries the main information message.
- Warm water – you only need a little liquid.
Method 3: Crello
Crello is another online service where the focus was on creating projects using templates. This will help you prepare the perfect sticker for further printing or publication on any resource.
In addition, no one has canceled the opportunity to create a project from scratch.
- If you are interested in choosing a template, enter the theme name in the search and go to view existing designs.
Find the appropriate option in the list and left-click on it.
A separate window will open to view the template, where you click “Select Template”.
In the editor, first remove or swap the necessary details, thereby creating a unique design.
You can start editing existing text using the elements in the panel on the left, which appear immediately after selecting one of the inscriptions.
You can also upload your own images from which the sticker will be formed. Do this through “My Files” by clicking on “Upload an image or video.”
Use backgrounds if you want to avoid a boring sticker background design, but also keep in mind that some options are available for a fee.
When you are finished editing the picture, click “Download” to proceed to download it to your local device.
Be careful when choosing the optimal format for saving. If you are going to send a picture to a printing house for printing, check the requirements again, and only then proceed to uploading.
Perform the save, and then proceed to the next interaction with the received object.
Sometimes, to create a sticker, sticker or label, you have to use a variety of tools, which are often simply not available in online services. Then you cannot do without the use of special software, which you can read about in more detail in the materials linked below.
Read more:Programs for creating labelsPrograms for creating stickers
Describe what didn't work for you. Our specialists will try to answer as quickly as possible.
Instead of tape - self-adhesive film
To get better quality stickers that can be used at any convenient time, use vinyl self-adhesive film. It is sold in construction stores (Avery products are also good). Need to:
- draw or print an image, cut it along the contour;
- attach the picture with the front side to the adhesive side of the wide tape, trim it along the edges of the future sticker;
- remove the paper from the picture: place the sticker in warm water, wipe off the soaked paper with your fingers or a sponge, let the tape dry;
- glue the sticker (the sticky layer of tape will remain) to the glossy side of the film, trim the edges again;
- remove the protective layer before attaching the sticker.
Before gluing the sticker onto the surface, you need to clean it from dirt and degrease it. In the selected location, the sticker is fixed along the upper edge, after which the backing is gradually removed
It is important to level the material in a timely manner and prevent the appearance of air bubbles. To do this, use scrapers or plastic cards.
Method 2: PicsArt
The PicsArt online service is divided into modules, each of which is responsible for performing a specific operation. If all you need to do to create a sticker is change the background, remove it, or add a couple of elements, PicsArt is definitely worth considering.
- Use the link that takes you to the PicsArt page, where you select one of the modules you want to use for photo editing.
We will look at an example of changing the background. After navigating to a new tab, click “Upload your image” or drag the file to the selected area.
When you open Explorer, find the image you need there.
Now you can change the background using one of the available options, for example, through the “Texture” tab. On the left there is a complete list of backgrounds, from where you can select the optimal one.
After application, you will immediately notice how the image has changed. PicsArt algorithms only work accurately when the main image is separated from the background by a clear line.
Use one of the colors in the palette if the textures present do not suit you.
When ready, click on “Download” to download the result to your computer.
Other models have a huge number of functions that any user can understand, so we will not dwell on them.
Using lamps on the walls in the nursery
In the evenings, the child needs good lighting. Additional light in the room is created diffused, without glare, preferably directed upwards and not downwards. Kids can easily drop a floor lamp or table lamp; the safest thing would be a children's lamp on the wall, with all the wires put away in boxes and sockets covered with covers.
The older the child, the more powerful the lighting required. If your baby does hard work in the evenings, good lighting is important, especially on the left. For classes, it is best to use several sources that complement each other. For example, spotlights on shelves above the table and a table lamp. During operation, all lamps should work simultaneously; creating a contrast of light and shadow should be avoided.
The play area in rooms with north and west windows also requires good lighting. Of course, a crystal chandelier is not suitable. It can be easily reached with bouncy balls. If there is not enough light, decorative lighting will help out. Light strips and lanterns are used to highlight design elements. Of course, they don’t provide much power, but they improve your mood. LED lamps in the shape of teddy bears, letters, clouds will remove the oppressive feeling in poorly lit apartments.
Bedside lighting is also important. Children, even those who cannot read, enjoy looking at pictures before bed. The light here should not be bright, but it should be enough for reading. A children's sconce on the wall is best. For older children, you can use table lamps.
A children's night light on the wall will be useful for all kids. The light is directed onto the crib and the space around it. In the light of the night light, the mother can go to the bed, check how the child is sleeping, and, if necessary, take some actions: change the diaper, put away toys. When the need to control sleep disappears, it is easier for a child to fall asleep with soft, soothing light. A night light on the wall allows kids to feel better than in complete darkness.
For classes, it is best to use several sources that complement each other.
Choosing the right color scheme for the walls in the nursery
Decorating walls in a nursery with paper wallpaper, especially with small patterns, is not the best option. Over time, paper begins to gather dust, ornaments are poorly perceived by a child’s vision, such a room looks overloaded with details, and when a child learns to draw, he will certainly pay attention to the walls. Painted surfaces are best suited, especially since paint and varnish materials are now considered the most environmentally friendly. Paints for children have safety certificates; the coating can be selected for children with lung diseases and allergies.
The bright colors of the nursery walls are balanced by restrained furniture, and contrasting details are selected to complement the monochromatic paint. The shades chosen are pure and noble. The Scandinavian style fascination often results in an almost black accent wall being balanced out by the lighter tones of others. This solution is not always suitable. Children very rarely choose dark shades even for drawing.
What color of the walls in the nursery should be the main color?
- Yellow – lifts the mood, affects the development of intelligence, but monochrome negatively affects vision, it is advisable to use it as an additional one; Yellow improves mood and improves intelligence, but monochrome negatively affects vision.
- Green – calms the nervous system; for children’s rooms choose light shades: mint, soft olive, lime; Green – calms the nervous system.
- Red – excites, raises blood pressure. It can have a positive effect on lethargic children, but only a few spots of color are used: a toy, a chair, a section of the wall. But related colors can be used without restrictions: light crimson, pink walls in the nursery, in combination with white or gray, will appeal to girls; May have a positive effect on lethargic children, but only a few spots of color are used.
- Blue – calms, increases productivity. Rich blue, diluted with white and red details, is suitable for boys, the main thing is not to make the room too heavy. Light blue in a classic style with stucco will appeal to school-age girls. Universal combination: light blue shades with gray and white; Blue – calms, increases productivity.
- Brown – light, powdery, beige shades will create a warm atmosphere and balance bright furniture and toys. Light, powdery, beige shades will create a warm atmosphere.
- Gray - light shades are combined with turquoise, pink, yellow. The gray color of the walls in a children's room is universal, suitable for babies and older children; The gray color of the walls in a children's room is universal.
- Black and white - a bright room, with a black slate board and black drawings: zebras, polka dots. Despite the adult contrast, the black and white nursery looks light and cheerful, thanks to the toys - scops owls, rugs, and the general light tone, but it will not be possible to maintain this style; by the age of 2-3, bright color spots will be required.
Despite the adult contrast, the black and white nursery looks bright and cheerful thanks to the toys.
Step-by-Step Guide to Making Stickers
The technology according to which stickers are produced does not have any difficulties. The whole process is as simple as possible and does not require skill and time. You can make stickers by following this step-by-step guide:
- First you need to choose a high-quality image. The main thing of any sticker is a drawing that reflects the general message of the product. You can draw a picture yourself, if, of course, you have such skills, but it is much easier to go looking for a suitable picture on the Internet.
- After searching for an image, it is time to print it. You can use either an ordinary laser printer or a powerful printing device with high resulting quality.
- Next you need to process the printed image using tape. The processing procedure is a bit like the lamination process - adhesive tape is attached to the front of the picture. When performing this work, special care should be taken to avoid bends or waves on the surface of the tape. Once the adhesive tape is attached to the design, you should smooth it down using a plastic bank card or similar object.
- Using scissors with a sharp blade, you should cut the picture along the contours corresponding to the picture.
- Next comes the main technological stage: the printed product, made by hand, is immersed in a container filled with warm water. In accordance with practical experience: the sticker takes one minute, and the finished image begins to get wet after just a few seconds. After removing the sticker from the water, carefully scrape off the layer of paper. As a result of the work done, you will receive a layer of transparent adhesive tape on which the selected image or design is printed.
- The sticker should be allowed to dry before use. After the sticker has completely dried, it can be glued to the surface prepared for this.
In this way, real stickers are created that can be used in real life. However, in the modern world, there are virtual stickers with which network users express their emotions when communicating with other people. In order to understand how to make your own stickers in Telegram, you should become familiar with the basics of web design and computer graphics.
The answer to the question of how to make a sticker on WhatsApp, Telegram, VKontakte or Odnoklassniki lies in understanding Internet design technologies.
Any artist who has skills in working with computer graphics programs can perform such work. You can make your own stickers in real life using the technology presented in the article - the work does not require any specialized skills or unique tools.