Today, 3D drawings on paper are becoming more and more popular; you can look at them for a long time and admire them. Not only talented artists, but also those who are just getting acquainted with fine art can create such masterpieces. It's never too late to learn how to draw; anyone can make spectacular 3D drawings.
The tools you need for 3D are the simplest: a pen, pencils, a marker and a piece of paper. By the way, it is best for beginners to draw using cells in a notebook, as it is much easier to draw figures this way.
It is worth noting that the image is created on paper in stages, in this case the main thing is consistency, even if simple and uncomplicated pictures are reproduced.
Many people are interested in how to draw a 3D drawing on paper with a pencil in a bright and realistic way. To do this, you should use photo instructions or videos that will clearly show all the techniques for recreating a 3D drawing.
Let's look at pencil drawings step by step for beginners. For clarity, print out the drawn images to make your task easier. Please note that the first acquaintance with 3D technology can cause mixed impressions; there is no need to rush, smooth movements and endurance are the main assistants of a novice artist.
So, let's get down to business, let's learn how to draw beautiful 3D drawings.
History of drawings
Images in 3D format appeared in the 16th century. Traveling artists depicted with chalk, on the pavements of medieval streets, paintings depicting the holy face of the Madonna.
Subsequently, the authorities of many cities began to encourage such creativity. The goal is to attract as many tourists as possible and replenish the city budget. But the people still have a love for street art.
3D art
With the advent of computers, 3D street drawing began to give way to 3D computer graphics. The task of 3D modeling is to create a visual, three-dimensional image of the depicted object.
A type of 3D drawings is graffiti, realistic paintings that create the appearance of a three-dimensional scene.
In modern life, three-dimensional art is familiar to the whole world. This is an incomparable, breathtaking spectacle. The paintings, as if born from the earth, fascinate with a riot of colors and a sense of reality.
Works in three-dimensional execution
But such works, executed in three-dimensional space, can be found on the Internet. They simply amaze with their depth and quality. Computer graphics can do anything these days. After all, you can draw not only on paper, but also, after studying special 3D modeling programs, on a personal computer.
Below in the pictures you will see fascinating models of the three-dimensional world of a three-dimensional image.
Images in three-dimensional space, thanks to the recreation of volume, captivate a person’s soul and seem to pull it along with them, not allowing them to tear themselves away from admiring the beautiful picture for even a second.
Step-by-step instruction
The image of three-dimensional drawings, even the simplest ones, is created on paper in stages. The main thing in this process is consistency. Step-by-step instructions provide for all stages of creative work. First of all, you need to have a photo or a finished drawing that you want to reproduce on paper.
When professional artists assure that if you just want to, everyone can draw such pictures, frankly, I can’t believe it. The creative process seems so complicated that many, even wanting to learn, put off their dream until better times. And, meanwhile, in vain.
Having studied the technical nuances of creating three-dimensional paintings and taking several master classes on this topic, everyone can learn how to create realistic images. Perseverance, patience and consistency of learning are what a person who wants to master 3D art needs to stock up on.
Note!
- Graphic dictation by cells for preschoolers and first graders. The easiest and most difficult graphic dictation options for a child
- Dog coloring page - useful tips on how to draw a dog. Instructions with basic drawing steps for children (160 photos)
Sketches: a master class on creating simple and complex drawings with your own hands with step-by-step diagrams for beginners + photo examples of original works
Some tips for learning to draw
If you liked what you saw in this article and you want to continue learning 3D graffiti, then read some tips that will be given below:
- If you don’t want to use paper and pencil, then study 3D modeling programs, which are abundant on the Internet, or better yet, take courses in this type of drawing.
- If you still want to stick to the manual form of work, you prefer to put your soul into the process, then you should learn the basics, first of all.
- Learn to draw from life. This develops the eye and spatial thinking.
- Learn from a variety of lessons available on the Internet.
- And the most important! Start with the minimum and don't stop until the last.
First steps in 3D art
A master class for beginners, as a rule, advises starting the drawing process by repeating someone else's work. If you are a person with a wild imagination, you can imagine an incredible story, but you will not be able to depict it realistically on paper. To do this, you need to understand the logical cycle of constructing a 3D drawing.
Usually, the teaching begins with the simplest thing: an image of one’s own hand. To do this, trace the hand and part of the wrist with a pencil on paper.
Using a felt-tip pen, draw straight lines before and after the outline of the hand, and draw an arc on the hand itself. Such lines are drawn along the entire sheet, at a distance of 1-2 cm from each other. Markers of 3 colors paint over the stripes. Add a shadow around the arm to make it look more voluminous.
Looking at the picture, it seems that the hand is covered with colored elastic paper.
This method of drawing is called "ruling". It is ideal for beginner artists: a simple and effective way.
How to draw a drop of water 3D
You will need pencils, white paper, and skillful hands.
You can draw a drop as shown in the video:
https://www.youtube.com/watch?v=Up0sLULnF9Y
- First a sketch.
- Details of the drop pattern (shimmer, reflection of light, shadow, trace of water).
3d Doorway (or Dungeon)
To create the illusion of a vertical image of the opening, you can add walls and floors:
- Unfold the sheet with the wide side. In the lower right part, draw a rectangular part about a third of the entire area. Connect the upper left corners of the page and the rectangle. This diagonal is the junction of the walls, the rectangle is the floor.
- Line the walls finely parallel to the edges of the sheet. The left side of the diagonal is vertical, the right side is horizontal. The walls are ready.
- Draw a doorway with a rounded top in the left wall, almost in the corner, so that the threshold is at the junction of the wall and the floor.
- The angle between the walls and the floor is a guide for the logical placement of the door. It should be slightly elongated along the left edge so that when viewed at an angle along the diagonal, the proportions are aligned.
- Shade the opening parallel to the threshold, more on the right side.
- Add hinges and a door that opens to the right. The right edge of the door should be parallel to the joint of the walls.
- Detail the door. “Vertical” boards look good.
- Apply shadows. Be sure to shade the borders of the ruling by 2-3 cm around the opening and door to hide the irregularity of the shapes.
Look at an angle of about 30-45 degrees from the lower right corner of the sheet.
3d Butterfly
One of the secrets to the illusion of volume is the cast shadow. The second is changed proportions. The part of the drawing further from the viewer should extend along the line of sight.
The wingspan is not important, but for beginners mastering 3D drawings on paper, it is better to choose the profile option in order to draw one wing instead of two.
The initial sketch of the butterfly is proportional, the bottom edge corresponds to the final location. From here the viewer will see it.
Let's draw:
- Now you need to stretch the image vertically. To do this, divide the sketch vertically into 4 equal parts. Temporary auxiliary lines can be drawn in these places.
- The proportions of the bottom piece do not change. You need to stretch the picture starting from the second part - lengthen it by a quarter, the third by half, and the fourth should be three quarters longer than the original.
- Draw the outline of the drawing, remove everything unnecessary - auxiliary lines and the remains of the first sketch.
- Detail the picture, indicate the pattern of the wings, the fibers on the body, draw the antennae. You can also color it if you wish.
- Add a shadow symmetrically diagonally from the bottom edge of the picture. Darken it completely, feather the borders.
- You can enhance the illusion by cutting off the top of the sheet at about ¾ of the way through the drawing, leaving a piece of the wing protruding beyond the edge of the page.
3d eraser
An eraser is a small object; its 3D copy on paper can be copied literally from life. First you need to arrange your workplace. Secure the sheet so that it does not move during the drawing process, install a lamp so that the light falls from the left.
Let's draw:
- Place the rubber band where it will be drawn. Trace the outline.
- View from the viewpoint chosen for the audience. Mark three points behind the eraser so that they are above its top three corners.
- Remove the eraser. Using the marks, draw the “upper” contour of the elastic band. In this case, the edges will narrow from the foreground to the background. Erase the auxiliary lines inside the figure.
- Put the eraser in place and see how the light falls on it. Outline the cast shadow and move the sample to the side.
- Darken the edges of the drawn eraser, shade it in the right places and enjoy the result.
3d falling man
A very simple 3D illusion - a picture with a man holding on to the edge. The trick is that the character is located on both sides of the sheet at the same time.
How to draw:
- First, draw a figure of a person stretching upward closer to the right edge of the sheet. The upper part of the figure is almost 2 times longer than the lower part, as seen from above. Hands up to the wrists, no palms.
- Measure the distance between the ends of the figurine's arms.
- Turn the paper face down, draw palms with fingers holding the edge of the left side of the sheet approximately in the middle.
- Bend the piece of paper into a semicircle so that the pictures match. If everything worked out, work out the details and paint the little man.
Pencil drawings
Visual, three-dimensional drawings allow you to experience the world in a different way.
Note!
- Easy gouache drawings - TOP-160 photos and step-by-step instructions for drawing with gouache. Best Reviews of Easy Drawings for Beginners
Drawing ideas: TOP-200 photos of the best ideas for do-it-yourself drawings + reviews of techniques with simple drawing schemes
- Pencil drawings are easy and beautiful - a master class on pencil drawing for beginners. Simple diagrams with a description of the work + photos of the best drawing ideas
To draw 3D drawings with a pencil, you need to be patient. At the beginning of mastering creativity, there is no need to rush; the pencil should describe smooth lines. By fulfilling these conditions, you yourself will be amazed at your new capabilities.
For this work you only need to stock up on a pencil, an eraser, a ruler and scissors. Any table where you feel comfortable working can become a creative workspace.
Three-dimensional drawings by cells
A simple diagram of drawing a butterfly in a three-dimensional format will allow you to create a miracle drawing that will be so realistic that it seems that the butterfly will flutter and fly away. 3D drawings by cells are easy to perform.
The technique of drawing by cells is most suitable for beginners:
- A sheet of paper needs to be marked with guide lines. - Draw the outline of a butterfly.
- Draw the details of the wings and abdomen.
- Having erased the guide lines with an eraser, you need to begin the process of painting the insect.
- Draw the shadow cast by a butterfly.
- Cut out part of the sheet so that the upper body and wings of the butterfly are outside the sheet.
The drawing is complete.
Note!
How to draw a squirrel: TOP-120 photos of the best drawing methods and techniques. Step-by-step master class for beginners with examples of the best drawings
How to draw anime - useful tips and simple diagrams for beginners. Instructions with the basic steps of drawing anime (160 photos)
- How to draw a girl's face with a pencil - instructions on how to draw with a pencil for beginners. Master class with a description of the technique + photos of the best drawing options
DIY 3d painting
This decoration of the wall of your living room or bedroom will delight any guest who finds himself in your home. The 3D poppies are impressive and evoke true respect for the one who created this miracle. A minimal set of classic colors gives the painting a sense of style and modernity. How to make a 3D Maki painting - read on and follow the instructions in the photos.
Wall decoration
First, you will need to print out templates for all the components of the painting.
The secret to creating a painting with a 3D effect is multi-layering. You will have to use at least three layers. Cut each one out and overlap each other. To glue the layers, use thin strips of bulk tape (it should not be noticeable) or special glue drops, similar to those used by the author of the master class.
Here are templates of all the required layers and details for the real painting.
Print and cut out all the details of the picture from colored paper.
Collect in this order:
Three-dimensional picture
Paper painting
To create volume, gather the top petals of poppies a little, giving them a slight corrugated effect.
After all, the petals of a real poppy are so thin and delicate, almost transparent.
How to make a picture
Having glued all the petals, complete the decoration with the poppy core, which you should also work on.
This beautiful decor can be a wonderful gift for a sophisticated and refined nature.
Source
And:
lookathis.ru
First drawings
3D drawings for beginners are work done in three-dimensional format. In this case, it is necessary to correctly take into account the height, width and depth.
The basis of the three-dimensional drawing technique is the play of light and shadow.
Before you start drawing, you need to analyze the features and nuances of the selected object: shape, angle of the cast shadow.
The first stage of drawing is to sketch a sketch of the object being drawn and determine the correct location on paper.
The location of the light source affects the cast shadow, this must be taken into account.
Shadows are indicated by moving from a lighter tone to a darker tone.
Using an eraser, the shadows are shaded. This helps to convey the depicted subject more realistically.
Drawings on paper
3D drawings on paper are a picture that comes to life before a person’s eyes.
When drawing on paper, we are well aware that it represents a plane: length and width. In order to give the drawing depth and sufficient volume on this plane, you need to remember about linear perspective, the correct choice of angle, and the location of the light source.
Children love to draw their favorite cartoon characters. You can help them depict, for example, a minion in such a way that it appears to them as if alive on a sheet of paper.
Even first-graders can simply draw a simple minion figure, but they need to learn how to give it volume.
Line the sheet with the image of the minion into strips 1.5 cm wide, without ruling the figure itself.
Connect each line with an arc (it will be on the toy figure). This can add volume to the image. Now apply shadows, taking into account the location of the light source. Apply shadows from light to dark tones. Blend the shadows, and the three-dimensional drawing on paper is ready.
The child will simply be delighted with such a minion.
3D paintings | Country of Masters
To work, choose ANY photo you like, except a portrait (although... It’s difficult, but you can do it) or any of your own (or someone else’s) drawing. Make several IDENTICAL photocopies.
We use one photocopy for the working drawing. Here we mark where and what layers will be. In one drawing you can get 3 layers or 33, it all depends on you. Take this work very seriously: if you make a mistake here, then you will have to redo all the work.
Looking at the working drawing, we cut out all the layers from the photocopies (one layer from one photocopy).
We glue corrugated cardboard or pieces of double-sided adhesive tape to the back of the layers.
All that remains is to paste the layers onto the photocopy background, frame it, hang it on the wall and admire your work.
In the same way, you can make your own house or cottage in volume.
Notes:
1. To avoid wrinkles, it is better to stick thin photocopies onto album sheets and then cut them out. For such purposes, I print photocopies on sheets from the “drawing folder”: there is no need to glue them.
2. I use corrugated cardboard to save on adhesive double-sided tape.
3. In the countries of the European Union, 3D paintings and 3D postcards are very popular. Many people make them. There is a whole industry there: you can buy a sheet of layer-by-layer prints at the Hobby Center. All that remains is to cut and paste. But in our Country of Masters I have not noticed such works and therefore I hasten to correct this shortcoming.
4. If any of you are in a hurry, you can send 3D New Year cards to your friends. And whoever is too lazy to invent something can do it
photocopies of a regular New Year's card and make a 3D version of it.
5. Good luck to you in your new business!
stranamasterov.ru
Accessible creativity
People who are confident in their abilities, without a shadow of hesitation, begin to master the process of creativity unknown to them. But people who hesitate, doubt everything, are tormented by the question: “How to draw a 3D drawing?”
In fact, you will find the answer to this question on the Internet on the Krugozor website and many others. The websites provide instructions for constructing three-dimensional images for beginners. Literally step by step, the entire creative process is explained, from a simple drawing to a more complex image.
Three-dimensional paintings made from putty
You've probably already worked with putty. For example, sealing seams before painting or smoothing out cracks in the walls before wallpapering. Having minimal skills in working with a spatula, you can try to make a three-dimensional picture from putty with your own hands.
Volumetric painting with roses
We will need:
- putty;
- primer;
- spatulas of different widths;
- water-based and acrylic paints.
First of all, it is necessary to prepare the surface: level, seal cracks, prime and clean with sandpaper. Next, use carbon paper to draw the outlines of the future painting. Then measure out the required amount of putty, dilute with water and stir thoroughly until a homogeneous mass is formed.
The easiest way to create a three-dimensional image from putty is to work with a spatula. With its help you can create simple ornaments, abstractions, tree branches, flowers. Place a small amount of putty on a spatula and apply to the desired location.
The excess can be cleaned off later, but now you need to apply the composition wherever it is needed.
Volumetric picture made of chiffon
After some time, the composition will harden somewhat, and it will be easier to give it the desired shape. Run a damp brush over the finished image; this will smooth out any unevenness and give it soft outlines.
Three-dimensional painting made of putty
After drying, you should clean off any excess with a piece of sandpaper, being careful not to remove any excess. The finished painting is painted over with primer again. Then you can start working with paints and a brush. Finally, apply acrylic varnish to the image. Now the painting will not be afraid of water.
Three-dimensional painting on the wall in the bedroom
Simple drawings
Any learning process moves from simple knowledge to fundamental knowledge. The same is true in the art of three-dimensional depiction of objects.
Easy 3D drawings are where all beginners begin the learning process.
Classic learning begins with realistic displays of geometric shapes. For example, a cube is visible only with its three faces when you look at it. One can only imagine its further construction.
In order for the cube to appear as a three-dimensional figure, you need to determine the light source and visually outline the shadow it casts on a sheet of paper. Having decided on this, they begin to create a play of shadows. By shading the shadows with an eraser, we get a three-dimensional image of the cube.
Drawings in a notebook
Drawing is an exciting creative process that can be practiced for more than one hour. If you think that drawing is the lot of selected people, then you are very mistaken. This creativity can be mastered by every person.
3D drawings in a notebook can be created both in easy versions and in complex compositions.
At the initial stage, it is best to copy the drawings cell by cell. This process will show how best to maintain proportions and how to correctly determine the image of shadows.
Checkered notebooks are ideal for depicting multi-level objects: stairs, houses. Although, in principle, any object can be depicted by the correct selection of cells to depict volume.
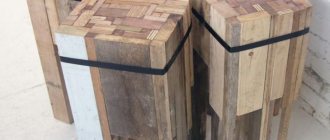
Volumetric paintings made of wood
Such paintings look luxurious, but require a lot of effort and perseverance. To work, you will need chisels, a special jamb knife, furniture varnish, stain and wooden cloth. You need to transfer the drawing onto the wood and cut grooves of different depths along the contour with a knife to give the image volume. Stain of different colors will add even more volume. Cover the finished painting with varnish.
Volumetric picture with glass
As we see, there are many opportunities to create a beautiful, unique thing with your own hands.
The main thing is that the work gives you pleasure, and that the finished three-dimensional painting fits into the interior and becomes a source of pride in your skillful and hardworking hands. Three-dimensional painting made of fabric
The benefits of volumetric drawing
Any type of creativity has a fruitful effect on personal development, and drawing in particular.
Children develop a sense of taste and improve hand motor skills. Thanks to mastering three-dimensional drawing, they improve their skills in working with a pencil. Gain knowledge by determining the location of a light source.
The play of light and shadow will be useful to them in drawing lessons, and later in descriptive geometry. Thinking three-dimensionally means seeing the world from a completely different perspective. They develop coordination of movements. Drawing makes children diligent, unhurried and careful in completing tasks.
For adults who have already established themselves in life, drawing is an opportunity to relax doing something they love, to relieve stress after a hard day at work. The aesthetic pleasure that adults experience when they create a three-dimensional drawing is immeasurable. This increases self-esteem and helps you believe in your abilities.
The ability to draw is a person’s ability to express his thoughts, dreams, joy or pain on paper or asphalt. Every person has the opportunity to learn three-dimensional images of objects in space. Desire, perseverance, love of creativity, this is what will help people create truly masterpieces of fine art.
Secrets of drawing in 3D for beginners
Scroll:
- In order to correctly calculate image distortions, taking into account perspective and angle, when creating a drawing with a 3D effect, novice artists are recommended to apply a guide grid to the paper.
- For a successful 3D photo, the light source in the picture must match the real lighting.
- Anamorphoses look more impressive through the camera than in real life
- It is better to start with the image of simple shapes, such as a cube, a cone and a ball. It is difficult to create a realistic three-dimensional drawing without understanding how shadows fall on these figures.
To start mastering drawing in 3D on paper you need desire, patience and time, and ideas can be gleaned from great artists and simply enthusiasts who exhibit their works on thematic sites on the Internet. Studying this technique will allow you to create interesting pictures and postcards with unexpected content to the delight of the author and his loved ones.