Previously, in order to make any craft, toy or interior decoration, you had to spend a lot of time searching for suitable material. Today, the synthetic fleece material available in fabric stores helps solve this issue.
Initially, soft, light and at the same time very warm fleece was used exclusively for the production of sportswear. Today, the scope of its application has expanded significantly; it is widely used in handicrafts.
We'll tell you what crafts you can make from this material with your own hands.
Creation of an octopus
First, we make the body of the toy by placing the ball in the center of the blue piece of fabric and wrapping it tightly with thread. After this, the threads should be unwound, the ball should be removed, and the fabric should be straightened. You'll want to leave a thread mark so you don't overdo the cuts.
Now from each corner of the straightened fabric you need to cut a square measuring 12 x 12 cm. You should get a cross-shaped part, on each side of which you need to make 6 more cuts. Try to ensure that the cuts do not reach the contours left by the thread by 2-2.2 cm.
Place the tennis ball again in the center of the part and tie it with thread. We braid the cut strips into braids, forming the legs of the fleece craft. We tie ribbons to them from below.
All that remains is to make the octopus's face. Cut out two circles from white, gray and black fleece. White should be the largest and black should be the smallest. We glue the circles to the toy’s head one by one: first a white circle, then a gray and black one.
We embroider a smile on the craft with red threads and tie a polka dot fleece scarf on her head.
How to choose fleece for toys?
Fleece is one of the most common materials for sewing toys. It is inexpensive, the color palette of the material is rich and varied, and it is also unpretentious in work. In addition, this fabric is easy to care for.
Fleece is easy to process and also has a rich color palette
Specifically for toys, you need to find high-quality material with a density of at least 200 mg per square meter. But if you have to work with fleece for the first time, it is better to take a piece of material from some old item or clothing. It's a great experience at no cost. And if you make a mistake, it won’t be so offensive.
Express tips for choosing fleece:
- the pile should be on one side of the canvas; it is convenient to apply chalk contours on the smooth reverse side;
- if you rub the edge of the fabric with a wet napkin, it will be clear whether the fabric is fading - the color should not change;
- You definitely need to smell the fleece; if the smell is strong and chemical, it means the manufacturer used cheap and unstable dyes.
By the way, fleece is translated as “fleece”, “sheep/goat wool”. But it is still synthetic, made from polyester fibers. The manufacturer combs it to a fluffy state with rotating brushes. Similar to wool, fleece is soft and has the ability to retain heat. But don’t be upset that the material is not natural: unlike wool, it is hypoallergenic.
You will learn a lot of useful information about fleece after watching this video:
Piggy
A homemade fleece pig will definitely delight your child. And to make it you will need the following materials:
- fleece (pink, yellow, crimson);
- white flannel fabric with a colorful pattern;
- holofiber or synthetic winterizer;
- threads (white, black, pink and yellow);
- pig pattern;
- sewing needle and scissors;
- small black beads.
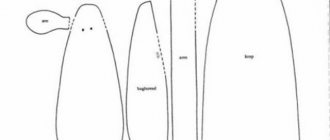
First you need to draw or print a toy template and cut out the necessary parts from paper. Then the pig pattern needs to be cut out of fleece, making small allowances.
We make the head, ears and paws pink, the body yellow, and the snout crimson. We cut out the skirt for the toy from flannel.
In total, you need to cut in two parts for the head, skirt and body, and four for the ears, front and hind legs. Only one piece is needed per patch.
Take the two head pieces, place them right sides together and sew them together, leaving a small hole for the stuffing. In the same way we fasten all the other parts of the fleece craft, except for the skirt.
We turn out the prepared pig elements and fill them with holofiber or padding polyester. There is no need to stuff the ears, just tuck the edges left at the bottom inward and sew them up.
The skirt pieces need to be folded right side inward and sewn along the edges with white threads. Then we fold the skirt at the top and bottom and stitch it. Then we turn the part inside out and sew it on one edge so that it can be pulled together and put on the toy.
Now you need to assemble the fleece craft. First we connect the head and torso, then attach the legs and ears. Sew a snout to the pig's face and black beads in place of the eyes. We embroider the nostrils and mouth with black thread, and put a skirt on the finished toy.
Required materials and tools
Before starting work on creating soft toys, a novice craftsman needs to prepare all the necessary materials and tools for work. The sewing process and the final result depend on their correct selection.
Fabric selection
Fleece is the most common material used for sewing toys. This is due to the large number of positive qualities of this material:
- low price;
- brightness and variety of color palette;
- unpretentiousness at work;
- ease of fabric care.
It should be noted that for the manufacture of toys it is necessary to choose high-quality material with a density of at least 200 mg/m2. The downside of some fleece fabrics is their tendency to pill.
Most craftsmen recommend using pieces of fabric from old fleece items for the first trial work . This will allow you to gain experience in making soft toys without large financial costs.
Filler material
An important component of a handmade soft toy is its filling. The main criteria when choosing it are its safety and suitability for the baby’s age.
The most common types of filling for toys and crafts intended for children of all ages are padding polyester and holofiber . For beginning craftsmen and on a limited budget, it is acceptable to use cotton wool for stuffing small crafts. It should be taken into account that this type of filler can form into dense clumps during use and after washing.
In educational toys, calcined cereals are often used as a filler. They act as a weighting agent and help develop tactile sensations in babies. When playing with such crafts, it is important to strictly monitor the integrity of the toy and prevent small parts from accidentally getting into the respiratory tract of small children.
Decorative elements
Toys should be bright, interesting and attract the attention of children from the first minutes of playing with them. For this purpose, finished products are decorated with ribbons, lace, and appliqué. They dress them in clothes made from remnants of fabric used in other works. To give the craft a finished look, buttons, beads, and seed beads are often used.
Tools needed
If we sew toys from fleece with our own hands for personal use, then we can do without a sewing machine. You should consider purchasing it if you are making crafts for commercial purposes.
Before you start working on soft toys, you should prepare:
- needles;
- scissors (large and small);
- threads of various colors and shades;
- sewing pins;
- measuring tape;
- a piece of soap or marker.
Creating a pattern
Creating designer patterns is a rather complex and time-consuming process that is not always quickly mastered by novice craftsmen. When starting to create toys from fleece, you can look for patterns for them in several sources .
- The Internet, where you can find not only patterns, but also recommendations for choosing fabric, filling and decor.
- Specialized printed publications on needlework and sewing, which contain patterns and instructions for them.
- Kits for sewing soft toys, which are sold in art and craft stores.
- The source of the pattern can be an old toy. It can be ripped open and disassembled into parts, the silhouettes of which are transferred to new fabric.
Fleece tilde: materials
Tilda is a rag doll created by Norwegian Tone Finnanger. Tilda's most recognizable features are her tiny dot-shaped eyes and rosy cheeks. Often Tildas are female dolls, but there are other variations. For example, you can sew Tilda, a fleece bunny.
To do this you will need:
- fleece (white and blue polka dots);
- pattern;
- scissors;
- baking paper;
- holofiber;
- sewing machine;
- black beads for eyes.
Tilda Bunny: master class
Follow these steps:
- Trace the pattern and cut out the necessary parts of the toy from fleece with allowances of 0.5 cm.
- We fold the ears and paws with the right sides inward and sew them on a machine, leaving holes for the filling.
- We sew two parts of the body along the middle seam. Also don't forget to sew the darts. Turn the prepared part right side out.
- Cut out 6 ear parts from baking paper and sew them to the ear blanks in three layers. After this, carefully turn the pieces out.
- We sew the inverted ears again on the machine.
- Now turn out all the paw blanks and fill them with holofiber, but not completely.
- On the front part of the body you need to pin and sew the ears, departing from the middle seam by 1.5 cm.
- Immediately below the neck we sew the upper legs to the body, and sew the lower legs from below, at a distance of 0.5 cm from the middle seam.
- We take the second part of the body, place it right side to the first part so that the ears and paws are inside, and sew the parts together. You need to leave a hole at the bottom so that the soft fleece toy can be turned out.
- After you have sewn and turned the craft, fill it with holofiber and sew up the hole by hand.
- Glue the eyes to the muzzle and embroider the nose.
MK fleece rabbit
Such an original soft bunny can be the best homemade birthday gift for a child.
What to take to work:
- light fleece square 50x50 cm;
- for the ears, a piece of contrasting colored fabric;
- filler;
- black beads;
- floss for embroidering a face (chocolate or pink);
- cardboard for templates;
- colored chalk;
- scissors;
- needle and thread (or sewing machine).
Master class in detail:
- First, print out the pattern diagrams, then transfer them to thick cardboard and cut them out.
- On a flat surface, you need to lay out the fleece fabric with the wrong side up. The pile should lie in one direction. The elements are outlined with sharp chalk. There will be 16 parts in total.
- The parts of the body must be sewn together using a running stitch. Elements of the paws too. Then they must either be stitched on a machine, or sewn by hand with a seam “by the needle”.
- Insert the finished parts of the ears into the holes in the head and sew them on from the inside out. The same thing is done with the paws. The paws are stuffed with filler before this.
- Lastly, the bunny's body is filled with stuffing, then the technological hole is sewn up with a hidden seam.
- It's time to take on the bunny's face: sew on the eyes, embroider the nose. To design the tail, a circle is cut out of fleece and assembled with a basting stitch. It needs to be tightened, a bag is formed, which is filled with holofiber and sewn to the hare’s body with a hidden seam.
The toy is ready! If you wish, you can sew an outfit for her separately (or even a whole set of outfits).
How to sew a snowman?
The pattern consists of two circles of different diameters and a rectangle for the hat. You can draw such a snowman template yourself and cut it out of paper. Then, using a pattern, cut out a smaller circle from white fleece, and a rectangle from blue fleece - and a second circle. We also cut a small strip of blue fleece to make a scarf.
We make long stitches along the edges of both circles, put padding polyester in them and tighten the thread. As a result, you should have two balls.
We cut small strips along the edges of the scarf, making a fringe.
Fold the part for the hat in half and sew it together. We tuck the cap at the bottom and rewind it at the top with thread or lace.
Sew the white ball to the blue one and decorate the bottom one with two buttons.
We put a hat on the snowman and tie a scarf, and sew beads on the face.
Felt hydrangea
Let's prepare for a lush flower (ball):
- felt (fabric);
- scissors;
- glue gun
- Cut 1 circle of 3 cm and 12 circles of 2 cm from felt fabric
- Drop hot glue into the center of a small circle and create the future hydrangea petal. Then you need to connect the edges of the circle to make 3 petals. Similarly, we make 12 petals for a large flower.
- Along the edges of the large circle (blank), 4 blank petals should be distributed with a glue gun
- Then glue 4 more pieces between them, then continue gluing until the full circle is filled
- We must get a three-dimensional ball - a hydrangea flower.
Each flower must be the same color.
New Year hat
Fleece is perfect for making a fun New Year's hat. You will need red and white fleece, matching thread colors and a pompom.
First you need to measure your head circumference to determine the amount of fleece you need. For example, the circumference of the head will be 58 cm, and the height of the cap will be 50 cm. Draw on paper a pattern in the shape of a triangle standing on a rectangle. The total height of the figure should be 50 cm, the height of the rectangle should be 8 cm, and its width should be 29 cm (half the circumference of the head).
Using the pattern, we cut out two such parts from red fleece, and from white fleece we make only two rectangles 29 x 8.
Place the pieces right sides together and sew along the edges. We sew a white stripe to the bottom part of the red cap so that it can then be turned right side up. We turn over the white stripe and sew it on top to the hat. At the end we sew on a pompom, which can be made from tinsel.
Fleece applique
Making such an application is quite simple. All you need is a pattern and colorful fleece. For example, if you want to embroider a beautiful owl on a pillow using the pattern below, then first you need to cut out all the parts separately, and then assemble the future applique step by step.
You will need to cut out 6 circles for the eyes (2 large, 2 medium and 2 small), one body, a beak, 2 legs, 2 wings, two branch parts and several leaves.
First you need to assemble the owl's eyes, taking turns sewing the circles on top of each other, starting from the largest and ending with the smallest. Then you need to sew the eyes to the head. After this we sew on the beak, wings and legs. Then we sew a twig and leaves to the pillow, and attach an owl on top of them.
cat pillow
To make such a craft from fleece, you will need bright fabric, scissors, threads, small pieces of red and white material, padding polyester or holofiber and a pattern.
We apply the pattern cut out of paper to the fabric and cut out two parts of the body. Place the pieces together with right sides facing in and sew, leaving a small section. We turn the craft inside out and stuff it with padding polyester. The amount of filling for the pillow depends on your preferences. The main thing is that it is filled evenly.
We cut out a nose and a heart from red fabric, and two eyes from white fabric. We sew the eyes and nose to the cat’s face, and the heart from below to the body. Using thread we embroider the mouth, pupils, mustache and eyelashes.
Dog toy
To make a wicker dog toy, you will only need three strips of fabric in different colors measuring 7 x 30 cm.
The strips need to be folded together and tied in the middle with thread or cord. On both sides of this place we weave the fabric into a tight braid to the middle length. For convenience, it is worth fixing the second half of the braid with something heavy.
Fold the braided braid in half and braid the remaining edges into one braid. At the end, tie the edges of the braid into a tight knot, and your toy is ready.
Fleece flowers
From this material you can make a cute decoration for a hairpin, headband or doll. All you need is a strip of fleece fabric 56 x 2.5 cm and a needle and thread.
Roll up the strip of fabric and secure it at the bottom with pins. Using red thread, sew the flower from the bottom as shown in the image, passing the needle through all layers of the rose.
Cut a leaf from green fabric and attach it under the flower. The first one should be large enough to completely cover the bottom of the flower. If desired, you can embroider veins on it.
If you make several of these flowers, you can attach them to a hoop. Or you can glue a fleece rose to a pin or hair clip.
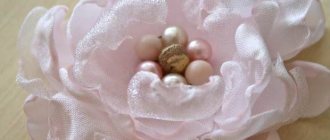
Fabric flowers are also easy to make in another way: just cut out a few flower pieces and sew them in the middle. You can decorate the craft with beads or ribbons, as you like.
Felt peony
Let's look at beautiful options for other flowers, for example, voluminous peony. This is a lush fragrant flower, loved by many. It has many petals.
Stages of work:
What is plumbing workHow to make decorative candles with your own hands at home
How to make an office organizer with your own hands at home
- From red, pink or white felt you need to cut out 20 small rectangles (not squares) of various sizes.
- We make teeth (fringe) on one edge, and make the other semicircular.
- You need to pin the round edge and secure it with glue.
- From several identical petals we form a flower, for example, white.
- The second layer should be a slightly larger flower, maybe the same shade as the first flower or pink.
- Each layer can be gradually made darker: from white to red (pink). Glue the centers of the flowers together and wait for them to dry.
- For a beautiful core, take a yellow (orange) thin strip of felt. We make a fringe on one side and cut it with scissors to the middle of the strip.
- Then we roll the strip with the fringe up, the yellow center of the flower.
- We glue it to the center of our peony and close the cut of the flower.
If you attach 1-3 flowers to the headband, you will get a creative head decoration.If we want to use the product as a brooch, then from the inside we need to glue a piece of felt to the flower, and a pin to it.
Schemes and types of original crafts in the photo of felt flowers.
