Among craftswomen who sew toys and soft goods with their own hands, various types of bunnies are especially popular. These soft toys not only look cute, but also provide enormous scope for creativity in this direction, because you can come up with a huge number of models of bunnies: they can be of different colors, shapes, sizes, from different materials and fillings. Don’t forget about the unique decor for each of them: clothes, dresses. In this article, several master classes with examples of simple patterns for sewing yourself were prepared especially for needlewomen. Below we will tell you how to sew a hare with your own hands, without having any special skills; an approximate pattern of a bunny is given.
Free patterns
Tilda, Hare tilde, Rabbit tilde, etc. - one of the most beloved and sincere Tildas. Repeatedly altered by craftswomen: sometimes the arms and legs are fastened with buttons, sometimes the ears are lengthened and shortened, the nose is higher and lower, the mouth is of different shapes - and, nevertheless, very recognizable 
It is not at all difficult to distinguish the Tilda bunny from the Tilda rabbit - just pay attention to their ears. The tilde rabbit's ears are downward, while the hare's ears stick out upward. Below you will find a large number of master classes and patterns that will help you easily make your own bunny or bunny.
Necessary materials:
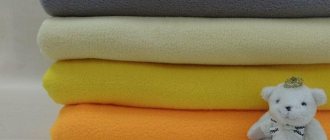
1. Main material for the toy . For beginners, short-pile mohair is best. The material must be non-elastic to avoid deformation of the toy. I chose faux fur.
2. Companion material . For the inside of the ears and feet. In my case it's faux leather.
3. Padding . The bunny can be stuffed with sawdust or synthetic fluff.
4. Granulates . Used to weigh down the toy.
5. Parts for attaching the paws and head:
- Disks. Diameter from 2.5 to 3 cm. 10 pcs.
- Cotter pins size 2.5 cm. 5 pcs.
- Washers. 10 pieces.
6. Eyes and nose . I chose beady eyes and a polymer glue nose.
Stage 1: Cutting out the parts.
Please note that seam allowances are not included! You need to make a 5mm allowance for the seams.
When laying out the parts, consider the direction of the pile. It is marked with arrows.
From the main material you should get:
- Head: 2 front parts and 2 occipital parts.
- Body: 2 mirror parts.
- Hands: 4 parts
- Legs: 4 parts
- Ears: 2 parts
- Tail: 1 piece.
After all the parts are cut out, you can start sewing them together.
Stage 2: Stitching the parts.
All parts are sewn with a “back needle” seam.
1. Stitching the head.
The head consists of four parts: 2 occipital parts and 2 front parts. First, you need to sew the parts of the front part along line AC, then the parts of the back part along line A1C1.
Now you need to sew the parts together, combine points A - A1 and C - C1. The hole for stuffing should remain at the bottom.
Next, secure the spout if you chose a screw spout. Pack the part tightly, especially if you chose sawdust. It should look like the photo below.
We install the mount. The fastening consists of a disk, a cotter pin and a washer.
After installing the fastener, tighten the hole for stuffing with a running stitch. The head is ready.
2. Stitching the torso.
The body consists of two symmetrical parts. First, you need to sew up the grooves on both parts in the upper and lower parts. The darts are sewn from the edge into the part. Next, sew both halves together, leaving an opening for stuffing. Using an awl, we make holes for attaching the head and paws (this place is marked with a bold black dot on the pattern).
Hare by Tone Finnanger
Pattern 1
Pattern 2
Such a rustic bunny with a carrot hem - I really like it!
Fat hare Tilda
Patterns and visual assembly of the toy.
Origin of the rosy toy
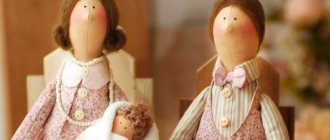
Tilda doll was born quite recently.
The first toy was invented by the Norwegian Tonne Finanger, who almost accidentally made an unusual rag doll. Calling her Tilda, the girl presented her creation to the world. And quite unexpectedly it found a strong response in the world of handicrafts. The name Tilda was firmly attached to subsequent toys that Toney created based on the same sketch. Long-armed and modest dolls have become popular and are growing in popularity.
The craftswoman opened mass production, and homemade toys made by needlewomen from all over the world began to follow suit.
Today, tildomania has taken over the whole world. In addition to girl angels, handmakers sew plush hares, cats and bears. But no matter what role Tilda appears in, seamstresses follow the mandatory rules for sewing a fashionable toy.
Classic signs of Tilda:
- Dark skin. The first toy was a little "tanned". Over time, the rule became stronger. Now all Tildas can boast of dark skin, which is made from fabric dyed in characteristic shades.
- Understatement. Another important feature is the modest expression of the face and dot eyes. The dolls' faces are never drawn in detail. It should only be intended. It is generally accepted that different people see different emotions on the face of the same doll.
- Long arms and legs. The characteristic lankyness is played up in toys of any type. Angels and animals have disproportionately large paws, which gives the style a special, recognizable charm.
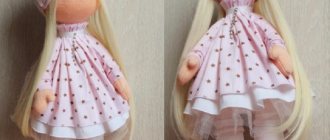
- Outfits. Tilda style says that clothes should be as simple as possible. The dolls are dressed in pajama fabrics, rustic overalls and light sundresses. The fabric for clothing should be simple and natural. Small floral designs are welcome.
- Padding. Rag toys are stuffed with high-quality material. The character's torso should be filled tightly. The limbs are light and fluffy.
- Subject. Most dolls are given a specific style when sewing. There are Farmer Tildas, Home Angels, Scops Owls and Wedding Toys. “Pregnant” dolls have also become fashionable today.
- Tilda's wings have a symbolic meaning. She won’t be able to fly on miniature wings, but she can easily amuse her household.
Selection of model and material
In order for the Tilda doll to turn out correctly, you need to choose the appropriate material and pattern. Before starting work, determine what the theme of the craft will be.
In any case, the fabric for Tilda should be natural. It is optimal if it is cotton, calico, chintz or flannel. For the so-called Scops Owls, pillow toys, soft plush fabrics are ideal.
Tilda's main attribute is her outfit. The choice of clothes is approached responsibly, since it is the clothes that set the mood of the toy. Angels of comfort are usually dressed in sundresses and pajamas. You can also sew a soft jumpsuit for the doll.
You can decorate an outfit made from natural fabrics with denim, tulle, pieces of tulle and other details.
A prerequisite for a proper Tilda is rosy cheeks. You can make them using a regular red pencil, sharpening the lead and rubbing it with a cotton swab. Some craftswomen use cosmetics, for example, blush. This option looks no less romantic. The main thing is to practice doll makeup on a scrap of fabric so as not to spoil the finished toy.
Tilda doll pattern
In life size, the classic toy reaches 40-50 cm in height. This is the optimal size, but there are no clear rules for doll growth. Each craftswoman sews a toy of a size that fits perfectly into the interior.
To sew a life-size Tilda doll, you need to print the pattern on an A4 sheet. To get a larger toy, just double the image on your computer.
Making a toy is very simple. Step-by-step instruction:
- Select the size of the doll and print out the pattern of the desired size.
- Cut out the templates, leaving approximately 5 mm for seam allowances.
- The fabric is folded in half with the right side inward.
- The cut out patterns are pinned to the fabric.
- Outline the templates with a pencil or chalk.
- Cut out the folded fabric.
- Without separating the halves, the parts are stitched. Be sure to leave small holes for turning and stuffing.
- Turn the parts inside out and fill them with padding polyester or other light filler. The body should be full, and the limbs should be almost hollow.
- Sew the details. First, the arms are attached to the body. This can be done either by machine or by hand.
- The upper ends of the legs, which are also marked with a broken line in the figure, are inserted into the hole in the body, indicated by a dotted line on the pattern. The torso and legs are sewn up manually. Later the seam will be covered with the toy's clothing.
- The base of the doll is ready. Now all that remains is to dress her up.
Soft themed animals
Universal patterns will help you sew cute inhabitants of the house. Life-size textile dolls will be an ideal interior decoration if you choose the right theme and size for them.
Having determined the desired size of the doll, the pattern is adjusted to it on the computer and printed. When printing, keep in mind that you will need to add a few millimeters to the templates for seam allowances.
Christmas deer
The Tilda toy gains particular popularity on the eve of the New Year. A cat or horse in a knitted sweater is the perfect Christmas present. On the Internet you can find many wonderful “winter” toys that play with the Christmas theme. For example, Santa's reindeer, made in a unique style.
DIY women's trousers: step-by-step construction of a pattern
You can sew a New Year's deer from the same materials as a regular Tilda doll. You will need “dark” fabric, as well as brown, red and white material. The color scheme of the toy can be changed at your discretion.
A winter deer will need an insulated outfit that can be sewn or knitted. A scarf with cute tassels is made from a piece of felt. The character's hat is made from two identical triangles, stitched on both sides.
Small details, such as ears, socks and other accessories, are sewn from fabric of different colors. The more materials and colors are combined in a toy, the more complete its image will seem.
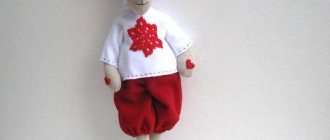
Dressy bunny with a secret
Hares are one of the most touching varieties of Tilda . Craftswomen make the most incredible bunnies and bunnies that have become real stars on the Internet. What roles have the big-eared characters tried on? On the Internet you can find a pattern for a groom hare, a sailor or a long-eared angel.
To build such a hero, you can use any Tilda pattern, adding ears to it. But to make the character proportional, it is better to cut it out according to a ready-made pattern.
You can dress this bunny in any outfit, for example, pajamas or jeans. The animals look very cute in light sundresses. Experienced needlewomen can try their hand at creating a full-fledged trouser suit for a cozy angel.
Cute yawning Scops Owls
Scops Owl, or sleepy angel, is a variation of the Tilda doll. This is a yawning character, certainly dressed in pajamas or a nightgown. Looking at such a toy, it is very difficult not to yawn. The purpose of the toy is comfort, which it certainly brings to any bedroom.
If you look into it, any Tilda can become a scops owl. It is enough to pay attention to yawning by fastening the doll’s palm to its mouth. However, to create a real sleepy angel, you need to use Tilda’s life-size Scops Owl pattern.
Face design and clothing
A hare's nose.
Naturally, everyone who sews such a toy wants to dress it up to their own taste. You will see for yourself what exactly suits your hare as soon as he is ready. Many craftsmen write that each tilde doll has its own character, and if the clothes that were originally planned do not fit (this happens!), you have to redo everything.
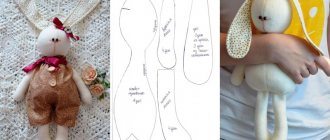
Torso
The hare's body consists of three parts: two front and one back. Fold the fabric for the front pieces in half with the outer side facing in and transfer the template. Baste and cut, leaving allowances. Sew the front pieces. The next step is to transfer the template of the back part of the body to the wrong side of the fabric and cut it out, leaving allowances. Connect all the parts of the body, secure with pins and sew.
Do not sew up the paw holes or the turning hole.
Fold the fabric in half with the right sides facing in and transfer the paw pattern. Baste, cut, leaving allowances, stitch, turn right side out, iron and stuff. Insert the legs into the corresponding holes of the body and sew them up.
Sew the ears. turn them right side out, iron them and then you need to sew up the hole used for turning them inside out.
Turn the body right side out and stuff it with stuffing.
Sew the heels of the hind legs so that the hare can stand, fold the ears and sew them to the hare's head.
Free master classes on sewing bunnies Tilda
Bunny in a dress and green coat
An interesting and photo-filled master class on sewing a tildo and clothes for it. Watch here
Bunny based on toys by T. Conne
Master class and patterns from Evgenia Ambartsumyan. Watch here
Step-by-step master class from NKALE
Watch here
Teddy Fashionista Outfits
To make the toy interesting and dynamic, you can sew several clothing options for it. For example, the interior Angel of Comfort can be decorated to match the curtains. When changing them, the clothes on the hare are also changed. This plush dude will become a real hearth keeper in any home.
Jacket or jacket
A hare in a jacket will be a star not only in any home, but also in the office. By placing such a hero on a shelf in the office, good luck and harmony in the soul are guaranteed to every employee.
And even though tilde toys are not accustomed to the official style, needlewomen have successfully introduced office clothes into the fashion trend. For example, by equipping a hare with a colored butterfly, you can give it some comedy.
By the way, hares in jackets are most often used in wedding themes.
Sewing a jacket or jacket for a rabbit is easy. To create a pattern, just attach the finished rabbit to a sheet of paper and outline its outline. After adding a little space for the seam allowance to this drawing, cut out the template and transfer it to the fabric.
A more complex model includes separately cut sleeves and a collar.
Dress or sundress
To sew a dress for a tilde, the doll itself is used as a template. Attaching it to a sheet of paper, outline the outline of the future clothes.
The width and length of the sundress can be varied. It is customary to add zest to outfits with the help of small decor.
A dress for a rabbit can be decorated with lace by sewing it to the bottom of the product. Large buttons on a miniature dress will look good.
Paid master classes
Of course, there are a great many free master classes and patterns for creating bunnies with your own hands on the Internet; some needlewomen prefer high-quality paid photo and video master classes and patterns.
Below you will find a selection of Russian-language paid master classes.
Large game bunnies from Ekaterina Vinnichek
Cost: 300 rub. Buy here
The bunnies according to this MK will turn out to be just play bunnies, made of undyed natural fabric, with embroidered faces, they can be washed, and clothes can be taken off. The height of the hares is 42-43 cm.
Easter bunny
Cost: 350 rub. Buy here
A very detailed master class in which on 40 pages you will find patterns, 134 step-by-step photographs and a description of the process of sewing Easter bunnies - a boy and a girl. And also: how to “weave” a basket and exclusive gift wrapping, how to age fabric, how to make a bunny stand confidently on its feet and how to make its arms bendable...
Necessary tools
In order to sew a Tilda hare yourself, you need to take textiles for the base, material for stuffing, fabric for decorating the ears and face, as well as fabric for clothing. You will also need blush or paint to create a blush.
It is worth saying that since Tilda is often decorated with various accessories, additionally in the work you will need: beads, buttons, ribbons, openwork Swarovski beads, feathers, artificial flowers, clips, smooth and machine embroidery, sculptural items made of polymer clay, knitted inserts, miniature floral elements and other materials. Naturally, all of the listed decorative items can be used as desired.
Fittings for finishing
Ideas for inspiration
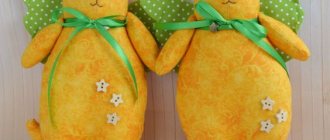
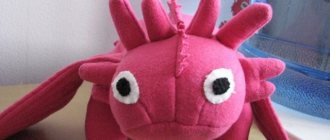
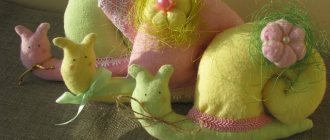
Bunnies from various authors. Just look at the images!
Maison de reve Dzigora Natalya
Konovalova Olga
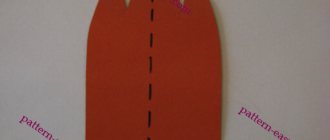
Jacket for a big-legged doll
For beginners, it is best to make your first jacket from fleece. The pattern for the first time is the simplest. Although the jacket is very easy to make without intricate details, it can be decorated with a variety of flowers, beads, whatever your imagination suggests.
More experienced seamstresses can sew a denim jacket. Using these patterns you can sew a jacket from any material.