Materials and tools:
- copper wire: a piece of about 20 centimeters thick (1.2 mm in diameter) and five pieces of thinner wire, about 50 centimeters long;
- a few beads made of natural stones (or any other material that you like);
- pliers;
- round nose pliers;
- an anvil (or any metal block with a flat surface; a part from a dumbbell serves me well);
- hammer;
- a handy round object, the size of a rim for our tree (mine is a glass vial, 4.5 cm in diameter).
Callas: elegance and grace
Snow-white callas - nobility in every leaf
We will make callas using the French weaving technique.
- To begin with, take a wire 55 cm long and bend it at a distance of 10 cm from the edge, twist 5 cm from them, and draw the long end perpendicularly.
- We string 8 beads onto the center thread.
- Next, we string beads onto a large part of the full wire and draw 4 full circles, twisting with perpendicular threads.
- For the stamen, take 20 cm of wire, string 5 cm of beads, fold it in half and twist it.
- We thread the stamen into the flower.
The leaf is made according to the same principle as the flower, only green.
Creating a trunk
At this stage, you need to create the trunk of a decorative tree with your own hands from V-shaped parts.
Crossing wires
Grab the left half of the wire with the index and thumb of your left hand, and the right half with the fingers of your other hand. Start moving the wire in your right hand to the left, over the wire in your left hand. Move the wire you hold with your left hand to the right under the wire in your other hand.
Repeat this several times until just under half of the wire pieces are twisted together. You can make any number of rotations, depending on how tall you want the tree to be.
Bonsai in a pot
We offer another way to easily make an artificial bonsai tree with your own hands. The operating algorithm is simple:
- We select the container. A ceramic flower pot with holes for draining water is ideal.
- Fill the pot with soil. The soil should not be collected from the yard. It’s better not to save money and buy a ready-made mixture at a flower shop. Why is this necessary if the tree is still artificial? We will be growing moss or lawn on top, so good soil is essential.
- For the trunk of a decorative tree, we select a branch that is thick enough and intricately curved to resemble a spreading plant.
- We attach decor to the branches of the wooden frame. It can be made from matte paper, fabric, satin ribbons or any material. The more original the decor, the more spectacular the final result.
- We plant the lawn mixture in the ground and water it generously daily. Very little time will pass, and under the original tree a bright and lush summer lawn will spread out.
By combining natural and synthetic materials, you can achieve unprecedented results in the art of bonsai, turning your favorite hobby into a successful business.
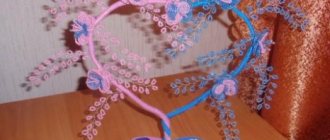
Yin-Yang tree made of beads: original and romantic
Yin-Yang is a Japanese symbol of the unity of opposites. Such a tree will be an excellent gift for your beloved girl. Most often, two intertwined trees of white and black colors are made, but you can also make one with black and white sides. Crafts are made according to a standard pattern and intertwined with each other before planting in the ground (one curl is enough). Please note that black decorative wire will look more impressive than regular red wire.
Black and white wood looks magical, doesn't it?
Preparing tree branches for interior use
Before you start creating, you need to prepare the branches and prepare the required number of different wooden fragments. All other actions are aimed at long-term preservation of the composition. The following sequence of actions is suggested:
All selected branches must be free of contamination. Remove any remaining bark and damaged wood.
All wood that was harvested during walks in the park must be inspected for pest infestation. Forethought will not hurt, so treat it with special mixtures in advance.
The time-tested method of impregnation with vegetable oil to which herbs have been added has proven itself well.
After drying, the wood changes size and shape, and has such a feature as deformation. In order to avoid disruption of the composition, the wood material must be dried before production. This process occurs quickly under sunlight with good access to fresh air.
In order to avoid the appearance of fungus on the product, pre-treat the wood with antifungal compounds.
In order for the finished product to have a stunning look, it is better to coat it with varnish. But this process remains at the discretion of the author of the composition.
The tree branches used are taken into the interior composition as they are used in nature, pre-treated with disinfectants. Varnishing adds charm and style.
But the most expressive result is obtained when making a composition painted in one color.
It would be good if it was a contrasting tone to the interior. In this case, it will easily fit into any style. The most widely used colors are white and black, as well as silver and golden colors.
Wire winding
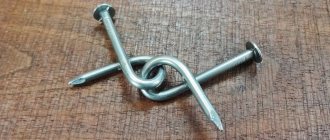
Having prepared the workspace, we begin to create the tree. Taking one end of the wire in your left hand, begin to tightly wind it clockwise around both nails.
Each circle made will eventually create 2 branches, so consider how dense you want your tree to be. Be sure to finish the wrap in a full circle. The ends of the wire left at the beginning and end of winding should be on the same nail.
§ 3. How to make a house model.
The buildings on the model are perhaps the most important and exciting moment, which raises the most questions for a beginner. So, let's start in order:
The basis.
First, let's create the walls - model plastic one or two millimeters thick is suitable for this. To begin, draw the walls of the house with window and door openings on paper or use ready-made layouts of houses on the Internet if the building model is not important. The scans cut out of paper will serve as a pattern for you. Attach the patterns to the plastic, trace along the contour and cut out with a regular stationery knife. Glue the resulting walls together with instant glue. Then make and glue the roof using the same principle. We've already created something similar to a house, now let's get creative:
Decor.
• The walls and roof can be painted or painted to look like brick, stone, tiles, etc.
• Again, self-adhesive colored textures can be used. For the walls, respectively, decorative stone or brick, and for the roof - slate or tiles.
• And of course, the most complex, time-consuming, but most effective method is pasting with volumetric textures. On our website you can easily find exactly what you need. For walls - brick, siding, masonry, and for roofing - various types of tiles and slate. Make a monochromatic color or create scuffs and age the surface - it’s up to you.
• After all the processes done, the result becomes visible, but for now our house is without windows and doors. To make glazing, we need a transparent film to imitate glass. It is quite hard and easily glued with super glue. Cut a rectangle slightly larger than the window opening and glue it from the inside of the house. The window frame can be cut out of paper or 0.5 mm plastic. The door is also cut out of slightly larger plastic and glued from the inside of the house.
Tip: using a non-writing pen or a manicure tool, you can press an imitation panel or pattern onto the door. You can complement and enliven the house with carved platbands, door trim and a porch, all made of the same model plastic.
Adding beads
Take one wire, cut to eighty centimeters. Add a bead or seed beads. You can choose any color. Place the bead on your first wire. Thread the bead to the center of the wire. Bend the wire around the bead until the ends meet. Twist the wire tightly, moving down from the bead about nineteen millimeters. You will be left with two ends on either side of the metal wire.
Add two more beads or seed beads to the first wire. Add another bead to one end of your first wire. Bend and twist the wire around the bead as you did in the last step. You will have about nineteen millimeters of wire under the bead. Repeat this step on the remaining end of the wire.
Smooth and fresh skin: dermaplaning, or why a woman needs to shave her face
Rare shot: Viktoria Isakova showed her grown-up daughter from Yuri Moroz (new photo)
"Dad is offended." Agata Muceniece about her relationship with Priluchny after the divorce
§ 6. The most pleasant part is the landscaping of the layout.
Trees, spruces and bushes for dioramas.
First of all, we determine the height of the trees and fir trees, depending on the scale of the layout.
a) Vegetation can be made independently using special various powders, lumpy foliage or deciduous and coniferous mats. Steel or copper wire is most often used to make barrels. Take several pieces of wire of the required length, twist them together into a bundle approximately to the middle, and spread the rest into branches. To make the barrel more realistic, you can cover the barrel with napkins and PVA glue. This will help hide the twisted wire and imitate the structure of tree bark. Then paint the trunk brown with acrylic paints or gouache. Another way to decorate the trunk and make it more realistic is to apply quick-drying Morrison-N glue to it and sprinkle it with imitation earth that we have left after making the landscape.
• The fastest way to make a crown is with clumping foliage. Just glue the ready-made crown pieces to the tree branches with super glue and you're done!
Tip: you can make this easy-to-use material yourself by mixing loose foliage of your favorite color with an emulsion to prepare the foliage in a container. Add approximately 100 ml to one bag of such crumbly leaves. (half a bottle) of Morrison foliage glue and mix thoroughly. After mixing, let the mixture dry for about one hour. This way you will get quite elastic and at the same time fluffy lumps. You can start crowning the tree.
• There are many more ways to use loose foliage. For example, glue pieces of cotton wool to the trunk (it is better to first paint it brown), dividing it into thin transparent fibers - it will look like thin twigs. Then carefully apply Morrison-E glue to the cotton wool with a brush and sprinkle the foliage through a sieve.
b) If you value time, ready-made Morrison trees will always come to your aid when landscaping your layout. We have developed about fifty different types of trees and spruces for you and continue to expand our range.
• The “Classic” series is a favorite line of trees from two to forty-five centimeters in height, loved by both beginners and professionals.
• The Pro Series is an excellent choice for any layout. These trees are handcrafted by our highly experienced craftsmen. “Pros” look great on any layouts of various themes, be it a railway layout, dollhouse landscaping, a miniature garden, a military diorama or an architectural layout.
• Trees and spruces from the “ArchiFORM” series amazingly enliven layouts and create a sunny mood! Excellent value for money and quality. Suitable for all types of dioramas, miniatures and architectural models.
• Textile trees and Christmas trees of the Micro series are an excellent help for architectural models. With such trees you can easily plant an entire forest or improve the territory of a residential complex. These trees are definitely not afraid of anything - no moving of the layout around exhibitions and your customer’s offices. They will never crumble or leave dirt under the glass cover. Trees, by the way, can be used as shrubs. And the various shades of the Micro series combine picturesquely with each other. But their main advantage is that absolutely everyone likes these “fluffies” and the process of landscaping the layout takes just a few minutes.
• Entourage and foam balls are a real salvation for urban planning conventional layouts on small scales (1:500, 1:800, 1:1000, 1:2000). Also, landscaping on such layouts can be made from clod foliage or leaf reticulum.
• Bushes – where would we be without them? Green, red, yellow, lilac and white! Just a godsend for the layout of a blooming garden and more! These bushes will definitely become a real decoration for any miniature or diorama and will not leave anyone indifferent.
• Of course, we haven’t forgotten about coniferous trees for your masterpieces. Here you will find fluffy Realistic Spruces and Pines for your models and dioramas. They have already been appreciated by both professionals and novice modelers and modelers.
Flowers on the model and diorama.
Flower beds, flower plantings in a park or garden, as well as flowering meadows always delight the eye and create a wonderful mood.
• You can use clumping foliage to imitate flowering vegetation and shrubs. This is the easiest and most convenient way to create flowering flower beds, plant a flower hedge or plant flowers next to a fence.
• Imitation flowers in powders - a versatile fluffy material that can be used to decorate hedges, create flowering trees and bushes, or make any other flowers.
• Flower ribbons are a quick way to create flowers in the garden by planting them in rows or forming a flower bed.
• Colored powders are a “lifesaver” in cases where you need to create flowering meadows or meadows. Apply some flowers to the finished green landscape and secure with glue.
How to put a tree in a pot
To place the tree in a pot or other container, add a sufficient amount of glue to the bottom of the container using a glue gun. Then place the tree in hot glue and press it to the bottom.
Hold in position until the glue dries. Also, before the glue has cooled, you need to put a layer of small pebbles on the bottom to give the wood more stability.
Add more glue to the first layer of stones and, holding the trunk, lay out the next row of stones. In this way, lay the stones in layers up to the very top of the pot.
After the glue has dried, you can bend the wire branches so that the composition takes the shape you want.
Satin ribbons
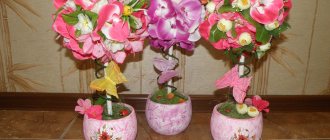
This tree will be a wonderful decoration for a wedding celebration. It's very easy to make. It is enough to show a little patience and imagination. The only difficulty that can arise is making flowers from satin ribbons.
So, to create a topiary you will need:
- About seven meters of satin ribbons.
- Threads, beads, yarn, lace for decoration.
- Glue.
- Wooden stick or plastic pipe.
- Flower pot.
- Crumpled newspaper or papier-mâché.
- Earth, decorative stones, shells.
Progress:
- According to the photo above, flowers are made from ribbons. On average, one topiary will require 15-19 roses.
- Now the crown is made. You can take ready-made papier-mâché, or you can crumple newspaper into a ball shape. The workpiece should be wrapped with yarn for greater density.
- The trunk is made from a branch or plastic pipe. Then it is wrapped with ribbon or decorated with lace.
- Next, using glue, the trunk is glued to the crown of the tree. The bottom of the trunk is placed in a pot and covered with earth and pebbles to make it heavier.
- Using threads, satin roses are sewn to the crown. In order for the flowers to hold more firmly, the workpiece is additionally fixed with glue.
- The pot is decorated with bows, lace and yarn. Flowers should be carefully straightened and, if necessary, decorated with decorative ribbons and rhinestones.
Beaded money tree: financial well-being as a bonus
The money tree is considered a symbol of prosperity in the home, so it is customary to give such decorations to family and friends. Making it is not as difficult as it seems at first glance. Hardware and craft stores sell coins with a loop through which you can thread a thread or wire. Instead of one of the leaves, thread a coin onto each branch. There is no need for excess; make sure the structure is harmoniously arranged. Most often, white or gold beads are used, but you can make the product in the form of sakura or any other tree, the meaning will not change.
You can make the gift more original: add rhinestones, beads or any interesting details to the composition.
§ 7. Models of cars, figures of people and plastic lanterns.
Most often they are needed to create additional surroundings on models and dioramas. These pleasant little things improve the detail of the layout, “breathe life” and fill the miniature world you create with a positive mood.
Conclusion. We hope that we have answered your question: “How to make a layout with your own hands?” and you will immerse yourself in creativity headlong. Your works always inspire us to create new materials for models and dioramas. We know for sure that your hands are golden, your imagination is limitless, and we try to keep up and invent as many new products as possible. Let's continue to create beauty together!
tree decoration
So, the tree model is ready, and now you can decorate it in any way you like:
- you can cover the surfaces with glue and sprinkle with flock;
- there is an option with stretching steel wool or cotton between the branches;
- the option of painting the wood with regular paint is not excluded;
You can also choose your own method, which involves using scrap materials such as buttons, polystyrene foam, candy or anything else.
Decorative trees are considered a worthy decoration for a home. They are appropriate in any interior; you just need to think in advance about the color scheme that fits into the finished design project. Ornamental trees do not require special conditions of maintenance and care. They do not need to be watered as they are artificial plants. These decorative items are freely sold in stores, but it is better to make topiary with your own hands. It will take some time to make it, but in the end you will get a unique decorative tree that fits perfectly into the existing interior of the room. And it’s better to build a topiary yourself, because according to the ancient Chinese teachings of Feng Shui, this tree brings joy to the house. By making a decorative tree, a person charges it. According to legend, topiary can only bring happiness to its creator.
We create bonsai
The tradition of creating bonsai was born in Ancient China more than two thousand years ago. The name “bonsai” is written in two hieroglyphs, which mean “bowl” and “tree”. Later, already in Japan, the unusual method was actively developed and rose to the rank of fine art.
It was the Japanese who brought the method to perfection, creating a special system of canons and proposing rules for exposure. Miniature trees are an aesthetic pleasure for perfectionists.
Many people claim that looking at an elegant bonsai, they are overcome by an extraordinary feeling of calm, tranquility, and anxiety goes away, as if by magic. Decorate the world around you, try your hand at creating amazingly beautiful products.
Do you want to create a luxurious miniature garden at home that does not require special care? Then an interesting master class will help beginners in creating a bonsai tree with their own hands.
Step-by-step instruction:
- We select materials for work. Any gifts of generous nature will be needed: intricately curved twigs, driftwood, juniper, spruce or pine branches, moss, reindeer moss.
- We preserve the branches. For processing, we will prepare a special solution consisting of denatured alcohol, acetone, and glycerin. We take everything in the exact proportion 1:1:2.
Important: The solution for preserving natural materials should be stored in a tightly closed container, as it has a pronounced chemical odor.
- Initially, we wash the branches under cold water, thoroughly cleaning them from dust and dirt, then place them in the solution for at least a week.
- Next, dry the decorative material and paint it if necessary. Let's reveal a little secret: before painting, you need to dip the branches in hot paraffin, the treatment will help to apply the paint evenly to the surface.
- Let's start making a decorative bonsai tree. Cut the branches to the required length and carefully glue each one to the base. To prevent the structure from falling apart, we will wrap the individual elements with wire; after gluing, it can be removed.
- We decorate individual areas with moss, reindeer moss, white sand or decorative pebbles. In our work, we will definitely designate the center of gravity of the structure in order to give the craft greater stability.
After completing the painstaking work, a unique live composition will open to your eyes. An eco-style bonsai will delight the eye for a long time; all that remains is to occasionally brush off the dust from the elegant creation.
DIY wire tree - video
To understand how to make a tree from wire, you first need to watch several videos with master classes, for example:
Wire is a very interesting and malleable material. It is widely used on an industrial and domestic scale. And home craftsmen have long appreciated its rich decorative capabilities. There are many different types of needlework that use this convenient material. And thanks to various materials: steel, aluminum, copper, brass, from which wire and coatings are made, multi-colored complex compositions are born in the hands of craftsmen. Moreover, the flexibility of the wire remains beyond any competition.
Features of work
- Craftsmanship is required to make almost all products. There is no need to immediately take on complex work, but start with simple crafts.
- It is advisable to use metals that are not subject to oxidation. The finished item can be varnished.
- The wire will become softer if you heat it over a fire.
- It is necessary to make a sketch of the future product on paper before starting work.
- It is important to follow safety precautions while working.
Tree bark modeling
Until our trees receive clothing in the form of bark, you can do whatever you want with them. The main task is to make the crown as branchy as possible and give it the shape inherent in a particular type of tree.
Once the optimal result is achieved, you can begin to apply primer to the wire base. It will play the role of tree bark.
Our bark imitation primer will consist of three components: undiluted PVA glue, building plaster and black powder pigment.
As an alternative to building plaster, you can use regular putty - both are equally suitable for our purposes. The only requirement is that the mixture must be thick enough to hide the texture of the twisted wire underneath.
We will not give the exact proportions here. Simply mix a small amount of dry black pigment with a full tablespoon of plaster, and then add PVA glue by eye until all the powder has dissolved and you get a thick mixture that can be applied to the base with a brush. By the way, this mixture is perfectly stored in a small container with a tight lid and can be used within several days from the moment of preparation.
The first layer of primer will be absorbed into the spaces between the wire veins and will darken as the adhesive base dries. For Z scale blanks we needed two coats of primer, for HO scale trees we needed three. On a larger scale, the number of layers will have to be increased to five or six. Let us remind you that our main task is to hide the wire texture of the twists.
When our primer is completely dry, we will see black trunks and branches with thin metal tips, just like in Tim Burton's The Nightmare Before Christmas. If this is exactly the effect you want, then you can leave it at that. But the vast majority of our colleagues will prefer the natural color of ordinary deciduous trees. To do this, we will use a can of dark gray automotive primer. After painting, leave the trees to dry overnight.
When the primer layer has dried, you can begin painting the trunk using dry acrylic pigments.
In our case, this is a set of Craft Smart paints: brown (No. 23628) and light brown (No. 23626) shades. We also used the gray shade (#20781) from the Apple Barrel set.
As a result, we got a very realistic tree without leaves. It can already be used on a winter layout. If we need a tree with foliage, then we move on to the next stage.
How and from what to create?
- Drawing is the most original method; it does not require serious expenses. In this case, it is not necessary to contact an artist, just be patient, buy paints and go ahead. Don’t be upset if the outline of the drawing is not the smoothest, nature is diverse and there are no perfectly straight trees. For greater confidence, you can use a stencil.
- Applique is also an excellent option for applying a design. You can use various papers, preferably thicker ones (wallpaper, cardboard). Sometimes there are a lot of boxes left over from things, or several rolls of wallpaper after renovation, all of which can be used.
The idea can also be implemented using more rigid materials, such as gypsum, polystyrene foam, various wooden coverings (fibreboard, chipboard). This will require ingenuity and the ability to work with material.
You can use natural tree branches. For this you will need good technical glue, and the tree branches themselves. Before fastening, it is necessary to treat the tree branches so that they can last longer. This technique enhances the natural effect in the room. It can be combined with patterns and appliques.
- Sgraffito is a more complex decoration option; it can be used when the apartment is being renovated. It involves applying several layers of paint or other coating to the surface, followed by cutting out the design. The result is very attractive, it gives volume to the room and a unique visual effect. It can be applied to rooms that do not use wallpaper.
How to imitate a decorative tree? Various fabrics can be used. Any covering will be useful - burlap, linen fabric. This technique is popular and will add unusualness to the picture.
Blanks for branches
At this stage of the work, it is necessary to cut one of the ends of the wire in such a way as to obtain a U-shape. It will turn into the future trunk and branches of our tree.
Wire biting
The wire should be cut with wire cutters on the other side from the one you squeezed. Make sure you eat all the twigs. If the wire cutters are not able to cut all the wire, do it in several stages.
You'll end up with a bunch of little V-shaped scraps of wire that you can throw away. We will need the resulting V-shaped pieces of wire 10 cm long for further work.
Poppies as a reminder of hot summer days
Scarlet poppies - the embodiment of summer and sun
Red poppies are also made using the French weaving technique. 2 cm of beads are strung on the central axis, braided in three layers, as well as two incomplete layers, which end 2 beads lower than the previous ones. This way we make 6 petals. To make stamens, we make 9 “needles” on a 60 cm section, twist them together, and insert them into the flower.
Fastening the wire
In this step you trim one edge of the wire. This is necessary to create a V-shape. Which will later become the trunk and branches of a homemade wire tree:
- Using your thumb and forefinger, pinch the piece at the opposite end from the edges created in the previous step.
- Using wire cutters, cut the piece next to the opposite nail from where you are holding the piece. Be sure to cut all wires. If you cannot handle all the wires at once with your wire cutters, then cut them in pieces. You should end up with a lot of little V-shaped parts. Anything left over can be thrown away.
Ending a Workflow
Once the glue is dry, you can adjust the tree branches. Bend the wire branches to form the tree into the desired shape. Bend the branches down so that the tree resembles a weeping willow. Bend the branches slightly upward if you want your creation to resemble a maple or oak.
Everything is ready, you can now put the decorative wire tree in the most visible place.
Step-by-step production
You need to make sure that the working surface is completely ready for the creative process - the working area is sufficient, all the tools are at hand, there is good lighting.
Some craftsmen make a preliminary sketch, which they base their work on. But this is not a mandatory stage; you can trust your creative intuition.
Let's look at the process of making wood from copper wire with your own hands step by step.
- The working tool will be a makeup brush (if you don’t have one, a pen and pencil will also work). You need to wind a wire onto the other end of the brush. At the very base of the brush, the wire should be squeezed with your fingers and scrolled at least 3 times. You will get one circle, which will become a new leaf. Naturally, the circle is hollow.
- In the same way, you should twist another circle, equivalent to the first. And then another one, so that on one wire end you get 3 circles at once.
- Now carefully - the circles are placed one by one on the brush, after which the master needs to gently pull the edge of the circle with his finger (or even a fingernail). As a result, the leaf will take on an extended shape.
- You need to do the same with the remaining circles. As a result, the twig will be crowned with a trefoil. A few calculations: if the diameter of the brush is 5 mm, and the leg of the trefoil base is 5 cm, then one such part will take approximately 14 cm of wire (you need to take it with a small margin).
- 2 more trefoils are made in the same way. Only the first and third element will have a slightly longer leg, 7 cm instead of 5 cm. On the one with the longer leg, you need to wind the remaining 2 elements. So, the piece consisting of three twisted trefoils is called the base.
And now let’s learn more about how varnish is used and why the tree will turn out colorful without beads.
- You need to put more varnish on the brush and run it along the wire from the edge to the middle - this means the hollow leaves. It is very important to press the brush with varnish so that no voids form between it and the wire. If there is a void, the varnish will go further and then peel off. It is also important to apply the varnish from one edge to the other exactly at one time. This is the only way to make a thin varnish film, which forms a bright leaf. And this procedure must be done with absolutely every leaf.
- After the first layer of varnish has dried, another layer must be applied to the sheet. This is done for a more saturated color of the tree’s crown. In addition, this way you can be safe from missing areas; they will be visible against the general background. If the first layer of varnish dries in literally a couple of minutes, then the second takes longer, about 20 minutes. And all the master classes assure you that there is no need to rush, otherwise all the work will go down the drain. For beginning masters, this is a real test of strength: wait and not move on to a new stage. But the main thing is that in this work the tree will have to be covered with a third layer of varnish.
- The third layer of varnish can be transparent if the leaves are painted well . But if defects are clearly visible, you still need the same colored varnish. Some craftsmen do the opposite - first they paint the leaves with two layers of colorless varnish (with each one drying well), and confidently make the third layer colored.
- When all the varnish layers have been applied to the future tree branches, it is recommended to leave them to dry completely overnight. You should not forget about ventilating the room, since you have to work with household chemicals.
- So, you will have to weave a lot of base branches and then varnish them. There are no exact values, each master does it for himself, but usually 50-60 base branches are needed for one tree. The question of how to properly dry them gives rise to interesting findings and even know-how. But if you don’t have your own ideas, then a plastic tray for food will be an excellent dryer. The wire fits well into it, and the shape of the substrate itself is not deformed. As an option, you can use a sponge, but this is not always convenient.
When everything is ready and the branches are completely dry, you can begin assembling large branches.
- To do this, you will need a thick wire 70 cm long. It needs to be folded in half, and then in half again. And 3 bases are attached to this wound part one by one. The same action is repeated for two large branches. Next, you need to bend 80 cm of wire twice in half, wrapping 3 newly formed branches around a thick branch.
- The base of the tree is assembled from branches, which are obtained according to the model of point 14. There is no need to make them fluffy, since in the future the branches will still have to be pressed. 3 pieces of thick wire need to be stuck to the trunk. Glue can also be used, but it is more convenient to do it with plasticine. This empty trunk should now be stuffed with something (paper, newspaper), and covered with plasticine on top. The top of the trunk can be covered with alabaster - 1 kg of this material is usually enough. You only need to work with it wearing gloves. The vase needs to be filled with alabaster almost to the top , leaving no more than 4 cm. The trunk is inserted into the vase, you just have to wait for it to dry - this will take about 7 minutes. It can be left white, but still more often the trunk is painted brown.
- And then comes the difficult stage. Absolutely all branches must be sealed with plasticine. It should be bright so that it can be easily painted over with brown paint in the future. Not a single piece of wire should stick out. If the alabaster is still visible from the vase, it is painted green to imitate grass.
- The work needs to be given time to dry. And the master usually needs rest after such a labor-intensive task. The very next day you can work on fluffing up the branches of the tree. Then you should inspect all the sheets: it happens that the varnish cracks and falls off. In this case, you need to touch up the defective areas.
Any beginner can make a “lacquer” tree, but you need to prepare yourself for a long time. Experienced craftsmen can make a tree in about 6 hours, excluding drying time. And they spend about 6 bottles of varnish on a souvenir.
If the tree becomes a present, you can give it along with an envelope with money and say that this is a money tree to protect the household budget.
And if you give a family photo frame along with it, the homemade tree can be positioned as a genealogical tree.
§ 1. What to make the base from.
Anything can serve as the basis for your miniature work.
• Fiberboard, chipboard, OSB, plywood - excellent materials on which a model or diorama will last for many years and perhaps even remain as a keepsake for future generations. If you are making a small diorama for the first time, for example, for a school or kindergarten, even a kitchen cutting board will do. By the way, they now come not only in wood, but also in plastic.
• If your child was given the task “to make a model” at school, but there is not enough time and you are faced with the task of completing the task from scrap materials with the least amount of labor, then a sheet of thick cardboard (for example, from a shoe box) or a picture frame with which always includes a sheet of the same fiberboard, and the frame itself will give a more finished look to your work. Let us clarify that a cardboard base is only suitable if the product is not heavy.
• If you are thinking about how to make a model with your own hands, and not just a simple one, but with internal lighting, or its presentable appearance is very important, for example, for an exhibition, then consider the option of a ready-made model base. For you, we have prepared a whole series of the most common sizes of Euro dummy bars made from lightweight but durable materials. The bottom cover is removable, which allows you to hide wiring elements inside (wires, power supply, batteries, etc.). The upper base is covered with gray vinyl and already edged with an elegant white profile. All you have to do is create!
Making the base for the tree and preparing the workplace
Before you make a wire tree with your own hands, you should form a base that will help in creating the craft. You can also use this base to make other wire trees in the future.
First, use a hammer to drive nails into a wooden board. Make the distance between them 1-1.5 cm wider than the height of your tree. We drive the nails one or two centimeters deep so that they do not wobble.
Cut off the nail heads with pliers. However, be careful! Their caps fly off very sharply, so as not to damage your eyes, it is better to wear safety glasses.
Having prepared your base for work, you should also take care of your workplace. To do this, use two clamps on the edge of the table to secure your board.
Completing the craft
Once you have twisted the branches, you can give your tree the shape you want.
When turning and bending the branches, it is important to try to make smooth bends to give the craft the shape of a real tree. Your task is to make the plant as realistic as possible.
After you have made a beautiful frame, you can, by analogy, create a tree of a different shape or size.
Next, you can use pliers to flatten the tree trunk if you want to insert it somewhere (for example, into a piece of foam).
There are also several ways to change the appearance of the frame:
- You can cover the crown of your tree with spray adhesive and sprinkle foliage made from foam rubber painted green.
- It is also permissible to stretch steel wool between the branches.
- To create colored wood, we recommend using spray paint.
With a little imagination, it’s not difficult to come up with a unique design for your little masterpiece.
You can also replicate the wire tree with your own hands from the photos presented in the article. Good luck!
Required Tools
The main consumable material in the work is wire: you can purchase a special one for needlework (0.3 mm) or take a regular one of small cross-section, soft, pliable for bending. Otherwise, it will be inconvenient to make a frame for a decorative product containing many small parts. To create some elements you will also need strong, thick wire.
Finding the right nail polish is equally important. Its color can be any, and its texture must be thickened. Working with liquid varnish is difficult, labor-intensive and time-consuming. Other necessary devices and tools that may be useful in needlework:
- Wire cutters. You can replace them with regular scissors, but it is easier to break off the wire with wire cutters.
- Pliers and round nose pliers. Helps twist the wire frame. Some craftsmen prefer to do this by hand, so these tools are not required.
- Pencil. A wire is wrapped around it, which helps to make loops conveniently. To make large flowers, you should take a felt-tip pen or marker.
- Paperclip with eraser. By sticking one item into another, you can get a convenient device for drying decor. Instead, foam rubber or cereal poured into a plate will be suitable for the same purpose.
- Sheet of paper, newspaper. Will allow you to keep the table clean when working with varnish.
- Wet wipes. They can be used to wipe away drops of uncured varnish if they accidentally get on your hands.
Also, the work may require plasticine, various beads, sparkles, threads, and glue.
§ 2. Materials for making landscapes.
Landscape.
If you decide not to limit yourself to a flat surface, but to create a three-dimensional relief, for example, mountains or hills, use solid construction foam. This material has different thicknesses and can be cut perfectly with a stationery knife. So even a beginner can easily shape the landscape. A more detailed video can be viewed on our YouTube channel.
Grass for layout.
Well, what would a layout be without grass? And how not to get confused in the variety of materials if you are faced with the task of “how to make a model with your own hands” for the first time. So, grass for a layout can be of several types. You can use one or combine several or all at once, depending on the idea.
• Powders – you can use pure colors or mix them together to create a variety of new shades to add beauty to your landscape. Using them is very simple, like “one, two, three!” First of all, apply glue to the surface (it’s better not to skimp on the glue and apply a good layer about one millimeter thick), then cover it with powder, blow off the excess and wait for it to dry.
Advice: for foam plastic surfaces, use PVA glue, or better yet, special moisture-resistant acrylic glue “Morrison-E” - it will last a long time and will not absorb moisture from the air. Using solvent-based adhesives will simply corrode the foam base and your mountains may “melt.” For hard surfaces, the same “Morrison-E” or “Morrison-N” is suitable - unlike “Morrison-E” it dries faster, but contains a solvent in its composition.
• Electrostatic grass - short fibers ranging from two to five millimeters in length. It is advisable to use a special device - a flocker. In short, the flocator creates an electric field and forces each fiber to stick vertically, which very realistically imitates living blades of grass. In the absence of a flocker, you can use a soft polyethylene container with holes in the lid or sprinkle through a sieve.
Remember that you can do without a flocator, but in this case the grass fibers will not stand upright.
For you, we have prepared various shades of electrostatic grass - from withered to bright green, with a height of two to five millimeters.
• Rolled grass is an ideal solution for flat landscapes. Just glue the sheet to the base and you're done.
Tip: before gluing the grass to the base of the diorama, iron the paper side of the sheet with an iron at the minimum temperature - this will help avoid wrinkles and unevenness. You can glue the sheet using any glue designed for paper or using special sheet double-sided tape.
In our arsenal you will select the desired shade and sheet format from A4 to A1.
• Tufts of grass – something that will add a “zest”. Ready-made tufts and strips are used as a complement to the main grass cover. The strips can be cut into the required pieces and placed along the road or fence, and the bunches look great, either individually or in whole bunches on any part of the landscape.
Earth.
In addition to grass in the landscape, it is necessary to create an imitation of earth, asphalt, sand, paving stones or a rocky surface, depending on the content of the layout. Our store offers a huge collection of various materials.
• The fastest way for smooth surfaces is sheet materials. For example, imitation of asphalt or crushed stone coating in rolls. Also a variety of self-adhesive textures of various surfaces in A4 sheets.
• For those who spare no time and effort to create a layout, there is a huge assortment of volumetric textures in various scales to imitate paving stones, cobblestones and much more. These textures are created for self-painting with acrylic and enamel paints. You can paint a single color in an even layer, giving the appearance of a new coating, or add the effect of antiquity, wear, etc. dry brush painting method. You can go even further and weatherize to effectively convey dirt, dust or grime using Morrison dry pigments.
Tip: it is recommended to seal the result with a transparent matte varnish. The easiest and most reliable way to glue it to the base of the layout is with instant glue.
• If you need to display the ground on a diorama, then the already familiar powders for simulating soil, peat or loam will come to the rescue. Powders can be used alone or mixed together. It is best to glue them with the same glue that is used to imitate grass (“Morrison-E” or “Morrison-N”).
• To transfer sand, a stone embankment or create an alpine slide in the garden, use special powders with micro-pebbles of various types and fractions.
Water.
It’s not at all difficult to create a pond, lake, stream or coastline on a model.
Method number 1. Take a plastic transparent texture to imitate water and cut out an oval, an uneven blot, or whatever your heart desires. Glue blue colored paper of the same shape as the cut out piece of water onto the layout, and then glue the water surface on top by the edges. The edges can be decorated with imitation sand, micro-pebbles and tufts of grass.
Method number 2. Mark with a pencil the area where you want to make water. We cut out a recess with a stationery knife: from the edges we make a smooth descent to the center. Using acrylic or gouache paints, we paint the resulting bottom with sandy shades and add “liveness” to the bottom with pebbles and grass, which in this case imitates algae.
Tip: It is better to provide a recess for water in advance and make a suitable basis for the layout. To do this, before starting all work, glue a sheet of construction foam plastic (we talked about it in the “Landscape” section) of the required thickness, depending on the depth of the reservoir, onto the base for the layout - a recess will be cut out in it.
From a plastic imitation of water, use scissors to cut out a repeating bottom shape, allowing the edges to be about one centimeter larger. Using these edges we glue the imitation water to the layout. Along the perimeter we cover the ends of the plastic with imitation sand, pebbles and grass. Thus, you get a real three-dimensional water surface with a whole underwater world.
Christmas tree
A Christmas tree made of wire will look good in any home or office interior. Even a small tree can transform an ordinary work environment into a festive one.
To make it you need:
- thick wire
- scissors
- scotch
- garland
Step-by-step instruction:
- Begin to perform from the bottom tier. A piece of wire is bent into a circle shape and secured with tape.
- Then they continue to bend in a spiral, gradually decreasing each subsequent turn.
- On the last circle, the end of the wire must be directed upward and used to form the top.
- The spiral is aligned on all sides so that there are even edges. It is necessary that the lower tier be flat for the stability of the structure.
The Christmas tree can be placed either on a table or on a shelf, or decorated with a garland.
The construction of such a Christmas tree will take only a couple of hours. But the New Year's mood will be guaranteed.
Wire weaving is a fascinating hobby, by doing which everyone gets the opportunity to create unusual and unique things.
It develops creative thinking and allows you to open up, showing others the results of hard work. It is only important to know and remember that perseverance and developed imagination are the main allies in this matter.
Artificial Bonsai Tree: What is it?
Usually work on creating such a tree begins by looking for a good branch for the trunk. Sometimes the branch is a slow-growing plant that, for example, no longer develops. Due to improper growth conditions, the plant acquired an not entirely correct shape - thickening, unevenness, curvature. And these defects can, paradoxically as it sounds, be turned into art.
The crown for bonsai is the most interesting thing. The use of juniper, foamiran, and azalea is widespread
The base is a container that must be filled with clay, plaster, even plasticine. In a word, something that will hold the mini-tree.
LED trees for outdoors
Artificial trees with LEDs can be installed in any place to decorate the landscape and surrounding areas. The attractive power of beauty actively attracts visitors to restaurants and cafes, shopping centers and boutiques, offices and other public places. Each luminous tree, with its configuration, largely resembles real plants, and sometimes completely imitates them. Artificial bark is used to cover metal branches. Maximum resemblance can be achieved thanks to silicone or plastic leaves and flowers made in life-size.
The entire structure of the artificial tree is decorated with multi-colored LEDs. Most often they operate from the electrical network, but in some cases autonomous power supply can be used, which leads to a slight increase in the cost of the design. Sometimes LED garlands are used, but they do not give the same effect as LEDs used separately.
Advantages of artificial trees with LEDs:
- Long service life of at least 5 years.
- Artificial structures do not require the maintenance required by real trees.
- Low power consumption. Even the largest trees consume electricity in quantities not exceeding 700 W.
- The simplicity of the design allows you to install it yourself, without involving specialists.
- Resistance of the structure to low temperatures, dust, high humidity and other negative influences.
- If one or more LEDs burn out, the rest of the chain will continue to work, and faulty elements can be easily replaced with others.
- The right choice of artificial trees and bushes allows you to advantageously emphasize and complement the elements of landscape design.
Sakura is especially popular among LED plants. These trees are especially beautiful thanks to the highly durable coating of the branches with plastic or aluminum alloy. Their appearance is as close to the real thing as possible. Despite its relatively small size, this tree provides as much light as taller structures. Sakura has a soft and delicate light spectrum, mainly white, pink and golden tones.
