Hello everyone))) Today there will be an unusual topic. I have a friend who is a drummer and presenter, an MC and an incredibly creative person. And my friend came up with the idea to create something similar:
I helped him a little with this, and today I will share the details of this process with you, since the idea is unusual, it may seem impossible to some, but it is quite real if you analyze this process step by step.
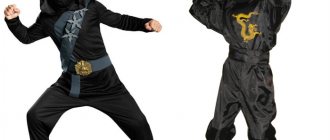
So today we are sewing a glowing suit with our own hands .
This costume looks unrealistic at night, at parties and discos; it can give your image originality and uniqueness.
And in complete darkness, a suit with LED strips is most effective!
So…..
How to make a glowing costume with your own hands? 8337
A light guide is a modern flexible lighting material that can be cut anywhere.
It can even work from portable power supplies. All these properties made it possible to use the light guide for sewing costumes! Yes, you heard right, glowing wires are used to decorate costumes. Usually these are club clothes or dance costumes, in a word, what is used in the darkness of nightclubs.
Fabric craft
This version of the traffic light is more suitable for girls and real needlewomen. A sewn fake can also serve as an educational toy if the circles are made with Velcro.
So, let's begin:
- You need to take rectangular pieces of black fabric and lay a small layer of foam rubber between them. Sew it together.
- Next, cut out circles from felt (red, yellow, green). We sew them along the edges. You need to sew one part of the Velcro to the traffic light body itself, and the second part directly to the circles.
- For a more interesting design, you can make a fabric lid on top. Having previously divided it into three parts. Thus, each color will be opened separately, or all at once. The fabric craft is ready.
How to create a costume using a light pipe?
In order to create a bright, contoured suit, you need to carefully calculate everything: choose the right cord length and the number of power supplies. The contours of the suit are illuminated in different colors; in the dark, such attire looks very impressive. To do everything correctly, you can create a mock-up of the suit and, using it, calculate all the necessary quantities that will be used in the future to sew a suit from a light guide. Then the cut light cable can simply be sewn to the suit and you become the owner of the most eye-catching suit.
If you use a controller when connecting a light cable, you can complement the suit not just with a uniform glow, but also with various dynamic light effects. Thus, the use of light pipe in costume design allows you to add an electronic theme to your look.
Traffic light from a plastic bottle
This fabulous option is very easy. Let's turn on our imagination. We will need:
- Plastic bottle
- Brushes and paints (preferably gouache)
- Colored paper
- PVA glue
- Scissors
Work progress:
- We choose a plastic bottle, it is better to take the one with a longer neck.
- We paint it a neutral color (meaning not red, not yellow, not green). Let it dry.
- Next, we cut out circles from colored paper for the traffic light itself and details for our fairy-tale character. These are eyes, mouth, nose, ears, hands.
- The bottle is dry. Carefully glue the finished parts and, of course, the circles, making sure that the distance between them is the same.
- But our hero cannot be without hair! We also make hair from paper. Cut into thin strips and twist with scissors.
- We also make the cap out of paper. And look what happened. To fully complete our hero, we will add a rod or a road sign to the handles.
DIY glowing costume
Step 1: Preparing materials
To work you will need:
- LED strip - wooden fingers - connectors for LED strips - 12 V battery - hoodie and pants - insulation tape
Step 2. Preparing tools
— Soldering iron, solder — Glue gun — Wire cutters
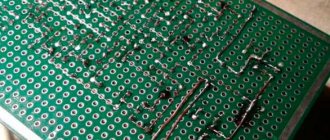
Step 3. Preparing the LED strip You should cut strips from the LED strip that will need to be attached to clothing.
It is necessary to draw a diagram of the LED layout in advance. As a rule, scissors are drawn on the tape in those places where a cut can be made.
You will need to make five strips of a predetermined length. The longest stripe is the one that runs along the body and around the head.
Step 4: Pants LED Line
We take two LED strips. We solder the positive wires together, and do the same with the negative ones. We fix the connectors for the LED strips. We use glue and a protective shell for the LED strip to make the mount safe. You should work carefully, otherwise you can ruin your pants with glue.
Step 5. LED line for the hoodie You need to place your hands on the hoodie and determine the center line. This is where the LED lines should go.
Next, solder the strips together and fix them on the hoodie using adhesive tape and a glue gun. For more accurate and precise work, it is recommended to use a wooden hoop. The connectors are secured in the manner indicated in the instructions (it is included with the LED strips).
LEDs for clothing - new in the fashion world
The topic of using LEDs on clothing is becoming increasingly popular. You can not only make bright luminous accessories, dresses and sneakers with your own hands, but also buy them on some specialized portals.
The popularity of clothing “encrusted” with LEDs is also evidenced by the new invention of designer Kate Hartman. The StitchLits LED Sewing Kit allows you to decorate t-shirts, dresses and any other fabric clothing with bright lights. Unfortunately, this set is not suitable for shoes and wardrobe items made of denser materials, but you can easily attach an LED strip to sneakers.
What is needed to create an LED costume?
What is needed to create an LED costume?
Post by Magic Friend » 17 Nov 2022, 23:04
In this topic I will try to briefly and concisely describe everything that is needed for this.
1 I’ll start, of course, with the basic elements. 1.1 - directly digital LED strip (pixel strip, smart strip, flash module). At the time of writing this topic, the following chips are relevant and have a winning price/quality ratio: WS2812, WS2812B, WS2813.
WS2813 has better characteristics, has protection against a single pixel failure and, as a result, is 20-30% more expensive.
1.2 - batteries (“batteries”). It is rational to choose mass-produced 3.7V li-ion batteries in the 18650 or 25560 housing with high current (25-50A). Such batteries are usually sold in vape stores (electronic cigarette stores). Despite the supply voltage of +5V indicated on the pixel strip, the range from +3.0 to 4.2V is quite acceptable, which corresponds to the operating voltage range for a 3.7V li-ion battery.
1.3 - 18650 or 26650 battery holders.
ENTERTAINMENT according to traffic rules “LIGHT UP”
Goal: To continue to consolidate children’s knowledge in a playful way on the rules of the road using reflective elements, to improve the acquired knowledge in practice.
Objectives: -to develop children’s basic knowledge about reflective elements,
-consolidate children’s knowledge about road signs, traffic lights,
-develop a desire to help others in difficult situations,
- create an environment of emotional well-being, provide children with the opportunity to relax and gain new experiences.
-instill discipline and responsibility for your own safety and the safety of others;
Equipment: reflective elements, cards with riddles, 3 Whatman paper, 3 easels, magnets, film projector.
How to make an LED costume with your own hands
The following paragraphs will directly reflect the entire process.
ATTENTION! You should not skip any of the steps, as all the work will lose its meaning. Items needed for work should also be selected carefully. Unsuitable products can certainly have a negative impact on your actions.
Required materials and tools
So, in order to create a truly high-quality item, it is recommended to first prepare the workplace, thereby selecting the necessary components.
Let's start with the material itself. To do this, it is advisable to purchase a grosgrain ribbon. It can be any width according to your preference. Typically the figures vary from two to five centimeters. Next, don’t forget about the elastic band. This product will be useful directly for sewing. IMPORTANT! Its density should be high, as should its elasticity. And the last important item is the hook. At this point, the main thing is that the workpiece has the ability to fasten the bra. Actually, this is what it will be needed for.
As for the tools, this is the following list below. It includes:
- scissors;
- pins;
- sewing machine;
- ruler or measuring tape;
- glue.
ATTENTION! It’s also worth having an LED strip and a T-shirt in stock (any fabric can be used, the main thing is a light shade).
What does an LED suit consist of?
The whole principle of work is based on the following stages: the main part is purchased, which will subsequently serve as the foundation of the entire suit, then a special tape is attached to it.
It is actually the source of light radiation. IMPORTANT! A T-shirt or any other thing must have certain qualities. These may include both the material from which the fabric is made and its inherent shade. This determines how well the light will be scattered.
In general, the above elements are the main ones in the entire costume.
Step-by-step execution of the costume
After the necessary tools are ready, and possible varieties have been considered, you can proceed to what is perhaps the main point - the manufacturing process itself. It consists of the following steps:
- First you need to take measurements by which you can navigate. For a clearer description of all actions, we will consider the concept in size 44. To do this you will need a 22 meter tape. To create a back-chest shape, you should mark and make a segment. Connect its ends with glue and a hook.
- Next, you need to take two parts of 10 centimeters each and fix the same part in the middle of one of them. As for the second product, it should be folded and fixed on the hook of the first.
- Now you can start working on the horizontals. They must be connected with elastic bands and hooks in the amount of 6 pieces. There will be a lot of them to do. Next, two parts are cut out separately. The remaining segments will be planted on them. The connection is made by the machine.
- After which you can make two straps. To do this, it is advisable to retreat 10 centimeters from the edge.
- As for the underside of the suit, these are the same manipulations, only in different sizes (horizontal and vertical). They need to be fastened.
- The next point is the hands. All the same. As a result, you should end up with separate parts that will stick to different parts of the body.
REFERENCE! It is worth trying on several times to achieve a suitable result. Finally, all that remains is to attach all the products to the base.
What are the features of LEDs for clothing?
The designer set will serve as an example rather than a purchase guide. You can easily attach almost any LEDs to clothing, but you should take into account their size, characteristics and brightness.
This entire small circuit runs on batteries, and it is proposed to fasten it all to the material using special conductive threads. The idea itself is not bad, but you should consider not only the design of the battery holders, but also a place where they can be securely hidden (ideally a pocket).
When attaching LEDs to clothing, you need to think about the following things:
In theory, everything should work, but you can go a slightly different way. Firstly, conductive threads cannot be found everywhere, and secondly, you can do it much simpler, while having the opportunity to attach LEDs not only to thin fabrics, but also to sweatshirts and even sneakers.
To do this, you will need a small piece of LED strip, glue, batteries and battery holders. The main thing is to mark equal distances and sew the tape to the clothing. You can also fix the LEDs with glue, but then removing this beauty will be quite problematic.
Don't worry about the fact that clothing with LEDs will be very impractical. The coating of the tape allows you not to worry about getting wet or dirty elements.
Source
What events is a luminous costume suitable for?
This clothing option is perfect for night parties. Based on the advantages of this clothing, luminous elements look great in a dark space. In addition, if the costume is created for little ones who like to dress up, then your child will stand out from his peers at various matinees. Thus, LED elements can be used for a wide variety of events, from discos to children's carnivals. You shouldn’t be afraid that it will look vulgar or too bright; on the contrary, it just emphasizes the individuality of a person, since few people neglect this decoration of the image.
Plasticine traffic light
What child doesn’t like to stretch their hands with plasticine? But don’t just stretch it, create something. In this case we will make a traffic light. For this we need:
- Plasticine
- Chupa Chups stick
- Pen refill
Progress:
- First we need to make the body of our road assistant.
- Let's take a piece of black plasticine and knead it thoroughly, giving it the shape of a rectangle.
- Next you will need to use red, yellow and green plasticine. From these pieces you need to roll into small circles.
- Then, carefully take them with your fingers and flatten them a little.
- And at the end we assemble the traffic light craft. Glue the circles to our body.
- A traffic light, as everyone knows, is mounted on a pole; you can use a candy stick or a pen rod as a pole.
- The fake is ready.