Optical illusions or how to create a masterpiece using a pencil, eraser and paper.
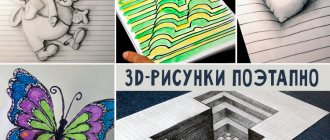
When a creative impulse comes suddenly and you want to try new drawing techniques, optical illusions come to the rescue. The ability to draw optical illusions and 3D drawings very well develops imagination and the ability to think abstractly.
In this article we will tell you how to draw several optical illusions and 3D drawings from the simplest to more complex ones.
Video: Drawing 3D on paper - Heart - Drawing
Now we will tell you how to correctly draw a non-existent 3D triangle. This is also quite easy to do.
Prepare accessories:
- several pencils of different hardness from hard to very soft
- sheet of thick paper for drawing
- ruler
- eraser
Step 1
- Draw an equilateral triangle. If you can’t make an equilateral one, stop at the isosceles one.
Step 2
- Inside this triangle we draw three lines parallel to its sides. The distance between parallel lines should be 0.5 cm, no more. We have a large triangle and a small triangle inside a large one.
Step 3
- Inside the small triangle we need to make an even smaller triangle. To do this, turn to Step 3.
Step 4
- When we first drew the inner triangle (now we have the middle one), some of our lines intersected at the corners of the large triangle. Now these lines need to be connected to each other as shown in the photo.
Step 5
- We outline everything exactly as shown in the photo. We do not outline only the corners of the large triangle and some lines of internal constructions.
Step 6
- We take an eraser and erase all the lines we don’t need. The drawing looks laconic and very neat.
Step 7
- Using a soft pencil, draw shadows in the three corners between the small and medium triangle, as shown in the figure.
- The darkest places are at the intersection of lines. The farther from them, the weaker the pressure on the pencil should be.
- Remove all excess streaks and pencil stains.
- The drawing “Non-existent triangle” is ready!
Step 8
Transforming stars into monsters
A few years ago, University of Queensland researchers researching visual distortions created an optical illusion video that took the Internet by storm. In it, the viewer sees photographs of celebrities to the right and left of the cross in the center that he is looking at, while peripheral vision distorts the portraits and turns the stars into monsters.
♥ ON TOPIC: Real names of stars - what are the real names of Chuck Norris, Bill Clinton, Elton John and 50 other celebrities.
DIY 3D drawings - optical illusion for beginners with explanations
The ability to draw optical illusions is interesting, useful and exciting. But the ability to draw 3D drawings opens up new boundaries of what is possible for you! Read on to learn how to turn a two-dimensional drawing into a three-dimensional one!
One of the simplest 3D drawings is a staircase. This is what we will learn to draw.
We will need:
- thick paper
- pencil
- eraser.
- Fold the paper in half on the short side.
- We draw one stripe from the center to the edge, then on the other side we draw a stripe symmetrical to it.
- We repeat below.
Step 1
- On one of the stairs we begin to draw horizontal steps.
Step 2
- We finish with one ladder and move on to another.
- We draw the same number of steps as on the first staircase.
- Do not forget that both stairs are located completely symmetrically relative to each other.
Step 3
- Take a ruler and, as shown in the picture, draw a shadow under the stairs. Without this shadow, the drawing will lose volume and realism.
Step 4
- We fold the drawing along the fold line that we made in Step 1. We have an excellent 3D staircase, congratulations!
Step 5
Square changing color
And although it may seem that a square moving across the paper somehow changes its color, it is obvious that this cannot be.
And the illusion is created by a background based on a black and white gradient, which makes our brain perceive the shade of a piece of paper on it differently.
One more example:
It seems incredible, but cells A and B have the same color!
♥ ON TOPIC: Poll: What color sneakers do you see - white or black?
Video: 3D Staircase - Optical Illusion
Next, we present to your attention a 3D drawing of a butterfly, made on lined graph paper with colored pencils. If you do not have such paper, then you can make it yourself by drawing squares measuring 1x1 cm on a regular sheet.
- Prepare your paper.
Step 1
- Outline the contours of the butterfly's body and wings. Use the example below, or come up with your own model.
Step 2
- Create a pattern inside the butterfly's wings. It can be absolutely anything.
Step 3
- Complete the pattern with additional elements.
- You can skip this step.
Step 4
- Take colored pencils, in our case red, yellow, black and brown, and add color to your work.
Step 5
- We made the pattern colored, and now we will need a black pencil to color everything inside the butterfly wings, except for the pattern.
Step 6
- Make the shading denser so that there are no gaps. But don't overdo it.
Step 7
- Using the smallest amount of pressure on the black pencil, outline the shadow under the butterfly.
Step 8
- Make the shadow darker. The darkest place is exactly under the butterfly. The shadow becomes lighter towards the edges.
Step 9
Step 10
- Cut out the butterfly as shown in the picture.
Step 11
- As a result, you will end up with a drawing like this! The work is ready!
Step 12
Which direction is the central dancer spinning?
Of the three twirling dancers, the central one should attract our attention. How does it move - clockwise or counterclockwise? It all depends on which part of the picture you looked at first.
If on the left, then the central girl will move in the same way - clockwise, but if on the right - then counter-clockwise.
♥ ON TOPIC: What will happen to Russia if the World Ocean rises or falls by 1 km? (map).
Oblique straight lines
The very first glance at this picture gives rise to the feeling that there are oblique blue lines on it, running at an angle in relation to each other. But this is just an illusion - the lines are strictly parallel, and the unusual effect is generated by the combination of colors. It is not difficult to be convinced of deception; you just need to squint and squint your eyes a little.
♥ ON TOPIC: What size meteorite is capable of destroying humanity.
Which direction is the train going?
In this picture, a train passes a metro station. But in which direction is the train going? You can try to name any option and you will be right. There is no right answer - it all depends on your point of view. And after a little training, you can even independently make the train move in the direction you want.
♥ ON TOPIC: How the brain distinguishes the beautiful from the ugly.
Rotating bearings
Animated GIF confuses our brain. Take a closer look at one of the colored circles, and then move your gaze to the other. It turns out that black and gray circles-satellites around are moving in one direction, then in the other. This effect is possible due to the difference in the perception of the movement of spinning objects located in the center or on the border of our peripheral vision.
♥ BY TOPIC: The tallest statues in the world: 40 mesmerizing places you need to see.
Diminishing circle
The gray circles growing next to the orange circle in this GIF create the feeling that the central element is either increasing or decreasing. But the orange circle remains unchanged; the illusion is generated by its actively changing neighbors.
♥ ON TOPIC: Russian names and surnames that make foreigners laugh.
Amazing transformation of geometric shapes in mirror image
In 2005, enthusiasts established an award for the best optical illusion - the Best Illusion of the Iear Contest, the winner of which last year was the Japanese mathematician Kokichi Sugihara, who demonstrated a truly amazing effect of transforming geometric figures in a mirror image.
♥ ON THE TOPIC: Life hacks and unusual effective uses for ordinary things: TOP-50.
How to do card tricks
Most often, beginners start learning with maps - they are accessible, understandable and familiar. But even such simple tricks will impress the audience.
But you need to choose a special deck: the cards must be flexible, with a thin base and without a plastic coating.
Choose a deck with a red back without a white border - this is very important. During tricks, you will need to hide the card in your palm, and the white frame will be very visible against the background of your hands. And the red shirt blends into your fingers when you move your hands quickly.
Guessing the bottom card
First, let the spectator shuffle the cards, then take them and align them on his hand, hitting the edge against the palm. At this moment, you need to discreetly spy the value of the card - this is the main trick of the trick. Be sure to remember it.
After this, place the cards on one hand, vertically towards the viewer, and begin to move the cards in the deck (use your index and middle fingers to scroll through them, as if you were walking down a ladder with your fingers). Someone from the audience should stop you.
Don't delay - when more than half the cards have been moved, slow down a little and ask if they are going to stop you.
When stopped, pull the top cards off the deck with your index and middle fingers. At the same moment, use your thumb to pull the card from below so that it is at the bottom of the tightened stack.
Now show the bottom card to the audience as if it were lying in the middle of the deck and you were randomly stopped on it. You can close your eyes at this moment or turn away so that no one thinks that you are peeping.
All that remains is to tell the surprised public the name of the card that you saw at the beginning at the bottom of the deck.
Guessing any card
Ask a volunteer to choose any card from the deck. After drawing the card, the spectator shows it to the audience, but so that the magician does not see. Places it in the middle of the deck, the magician shuffles the cards and, fanning out the entire deck, unerringly takes out the desired card.
The secret of the trick lies in peeking at the bottom card - the last one in the deck. Now you divide the deck into two halves - the spectator places the mystery card on top of one, and you cover the top with the second half, which was previously at the bottom of the deck.
So in this setup, the spectator's card is immediately after the bottom card that you know. When opening the fan, find a known card, and to the right of it will be the one you need.
Don't rush through the trick - people like it when the magician pauses before revealing his cards.
This information is enough to learn magic tricks, at least for an audience among your friends. Later, you can master more complex tricks, buy interesting props and continue training.
Purkinje effect
Jan Purkinje, the founder of modern neuroscience, discovered an interesting hallucination while still a child. He closed his eyes, turned his head towards the sun and began to quickly move his hand back and forth in front of his closed eyes.
.
After a few minutes, Purkinje noticed multi-colored figures that became more and more intricate.
Subsequently, scientists created special glasses on which light came on at a certain frequency. This stimulation short-circuits the brain's visual cortex, causing cells to light up in unpredictable ways, resulting in imaginary images.
Ames room
The perception of geometry in general is a big problem for our brain. A striking example is the “Ames room”, in which one person seems to be a giant, and the second - a midget. The effect is usually achieved by using distorted squares on the floor and walls to disguise the fact that the room is trapezoidal rather than square.
♥ ON THE TOPIC: 29 logos with masterfully hidden subtext.
