A cosmetic bag is an extremely necessary thing for a woman. It is better if there are several cosmetic bags - of different sizes, colors, for each handbag. Since we girls are capricious creatures, or rather demanding ones, and it’s difficult to please us, we suggest that you do not waste time looking for a suitable cosmetic bag in stores, but sew it yourself. There are many advantages to this solution. Firstly, you determine the size yourself, design a pattern for the cosmetic bag, and secondly, the choice of material is also yours. And thirdly, sewing a bag accessory yourself is much cheaper than buying a ready-made one. Not to mention, sewing cosmetic bags for yourself is a very exciting activity!
You will need to spend as little as possible: sewing thread and a ready-made zipper or clasp (for a cosmetic bag with a clasp). In this case, the pattern for the cosmetic bag should be made taking into account the size and design of the clasp.
Every needlewoman will have the necessary scraps of fabric, leather, non-woven fabric, and dublerin.
Fabric cosmetic bag
If there are scraps of fabric left from some voluminous work, a thrifty housewife, and besides, a needlewoman will never throw them away. Depending on the type of fabric, the remains can go to the outer part (thick, decorative) or to the lining (smooth, wear-resistant).
You can sew a cosmetic bag with your own hands, using simple patterns, and having basic sewing skills, in a couple of hours or in one free evening. As a result, an original, practical product will be born, and you will enjoy the creative process and the achieved result.
A fabric cosmetic bag can create a complete image and complement a suit, style, appearance, match a handbag or even the interior of a room or workplace. For every occasion in life, you can afford a new exclusive model for mere pennies.
Manufacturing methods
Important properties of a cosmetic bag, in addition to its interesting appearance, are spaciousness, compactness and ease of use. Taking into account all the nuances, you can move on to choosing a manufacturing method and selecting the main material. You can sew a cosmetic bag with your own hands from any suitable fabric or knit it. Each of the options is original, but at the same time has a number of features.
Sewing
This method is the most popular and less time-consuming. When working with fabric, you can choose arbitrary sizes and shapes of accessories for cosmetics, and use decorative elements to decorate the finished product: beads, rhinestones, ribbons or appliqués.
In addition to the obvious ease of manufacture, tailoring has other advantages, including a huge range of fabrics and textures, which allows you to create a product for every taste and in the desired style. When sewing, you can take into account the interior of the bedroom, the season, the features of the wardrobe, the model of the bag for which the cosmetic bag will become a harmonious addition, and other circumstances.
The accessory is made from felt, leather, leatherette, velvet, fleece, fur, and cotton materials. Patchwork style models and cosmetic bags made from old jeans are popular – there are plenty to choose from.
The manufacture of the product has a number of nuances, which some users may consider to be disadvantages. To sew a cosmetic bag, you need to know how to use a sewing machine and work with patterns. However, many master classes offer accessory models that can be made entirely by hand - without lining, using a hidden seam.
Knitting
Along with fabric models, knitted cosmetic bags are also popular, which have a pleasant texture and unusual appearance. You can make an accessory by knitting or crocheting. The choice of tool and type of yarn will directly determine the pattern on the finished product (openwork or dense). Any yarn is suitable for knitting: for example, cotton or wool blend. The size of the cosmetic bag will depend on the density of the threads and the diameter of the knitting needles. Knitting with these tools does not allow you to choose an unusual shape for the product, so it is better to stick to a simple one - rectangular or square.
For beginning craftswomen, it is recommended to work with crochet; this is the easiest way to create a cosmetic bag. Various threads are suitable for knitting: from dense cotton to thin “Iris”. Depending on the chosen yarn, the hook size is selected.
Travel cosmetic bag organizer
If you are going on a trip and want all your things to remain in their places even while traveling, you have no other option but to make a travel cosmetic bag organizer with your own hands. A convenient and practical thing will serve you well more than once.
The main difference between the travel organizer is the abundance of functional pockets. It may have zippers and push-button latches.
It is convenient when there are transparent compartments where you can see everything that is in them. A good cosmetic bag is compact, it folds to the desired size and does not take up much space in your suitcase.
Knitted cosmetic bag
For those who know how to knit, making a handmade cosmetic bag will not be difficult. Those who are just mastering the technique of crocheting or knitting should also pay attention to this kind of product. A small thing can be made very quickly. It is very important to quickly and immediately see the result of your labors at the beginning of learning needlework.
Using such a simple example, you can practice the technique of knitting a cosmetic bag with your own hands, improve your hand and usefully master elementary techniques and new patterns. Knitting a cute little organizer for yourself or as a gift is a great way to organize leisure time for a girl who likes to do handicrafts.
The product is knitted in a separate fabric and then stitched. Or it may consist of several simple rectangular shapes or a couple of circles. The size of the cosmetic bag is influenced by the knitting density, the size of the knitting needles, and the characteristics of the yarn.
You can knit a beautiful product from leftover yarn and decorate it with knitted elements. Typically, such cosmetic bags need a lining, since the pattern and weave of the threads are loose. An openwork product with a contrasting lining can even become a decoration for an evening dress or a bride’s wedding dress.
Felt cosmetic bag
Don't rush to throw away your old, out-of-fashion felt coat. With the help, imagination, skillful hands, and if you have free time, you can make a lot of useful things around the house from it. Including a cosmetic bag that can be sewn even without a sewing machine.
Felt products are now in trend. They are based on non-flowing material, the edges of which do not need to be overcast. Decorative hand stitches on felt products look very authentic. Felt is often used in children's art as a comfortable, tactilely pleasant, pliable material.
Photos and patterns of felt cosmetic bags can be found in abundance on the Internet. They will serve as a source of ideas and inspiration for you.
Note!
DIY satin ribbon bows: photos of original design ideas, step-by-step DIY master class- DIY hair bands - ideas for decorating homemade rubber bands + step-by-step instructions for making them yourself
DIY shadow theater: step by step how to do it at home! 175 real photos
Volumetric cosmetic bag
Those who use a large assortment of skin care products and a variety of decorative cosmetics will fully appreciate the advantages of a large, voluminous cosmetic bag.
In shape and appearance, it resembles a small suitcase or chest, made of thick fabric, tarpaulin. But this does not prevent it from being beautifully designed. When sewing, it is better to use thick lining material, fabric with an adhesive layer, waterproof film or foam padding so that the cosmetic bag keeps its shape.
A voluminous cosmetic bag with your own hands does not require a complex pattern. All simple calculations can be done based on the master classes, and the video instructions describe the sewing process in detail.
Note!
- DIY bracelets | Selection of the best models and master class on making beautiful bracelets
DIY bird feeder - interesting ideas on how to make it quickly and easily from scrap materials
- Do-it-yourself cold porcelain: the best options for porcelain products, step-by-step instructions and recipes for making it yourself (photo + video)
Such a cosmetic bag can serve as a belt bag, a first aid kit, and a travel bag for baby accessories.
Satin cosmetic bag
Satin cosmetic bags deserve special attention. The material looks very beautiful, smooth and delicate, so it is popular with girls. Handbags made from satin ribbons look especially attractive.
You might be interested in this: Patterns and sewing of a “swing” collar for dresses and blouses
You will need to purchase several satin ribbons, the total length of which will be approximately 15 m; fabric for lining A4 format; threads; zipper 25 cm; 50 cm bias tape and adhesive interlining.
Satin option
- To begin with, you should make a blank from satin ribbons. To do this, you need to intertwine them with each other and place them on adhesive non-woven fabric. It is recommended to secure the ends of the ribbons with pins so that the design does not fall apart during the process of creating a cosmetic bag.
- The resulting fabric needs to be leveled and ironed, cutting the fabric to the size of the lining material.
- The short sides of the workpiece and the lining are placed right sides together, and a zipper is placed between them, which is secured using a regular seam.
- The template and lining are applied inside out and stitched with thread.
- Next, you need to turn the product right side inward, and make a seam around the perimeter, lowering the zipper 1 cm inward.
- Bias binding is necessary for processing the side of the product. Its end, located next to the zipper, needs to be bent and tucked inside.
- A corner is cut 1 cm from the edge, and then the seam is sewn and processed with bias tape.
Light and convenient
The result is a very light and elegant bag for storing personal items, hygiene items or cosmetics.
Jeans cosmetic bag
The most ordinary things can serve as inspiration for creating unique art pieces. How many interesting and useful things can be made from old, worn-out denim pants and jackets.
Denim has not gone out of fashion for over a hundred years. The universal fabric has long become a style classic. Decorative details - buttons, textured seams, pockets, flaps, snakes on jeans, if cut and sewn wisely and creatively, will serve as decoration for an author's handmade accessory in the form of a functional handbag for cosmetics and all sorts of necessary women's items.
Material selection
According to the laws of the genre, any, the most unexpected fabrics and non-woven materials are suitable for making small original bags with small items. Remade from old things, cosmetic bags remind you of moments dear to your heart.
Even completely waste materials, such as empty plastic bottles or used plastic bags, can become the basis for interesting works in skillful creative hands. Their cost will tend to zero, and their practical benefits will be immeasurable.
Some will only take a couple of hours to make. Others, for example, embroidered or woven from beads, will require many days of painstaking work. But the result of such work will exceed all expectations.
Constructing a pattern
The shape, size and volume of the future product depends on which pattern is chosen. To create a pattern you will need:
- thick paper or cardboard;
- pencil pen;
- ruler or square;
- scissors.
On paper you will need to draw out the details of the future cosmetic bag. Pay careful attention to the sizes. Different parts must fit with each other - fit in length and width. This is important, because once the fabric is cut according to a poor-quality pattern, nothing can be changed.
Once the pattern is drawn, it is cut and placed on the fabric for cutting.
Leather cosmetic bag
In most cases, leather products look high quality and luxurious. In order to create a leather cosmetic bag for yourself, you just need to have the desire, the necessary items for sewing and free time.
Leather option
Genuine leather requires a special approach and care. It is important to be careful not to spoil the material. You need to buy leather needles in advance and use a special Teflon foot for your sewing machine. Working with leather is not difficult. Even if you don’t have the required size piece in your arsenal, but you have several small ones, they can be sewn together, creating a single piece of material.
When creating an accessory, it is important to give the snake its due. It is recommended to choose a high-quality zipper that will not only look good, but also function perfectly.
Important! When working with a workpiece, a person must remember not to use pins to secure patterns. Otherwise, the material will deteriorate, as holes and marks from injections will remain on it.
Expensive and unique
In addition to leather fabric, you will need to arm yourself with a metal ring, leather threads, scissors, glue and several additional tools. In this creation process, two colors of leather will be used: the first - 34x27 cm, the second - 2 pieces of 5x4 cm and 1 piece of 2x9 cm.
- Leather parts of the same color are folded in half and glued together. This way you get 2 parts 2x4 cm and 1 slightly smaller - 1x8.
- The folds formed during the gluing process are tapped with a hammer for folding.
- The short sides of the second skin are folded 1 cm inward and glued with glue. During the process, the fold is fixed with a clothespin.
- Threads for leather are placed in the machine, and a zipper fastener is placed under the leather of the second color, which is attached to the material.
- The threads are pulled out from the wrong side and secured with a drop of glue. After 2-3 minutes for the glue to dry, you can continue the process.
- Threads of a different color are placed in the machine, matching the color of the skin, and the details of the first color are stitched along the thickness of the foot. The threads are pulled out, a knot is tied on the wrong side, which is secured with glue.
- It is necessary to make two parts according to point 5, which subsequently need to be glued in half and treated with glue along the edges.
- The parts from the first skin are located along the edges of the zipper so that the sections are aligned with each other. They are sewn on a machine from the edge, and the thread knots are fixed with glue from the wrong side.
- The resulting rectangle needs to be turned inside out and the zipper cut to half.
- On the side, the product is stitched along the width of the sewing machine foot, while the edges of the threads remain free. From each corner you need to mark 3 cm, leaving marks with a pen or non-sharp pencil.
- The corners need to be fixed with clothespins and a line drawn from the mark to the fold at an angle of 90 degrees. (A right angle is formed to the line). It is necessary to stitch along the intended line on a machine, again securing the threads with a knot and glue.
- The remaining threads are pulled out and also secured with a double knot and glue.
- It's time for the lining. The material on the short sides of the rectangle is folded 1 cm and secured with an iron. From it you need to create a model of the product that will correspond to the leather item.
- The leather product is turned right side out, and a cosmetic bag from the lining is inserted inside it.
- The lining fabric must be sewn to the edge of the zipper by hand using a blind stitch.
- At the end, one piece of fabric of the first color remains, into which you need to insert a metal ring or half-ring. It is inserted into the snake slider to simplify the opening process and make it look beautiful.
You might be interested in Simple patterns for women's summer overalls with shorts
The result is a very beautiful cosmetic bag pocket, which does not even need to be supplemented with any decorative figures.
Basic details of a cosmetic bag
The simplest model of a cosmetic bag is cut from a single piece of fabric. To do this, you need to take a rectangle of fabric, fold it in half, stitch the sides and adjust the fastener with a snake, button or in the form of a patch flap. Such a primitive pocket will cope with its functions, but will not be very convenient.
Much more functional than cosmetic bags, which are given volume by the side parts. They consist of at least three parts:
- Two frontal ones, which can be rectangular, square, round and semicircular.
- Sidewalls (one or more) to create volume of the product.
The fastener is arranged based on the model and functional features of the product. Most often, a zipper or push-button fastener is used. A frame lock on a cosmetic bag looks original, but its use requires sufficient skill experience.
To sew a simple cosmetic bag, you can do:
- 2 main front parts - rectangles with a side of 10x15 cm.
- 1 part of the bottom is a rectangle 15x6 cm.
- 2 parts of the sidewalls are isosceles triangles with sides 10 cm and base 6 cm.
The result will be a cosmetic bag similar in shape to a pencil case for stationery or an eyeglass case.
Pencil case
Before creating a pencil case, you need to take care of the fabric. The material, as well as its design, is selected independently, based on desires. It is only worth remembering that denser material will last much longer than the rest.
The standard style for schoolchildren's pencil cases is circle or rectangle. The amount of material depends on the shape and size of the product. First you should estimate the required dimensions and add a few centimeters for allowances.
It is important not to forget about lightning. Its length is also selected according to the length of the product itself. It's not scary to buy a clasp with a reserve.
The pencil case, which holds pens, pencils and other stationery items, resembles a small cosmetic bag in its shape and structure. Therefore, the processes of sewing a pencil case and a small bag are identical.
Pencil case
Uncover
We offer a detailed master class on cutting out a cosmetic bag.
- The patterns are laid out on a clean, ironed fabric on the wrong side. If the patterns are asymmetrical, then they are placed in a mirror manner.
- The details are outlined with tailor's chalk, a thin piece of soap, and a special marker for marking the fabric. As a last resort, you can use a simple pencil.
- The main thing is that the markings are easily removed without a trace when washing the finished product.
- If you are cutting leather or other non-woven material that may have holes, you can secure the pattern to the fabric using safety pins.
- Don't forget to allow seam allowances. For loose and slippery fabrics (organza, silk, satin, etc.) they should be larger.
- If you are cutting pile material or fabric with a pronounced pattern, watch the direction of the pile and the pattern.
Useful tips
Before sewing, the outer fabric can be duplicated using adhesive interlining. The fabric will become denser and will hold its shape better.
If you want your cosmetic bag to be “plump,” place a thin layer of insulation between the main fabric and the lining. The product can be quilted, which will make the cosmetic bag even more interesting.
If you use leather as the main fabric, you should not attach the pattern and lining with tailor's pins, they can leave unsightly holes in the material.
To make the bag stable, you can lay a rectangle of cardboard in its lower part, it will act as the bottom.
Don't be afraid to experiment with materials and techniques. If you enjoy sewing cosmetic bags, but find that there are too many for yourself, you can always give such an accessory to your mother or friends.
Sewing
Before sewing a cosmetic bag with your own hands or making a pattern, watch one, or better yet, several master classes to get a general idea of the technology and sewing of a simple product - a cosmetic bag. This way you can easily apply the acquired knowledge to your sewing conditions.
We will give only a few working subtleties, knowing which, you will quickly and correctly cope with the task.
- Before stitching the parts together, they need to be reinforced with non-woven fabric, dublerin, batting, thick cotton and similar cushioning materials.
- The parts of the product are folded with the right sides inward and sewn in sequence and in accordance with the specific instructions for sewing a particular model.
- If you use natural fabric (cotton, satin, linen) that is not very loose, leave seam allowances of 2-3 mm. If the fabric is slippery, smooth and very loose (tulle, satin, silk, organza), the margins from the edge should be larger - 5-7 mm.
- Non-flowing materials, such as felt, suede, leather, can be sewn on the hands with a decorative seam.
- External seams on a machine - on the front side of the product can be done with decorative stitching.
- Do not forget to iron or steam all seams and the finished product.
Felt handbag
You can sew such a small cosmetic bag without the help of special equipment - a sewing machine.
Felt product
- A piece of felt is laid out on a flat surface.
- Using a ruler and pencil, the middle of the material is measured, and a rectangle is built in the center. The dimensions are chosen arbitrarily so that a zipper can be sewn in there and it can function successfully.
- After this, the fastener is inserted and sewn to the fabric.
- Then we sew the cosmetic bag in such a way as to obtain a rectangle. From the wrong side, the product is swept around the perimeter and turned inside out.
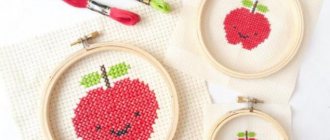
- The result is a ready-made felt bag, which can be decorated at your discretion with appliqués, beads, embroidery, rhinestones and other decorative elements.
Type of application
How to sew a zipper correctly
Patterning a cosmetic bag with your own hands is usually done taking into account that the closure will be with a zipper. Now we will tell you how to correctly, without errors, sew a fastener into a finished product.
- The size of the fastener and its length depend on the size of the product and the space for the zipper that is allocated by the model. As a rule, a regular zipper on a fabric base with teeth made of plastic or rigid fishing line is used; metal fasteners are less commonly used.
- Secure the closed zipper to one side of the cosmetic bag with pins or basting.
- Sew by machine.
- Then unfasten the clasp and connect the other side to the fabric.
- Carefully trim the edges of the fastener and tuck it inside the product.
With this method of stitching, the zipper slider does not get under the foot of the sewing machine and does not interfere with sewing.
ATTENTION: If the model includes a lining, the snake is sewn between the front fabric and the lining fabric. There is a possible method where the lining is inserted after, but then it will have to be sewn to the fastener by hand using blind stitches.
How to sew a cosmetic bag with a clasp
Women's cosmetic bags with a clasp look very stylish. Of course, using such a fastener requires thoughtful selection of fabric. Too bright, flashy colors will simply spoil the impression.
So, we will need:
- fabric for the main part;
- for finishing;
- for internal part;
- interlining;
- doublerin;
- clasp;
- threads
Progress
We cut out the side and central parts of the cosmetic bag. 2 pcs. each with allowances of 6-7mm. The same 4 pieces. made of lining fabric without allowances and 4 pcs. from dublerin without allowances.
We prepare the decoration: in our case it is an applique, but you can decorate the products as you wish.
Using an iron, we glue the doubler paper onto the top parts and the interlining onto the applique. We fix the applique in the right place on the main part. We attach it and sew the edges with a decorative seam.
Let's start assembling the cosmetic bag. We chop off the parts of the upper part (it is more convenient to pair the side part and the front part) and sew the outer part. We also sew the inside. We make cuts at the edges of the allowances so that the allowance does not tighten the seam in the finished part. Smooth out the seams.
We insert the lining into the main part with right sides facing each other. We chop off the top and stitch, leaving a gap for turning.
Turn it right side out and sew the gap by hand using a blind stitch. Finding the center of the cosmetic bag. From this place we begin to sew the clasp. It is better to sew with double thread - it will be stronger. The stitches of the seam should be neat and uniform, it should not be visible that they were sewn by hand.
Having sewn 1⁄2 of one part, we return to the center and again sew the second half of this part from there. In the same way we sew the second element of the clasp. Then you can decorate the handbag as your imagination dictates - with beads, pendants, etc.
Decoration and decor
Woven material does not at all limit you in choosing a style, model, pattern, or size of the future product. Accessories that match the fabric:
- beads;
- beads;
- sequins;
- embroidery;
- rhinestones;
- buttons;
- ribbons;
- lace;
- rivets;
- metal fittings;
- application and much more.
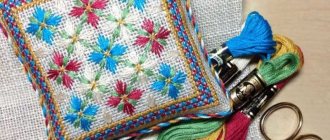
It is the decorations that give the cosmetic bag a unique style and charm, indicating its uniqueness and belonging to its owner.
Decor ideas
To decorate the appearance of the cosmetic bag, you can use original elements. For fabric accessories, sew-on rhinestones, beads, sequins or adhesive-based half-beads are suitable. Felt appliques will look interesting. Also, elements of patchwork are often used for decoration; such decor is especially held in high esteem by needlewomen today.
Knitted cosmetic bags can be decorated with satin or openwork ribbons. All you have to do is come up with a design and use a hook to secure the decor. Beads and beads can also be useful when knitting. This option is suitable if thin yarn was used to make a cosmetic bag - the beads are strung on a thread and crocheted into the base of the product.
When working with felt, embroidery with lurex (metalized) thread is often used - the product turns out very impressive. If you use regular floss threads instead, you can create an ethno-style cosmetic bag.