- April 13, 2019
- Crafts
- Natalia Penchkovskaya
Cornflower is a member of the aster family of plants, so it has many petals of a beautiful patterned shape, collected in a basket. There are several varieties of the plant with petals in white and purple, blue and dark blue, pink, red and even burgundy. Craftsmen also fell in love with such a spectacular flower.
In the article we will look at how to make a cornflower out of paper in different ways, how to draw a pattern of petals, and how to mount them on a round base in the center. They use both thick double-sided colored paper and corrugated sheets. The photographs located in the article will help you make such beautiful flowers faster and better, as they give a more complete idea of the step-by-step execution of the work by the master.
Volume applique
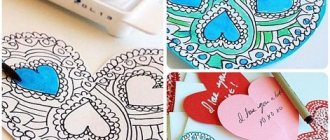
One of the easy ways to make a cornflower out of paper is to glue blanks cut out from a template on top of each other with a slight shift of the part to the side. Cut out flower elements from circles of different diameters. The photograph clearly shows that trapezoids are cut out around the middle of the lower blank, expanding towards the outer contour. On each element several corners are made with scissors. They can be of different sizes and quantities.
Work is carried out similarly with parts of smaller diameter. Then the craft is designed differently. To make the flowers original, each trapezoid is cut into longitudinal strips. To do this, use a stationery knife and a board.
Separately, thin strips of light-colored paper are cut and inserted into the slots in a checkerboard pattern. The middle can be decorated with a glued bead or simply cut out a yellow circle, cutting its edges with a thin “noodle”. As you can see, making cornflowers from paper with your own hands is not difficult. It is enough to be able to draw straight lines and carefully cut out elements with scissors. If necessary, use a compass to mark the placement of the petals around the circle.
Cutting petals according to a template
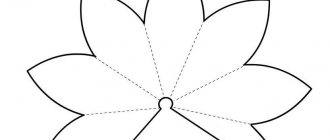
Let's figure out how to make a cornflower out of paper so that it is voluminous. Let's use the pattern shown in the first frame of the photo below. It looks like an isosceles triangle, on the base of which jagged cuts are made.
To cut out several petals at once, fold the paper prepared for the craft into several layers. When many elements have been made, you need to additionally decorate the teeth on the edge with thin “noodles”. To do this, you can purchase special craft scissors that can cut several strips at once. If you don’t have them in stock, then it will just take a little more time to design each petal.
DIY paper cornflower: master class and templates
Paper angel: options for paper products, detailed diagrams and drawings for creating with your own hands + step-by-step master class
Making flowers from paper is a very exciting creative process that brings benefit and pleasure not only to adults, but also to children. For adults, this activity allows them to escape from everyday worries and plunge into the world of creativity and fantasy, while for children it helps develop creative abilities. Today we will talk about how to make a cornflower out of paper with your own hands, because this is not a simple craft, but a piece of summer that you so want to take with you into the long and cold winter.
Currently, handicrafts are experiencing a real flourishing - masters and craftswomen of handicrafts are able to create works of art out of nothing. At the same time, paper is the most popular material for various crafts. All types of paper products are used - from newspapers and magazines, which are found in every home, to paper towel rolls. In addition, the paper is well cut, glued, crumpled, and bent, which gives enormous scope to fantasy and imagination.
In order to learn more about the technique of making this wild flower, we offer you a step-by-step master class “Cornflower flower made of corrugated paper.”
Master class “Cornflower flower made of corrugated paper”
Required materials and tools:
- Corrugated paper in green, blue and dark blue colors;
- Wire;
- PVA glue;
- Semolina;
- Scissors.
Stage 1
We cut out a strip 2 cm wide from dark blue corrugated paper, cut one side of it in the form of a “fence” and twist its sharp ends into thin tubes with our fingers.
Stage 2
We take a wire approximately 1 mm thick, from which we will make a stem, drip PVA glue onto one edge and twist a strip with thin tubes around it.
The flower core is ready. We put it aside to dry, and we proceed to making the remaining parts.
Stage 3
We take a sheet of blue corrugated paper, fold it in half, cut out a 3 cm strip and again cut one of its edges in the form of a “fence”.
These will be the outer petals of our flower. We cut them into pieces of three wedges and twist them around a thin wire. We do not leave the wire inside each petal - it only serves as a support for more reliable curling of the paper.
You can also use templates of different sizes for the outer petals - with them the flower will turn out more realistic.
Stage 4
Let's start forming the flower. To do this, we take the blank of its central part and begin to glue the petals evenly in a circle, while we form the base of the flower, additionally securing the petals with thread.
Stage 5
While the flower and its base are drying, we make the leaves. To do this, glue a sheet of green corrugated paper in two layers, then glue this sheet again, inserting a thin wire inside, which will serve as the vein of the leaf (we leave a small tail outside to secure the leaf to the stem).
We cut out the leaves for the flower so that the wire-vein is located approximately in the middle of the leaf.
Stage 6
We screw the finished leaves onto the stem as you like - you can arrange the leaves opposite each other, or in a checkerboard pattern
After this, cut out a long strip of green paper about 1 cm wide, coat it on one side with glue and wind it onto the wire, starting from the bottom and paying special attention to the places where the leaves connect to the stem
Stage 7
Now we need to design the base of the flower. To do this, take a glued sheet of green paper (from which the leaves were cut out), cut out a strip about 1 cm wide from it, turn it into a “fence” and wrap it around the base of the flower.
Petals twisted
If you have not yet decided how to make a cornflower out of paper with your own hands, check out another option for making this beautiful flower. To work, prepare several strips of corrugated paper of the same size. On each side, cut the short edges with corners.
Next, roll the paper at the central point several times around its axis. Fasten them together with matching threads. For the center of the craft, you can use yellow napkin balls, which are glued to the center with PVA glue.
DIY paper cornflower: master class with templates
How to make a pig costume with your own hands: the best ideas and options for making a costume for children (85 photos + video)
Many people associate summer with a variety of flowers, especially wild ones. One of these plants is cornflowers. However, what if you want to give such a flower, but there is no way to pick or buy it? We invite you to make a cornflower out of paper with your own hands. The article will offer options using different materials.
Easy to manufacture
It is perfect for joint creativity with children. For the master class we will need:
- colored paper in blue and green shades;
- compass;
- scissors;
- glue.
We take blue paper and cut out three circles with a diameter of 8 cm, and seven - Ø 6 cm. You choose the combination of colors for large and small circles yourself. Fold each circle in half three times and use the template below to cut out a petal, but do not cut all the way at the base.
Naturally, we make our own templates for each circle size. Unfold the resulting flowers. Using scissors, slightly curl the petals inward. Glue the big one to the small one by the middle.
Make different options for assembling flowers. Also cut out a stem 10-12 cm long and leaves 5-6 cm long from green paper. Glue all the blanks onto the base.
This could be a painting or a postcard, for example.
Second way
Prepare corrugated paper of blue, dark blue and green colors, 0.3 mm and about 1 mm wire, PVA glue, semolina and scissors.
We cut out a strip of dark blue paper, the width of which is 1.5-2 cm. We cut teeth on one edge of it, which we twist with our fingers. Now we drip glue onto one end and attach a thick wire, it will act as a stem.
You can wrap the entire strip around the finished base. Or you can cut into sections and attach one by one.
We cut out long leaves from green paper, glue a thinner wire to their base and attach it to the stem. We cover the stem itself with a strip of green corrugated paper.
As a finishing touch, dip the tips of the core into glue and semolina.
Third option
To begin with, take black threads and wind them around four folded fingers in 50-60 turns. Then we remove it from the hand and bandage it in the middle.
We cut the side folds, making a tassel. This will be our middle ground.
Preparing the peduncle. To do this, cut out a strip of approximately one centimeter wide from green corrugated paper and wrap it around a piece of wire.
Apply glue to the center of the center piece and attach it to the top of the stem. It's better to use a hot glue gun.
Dip the ends of the stamens first in PVA glue, then in semolina.
Having unfolded the strip, we twist the ends of the fringe into flagella.
Now we begin preparing the outer row of petals. For it, we cut out a strip of blue paper 35-40 cm long and wider than the previous one. Smooth out and fold six times.
We cut the edge into small triangles.
We begin directly assembling the flower. To do this, we wrap the bases of the stamens first with a strip of the inner row, then the outer one. For greater splendor, the strip of outer petals can be folded into an accordion. We use glue, maybe PVA. For greater reliability, we wrap the finished flower with thread.
We make another such flower and one with only inner petals. We make a bouquet.
Cornflower with candy
We will need:
- blue corrugated paper;
- candy;
- foil;
- scissors.
Cut out a square with sides 7 cm. Cut out small triangles along the top edge.
We make three such blanks. Then on each one, from the jagged edge inwards, but not all the way, we make cuts.
We make another 0.8 cm cuts in the middle of each resulting petal. We give each petal a rounded shape, stretching it from the middle with our thumbs.
We attach the first row of three petal blanks to the base of the candy using a thread. In the second row we attach the same number of blanks, but we fasten them in a checkerboard pattern in relation to the previous ones. And one more row.
It will make a beautiful and sweet gift.
Below is a selection of videos on making cornflower flowers from paper.
Craft from corrugated paper “Cornflowers”
The development of fine motor skills is a task of paramount importance. The projection of the hand, located near the speech zone, accounts for about a third of the area of the motor projection of the cerebral cortex. The development of speech is directly dependent on the development of fine motor skills. Paper crafts are great training. We offer a master class on creating cornflowers - quite difficult to make. Make them together with your child - the exciting creative process and the result will cause children's delight.
To make cornflowers with your own hands you will need tools and materials:
- corrugated paper in rich blue and green colors
- small scissors
- semolina
- PVA glue
- hot glue
- cardboard
- tape
- pencil
- wire
If there is no tape, replace it with glue and paper. If there is no thermal glue, replace it with another that is durable and glues metal (PVA will not stick reliably to the wire, but Moment will).
1. On a piece of cardboard, draw a template of large cornflower petals.
2. Cut out the template.
3. Prepare a strip of blue corrugated paper. Cut it into pieces 3-4 cm wide.
4. Attach the template to the leaves and cut out the petal blanks.
5. Create small stamens - they will be in the middle of the flower. We make many cuts on strips of blue paper.
6. Twist the ends of the created fringe with your fingers.
7. Wrap the prepared piece of wire with tape or a strip of green corrugated paper.
8. Glue a strip with thin stamens to the tip of the stem.
9. Apply a small amount of PVA glue to the tips of the sticks.
10. Sprinkle the stamens with artificial pollen or semolina.
11. While the glue dries, give the large petals the desired shape. To do this, stretch the petals to the sides to form a convex shape.
12. Curl the base of the petals.
13. Glue the cone-shaped petals to the bottom of the stamens. We straighten them carefully.
14. Use a green paper strip to hide the lower part of the flower. Thus, a three-dimensional receptacle was formed.
15. Cut out thin leaves - for one cornflower you will need 3-4 leaves.
16. Glue the leaves to the stems.
Field cornflowers made from corrugated paper are ready.
The connection between finger motor skills and speech function was confirmed by researchers from the Institute of Physiology of Children and Adolescents (L. V. Antakova-Fomina, E. I. Isenina, M. M. Koltsova)
User comments
DIY cat house: options, drawings, sizes, manufacturing guidelines
Wonderful cornflower! I really liked the idea, especially since I really need two of these cornflowers. Please share what they are made of and how they are secured?!
I made the cornflower from soft tulle in bright blue and black colors. for stamens - soft thick wire and large beads. I immediately made a black core: I bent a piece of tulle 10:120 cm in half and pulled it into an accordion with a needle, twisted it into a bud, gradually inserting the stamens (40 cm wire bent in half = 2 stamens). Because I didn’t have thin felt, but I had an insole from which I cut out a circle with a diameter of 5-6 cm.
I cut out 30:30cm squares from blue felt (I bought 120cm of felt in total, I don’t remember the width). I bent the corner to the corner and two more times to make it look like this
and sewed these tulle petals to the felt in a circle in three rows in a checkerboard pattern.
Then I made a circle from a wide satin ribbon (gathered along the edge of the ribbon into an accordion) that covers the place where the petals are sewn.
Now about the fastening. I took a hoop that stayed well on my daughter’s head and wrapped it with a 2cm green satin ribbon. And I already sewed a flower to the ribbon and hoop.
I hope I described the whole process clearly. If you don’t understand something, ask.
Source
Paper craft “Cornflower”. Master class / Masterclasses Blogs
Making a cornflower stem. Cut out a green strip (part No. 1).
Fold the cornflower stem in half lengthwise.
Next, on one side of the stem we make a 0.5 cm long cut along the fold line (this will be the upper edge of the stem).
Then cut out a green circle (part No. 2). This will be a cup of cornflower.
Taking a cornflower stem, glue the upper edge of the stem to the cup, as shown in the photo.
Cut out 11 blue pieces (parts no. 3) and 6 light purple pieces (parts no. 4).
Using a pencil, we give an arched shape to the wide edges of these parts - these will be the outer (blue) and inner (light purple parts) petals of the cornflower.
Then we glue the outer petals to the cup, placing these parts next to each other (with the bent edges outward). In this case, we apply glue only to the narrow edge of the petals.
- After this, we take the inner petals and glue these parts to the outer petals of the cornflower so that the outer and inner petals are staggered (we glue these petals with the bent edges outward).
- Apply glue only to the narrow edges of the petals.
- Cut out a yellow rectangle (part No. 5) and make cuts on one side of the part.
Cut this rectangle as shown in the photo. These are the details of the middle.
Now we apply glue to the junction of the inner petals.
We take the parts of the middle and glue them to the junction of the inner petals. This will be the center of the cornflower flower. The cornflower is ready.
Easy to manufacture
It is perfect for joint creativity with children. For the master class we will need:
- colored paper in blue and green shades;
- compass;
- scissors;
- glue.
We take blue paper and cut out three circles with a diameter of 8 cm, and seven - Ø 6 cm. You choose the combination of colors for large and small circles yourself. Fold each circle in half three times and use the template below to cut out a petal, but do not cut all the way at the base.
Naturally, we make our own templates for each circle size. Unfold the resulting flowers. Using scissors, slightly curl the petals inward. Glue the big one to the small one by the middle.
Make different options for assembling flowers. Also cut out a stem 10-12 cm long and leaves 5-6 cm long from green paper. Glue all the blanks onto the base.
This could be a painting or a postcard, for example.
Cornflower with candy
We will need:
- blue corrugated paper;
- candy;
- foil;
- scissors.
Cut out a square with sides 7 cm. Cut out small triangles along the top edge.
We make three such blanks. Then on each one, from the jagged edge inwards, but not all the way, we make cuts.
We make another 0.8 cm cuts in the middle of each resulting petal. We give each petal a rounded shape, stretching it from the middle with our thumbs.
Now let's get to the candy. To do this, cut a piece of wire and wrap a loop at one end. Then we wrap the candy in a square of foil with sides of 10 cm. At the same time, we attach the wire.
We attach the first row of three petal blanks to the base of the candy using a thread. In the second row we attach the same number of blanks, but we fasten them in a checkerboard pattern in relation to the previous ones. And one more row.
It will make a beautiful and sweet gift.
Below is a selection of videos on making cornflower flowers from paper.
Fast way
It’s easy to roll a cornflower from corrugated paper using the following method of making a craft. Cut a long strip of paper and fold it in several layers. To prevent the material from moving when cutting out the petals, place several clothespins on the free edge.
All that remains is to cut the trapezoid at an equal distance, without affecting the thin strip at the bottom. Each petal is cut into the corners already familiar to us. All that remains is to roll up the workpiece and attach them in the center with glue or paper clips.
Paper craft “Cornflower”. Master class / Masterclasses Blogs
Making a cornflower stem. Cut out a green strip (part No. 1).
Fold the cornflower stem in half lengthwise.
Next, on one side of the stem we make a 0.5 cm long cut along the fold line (this will be the upper edge of the stem).
Then cut out a green circle (part No. 2). This will be a cup of cornflower.
Taking a cornflower stem, glue the upper edge of the stem to the cup, as shown in the photo.
Cut out 11 blue pieces (parts no. 3) and 6 light purple pieces (parts no. 4).
Using a pencil, we give an arched shape to the wide edges of these parts - these will be the outer (blue) and inner (light purple parts) petals of the cornflower.
Then we glue the outer petals to the cup, placing these parts next to each other (with the bent edges outward). In this case, we apply glue only to the narrow edge of the petals.
- After this, we take the inner petals and glue these parts to the outer petals of the cornflower so that the outer and inner petals are staggered (we glue these petals with the bent edges outward).
- Apply glue only to the narrow edges of the petals.
- Cut out a yellow rectangle (part No. 5) and make cuts on one side of the part.
Cut this rectangle as shown in the photo. These are the details of the middle.
Now we apply glue to the junction of the inner petals.
We take the parts of the middle and glue them to the junction of the inner petals. This will be the center of the cornflower flower. The cornflower is ready.
Third option
To begin with, take black threads and wind them around four folded fingers in 50-60 turns. Then we remove it from the hand and bandage it in the middle.
We cut the side folds, making a tassel. This will be our middle ground.
Master class “Paper flower cap”
Karimova Yulia Alexandrovna
Master class “Paper flower cap”
1) Cut out a strip of thick cardboard, 4 to 5 centimeters wide, around the circumference of the head, and secure the ends of the strip with a stapler. The result is a headband. 2) The headband must be wrapped in corrugated paper in bright colors. 3) Cut 4 more strips to fit the volume of the head and fasten them to the headband at both ends. You will get a hat. 4) Cut out circles with a diameter of 5 to 7 centimeters and give them the shape of petals. 5) We secure each petal individually with a stapler, starting from the rim, rising to the crown. The crown can be made in a different color. Decorate the hat as desired. 6) As a result, we get a beautiful flower hat.
Summary of a lesson for older preschoolers “The Magic Hat” using educational games by V. Voskobovich Objectives: • Continue to teach children to compose an object according to a diagram from parts. • Develop skills in techniques for constructing geometric shapes.
GCD notes on paper construction for “May 9” “Dove” Goal: Mastering the technique of folding a paper dove figurine using the origami technique. Develop the eye and coordination of movements. Material:.
Context of the GCD “World of Paper” Purpose. Improve knowledge about different types of paper (napkin, writing, wrapping, drawing, compare their quality characteristics.
Source
LiveInternetLiveInternet
—Categories
- Crochet and knitting (2113)
- Grandmother's Square (317)
- knitting (295)
- Hats, panama hats (284)
- Amigurumi - knitted toys (258)
- Girls' Dresses (191)
- Irish lace (183)
- Knitted and crocheted socks (133)
- machine knitting (33)
- Bolero crochet or knitting (20)
- Burda knitting (18)
- knitting on a fork (8)
- Backpacks (4)
- embroidery (777)
- I want to try embroidering (296)
- Ukrainian patterns (1)
- Monochrome (1)
- Animals (1)
- Houses (1)
- Sewing (770)
- Tildomania (262)
- Cooking (644)
- Master class (412)
- Candy products (85)
- Crafts from paper and newspapers (261)
- Beads (195)
- Weaving (166)
- Shambhala bracelets (21)
- Weight loss and other worries (144)
- CHILDREN (130)
- Magazine Doublet (118)
- Special edition Irish lace (9)
- 2014 (8)
- Special edition of Shawls. Stoles (7)
- 2015 (5)
- 2012 (4)
- 2011 (3)
- Special edition Bruges lace and Ribbon lace (2)
- Retro (2)
- Special Issue (1)
- 2010 (1)
- 2004 (1)
- Postcards (92)
- Kanzashi (85)
- Ribbon embroidery (73)
- Quilling (47)
- Origami (37)
- Soap making (32)
- Vegetable garden (27)
- Felt (22)
- felting (19)
- Isothread (12)
- Polymer clay (7)
- Orthodoxy (6)
- Baubles (5)
- Music (3)
- Craft magazines (247)
- schematics (6)
-I'm a photographer
—Search by diary
—Subscription by e-mail
-Statistics
How to make cornflowers from paper with your own hands.
Cornflowers made of colored paper can be used as an original interior decoration. Making a flower is very easy, you just need a little patience and some materials. To create such a craft you will need the following materials:
- colored paper in blue, green and purple shades;
- convenient small scissors;
- glue stick or ordinary PVA;
- green wire.
For cornflower petals, you can use double-sided colored paper, but it is better if you take one-sided paper and paint the reverse (white) side of the sheet with paints. Select several shades and color the sheet like this.
Petals made from such paper will look much more impressive due to the uneven distribution of shades!
First we will make the middle of the flower, for this we will need a purple stripe like this.
Make cuts like this along its entire length. They can be of different thickness.
Now take the wire and wind a purple strip onto it. Be sure to secure the tip with glue!
Make a small loop at the other end of the wire and move the strip to the other end.
You need to cut out the following blanks from blue paper. In total, you need five or six blanks for one flower.
Make a small hole in the middle of the workpiece and move the petals to the middle of the flower.
Then take a strip of green paper and wind it onto a wire, move it to the bud and secure the tip of the tape with glue. Thus, we created the base of the bud.
Let's move on to creating the center of the cornflower. We must carefully “fluff” it. Straighten the miniature strips from the middle to the edges, and you will get this result.
Next, give a natural shape to all the petals, but glue the petals of the upper tier to the middle of the bud.
Cut out blanks for flower leaves from green paper.
Then glue them to the wire - the stalk of the cornflower.
Wait for the glue to dry completely.
That's all, the wonderful paper wildflower is ready!
You can create a bouquet from several of these flowers, then place it in a decorative vase, and then decorate the room with it in an original way.
Cornflower made from quilling strips
For this craft, prepare only wide strips. The central part is first cut into “noodles” along the entire length of one side, then wrapped in a tight roll. The edge of the paper is glued to the last turn of the skein with PVA glue.
All petals are made in the same way and are attached along the flat side of the base. Apply glue to the end part of the workpiece. You can use hot glue to be safe.
Now you know how to make a cornflower flower from paper. Choose the option you like and try making beautiful flowers with your own hands!
Cornflower – paper applique for children over 7 years old | SCRIBBLE
Cornflowers are a rather complex paper applique for children aged 7 years and older. The main difficulty for the guys is to carefully cut the sides of the flowers without touching the middle. But all the work will pay off in that the result will be a delicate and airy work. For children 7 years old, it is better to simplify the application somewhat - make not five, but three cornflowers. In this case, the squares from which the flowers will be cut must be enlarged. Then it will be much easier for the guys to cut. To make the “Cornflowers” applique from paper we will need: A sheet of colored cardboard; • Blue or light blue paper in two shades; • Green and orange colored paper • Glue • Scissors • Pencil
- How to make an applique from paper “Cornflower”
- Fold the square in half diagonally, then in half again, and in half again.
- Step 3
Step 1 Cut squares of blue paper in two shades and two sizes. Large square – 6x6 cm; small square – 5x5 cm. For each cornflower we need one large and one small square. Step 2
Now take the scissors and start cutting. First, round off the wide part of our triangle. If you immediately take circles rather than squares, then this operation will not be necessary. Then we cut out the teeth on the edge of the flower. And lastly, we need to cut out the sides. Look carefully at how the line goes.
We unfold the paper - there is a cornflower flower! Let's cut out such flowers from all the prepared squares.
Glue together small and large flowers in pairs.
Step 4 Take a sheet of yellow cardboard. Cut out an oval of any size from orange paper and glue the applique onto a cardboard base. Step 5
Let's attach the finished cornflowers to the base of the applique. Then, removing the flowers one by one, mark their location with a pencil.
Step 6
Cut thin (about 0.5 cm) strips of stems. Let's glue them to the applique. You only need to glue in two places - at the intended point where the flower will later be, and below. We cut off the excess length of the stems after gluing.
Step 7 Glue the cornflowers onto the base of the applique. Step 8
Let's make leaves. Take a rectangle measuring 12x4 cm and fold it in half. Let's draw an outline of the future leaf with a pencil.
Cut out the leaf along the marked line. Let's unfold the leaflet. Let's make 4-5 such leaves.
Step 9
Glue the leaves onto the base. Our paper application “Cornflower” is ready.
When you collect a summer “bouquet” - make the “Lilies of the Valley” applique, the “Poppies” applique, the “Daisies” applique.
Flower assembly
Before making a cornflower out of paper, cut out a thick base for further gluing of the petals. It is more convenient to use cardboard of the same color as the petals. The first layer is attached in a circle with PVA glue.
Then work is carried out in a similar manner to install several more layers; the petals are glued not directly on top of each other, but shifted to the side by a couple of cloves. For the central part of the work, the prepared petals need to be reduced in size. To do this, cut off one side with scissors, as in the photo above. The core can be covered with a pebble or bead using a glue gun.
Making quilling cornflowers using photos and video master class
Quilling is one of the most popular handicraft techniques, both among adult craftsmen and among preschool creativity groups. This is due to the fact that it is quite easy to make crafts in the paper rolling style, but at the same time, complex and elegant compositions can be created from basic figures and elements.
For example, artificial flowers made using the quilling technique look very beautiful. From them you can create not only a three-dimensional panel, but also a whole bouquet for a vase. Bouquets made from wildflowers look especially good. We offer you a master class with photos that tells in detail how to make cornflowers using the quilling technique.
If you are just a beginner and want to master this technique, you will need some materials and tools, as well as an understanding of the basic elements of quilling. List of required materials and tools:
- paper quilling strips (for cornflowers you will need shades of blue and green);
- wooden round toothpick;
- glue;
- scissors;
- beautiful thick cardboard for the base of the picture.
All these materials can be purchased at craft stores. They also sell various accessories for quilling. But some, for example, quilling strips, can be made independently.
To do this, you may need paper painted on both sides, a ruler and scissors. The sheet must be cut into the required strip width, and if necessary, their edges are tinted with a marker or paint.
This detailed video will help you master the basic elements of quilling.
We create quilling cornflowers from corrugated paper
This MK with cornflowers is perfect for those who are beginners in quilling. For these cornflowers you will need green quilling strips, a thin twig or wire for the stem and blue crepe paper. Making them will not be difficult even for school-aged children.
Making cornflower
First you need to make a cornflower stem with a cup on it. A twig or wire is wrapped with a green strip of paper. Then an ordinary dense round element is twisted from the same strip and pulled out a little with a finger, as shown in the picture, to form a cup for a cornflower flower. The stem is inserted into the center of the calyx.
Before making the petals for the cornflower, you need to cut the corrugated paper into strips approximately 20 millimeters wide. Be sure to cut across the folds of the paper.
Petals are created according to the following scheme. Each strip is folded in half lengthwise, and a fringe is cut on it, slightly more than half wide.
Each new layer is attached in the same way. It is better to shorten the stem of the petals in the center a little so that the flower looks more like a cornflower.
The leaves for the cornflower are cut out of thick (or double-glued) green paper and carefully glued to the stem.
You should have flowers like this that you can collect in a bouquet and put in a vase. In addition, you can use special templates for creating petals of other colors, as well as sketches of beautiful field bouquets for inspiration.
Cornflowers made from sweets and corrugated paper for a field bouquet
Cornflowers are great for creating field bouquets. This candy flower is very easy to make. Watch the master class below the cut.
Author - Tatyana Moroz
Cut a rectangle of blue corrugated paper to the width of the strip. You can do this with serrated scissors, but regular scissors will do. The cloves can later be cut using nail scissors directly on the petals.
We divide the rectangle into three parts, make 2 cuts on each part and thus get 3 petals.
We stretch the corrugated paper a little with our fingers, forming petals and giving them a slightly concave shape.
We make small cuts on each petal.
Attach the first three petals to the candy.
We tie it at the base with thread.
Then attach the next 3 petals.
We straighten all the petals, give the flower a beautiful shape and tape it at the base with tape.
Our cornflower flower is ready! You can decorate a candy bouquet with it.