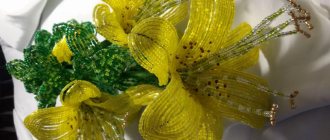
how to make a paper lily
A little about the flower... Lily means admiration, which is why it is so good for a wedding, birthday, or just to tell someone how much you love them. Making a paper lily is easier than many types of other flowers because the lily has a simple and expressive petal shape.
Here you will find ten wonderful examples of how to make a paper lily flower with your own hands . Various materials can be used for manufacturing. Lilies made from corrugated paper look very beautiful . If you are interested in origami or just want to learn this wonderful art, in the article you will find several examples of how to make an origami lily . Check out the master classes below and choose an option to suit your taste.
Flower template
Before you make a paper lily with your own hands, be sure to draw a template on cardboard. A sample of it is presented below in the article. First, use a compass to draw a circle whose diameter is the size of the intended flower. Divide the circle into 8 sectors and draw the rounded corners of the petals. Next, cut out the cardboard template along the contours. To make the lily have a concave shape, you need to cut off 1.5 petals.
Also leave a small hole in the center for attaching the stamens and stem.
After the template is ready, trace it along the contours with a simple pencil, placing it on colored thick paper. If thin sheets are used, the craft will not hold the given shape, but will quickly deform and become unusable.
Since there are many varieties of lilies, the patterns vary. You can cut fewer petals and make them pointed, with deep cuts in the paper towards the center point. Smooth folds are made along the dotted lines of the workpiece. This is necessary to give volume to the craft.
Corrugated paper lily
Artificial flowers are often used to decorate a room. The ideal option would be paper lilies made from corrugated paper. This type of material holds its shape perfectly.
Required material:
- Corrugated paper.
- Scissors.
- Pliers.
- We take thick and thin wire.
- Any glue will do, so use the one that is more convenient.
- Any paints and brush.
Step-by-step algorithm for creating a flower:
- Take corrugated paper. Cut a piece of about 8 centimeters from it.
- Next, cut off 6 strips from this piece.
- Then, using scissors, we give the lily petals a pointed shape.
- Bend them slightly to give a more natural shape.
- Take paints and draw dots at the base of each petal.
- We will create stamens from the prepared wire. Measure and separate several pieces of approximately the same length with pliers.
- Wrap each of them in paper, which is secured with glue. If desired, the tip of the stamen can be tinted brown or yellow.
- Let's move on to assembly. It screws the stamens, and then the petals are glued to the stem. Don't mix up the sequence, otherwise it won't look good.
- The joint must be sealed with green paper.
The only thing missing is leaves. Let's move on to creating them. To do this, take green corrugated paper, from which you cut out several petals. Sharpen each edge for a natural shape. The last step will be fixation to the stem.
Making petals
Now let's start preparing the petals. Cut out templates of petals 1,2,3,4 from cardboard. Dimensions of the templates: 1 - height 6.5 cm, width 3 cm; 2 - height 7.3 cm, width 3.5 cm; 3 — height 9 cm, width 4 cm; 4 - height 9.8 cm, width 4.5 (the size of the petals will depend on who, what diameter you want the flower; I ended up with a lily 14-15 cm in diameter).
Cut out petals from yellow foamiran. To make one lily we will need 3 petals of each type.
Take a green pastel and a damp cloth and draw all the petals at the base, on both sides.
Now let's process our petals using an iron and mold. We apply each petal to a heated iron for a few seconds, and quickly until it cools down to the floral mold, and press the texture with our fingers along the entire length.
These are the textured petals you should get:
Now take dark acrylic paint and the thinnest brush. Apply specks to 1/3 of the petal. We give it a little time to dry. We do this with all the petals.
Then we will stretch the edges a little, as in the photo and crumple the top of each petal. We will also curl the edges with our fingers, this is not even possible for all petals. And fold the smallest petals (No. 1) in half lengthwise and twist them a little.
Let's do this with all the petals.
Lily using origami technique
A paper lily made using the origami technique will look very original. Using Japanese art will require a lot of patience, but after the work done, you will be satisfied with the result.
You can also involve children to create a lily using the origami technique.
By following the step-by-step instructions for creating a paper lily using this technique, you will easily complete the task.
Simple origami lily
There are many schemes for creating a paper lily using the origami technique, but it is best to start making a flower with a simpler method. And then move on to making more complex origami techniques for this craft. Most often they are assembled from simple, already familiar methods.
Step-by-step instruction:
- Prepare a square-shaped sheet, it will become the main one.
- Bend it in half on all sides (that is, horizontally and vertically). Iron the folds well. Expand.
- We created lines that will help you carefully assemble the flower later.
- Take each edge of the unfolded sheet and fold it towards the center.
- Fold the resulting figure again to the center on all sides.
- Turn it over. And bend again.
- Take the middle and carefully straighten it, bending it back and forming a new fold.
- Tuck the resulting folds inside.
- Fold into a rhombus.
- Now straighten what you got. This is one lily petal.
The lily will be an excellent decoration and a joint craft. If you want to make something beautiful, start with flowers.
Don't be afraid to experiment by changing the material and additional attributes. And a joint activity with children will bring a lot of positive emotions.
Sweet bouquet
The shape of lily flowers allows you to effectively arrange a sweet bouquet or an original gift basket.
Note!
Mimosa craft: TOP-160 photos of simple and complex crafts. Master class for children and adults on making mimosa with your own hands
DIY napkin flowers - a detailed master class with simple diagrams. Non-standard solutions for creating flowers + photos of finished crafts
DIY paper flowers: a detailed master class with simple work patterns + photo examples for beginners with interesting color options
When working on a sweet gift, it is easy to apply any scheme for creating a lily from paper, using candies as a base for attaching the petals.
The most convenient for work are oval or elongated candies. Petals are easy to make from wrapping or corrugated paper, securing them with wire.
Method No. 3
Using the photos of the master class below, you can learn another, easier, scheme for making lily petals.
Bend diagonally.
We make a diagonal on the reverse side.
We bend the edges so that we get parallel diagonal lines.
Fold opposite corners.
Rotate the sheet 45 degrees.
Turn the petal over.
Round off the edges.
By fastening the corners of the petal, you can make such a beautiful lily.
Triple with green bottom
If you wish, you can complicate the work a little and get a lush flower with green sepals. For this purpose, the double lily is placed in a specially made blank of green paper.
It is made according to the same pattern as the flower itself, with the exception that at the final stages it is bent a little differently:
- The finished workpiece needs to be stretched a little.
- Straighten the internal parts and bend them inward, gently smoothing them.
- Collect the pre-made colored parts together and place them in the sepals.
That's it, the beautiful lily is ready. You can use it as is or create a paper vase for it.


