do-it-yourself transformer bed cabinet
An extra bed is needed, but there is no extra room to convert it into a bedroom. Then we suggest you make a transformable wardrobe bed with your own hands , this is an excellent solution, especially if you have a small room. In this article we will look at various options for making folding beds with a wardrobe from scratch and assembling them from ready-made kits at home. What is the advantage of a homemade design? Control over design and cost. In our selection you will find announcements of articles with step-by-step photos and links to instructions on how to make a wardrobe bed with your own hands with drawings and diagrams for various interiors. This is all very possible, if you have at least basic woodworking skills, you have a plan, you use the right tools and follow the step-by-step instructions (we have a link to a guide for each example) - then you will undoubtedly achieve excellent results.
Manufacturing stages
The procedure depends on the type of model selected. Among the general stages are:
- cutting parts of the chair-bed strictly according to the drawing, grinding surfaces, trimming, drilling holes for corner fasteners and the transformation mechanism;
- assembly of the case, installation of folding elements;
- covering the chair with soft filling;
- textile covering.
Cutting out the parts
At this stage, parts are cut out of the timber to assemble the frame of the chair-bed, and the sidewalls (armrests) are cut out of chipboard or its analogues with a thickness of 18 mm or more. Thin but durable plywood is sawn into squares that cover the folding parts. All parts are polished, impregnated with antiseptics, and dried. The stage ends with marking and drilling holes for self-tapping screws.
Housing assembly
Work begins with assembling the base of the chair. After this, the back and 2 supporting sides are sequentially screwed to the bottom with self-tapping screws. Retractable or folding elements are assembled after checking the stability of the main body. The chair transformation mechanism is fixed last, in specially cleaned areas.
Sheathing
At this stage, the assembled structure is sequentially:
- It is pasted over with pieces of foam rubber from 2 to 10 cm thick.
- Sheathed with pre-cut textile blanks with a margin of at least 1.5 cm at the edges.
- Decorated with armrests (if available).
Tips for choosing a transformable wardrobe bed, design advantages
The work is carried out using glue and a furniture stapler. In most cases, the textiles are stretched over the parts with fastening to the bottom of the timber frame. At the request of the owners, the chair-bed is decorated with an additional removable cover, made upon completion of the remaining work.
Installation of the transformation mechanism
To assemble a chair-bed, any ready-made transformation mechanism can be used. Of the offered range (over 15 varieties), the models presented in the table are best suited for these purposes.
| Name, brief description | Maximum load, kg/ Availability of linen box | Layout method, advantages or limitations |
| “Dolphin” - a simple pull-out unit with a sun lounger in a hidden drawer | 200/no | The secret drawer and additional section are pulled out using straps. The length is limited by their size, the mechanism is better suited for sofas and corner models than for regular chairs |
| “Eurobook” is a reliable and simple mechanism with durable wooden guides, a system of rollers and wheel supports in the front of the chair | 240/yes | The seat extends towards itself after removing the back cushions |
| “Tick-tock” - with smooth guides, holding 2 identical elements (back and base) | 240/yes | Easy movement up and forward, with the backrest lowering into the vacant space |
| “Telescope” - a roll-out or retractable design that folds 3 connected pillows forward | 180/linen compartment is allowed only on wide models | The front section rolls forward, the headrest rises from the backrest, and a seat cushion fits into the free space |
| “HODRY” – draw-out mechanism with electric drive | Up to 200/yes | Transformation is performed automatically after pressing a button on the remote control |
The above list is far from complete. When assembling a chair-bed with your own hands, you can safely use the Sedaflex, Mixotoil, Spartak, Puma, and Accordion systems. The main criteria when choosing are cost, the possibility of using a linen box, the height of the steel space, compliance with the selected dimensions of the furniture
You also need to pay attention to the admissibility of daily use (not all mechanisms are provided for, in some cases there is no need for frequent layout)
"Dolphin"
"Tick-tock"
"Eurobook"
"Telescope"
"HODRY"
Making a lift bed
A bed that can be folded saves a huge amount of space in the apartment.
Taking into account the measured data, a bed assembly diagram is drawn up.
How to make this design:
project preparation (drawing the drawings yourself or selecting the desired diagrams on the Internet, purchasing materials and tools); be sure to pay attention that there is a sufficient number of plates (lamellas); the bed frame is placed on reliable wooden beams; side markings are made; installation of the monolithic bed structure begins; a front panel is attached on top of the structure (this is the bottom - it can be covered with a laminated chipboard sheet); the bed frame is fixed to the wall; a lifting mechanism connects the body and the bed itself; We make boxes for clothes according to the drawing. The set of accessories depends on the selected product model
You need to think through everything in advance, make a list of necessary elements for assembling furniture
The set of accessories depends on the selected product model. You need to think through everything in advance, make a list of the necessary elements for assembling the furniture.
Labor costs
| № | Work stage | Number of hours |
| 1 | Assembling the vertical frame | 4 |
| 2 | Making a bed frame | 4 |
| 3 | Installation of lifting mechanisms | 3 |
| 4 | Total | 11 |
The assembly of the transformer bed cabinet was completed in 2 days.
This do-it-yourself scheme for assembling a bed cabinet will cost much less than ordering such furniture. To build such a simple but responsible structure yourself, you must have experience working with the above tool.
Tips for choosing
In order to engage in a hobby or work with comfort and pleasure, you need to consider several nuances when choosing furniture:
In spacious rooms, it is advisable to equip a permanent corner work area near the window. This arrangement has two significant advantages. Firstly, this is natural light, and secondly, the cutting corner table will take up a minimum of space. If you use heavy professional equipment in your work, it is recommended to choose a sewing table with reliable metal supports. In small apartments it is advisable to install compact and mobile transforming tables
IKEA offers a wide range of similar furniture, so setting up a work area anywhere is not difficult. It is important to consider the size of the sewing machine itself and the mobility of the design.
For spacious rooms, a large, massive table with a place for ironing would be an excellent solution.
For small rooms, you should choose the most compact models
Materials
As for the choice of materials, you can make a transformable bed on your own from:
- natural wood. This is the most expensive option. This product will delight owners with a long service life, beautiful texture, naturalness and environmental friendliness. But keep in mind, natural wood is quite difficult to work with. In addition to special equipment and tools, working with wood requires experience;
- Chipboard. This lumber attracts buyers with a wide range. Laminated chipboard has a rich color palette, various textures and textures. He is easy to work with. Laminated chipboard is suitable for those who have not previously had experience in making furniture;
- MDF. This material is environmentally friendly, easy to use, and durable. It is easy to process, and MDF furniture is aesthetically pleasing.
How to make a transforming sofa bed with your own hands
To create this sofa you will need the following tools:
- drill and various drills;
- hacksaw;
- screwdrivers;
- furniture nails (screws, self-tapping screws);
- tape measure and pencil;
- grinding materials.
Materials you will need:
- boards;
- plywood;
- hinges (or other mechanism);
- dye;
- varnish
It is necessary to select well-dried raw materials, otherwise the furniture parts may become deformed after assembly.
How to make a drawing of a transforming sofa bed with your own hands:
- the diagram must demonstrate the monolithic structure and each part separately, including the smallest elements;
- the correct drawing will make it possible to calculate the amount of material needed;
- It is also possible to find suitable projects on special resources on the Internet.
Drawings and diagrams must be made to a strict scale and clearly correspond to reality.
Installation is carried out as follows:
- We form a supporting structure from the boards and secure it with screws;
- we strengthen the box with transverse bars;
- we fix the casing at the end, and where the drawing suggests;
- attach the front pillar;
- We place a cross beam, focusing on this element, and attach an end board on top;
- we attach the plywood to the box (reinforce it with boards);
- We make a folding element from plywood, simply attach it to the end with a board;
- Now we connect the two parts with a lifting mechanism.
All dimensions should be clearly defined in advance.
Preparing tools
Before starting work, you should have the following tools on hand:
- construction tape;
- pencil;
- ruler;
- jigsaw or circular saw;
- pliers;
- fastening elements - bolts and European screws;
- sandpaper;
- building level;
- screwdriver.
Professional tools will help you quickly achieve excellent results.
It is recommended to use Euroscrews as the most reliable type of fastener with a screwdriver of the appropriate type.
Wardrobe bed
New!
Wardrobe-bed-sofa Blues
Dimensions: width 1520 mm, height 2140 mm, depth 1050 mm (depth 2140 when unfolded). The wardrobe, bed, sofa transformer, is a representative of the bedup furniture family, which is sold ready-made (you can choose the color of the fabric of the covers, the color of the chipboard and photo printing on the facades. The dimensions remain unchanged). Therefore, they have the best price in Moscow compared to their competitors. We produce them ourselves, so we can offer a 5% discount to everyone who comes to our salons. The lifting bed mechanism on gas elevators easily turns a sofa into a double bed. In production, high-quality chipboard and time-tested mechanisms are used.
A transformable wardrobe-bed with a sofa performs three functions in an apartment at once: it saves space, provides a sleeping place and a sofa for sitting during the day. Price: 61,493 rubles. Order
Wardrobe-bed No. 11664.
Dimensions: width 4180 mm, height 2500 mm, depth 600 mm (wardrobe bed in the center). Width: 1700 mm, height: 2500 mm, depth: 500-200 mm (cabinet on the left with a bevel). The following materials were used in production: the front part is sliding doors of the ARISTO aluminum system, French walnut. The body of the product is made of EGGER H1709 laminated chipboard, French walnut, PVC edge 2mm thick. in the color of chipboard, REHAU.
The wardrobe with built-in bed was custom made according to an individual design. There is a beautiful photo print on the front, and there is plenty of storage space in the closet that surrounds the lift-up bed. Price of the entire order including delivery and installation: 188,933 rubles. Order
Wardrobe bed No. 11495.
Dimensions: width 900 mm, height 1900 mm (bed). The wardrobe bed with frame measures 1050 mm in width, 2100 mm in height and 450 mm in depth. The following materials were used in the manufacture of the order: the cabinet body is made of EGGER H1215 laminated chipboard, brown Kasino Ash, framed with a 2mm PVC edge. H1599 Tyrolean Beech Chocolate. On the front of the bed, a combination of two colors of laminated chipboard N1215 Ash Kasino brown and U627 Avocado was used. The central part of the facade is made of ALU-STYLE champagne frame with an insert of FRIZZZ brown plexiglass.
In a small children's room it was necessary to fit a wall for a TV, a sleeping place, a folding sofa and a sports wall bars; only transformable furniture could cope with this, so a wardrobe-bed was made to order in the required dimensions. The cost of the order, including installation and delivery, was 118,630 rubles. Order
Wardrobe with beds No. 12239.
Dimensions: width 3660 mm, height 2550 mm, depth 600 mm (entire cabinet). The sleeping area of the beds is 800 mm by 1900 mm. The following materials were used in the manufacture of furniture: the furniture body is made of EGGER laminated chipboard ( color F509 Aluminum
), on the front of cabinets, drawers and mezzanine shelves, a combination of colors U527 Royal Blue, U321 Chinese Red and U630 Lime was used. On the facades of the folding beds there is a photo print of a geometric print in a similar color scheme to the previously described colors. The mezzanine shelves above the bed are raised using the Klock Wood mechanism (Hungary).
The furniture wall was made for two teenagers. Taking up little space, she provided two beds and plenty of shelves for storage. When unfolded, the wardrobe-bed is a comfortable sleeping place with an orthopedic mattress, in no way inferior to ordinary beds. Thanks to the metal structure of the base, the mattress does not sink like on beds with wooden ribs, which has a beneficial effect on the spine and allows you to completely relax and get a good night's sleep. The lifting mechanism is based on gas shock absorbers, which ensures noiselessness, lightness and smooth operation of the structure. Price for a wall with wardrobe beds: RUB 190,000. Order
What types are there?
What types of folding beds are there? There are no restrictions on typology; products can be structured according to the principle of utilitarianism:
- Single folding;
- Double or one and a half folding;
- Wardrobe bed with sliding doors;
- Double caterpillar bed (quite expensive foreign version);
- Bed-couch - narrowed type and others.
- playing sports;
- expand the nursery and provide children with space to play;
- equip a home office;
- seat guests at the party;
- put to bed relatives who came to visit;
- place a gym.
Criteria for choosing a good folding model:
- the bed must be compatible with standard mattress sizes;
- the depth should be equal to the depth of the cabinet, and the width should be equal to the width of the mattress;
- when disassembled, the bed should fit normally with the decor, interior of the house or apartment, and not block other types of furniture and the passage;
- the model should not have sharp dangerous corners that can cut or injure a person, as well as cracks, empty cavities where small animals or children can hide or accidentally get stuck;
- the operating mechanism or spring should not be located near the head of a sleeping person;
- prices for all materials and components should not be overpriced, humane - after all, we are also assembling such a bed for reasons of economy. If you can invest significantly in purchasing a good model, then there is no need for self-assembly.
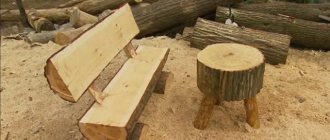
Building a classic version of a step stool
In order to make a transformable stepladder chair with your own hands exactly according to the drawings, you will need a minimum set of power tools:
- Jigsaw with a set of saws for wood;
- Manual electric router with 25 mm and 30 mm end mills;
- Drilling machine or drill with a device for precise vertical drilling;
- Polishing machine with wood attachment;
- Screwdriver;
- Set of carpentry clamps.
Since this design, in addition to the functions of a staircase, will also be used as a piece of furniture, it is best to choose a design with elements of carving and decor.
For the most part, a step stool will be used as a piece of furniture, so it makes sense to make it as beautiful and attractive as possible. In this case, decorative elements are practically not used; windows are made on the sidewalls in order to make the structure lighter and give it a more elegant look.
Structurally, each part of the step-chair consists of two sidewalls, between which four transverse steps are glued. One of the steps serves as a seat, the rest are used only for climbing stairs.
Initially, you will need to transfer the contours of the side posts of the stepladder chair to the boards. This can be done in two ways. In the first case, the contours are transferred by drawing lines using carbon paper. The second method allows you to do the work much faster - you can simply print out the outlines of the parts of the future step-chair and stick the paper on a wooden blank.
At the first stage, you need to make longitudinal grooves or cuts on each side of the large and small parts of the step stool, as in the photo. The grooves must be made for two reasons: firstly, they will be necessary for further processing of the workpieces. Secondly, the step boards will be inserted into the grooves. If you fasten the steps only with self-tapping screws, the rigidity of the step-chair will be very small, and the entire structure will quickly fall apart under the weight of a person.
Next, you need to make several through holes with a drill and cutter, preferably at the corner points of the internal contours. This must be done in order to be able to cut out selections along the openwork thread with a jigsaw.
Following the inner contours, we cut out the outer lines of the sidewalls in the same way. After all four sidewalls have been cut out, two for the larger part of the stepladder chair and two blanks for the smaller one, you will need to calibrate the dimensions, as in the video
https://youtube.com/watch?v=oQq1OMXHA1Q
To do this, two side blanks are folded in pairs and cut on a router. This allows you to make both elements of the step-chair absolutely identical in shape and size. At the same time, we remove chamfers and burrs, and treat the surface with a grinding and polishing attachment.
The steps for a stepladder chair are best made from oak boards, 15-20 mm thick. For the large swivel part of the chair, you will need to make three steps, all three of different sizes. For the smaller stationary part, you will need to cut two steps, also of different sizes. The step blanks, cut to size, are carefully glued to the sidewalls. To do this, you need to coat the gluing areas with wood glue or epoxy glue and insert the blanks into the grooves. To maintain the geometry of the step-chair, gluing is best done with fixation in carpentry clamps.
After the glue has dried, the steps of the step stool must be reinforced with carpentry screws. At this stage we have two small structures, one looks like a short chair, the second looks like a stool. To make a full-fledged folding stepladder out of them, you need to connect the two parts with a furniture or piano hinge.
Attention! To ensure that during use the vertical load on the step-chair does not deform or tear off the hinge fastening, special stop pins are used in the design.
The last element of the chair is the back. It must be made and a stepladder installed on the chair without fail. Otherwise, the front supports of the ladder will be unstable and will quickly fail.
The step-chair is almost ready for use; you need to finish the exterior with stain or varnish.
The result is a nice design that can not be hidden, but rather installed in the kitchen or hallway, where there is always work for such devices.
What you need for work
To quickly attach the lifting mechanisms, use a screwdriver.
They can be ordinary bolts or hidden decorative ones. However, there are lifting mechanisms on sale equipped with magnetic latches - they will prevent the bed from falling at an unexpected moment and will be securely hidden without disturbing the appearance of the structure.
The “handles” of the cabinet will help you pull out and install the transformer bed. Expensive purchased models come complete with a control panel.
The transformable bed with your own hands is almost ready. It's time for finishing. If the room already has furniture, then you can stylize the design to match the overall decor. However, in the era of combining incompatible things, you can try to create a unique style. For example, make the false doors and headboards of the bed leather, while the overall style of the room is high-tech, and glass and metal reign in it. It is also not uncommon to have completely glass doors - matte or transparent, or even mirrored surfaces, which creates a visual expansion of a small space.
You can make the overall structure, along with other items, perfectly glossy, reminiscent of expensive car enamel. To do this, all surfaces are sheathed with plasterboard, marked as gypsum board and having a thickness of no more than 1 cm.
After this, the surfaces are treated with epoxy putties, which make it possible to impart special strength to the coating. Then all roughness is smoothed out with fine sandpaper until it is completely smooth. Next, the entire area is covered with bright-colored automotive enamel. This bedroom looks very stylish and expensive. No one will guess what materials were used in the work.
The outer false panel is decorated to match the overall interior, for example, with a mirror.
Night lights and sconces can also be built into the overall structure of the bed - then you need to take care of installing the internal wiring hidden by the wall box, or they can be put on display - in the evening they will play the role of ordinary lighting fixtures. Small Velcro night lights are in demand - they will not interfere with the free movement of the bed, and they look stylish and romantic. They are readily installed in children's rooms - the star-shaped shapes help children fall asleep. They run on batteries, which is good because no wiring is required.
A transformable bed can be transformed not only into a closet, but also into a workplace, a sofa or something decorative. Or even everything taken together. This allows you to get a completely new interior every day. But such beds without carpentry skills are unlikely to be made by amateurs, but the idea can be adopted.
Step-by-step instructions on how to make a wardrobe bed with your own hands
After I brought home the materials and prepared the tools, I began to assemble the transformer bed cabinet with my own hands according to the drawings. The work was carried out in stages.
- On the wall I made markings with a pencil for the fastenings of the vertical furniture frame.
- At two points, I made holes in a concrete wall with a diameter of 10 mm and a depth of 120 mm using a hammer drill.
- Through the holes in the corners, I hammered 2 frame dowels into the wall.
- The vertical body box was assembled from the panels listed in the “Materials” chapter. I drilled holes in the ends and mating planes of the parts for installing confirmations.
- Having screwed in the confirmations, I installed the body in a vertical position.
- I secured the mounting angles screwed to the wall with screws.
- I assembled the bed frame, connecting the panels with confirmations.
- I attached the bottom-facade to the box with steel corners 50 x 50 mm on screws. The corners were placed in increments of 300 mm - 24 pcs.
- Using the markings, I drilled mounting holes in the sides of the box.
- After threading the bolts through the holes, I installed the right and left lifting mechanisms.
- The nuts were tightened with a head, having previously placed washers.
- Installed swivel legs in the rear panel.
- I inserted the front of the bed into the vertical part of the closet.
- The swing arms were secured with bolts inserted into pre-drilled holes in the side walls of the case.
- After making several test lifts and lowerings of the built-in part of the furniture, I tightened all the fastenings of the structure.
- To prevent the front of the bed closet from looking like a big empty plane, I attached a beautiful panel depicting an exotic landscape to it.
Creating a headboard
The headboard of the transforming wardrobe should be made of soft material, especially if the bed is intended for children. It is advisable to make soft not only the headboard, but also the lower part of the side walls of the frame. The simplest version of a soft headboard that you can make with your own hands is upholstery made of soft foam rubber. The role of foam rubber can also be performed by padding polyester.
How to make a headboard:
- Fold the softening material in several layers;
- This material must be covered with beautiful fabric with decorative elements or quilted seams;
- For ease of care, you can create a detachable hem with hidden zippers. It will be convenient to remove, wash and put on again;
- The height of the soft headboard should be at least 60-70 cm, and preferably about 1 m. This will provide soft upholstery under the back of the person sitting at the head of the bed. For the same reason, the same softening coating must be prepared for the side walls of the frame;
- The height of the foam cushion on the side walls of the frame should correspond to the height of the same padding at the headboard;
- The prepared covering can be attached to the frame or wall using screws and loops made of fabric (or elastic). If the cover is permanent, the back of the fabric cover may be stapled.
Sawing sheets Making holes for buttons
Gluing foam rubber Repairing upholstery
Collecting buttons
Furniture items
A few examples of furnishing a kitchen combined with a living room:
- 1. Sofa. It becomes an object that zones space. The sofa is placed with its back facing the place where food is prepared. In small rooms (less than 20 sq m) a corner is placed, which is placed against a wall installed perpendicular or parallel to the kitchen.
- 2. Set. According to designers, minimalist models without elaborate details look modern. The service, vases or glasses are placed on an open shelf. You can buy a fashionable display case for them. Furniture is placed near the wall. If the space is large (20 sq. m, 25 sq. m or 30 sq. m), then in the central part you can install an island, which also has sections for kitchen appliances.
- 3. Furniture set. The style should be combined with the design of both rooms. In small rooms, a compact table and chairs made of transparent material or painted in light colors look good. You can add a table with a round top to your living room interior. In spacious rooms, the kit is installed near the wall or in the central part. An elongated rectangular dining table would look good here.
Read here: Furniture for a bath in a relaxation room: ideas for arranging a bath and types of the best modern elements of a bath interior (110 photos)
Design
According to the type of design, a transformable bed can be:
- vertical. This product is a two-meter-long wardrobe, the head of which is fixed to the wall, and the sleeping place is hidden in the closet during the day;
- horizontal. Such models are equipped with a single bed attached to the wall on the side;
- roll-out These are the most common models in which the lower built-in part slides out and forms a spacious sleeping area. Such models are suitable for arranging children's rooms and adult bedrooms;
- lifting This product is equipped with a pneumatic mechanism that easily allows you to remove the bed into a niche in a wall or cabinet.
In addition, the transformable bed can be a folding pouf. That is, when folded, the product is a regular pouf, and when unfolded, it is a small sleeping place. Round transformable beds are also popular, ideal for small children. They are safe because they have no sharp corners.
Help: children's models are often equipped not only with a sleeping place, but also with a sofa, chest of drawers and a work desk.
If there are two children in a family, it is recommended to install a transformable bunk bed in the room. This design has one mechanism by which the product folds and unfolds.
As for additional features, transformable beds are unique and versatile:
- beds for adults can be transformed not only into wardrobes and sofas, but also tables, chests of drawers, closed shelves;
- children's models are equipped with: changing tables, chests of drawers, drawers. Such products can be supplemented with lighting or a canopy.
How to make a podium for a bed with your own hands
You can make drawings and diagrams, choose dimensions, create projects and sketches of a podium bed with your own hands. To make a structure, materials and tools are selected, the frame is assembled, sheathed, and a roll-out bed-shelf is made. For a standard room of at least 15 square meters. m., ceiling height is 2.5-2.9 meters, podium height is 45-55 cm. The sleeping place in the described model is rolled out on caster wheels.
It is advisable to double-check the results obtained several times to avoid annoying misunderstandings.
If you want the bed to be able to be pushed into the podium directly with the bed linen, do not forget to make a reserve in its height.
Selection of materials
The material used for making the frame is usually timber with a section of 40 by 40 mm. or 40 by 60 mm., with a total length of about 25 meters
It is important that the product is purchased dry, there are no falling knots or large irregularities. For cladding, wide boards made of natural wood (oak, pine, walnut, ash, larch, etc.) are purchased, less often - chipboard, MDF, plywood. As a rule, use a board or timber with a thickness of at least 40 mm
As a rule, a board or timber with a thickness of at least 40 mm is used.
The thickness of the material of the upper part is from 19 mm, the length is at least 250 cm, the total width is 200 cm. For the side parts you also need boards measuring 2500 by 600 by 22 mm. The amount of materials required for cladding is multiplied by two. To decorate the surface of the structure, use the same coating that is laid on the floor of the room - laminate, parquet board, carpet, linoleum.
When taking measurements, use the famous proverb “Measure twice, cut once.”
Additionally, they buy PVA glue, furniture wheels (rollers), wood varnish, dowels, screws, fabric and foam rubber for the mattress.
Required Tools
Tools for work will require a jigsaw, electric saw or hacksaw, hammer drill, screwdriver, milling and grinding machine, screwdriver, metal tape measure, pencil, ruler, brush, roller.
In order to make a pull-out bed step by step, make sure you have all the necessary tools in advance.
Assembling the podium frame
Assembling the frame begins with the installation of a supporting structure in the room, mounted along the wall. Markings are made on the floor, a timber frame is laid along the contour, having previously dismantled the plinth in order to install the frame close to the wall.
The first and most important stage in assembling a retractable podium bed is making the frame.
Afterwards, vertical support posts made of timber are installed on the frame - the distance between them depends on the expected load. The height of the supports depends on the thickness of the platform. Next, horizontal beams are installed. The entire frame is secured to the wall with dowels.
How to cover the podium frame
The frame is most often covered with MDF boards - they are cheaper than chipboard or natural wood, and the finished structure looks quite presentable. The material is cut into the required pieces, in accordance with the drawings, and carefully screwed onto the frame with self-tapping screws.
To prevent the podium from creaking, the ribs of the transverse boards can be covered with felt.
We make a pull-out bed for a podium
The bed, hidden in the podium, is a drawer on wheels - it is created separately. First, markings are made, then the base, lid, sides are cut out with a jigsaw, and all cuts are sanded. The sides are mounted to the floor of the podium, the flooring is attached on top, and stiffeners made of timber are installed along the edges.
If the size of the room allows you to implement an additional storage system on the podium, then you can add several drawers.
Next, assemble a lattice of slats on which the mattress will lie. The structure is varnished, dried, and installed on legs. Using a screwdriver, attach the front of the crib to the frame and screw on the wheels. Steps are made for high podiums. The top surface is sanded, painted, decorated with carpet, laminate, or natural veneer.
To equip a retractable structure, you need to purchase gel-based wheels in advance from a furniture store.
Making a pull-out bed at home is not difficult. For the interior of a small apartment with a cramped bedroom, this is the best solution. Ready-made step-by-step instructions can be found on the Internet and in magazines dedicated to interior design.
Bed dimensions
The folding bed model is selected depending on who will sleep on it. Married couples, children and teenagers, people of different builds and heights will need different designs.
Varieties of transforming structures of different sizes:
- single: 800…900 x 1900…2000 mm;
- one-and-a-half: 1200 x 1900...2000 mm;
- double: 1600…2200 x 2000 mm.
Single vertical bed-wardrobe
For small children, a sleeping place with dimensions of 700 x 1500 mm is enough. The height of the ceilings allows you to place beds in closets designed for tall people. The length of such structures can vary between 2000...2200 mm.
Multifunctional wardrobe-bed 6 in 1 with mirror, lighting, assembled shelf
Factory model options
The range of products offered by manufacturers allows you to choose the right design depending on your living conditions, family composition and personal preferences.
Table. Design options for wardrobe beds.
| Model | Description |
| Single built-in bed | This design allows one person to sleep comfortably. The width of the bed is 700 or 800 mm, length – 1900 or 2000 mm. In the upper part of the closet you can place, for example, bedding sets. The remaining space on the side is also used for storing things. The customer is offered a large selection of color solutions. If desired, you can order a mirror facade. The sleeping place is equipped with an orthopedic grill. |
| 3 in 1 design | This design combines a wardrobe with storage systems for things, equipment or books, a comfortable sleeping place for two people and a sofa that can be used after folding the bed. This option will fit perfectly into the interior of a living room or studio apartment. The structure is equipped with lighting (overhead and bedside), as well as USB sockets. The storage system is made from laminated chipboard. For upholstery of the sofa, you can choose several fabric options (flock, velor, jacquard, eco-leather, etc. The choice of colors for the facade is extensive. The package includes fittings: gas lifts, ball guides, shock absorbers and hinges. |
| Children's folding bed | A special feature of this design is the ability to use the folded piece of furniture as a table. This design is convenient for placement in a children's room, giving the younger generation the opportunity not only to rest comfortably at night, but also to do business during the daytime. The pneumatic folding system allows you to transform the bed with ease and without noise. |
Drawings of beds built into the closet
Design and individual components
Folding bed mechanism diagram
Transformation mechanism
Transformable bed-wardrobe
Double lift bed
Step-by-step diagram for assembling a transformer for a small apartment
Preparation
Having decided to make transformable furniture on your own, you need to think through everything carefully. You should start with:
- creating a detailed drawing;
- sizing;
- selection of materials;
- preparation of instruments;
- selection of colors and design.
Dimensions
The size of the bed is selected according to the free space of the room. If the room is spacious and bright, you can make fairly large furniture with a spacious double bed. For married couples, beds with sizes from 1600x2000 to 1800x2000 are suitable.
But for children, teenagers and single people, you can choose products with sizes from 1200x1900 to 1500x1900.
Advice. For small, cramped rooms, it is better to choose models with a horizontal bed position.
Drawing with dimensions
Creating a sketch is an important point in making furniture. You can do it yourself using a pencil, ruler and sheet, or you can order it from a special company, where they will make accurate calculations based on the model of the wardrobe-bed.
Advice. If you are good with a personal computer, you can download a special program for cutting furniture. She will create a competent and accurate drawing of all furniture elements.
If you use the services of professionals or a computer program, with the help of a well-drawn drawing it will be easier to assemble furniture on your own, since there will be no inaccuracies in the drawings. And if you do the calculations yourself, without having any skills in this area, you may encounter certain difficulties. For example, the dimensions of the parts and the like may not match.
Tools and materials
The preparatory stage of assembly includes the preparation of tools and materials. Most often, transformable furniture is made of natural wood or laminated chipboard. As for the array, it has the following qualities:
- naturalness;
- durability;
- resistance to mechanical damage.
LDSP is:
- durable and reliable;
- affordable;
- rich in interesting textures, textures and color schemes.
The tools you will need to prepare or purchase are:
- screwdriver;
- drill;
- electric jigsaw;
- roulette;
- furniture screws;
- self-tapping screws;
- grinding machine;
- hex keys;
- Screwdriver Set;
- folding mechanism and other accessories.
How to make it yourself at home?
After creating a drawing, purchasing consumables, and preparing tools, you can begin making furniture.
Some prefer to make parts with their own hands using an existing drawing and the necessary power tools. Others use the services of companies where they cut all the parts. The second option is more convenient.
After cutting and trimming the parts, all that is required of you is to drill holes in the right places and assemble the furniture in the correct order.
Assembling the wardrobe-bed is divided into certain stages:
- First, the cabinet body is assembled, in the middle of which the sleeping place will be hidden. Such a housing should consist of: a back wall, a plinth and a shelf for support. All parts must be fastened to each other with self-tapping screws at a distance of 25 cm from each other. The assembled cabinet body is installed in a previously prepared place.
- The next step is to install the assembled case in place and fix it to the wall.
- Now you can begin assembling the bed base. It consists of a frame with boards, and its height must clearly correspond to the size of the mattress.
- Now, after assembling all the other parts of the product, we firmly fix the base with the box using self-tapping screws.
- We attach the folding mechanism according to the instructions supplied by the manufacturer.
- The final stage of assembly is connecting the body with the remaining elements and installing the facade.
Important. Furniture must be placed on a perfectly flat surface
The base of the bed must strictly fit the dimensions of the assembled cabinet frame.
Installation of the facade is the final stage of decorating the wardrobe-bed. It is best to choose blank facades made of laminated chipboard.
To complete the assembly, the transformable wardrobe-bed can be equipped with shelves for books, racks and other elements.
That's the whole simple process of making a wardrobe bed with your own hands. Now you need to install a pre-purchased mattress and securely secure it with seat belts.
Important. Under no circumstances should mirrors be used on false doors. Since they are not designed for such loads and may crack over time.
Drawing up a drawing and cutting out parts
Making a wardrobe bed is impossible without a previously drawn drawing. It will become a kind of action plan and will help determine the consumption of materials. Without a detailed diagram, making a high-quality bed with your own hands is much more difficult than making one.
Standard double beds are made at home with the following parameters:
- 1.8 x 2 meters;
- 1715 x 2120 m;
- 2.04 x 2.20 meters;
- 1.731 × 2.02 m.
Single models of smaller sizes are mainly intended for children. It is not necessary to adhere to the specified dimensions. You can make a bed of any shape and size, depending on the size of the room and the availability of free space. It should be understood that using ready-made schemes in this case will not work. Meanwhile, self-drawn drawings must be done with millimeter precision.
If problems arise with the development of a drawing, it is better to seek help from specialists at this stage.
Once the pattern is ready, you can start cutting out the parts:
- Each of the elements of the future product must be depicted on sheets of wallpaper or whatman paper in exact accordance with the original size.
- Label all drawn details.
- Mark on the pictures the location of the fasteners for connection to other parts.
Pros and cons of a transforming sofa-wardrobe, construction and design
This work minimizes the risk of making mistakes when cutting wood panels. An error of a few millimeters will not allow you to make a wardrobe bed with your own hands as planned according to the drawing. As a result, you will have to buy new material and incur additional costs.
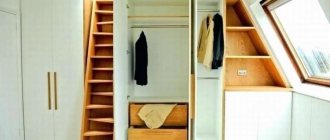
Installation of a cabinet model "pencil case"
Figure 2. Drawing of a wall with hangers for the hallway.
One of the main pieces of furniture that is ideal for a hallway is a pencil case. This is a tall wardrobe, quite narrow, it can only include horizontal shelves for storing things. The second option is a design that has a top shelf and drawers, and the main space is given to a hanging bar.
Usually cabinets are placed near large cabinets. Ideal sizes:
- height – 2000 mm;
- width – 400 mm;
- depth – 400 mm.
The cabinet can be divided into 2 compartments, with a partition in the center. In one part of it there is usually a row of horizontal shelves, and in the other there are hangers for clothes. First you need to assemble the body for the future cabinet. To do this, connect the bottom, 2 walls and the lid with furniture screws. A partition is installed immediately, as this will be problematic later. For additional fastening, wooden dowels are used; they are coated with glue.
The next step is to attach the back wall; furniture nails are used for installation. Next, markings are made for the shelves, holes are drilled for special fasteners, the shelves themselves are installed, and a bar is hung under the hangers. If necessary, drawers are installed. When the cabinet is completely assembled, the door hinges are fixed. To install them, holes are made with a milling cutter about half the size of the wood. When the cabinet is ready, handles, locks and other decorative fittings are attached.