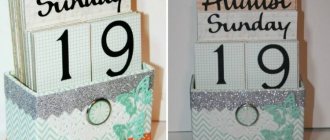
Almost everything is ready to celebrate your son or daughter’s first birthday. A plan for the event was thought out, a theme was invented and attributes were prepared to decorate the room. But how can we emphasize that this is the first anniversary? And not just a celebration dedicated to a child. Here the number 1 will come to the rescue. Moreover, it can be used in decoration in the most unexpected way. But large decorative numbers look especially interesting. We will teach you how to make a birthday card with your own hands.
When preparing for their baby's first birthday, parents try to think through everything down to the smallest detail. In this case, special attention is paid to the decoration of the room. On this day, everything should focus on the fact that the guests have gathered here for a reason. Therefore, the main attribute will be the number 1 for a year old, made with your own hands. What can you make a one-year unit from? There are many options for making figurines in the form of the number one to decorate the venue for a baby’s first birthday.
For this the following can be used:
- balloons;
- cardboard;
- corrugated paper;
- flowers;
- textile;
- napkins.
One for a boy for his first birthday
To make a one for a boy you need to take:
- corrugated paper;
- silicone glue;
- cardboard;
- double-sided tape. How to make the number 1 for a one-year-old child with your own hands. Step-by-step instructions for making corrugated paper,
- napkins.
Process of creation:
- Make a three-dimensional unit out of cardboard.
- Cover the finished figurine on all sides with blue corrugated paper.
- Cut out 5x5 cm squares from paper.
- Using a pencil, make a tube from each square, which you then glue to the number. Thus decorate the entire unit.
- Decorate the figurine with a bow tie, figurines of a car, airplane, or other decoration that the birthday boy will like.
Blank for small decoration
Food packaging produces small numbers. If you decide to use a box in which cornflakes, juice or milk were sold, then before starting the process of decorating the number, glue the surface of the base with a layer of papier-mâché so that the factory design is not visible. For pasting, take thick PVA glue and toilet paper (newspaper or plain thin paper). This will give the workpiece additional strength, because thin cardboard may swell and blur during operation. Another option is to simply choose foil-faced packaging. These produce many dairy products and juices.
Birthday item for a girl
You can decorate your little one's birthday suit with fabric to match her dress. To do this, you will need cardboard, fabric, a silicone glue gun, scissors, a pencil and a ruler. How to make the number 1 for a one-year-old child with your own hands. Step-by-step instructions from corrugated paper, napkins.
You need to do the numbers as follows:
- Make a unit template from cardboard.
- In order for the fabric to lay beautifully on the base, the width of the cut should be 3 times larger than the width of the number.
- The base of the figure is smeared with glue and, forming arbitrary folds on the fabric, it is glued to the figure.
- In this way, the entire front part of the figure should be decorated.
- After the front part is ready, the fabric is carefully wrapped and its edges are glued to the back of the figure.
Winter version of numbers for decoration
How to make a volumetric figure unusual? If you decide to decorate your house with a voluminous congratulatory inscription or the number of the coming year, you can decorate the decoration in the appropriate style. If your child's birthday falls in the winter, you can also use a New Year's theme.
In addition, pom-poms made of woolen threads are perfect for winter decorations. This figure will look cute and homey. The base is made from any convenient material: cardboard or foam. Wood is not suitable because such numbers are usually simply painted.
Pompoms can be made in different sizes from different colored threads. Very small pompoms can be made on a fork, and slightly larger ones can be made simply on your hands. Any size is available if you use the standard method: winding wool threads on a cardboard base circle. It's easier to make pompoms on your fingers. Simply wind the required amount of yarn on your fingers and then tie with a thread (optimal length 20-25 cm) between the middle and ring fingers. Remove the future pompom from your hand and fluff it up. To decorate a three-dimensional figure you will need a lot of such blanks.
Additionally, you can stick decorative snowflakes, sparkles, and beads on the figurine. If desired, you can sprinkle the numbers and letters with “snow”, which is made from white foam. To do this, you need to cut small pieces from the sheet (or take the waste that remains after making the number) and crumble them thoroughly. “Snow” is poured onto the adhesive base.
How to celebrate a child's first birthday
Decorating the nursery of a baby celebrating his first birthday is a responsible and exciting mission. It’s better to prepare everything in advance, so that when the birthday boy wakes up, he sees the updated environment: what decorations his parents made for him with their own hands for his one-year anniversary! Despite his tender age, the baby will understand that today is a special day. Decorating a 1st birthday with your own hands is impossible without balloons - a classic accompaniment to a children's party.
Use colored tulle stretched across the room's ceiling, paper pom-poms, or a spectacular rainbow on the wall made from crepe paper. All decorations should be large and safe for the birthday boy - he will probably want to touch them. Don’t forget to “mark” everything around with ones: balloons, birthday cake, invitations, treats, costume of the hero of the occasion. And disposable tableware, napkins and a tablecloth with appropriate “children’s” paraphernalia will add a special charm to the holiday.
Materials for production
If there is a very small baby in the house, and you have not yet got hold of office supplies, we advise you to immediately go to a craft store. Create a note in your phone so you don't forget the tools you need to purchase for a future craft:
- Cardboard The size of the cardboard depends on the size of the figure you are going to make. For a large number of numbers that are planned to be used as props for a photo shoot, it is better to prefer thick A4 cardboard. if you plan to make huge crafts, you will have to be creative and find large boxes of large household appliances. The easiest way to do this is to ask in the store: usually sellers are happy to give away unnecessary product packaging.
- Scissors Take comfortable scissors: when cutting cardboard, they should not rub the areas in contact with the skin.
- Corrugated paper If you don’t yet have a clear idea in your head of what your number should look like, take the colors that most appeal to you in the store. Otherwise, select the material according to your design.
- Twine Buy a couple of skeins of twine if the planned event will be held in a rustic style.
- Construction stapler A stapler will be needed when working with thick cardboard. Without it, creating three-dimensional figures will become almost impossible.
- Glue gun Needed for fastening parts
- Rulers, pencils, erasers Materials are needed for constructing and marking numbers on sheets of cardboard.
- Additional Materials Purchase additional materials as needed. These include: textiles, beads (beads), napkins and colored paper, knitting threads, tinsel.
How to make the number 1 for a one year old from napkins?
Before one year, your baby has already achieved a lot and accomplished a lot. For example, at three months he can hold his head, at six he can sit, and at nine months this “little miracle” takes his first steps! The joy of parents knows no bounds and, of course, they will want to capture these important events and leave them for a long, happy life. At such moments, parents will want to give their baby something special and beautiful. A popular decoration for the festive interior are voluminous products decorated with fluffy buds made from simple paper napkins. There are several options for decorating crafts with napkins.
An original birthday decoration in the form of a number is made on the basis of a frame made with your own hands from juice boxes. DIY birthday number.
Dessert
What's a holiday without sweets? If you present the birthday person with a cake in the form of a date, there will definitely be a lot of positive emotions. Such tasty numbers are usually ordered from pastry shops, but if you wish, you can bake them yourself. The main thing is to cut out the desired shape from the finished dough and decorate it as desired.
Any holiday, especially for children, is a sea of joy and positive emotions. Bright numbers will decorate the room and will be a good gift.
You can create this design yourself from inches of ribbon, paper balls or colorful leaves, sweets and flowers, or you can order it from an experienced craftsman. The result will always be excellent!
How to make flat and voluminous numbers for a boy
To make it you will need:
- 200 ml juice box;
- double sided tape;
- paper towels;
- PVA glue.
Strips of tape are applied to the wide sides of the boxes and connected to each other, creating the required shape. Then it is covered with 4-5 layers of paper towels, pieces of which are moistened in a mixture of glue and water, combined in a 1:1 ratio. Each layer is dried well for at least 5-6 hours. Flowers made from paper napkins are used to decorate the frame. Depending on the size of the base, 200-500 buds are made.
To work, you need to prepare the following materials and tools:
- napkins;
- stapler;
- scissors.
Multi-colored crafts look impressive. A standard napkin is folded into four without unfolding. The resulting square is fastened in the middle with a stapler and the corners are cut off, giving the workpiece a round shape. Each layer of the future flower is lifted up and pressed to the middle. A piece of double-sided tape is glued to the underside of each bud. The frame is covered with rows of buds, starting from its base. The finished product is decorated with rhinestones, ribbons, and butterflies.
From balloons
All children love balloons, so this figure will delight your little one. However, inflatable balloons are a universal thing for decorating a holiday for people of any age.
There are many ways to make a unit using balloons. We will look at several basic options that do not require special training.
Method 1
Action 1
First of all, we prepare everything necessary. We buy balls whose diameter does not exceed 10 - 15 cm. It is better to take balls of two or three colors, so the unit will turn out more beautiful. The approximate number of balls is 90 – 100 pcs. We will also need a transparent thread or fishing line to tie the balls together.
Act 2
We inflate all the balloons with a pump. An important condition is that all balls must be the same size. If they are different, the figure will turn out to be crooked.
Act 3
We tie together two balls of the same color. Then we make the same pair and tie the two pieces together with thread. You will get four connected balls.
This is one level, we will make 10 levels of one color for the base, and 15 levels of a different color for the vertical part and tail.
Act 4
We connect the base balls together using thread. You should get a voluminous rectangle. The levels must be fastened tightly; they should not move away from each other or have large gaps between them.
Action 5
We attach one level of a different color to the middle of the base. This will be the vertical part of the unit.
We connect the vertical levels to each other in the same way as the base. This will take 11 levels.
Action 6
We connect the remaining levels together, this will be the upper tail. Carefully attach it to a vertical surface so that it stands at an angle.
Action 7
The number is ready, if you have the desire and time, you can decorate it with balls of a different color.
How to organize a 1 year old child's birthday?
Parents want to celebrate their first birthday in a special way. To organize a great fun holiday, you need to prepare for a long time and not miss anything:
- Determine the venue: home, cafe, nature. Be sure to consider the child's needs. If it’s summer outside, then you can safely organize a holiday in nature. The child will walk outdoors with other children. And after the holiday, tired and full of emotions, go into a deep sleep;
- Determine the approximate time. With a small child this is quite a difficult task, because the schedule of a child under 1 year old changes very often;
- Determine your guest list. You should not invite people to the holiday that the child does not know at all. Children react differently to strangers. Let only the people closest to the child be on the guest list. It will be very good if you invite children;
- Determine for yourself how you see the upcoming holiday: a fun holiday exclusively for children, or you want to have fun for adults as well; At the celebration, every little detail will be thought out or decide to make do with a beautiful cake and balloons; Will there be a holiday theme? By answering these questions, you will know, you can create a clear preparation plan
- Choose an outfit for the birthday boy;
- Make or order invitations (optional);
- Make or order a book of wishes (not required, but will remain as a keepsake);
- Think about accessories for the holiday;
- Decide how you will decorate the room;
- Select suitable competitions;
- Think about what the holiday table will look like;
- Order a beautiful cake in advance;
- Print out the best photos of the first year of life.
IMPORTANT: Since the young mother has little free time, it is better to start all preparation 2 months before the event in order to gradually carry out each stage of preparation.
Not only practical, but also modern
In fact, three-dimensional wire crafts, in particular numbers, are becoming increasingly popular. You can use it to create Christmas decorations in the shape of stars, balls, etc., decorations for the garden or for flowers in pots, and they also make very beautiful wreaths: New Year’s wreaths from a Christmas tree, autumn and even summer wreaths from fresh flowers.
This is because it is the most flexible material and can be matched to any design. Glitter and sparkles attached with glue fit well on the wire. For wreaths, a special tape is used, which allows you to leave the base completely invisible. Well, matte wire goes well with thick threads of natural shades, with the help of which shape and accents are so often added. And the thread can be decorated with anything, paint and additional decorations are used, the same buttons, flowers, pine cones and beads.