Foil is a thin metallized "paper" that can be cut, folded and glued.
The ability to take different shapes without damaging the structure, a wide selection of colors and effects makes foil an excellent material for creativity.
With a minimum number of tools for work, it is easy to make things that will amaze children and adults with their brilliance and clarity of shape.
Icicle
If you have never used foil for crafts and are thinking about what kind of craft to make from foil, choose icicles.
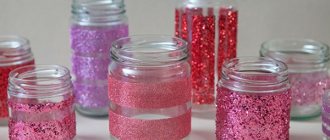
This craft is perfect for decorating a New Year tree or trees at the dacha in winter. Prepare:
- Aluminum foil;
- Scissors;
- Glue;
- Sequins;
- Paper clips.
Cut out long trapezoids from foil, 10-20 cm long. The top should be 2-4 cm less than the base of the figure. This is necessary so that when twisted you get a sharp icicle.
You just need to roll the workpiece between your palms and roll it into a thin cone. Then you can coat it with glue and sprinkle it with shiny sparkles. Attach a paper clip bent on one side to the wide part of the icicle; it will form a toy mount.
Butterfly
The butterfly craft is traditionally considered a creative task for little ones. In kindergartens they often make it with children. The teacher prepares in advance several foil strips, 25 cm long and 5-7 cm wide.
While working, the child practices twisting skills, which is very important for the development of fine motor skills.
Master Class:
- Twist the tubes from the strips with your fingers;
- Fold one tube in half, then in half again, twist it around its axis, this will be the body of an insect;
- Twist the remaining strips into thin tubes and wrap them around the body, retreating 2-2 cm from the body, forming wings.
The teacher helps the children create wings; this is not an easy task. The result is an elegant, airy butterfly, incredibly pleasing to its creator.
Snowflake
To continue the winter theme, you can make a snowflake out of foil. In addition to the main material, you need:
- Scissors;
- Thermocray;
- Pencil.
On a sheet of paper you need to draw 4 intersecting lines - markings for the future snowflake. You need to cut long strips of aluminum measuring 50 cm by 3-4 cm. The details of the craft are made using the quilling technique.
Each long strip needs to be wound around a pencil to form a spiral. The end of it needs to be secured with glue, and one end should be slightly flattened in the shape of a droplet. The finished modules need to be folded according to size and connected with hot glue.
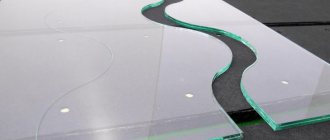
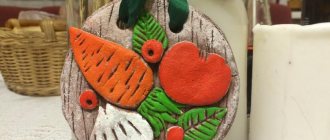
Imitation of coinage
Since foil is essentially a very thin metal, it makes a wonderful imitation of embossed paintings. To make one, take the basic material and additional consumables:
- Cardboard;
- PVA glue;
- Black shoe polish;
- Glue stick;
- Vatu.
Draw a picture on thick cardboard. Apply a layer of PVA to each line so that after drying, three-dimensional contours remain. Let the workpiece dry. Then you need to carefully coat the entire sheet with a glue stick and carefully glue the foil. It needs to be carefully smoothed with the wide surface of the nails.
Using a cotton swab, press down the foil so that it takes the shape of the glue lines on the cardboard. You can complement the picture with strokes made with a pen without a rod. The finished painting is coated with shoe polish to highlight the convex elements.
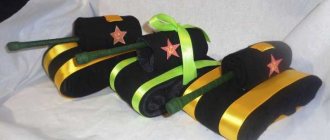
New Year's toys using the wrapping method
Foil is better suited than other materials for creating New Year's decorations. You can use any suitable shaped object and wrap it in foil. Decorating with metallic paper always creates a festive effect due to sparkles and silver texture.
Master class on creating a New Year's ball:
- Take a container from an empty kinder egg;
- “Pinch” a ribbon folded in half in it;
- Wrap the container in colored metallized paper.
The Christmas tree toy is ready. You can use your imagination or get ideas from a photo from the Internet and further decorate it with available materials.
In a similar way, you can give a second life to old New Year's balls that have lost their appeal.
Basket
You can make a silver basket from the same strands. The step-by-step instructions for completing the craft are as follows:
- Place the two strands crosswise and connect;
- Wrap the following pieces around the center of the basket, passing them either from below or from above the base cross;
- Weave the basket in a circle, giving it a shape;
- When you reach the desired height, attach additional strands to create braids.
- Use the braids to form the handle of the basket.
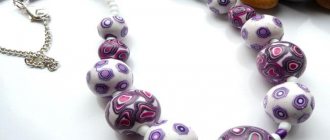
Rose
Making a rose is even easier than making a lily. To do this, you need to take a roll of culinary foil. You need to cut long strips from it, 3-4cm wide, the wider the stripes, the larger the flower you will get.
Next, the tape needs to be twisted into a loose roll around a handle or even a finger. One end of the spiral needs to be crumpled, connecting the edges. On the other side, the petals need to be bent slightly outward, like a real flower.
The leg can be made from wire, loosely wrapped in aluminum, or you can abandon it altogether and glue the roses onto a cardboard base to make a panel.
Multilayer models
- To make multi-layer butterflies on the wall with your own hands, you need to cut out several identical blanks using a stencil.
- Then put them together, glue or pin them together in the abdominal area.
- Bend the wings nicely.
- The abdomen can be decorated with beads.
- The blanks must be identical only in shape.
- If you use different elements in color and size, you will get an original three-dimensional butterfly.
- One of the folded silhouettes may well be openwork.
Snail
Kids will also love a simple shiny snail.
- Twist two eye balls;
- Wrap each of the balls in a strip of foil to create a stem with a ball at the end;
- Place the blanks together;
- Wrap them with another tourniquet from the end and not reaching a couple of centimeters to the eyes;
- Twist a thick rope, forming a spiral-house of a snail.
Fungus
A fungus can be made using the same wrapping method. As a base for the hat, you can use a large button, a spherical cap, half a plastic Kinder Surprise egg, or something similar. The part is located in the center of the foil and wrapped around it.
Wrapping the future hat
The excess foil is then rolled into a mushroom stalk.
Cooking the leg
For greater stability at the bottom, it is better to leave the leg thicker and flatten it in the middle. In addition, the cap can also be slightly dented inwards to make it look more like a real mushroom.
Foil mushroom
Shiny metal ball
This craft came to us from Japan. For it, in addition to baking foil, you need:
- Hammer;
- Sandpaper;
- Wet wipes.
From a metal sheet you need to fold a dense ball of the required size.
Next, this ball must be carefully tapped with a heavy hammer from all sides. Literally before your eyes it will become smooth and shiny.
To make the ball perfectly smooth, sand it to a mirror finish using sandpaper.
The finished ball can be used for decorative purposes or as an anti-stress toy.
Methods for attaching products to the wall
There are many options for attaching finished products to the wall. Of these, the following are distinguished:
- PVA glue. It should be used in cases where you do not need to maintain the beautiful appearance of the wall after removing the figures. You should not completely glue the moths, as this will reduce the volume and naturalness of the composition. It is best to attach only the middle of the moth and bend the wings slightly. With the slightest breeze or air conditioning, these figures will come to life and create the effect of movement.
- Styrofoam. It is glued to the moth and then to the wall.
- Double sided tape. One side of it is glued to the figure, and the other to the wall.
- Pin. This option is ideal if you are going to remove the composition over time. Pins will help prevent damage to the surface of the wallpaper.
When attaching cardboard figures , it is worth considering their heavy weight.
It doesn’t matter which of the described options you choose, the main thing is that the figurines made for decoration will add uniqueness and emphasize your individuality.
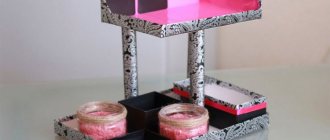
Candlestick
If you are an experienced crafter and you are no longer impressed with simple foil crafts for beginners, show your imagination and create a candle holder. You can make it from the metal flagella you already know.
The stand can be made in the form of a hollow cube, the walls of which can be made in the form of loose weaving like a basket or consist of spirals connected to each other.
The hanging candle holder for the “tablet candle” looks original. It is made from the base for a small round candle and chains. Each chain link is made from a rope.
Sheet Features
The foil has the following functionality:
- weightlessness;
- environmental safety;
- tightness;
- thermal stability;
- preservation of shape;
- anti-corrosion;
- opacity;
- food safety.
The excellent combination of properties of foil makes it a high-quality packaging material. Its application is realistic in a huge number of industries.
That is why foil is produced in different types: technical, food and tape and colors. Crafts made from colored foil are real masterpieces.
Easter decor
You can also make an Easter decoration from the baking sheet protector. More precisely, you can use it to decorate boiled eggs.
The egg needs to be wrapped in a round piece of foil, press it tightly and smooth the surface with your fingernail or the handle of a spoon or knife.
The elegant egg can be left silver or additionally decorated with paints.
If you put a chilled egg in foil, it will not only become festive, but will also stay fresh for much longer.
Homemade stylus
To make a stylus, remove the refill from the ballpoint pen.
Instead, insert a cotton swab from the outside; it needs to be cut to form a cotton “head” on a short plastic stem.
The handle needs to be wrapped with a piece of foil, but the cotton wool must remain outside.
Periodically moisten the cotton at the end and use the structure as a stylus.
Plaster protection
If you have a cast on your arm or leg, the foil will keep it from getting wet when it rains. Just wrap it in plaster and you can safely walk in any weather.
In the same way, the material protects anything from moisture. For example, a folder with documents that has nowhere to put it.
Unusual use
From foil you can make a lot of not only decorative crafts, but also unusual things.
For example, you can use a kitchen utensil to make a carnival dress or costume. To do this, just wrap yourself in the material and decorate the outfit as you wish.
If you take a pack of baking foil on a camping trip, you can use it to make a tent. To do this, it is enough to make a frame for the future shelter from branches and wrap it with thin metal sheets.
You can also use foil to update outdated furniture. To do this, glue is applied to it and a shiny coating is carefully glued on.
Foil not only helps in the kitchen, but also serves as an excellent material for various kinds of crafts. The finished products are quite durable, are not afraid of water and high temperatures, and weigh very little. These properties make foil an indispensable material for creativity.
Volumetric drawings
In addition to making objects, children may find the process of squeezing foil interesting. The simplest is to press the image of a coin. It is best to do this with a moistened cotton swab or cotton swab, then the foil will not tear. You can emboss both sides of a coin on the foil, then cut them out and glue them together to use for games.
Printed coin
Then you can start making completely independent relief pictures. First, the required design is applied to the paper and outlined with glue. For young children, a drawing can be prepared in advance by drawing with a pencil or printing it out.
We trace the contours with glue and wait for the glue to harden.
Then, when the glue has hardened, a sheet of foil is placed on top of the design and gradually pressed in using cotton wool or a napkin. As a napkin, it is better to use not a paper one, but a fabric one, like a miracle rag.
Gently crush the foil
You can also use ready-made three-dimensional plastic designs as a substrate.