Don't throw away boxes; craftsmen use them to create beautiful and functional objects. To make sure all tubes, lipsticks, and shadows can be easily found, there are special organizers on sale.
They are expensive, so it is better to make an organizer for cosmetics from boxes with your own hands. First of all, they think through all the details. There are many options for this product.
They create stationary models for home use. They are placed on the dressing table, bedside table, chest of drawers. You can opt for a wall-mounted version.
Craftswomen also create travel cases. They are made of fabric, so the products are easy to roll. This roll is ideal for travel. It takes up little space in your luggage.
Organizer made from boxes
The base of the product will be a simple box. It can accommodate many containers of different sizes. A DIY cardboard cosmetics organizer should be wrapped in paper. Glue or a stapler is suitable for these purposes.
Cups are made from dense material. You should measure the main container to calculate how many modules will fit in it. Each element is also covered with paper. Then they are all placed inside the base.
Assembly
First of all, I attached the zippered compartment to the main part. To do this, you need to attach each fabric (top and lining) from the uncovered side to the base side. This is done in the usual way (the base is placed in the middle between the lining and the top material and each part is tucked inward by one or one and a half centimeters). After the vertical connecting seam has been laid, it is necessary to sew on the edging. Iron the ribbon of your choice in half lengthwise. Then it is recommended to insert the product itself directly into this middle. Along the very edge of the border, carefully stitch the entire perimeter of the organizer. Process the junction of the edging manually, since it will be extremely difficult to do this accurately with a machine. Fold the tying ribbon in half and sew it halfway to one side of the product. Fold the finished organizer into a roll and secure it with a border or tape.
Cardboard tubes
After using cling film, cardboard tubes remain. They are suitable for creating an original product.
You can use toilet paper rolls. The bottom of any box will serve as the base. Cardboard tubes are placed in it, which are attached to the bottom of the container.
The box is covered with wallpaper and colored paper. It is decorated with rhinestones, ribbons, and other decor.
This option is great for storing paintbrushes, pencils, and brushes. For tubes, jars, and bottles, it is better to choose a different type of system.
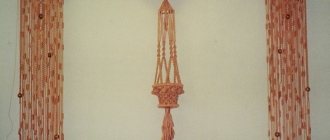
Wall organizer
It is made from thick fabric. To do this, you should provide many pockets for different products. This option will save space on the dressing table. It can be decorated to match the style of the interior of the room.
A DIY fabric cosmetics organizer will help you maintain order. Each tool will have its place.
Wall craft pockets come in different sizes depending on what item is being stored in them. The model looks original with elements from different fabrics.Master class furoshiki type pencil case
This technique can be used if:
And furoshiki has many advantages:
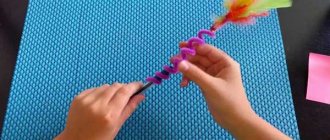
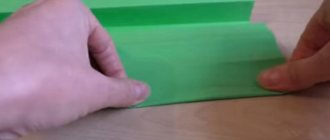
I only needed a scarf. I specifically chose one with a simple ornament so that everything I do would be more noticeable. You can choose fabric with a brighter design. What and how I made from it:
Such furoshiki can even be cut out of jeans. You just can't tie the corners. But putting elastic bands on the edges, in places where there are knots, is quite possible. You can't tie your hands either. They will need to be sewn. This fashionable stationery handbag looks very cool!
Tell us what you can make with your children. Share what you learn with your friends. And don't forget about subscribing. You have the opportunity not to miss a single topic!
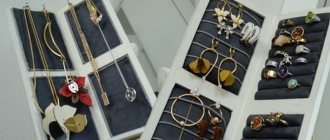
The unusual word organizer entered our lives not so long ago. This is a kind of module for storing things (most often of one type or type) in a certain order. Cells, compartments and pockets allow you to fold items for ease of use and storage.
The brush organizer is a very easy-to-use and easy-to-store case for your most important makeup tool. Finding such cases on sale is not so easy, especially if the brushes are of non-standard sizes. Therefore, I propose to sew an organizer for brushes with your own hands and with your own hands for brushes of the required size and quantity.
Travel case
It is convenient to store such a mobile product in a rolled up state. It will take up minimal space in your travel bag.
The organizer is used if necessary. The canvas with different pockets and sections is suitable for storing lipsticks, creams, powders and other products.
To get the job done, you should use step-by-step instructions for creating a do-it-yourself cosmetics organizer. For storage, the product is tied with a ribbon. At home it can be mounted on the wall.
The basis
In order to sew the base, you just need to combine two fabrics. We are talking about outer material and lining. Since there will still be a border on top, they can be connected at the top. But if you want the organizer to be neater, or decide to sew it without piping, place the top and lining right sides together. Sew them around the perimeter on three sides and then turn them inside out. Close the open side in the usual way, folding the fabric inward by a centimeter or one and a half.
Product made of fabric and cardboard
Textiles are used to sew a convenient storage system. You should place parts made of thick cardboard inside to give the organizer the desired shape.
Products are often complemented with pockets on the inside and outside. You should definitely decide what size the organizer for cosmetics you create yourself should be.
Then fabric and cardboard are selected. You can use a ready-made scheme developed by experienced craftsmen.Pocket with zipper
To simplify the work, I first started making the pocket with a zipper. To do this, I took four pieces (two tops and two linings) and carefully attached a zipper in the middle. This can be done with hand stitches or pins. The first side of the zipper should be sewn in the fastened position, the second side should be sewn in the way that is most convenient for you. Just make sure that there is no slight bend that will prevent the zipper from closing firmly. It is recommended to insert it using one of two methods. Or sew both sides (top and back) and then fold the sides under the bottom (about one centimeter) and stitch both fabrics at once. Alternatively, fold the top over the top of the zipper and the lining under the bottom (so the zipper is in the middle), and then join with a seam. Once the zipper is inserted, sew the bottom panels (with the top and lining) around the perimeter on three sides so as to leave an uncovered part that is supposed to be sewn to the main one.
If there is little snow, there will be no harvest: December 16 is Ivan the Silent Day
“We are still friends”: Derevianko commented on the breakup with his wife
It’s good to wash often: myths about shampoo and hair care that only harm
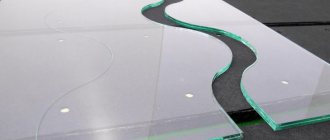
Plastic storage system
Make a model from office paper trays. The multi-tiered option will allow you to accommodate a lot of cosmetics.
Finding the right product will take a minimum of time if transparent plastic containers were used for the product. They are purchased at office supply stores.
Video instruction
Now you will see for yourself that making your own case for storing brushes is very simple. To make it stylish and reliable, you will need perseverance, accuracy and attention.
Tell me, maybe you do it differently? Then be sure to share my article on your favorite social network and tell us about your own method there. And in order not to miss other useful articles, subscribe to me and you will always be aware of fresh and useful ideas.
Source
Wooden model
They create durable and stylish organizers for storing cosmetics with their own hands from wood. This type of work requires certain skills and knowledge. But the result is worth it.
The result will be a system with many departments for storing all kinds of funds. The mini-dresser consists of a body, internal dividers and drawers.
The shape of the model and the number of departments are selected in accordance with personal preferences.
Cell Strip
I had a choice: make cells that consist of two layers of fabric, or leave them single. I chose the first option because it seemed more reliable and neat to me. To do this, I had to cut a piece of fabric that was twice the size of the planned strip for the cells. I folded it in half lengthwise with the right side facing in. After that, I stitched along the sides, then turned it inside out and ironed it so that the fold was on top. I sewed the lower uncovered part in the usual way (that is, I folded both sides of the fabric inward by a centimeter and stitched it on a machine). After that, I applied the strip to the base and temporarily secured it with pins on three sides (bottom and sides). In addition, I calculated the width of the cells I needed and outlined the vertical stripes using chalk. Pay attention to the diameter of your brushes. Mine are all different, that’s why my cells alternate (narrow with wide). Lay all the necessary seams along the pre-designated lines.
Smooth and fresh skin: dermaplaning, or why a woman needs to shave her face
A Brazilian travels 36 km by bike every day to take his loved one home.
A student at the Vietnam Police Academy shared how she takes care of her facial skin.