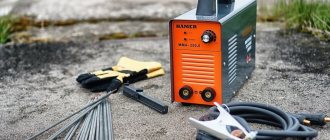
Today, with time constantly freed up due to increased technology, more and more people prefer to do everything with their own hands.
Today we will talk about how to make a welding machine with your own hands. Yes, it is possible to buy ready-made. But it’s much more interesting to create an inverter welding machine with your own hands. This will provide significant savings.
Types of welding
First you need to understand what kind of welding we are making the machine for. The following types of welding are distinguished:
- Electric arc;
- Microarc;
- Point pulse (contact);
- Gas.
Arc welding
It uses an industrial frequency of 50-60 hertz, as well as a direct current of 200 amperes. You can weld a fence, garage and other fairly serious structures.
Micro arc welding
Used when laying wiring, as well as when repairing it.
Spot pulse or resistance welding
Used in the manufacture of products from thin steel sheets.
Gas welding
It is such a serious process that there is no point in making such a device at home. It's easier and cheaper to buy it. Moreover, it is impossible to make gas cylinders for it at home.
Making a gas generator at home is dangerous; if something goes wrong, an explosion may occur.
Operating principle of the burner
The operation of a plasma welding and cutting apparatus (plasma cutter) is based on the use of plasma, the fourth state of matter, as a cutting or welding tool.
To obtain it, high temperature and gas under high pressure are required. When an electric arc is created between the anode and cathode of the burner, a temperature of several thousand degrees is maintained in it.
Plasma formation
If you pass a gas stream through an arc under such conditions, it will ionize, expand in volume several hundred times and heat up to a temperature of 20-30 thousand °C, turning into plasma. High temperature almost instantly melts any metal.
Unlike a cumulative projectile, the process of plasma formation in a plasmatron is adjustable.
The anode and cathode in a plasma cutter are located at a distance of several millimeters from each other. The oscillator generates a pulsed current of high magnitude and frequency, passes it between the anode and the cathode, which leads to the occurrence of an electric arc.
After this, gas is passed through the arc, which is ionized. Since everything happens in a closed chamber with one exit hole, the resulting plasma rushes out at tremendous speed.
At the output of the plasma cutter torch, it reaches a temperature of 30,000 ° and melts any metal. Before starting work, a ground wire is connected to the workpiece using a powerful clamp.
When the plasma reaches the workpiece, an electric current begins to flow through the mass cable and the plasma reaches maximum power. The current reaches 200-250 A. The anode-cathode circuit is broken using a relay.
cutting
When the main arc of the plasma cutter disappears, this circuit turns on again, preventing the plasma from disappearing.
Plasma plays the role of an electrode in electric arc welding; it conducts current and, due to its properties, creates an area of high temperature in the area of contact with the metal. The contact area between the plasma jet and the metal is small, the temperature is high, heating occurs very quickly, so there is virtually no stress or deformation of the workpiece.
The cut is smooth, thin and does not require further processing. Under the pressure of compressed air, which is used as a plasma working fluid, the liquid metal is blown out and a high-quality cut is obtained.
When using inert gases with a plasma cutter, you can carry out high-quality welding without the harmful effects of hydrogen.
How to quickly make a simple welding machine
You need to find a step-down transformer in your household. Power - 1 or 2 kW. If you find it, then the process was a success! The fact is that it is capable of lowering the voltage and serving to power a DC welding machine.
Even if the winding of your transformer has already completely failed, this does not mean that nothing will work. You can still build a working simple welding machine!
Homemade inverter from power supply
Specifications
The device that you can assemble according to the instructions given in the article belongs to the category of resonant ones. The maximum welding current is 120 Amps, the minimum is 5 Amps. Voltage – 90V. When welding with electrodes with a diameter of 2 mm, the machine works without the need for a break, and when working with 3 mm rods, 2 minutes of rest are required with a 10-minute welding cycle. But keep in mind that these numbers may vary depending on the temperature and humidity of the environment.
The weight of the device does not exceed 2 kilograms, so you can carry it without difficulty. There is a smooth adjustment of the current strength and a falling characteristic. Consists of 4 boards (main board, capacitor board, power board and control unit). From our experience, we can say that this device is excellent for simple country house and garage work.
Homemade inverter circuit
Required Parts
First, a little theory. Let’s say right away that making a welding machine from a computer power supply is not the best idea. An inverter and a power supply are two radically different devices. The power supply unit, of course, can be rebuilt to work as an inverter, but this is very difficult and the finished device will not be very efficient.
Therefore, we recommend using only the case itself from the power supply. Some parts can be found on the radio market, and the rest can be taken from an old PC.
Let's move on to the details themselves. We need a power transformer that can be assembled from three E42 type cores. We recommend installing them vertically. E42 cores can be obtained from an old monitor.
We also need a throttle. It can be assembled from two cores, which can also be found in an old computer monitor. The remaining cores are ferrite, type 2000 NM. Power transistors and diodes can be taken from the same monitor. You may have to buy a couple of transistors along the way, but they are very inexpensive. Also buy two electrolytes and a diode bridge.
Additionally, you will need a control power transformer, a PWM controller such as SG3524 and a relay from an unnecessary uninterruptible power supply, which is found in every computer.
Assembly Features
It is necessary to thread ferrite tubes onto the output wires to smooth out the shape of the sinusoidal rectified voltage. Such straws can be found in Samsung brand cash registers. There they are used as filters. In this case, the waves are smoothed out without problems if the inductance does not exceed 5 mkH.
The power part of such an inverter is rarely overloaded, and the arc length does not exceed 4 mm due to the low open circuit voltage (without voltage boost). You can add a voltage booster to the winding so that the arc is ignited without problems and burns steadily.
Current transformers must be connected only to the secondary winding, since in the primary the current is maximum and it flows only at the moment of resonance. are switched on in the secondary since the maximum current is in the primary winding.
Additionally, using a field-effect transistor type IRF510, you can make a manual start of the device and provide an anti-sticking function. The input of the “Shutdown” microcircuit must be broken using a transistor (in the event of a short circuit), a temperature sensor or a power switch.
The operating principle and detailed setup of this homemade inverter are described in great detail in the book “Inverter Made Simple,” which is easy to find on the Internet. Check it out for yourself.
Toroidal apparatus
It is much lighter than usual. It is convenient to carry. Such devices are used where the ability to quickly transport is important.
Whatever device you choose, in any case, make it yourself:
- Interesting;
- Practical;
- Economical.
And, of course, it’s always nice to show a homemade welding machine to your friends. It will become a source of pride and an indispensable assistant in the household.
Repairing a welding machine with your own hands is also quite exciting.
List of materials and tools
When carefully familiarizing yourself with the design of a welding machine operating on alternating current, you need to know that such samples have a primary winding of 220 volts, and on the secondary winding it drops to 50-60 volts, after which it goes to the electrode in contact with the workpiece.
Before you begin assembling the equipment, you should prepare or purchase the following items:
- Magnetic core.
- Cable for coil winding.
- Materials for insulating connections.
Experts consider the factory transformer to be the most versatile workpiece; some parts are perfect for making simple models yourself. We are talking about a magnetic circuit and a primary winding, but when such components are not available, the element must be created from scratch.


