A dressing room is better with it than without it! And it is true! When there is a separate place to store things, then you don’t have to run from room to room looking for clothes or a hat.
Probably the most convenient device for storing things is a dressing room. After all, it’s really great when all the details of the wardrobe are in one place and you can immediately assess how well the set you’ve just chosen fits together, rather than running from room to room - take it, try it on, look. Moreover, you can make a dressing room in a very small area: the minimum is 1.5-2 square meters. EVEN in a small apartment it is possible to fence off such space. Moreover, it has been noticed that it is more convenient to use them if the dressing room is assembled with your own hands. It's simple: no one knows your habits better than you and can put things in the right order. So, let’s start creating our own dressing room.
Wardrobe sizes
Our realities are such that most people live in small apartments, where every centimeter counts. Therefore, issues of size often play a decisive role. The smallest dressing room can have an area of 1.2 - 1.5 square meters. meters. It is a rectangle with sides 1.5 * 1 meter or so. Also, a small dressing room can be corner - this option is even more spacious than a rectangular one of similar size: with an equal area, the length of the sides on which shelves and storage systems can be placed will be greater.
Small dressing rooms: 1.5 by 2.5 m and 2 by 2 m
A rectangular mini-dressing room should have a width of at least 1.2 m when things are placed on one side, and at least 1.5 m when placed on both sides. The depth should be such that it is possible to “enter” there. This is what mainly distinguishes dressing rooms from sliding wardrobes, and also the ability to install any doors.
Choosing a pantsuit: tips
The following recommendations will help you invest your money profitably and not regret your purchase:
- The main sign of a comfortable pantsuit is that it matches the size of the wardrobe or closet.
- Some models are sold without frames and guides included; they will have to be purchased separately.
- Combined systems have additional compartments for storing accessories (ties, belts). For example, a retractable clothes holder from the Swedish company Pelly.
- The reason for refusing to purchase may be defects: a bent frame or uneven crossbars, nicks on the holders.
Lifehacks for long-term convenient use:
- If the edge of the holders is open, you can install silicone rings. They will not allow clothes to slip off.
- To securely hold things, a load of 15 to 20 kg is recommended.
- When installing, take into account the quality of the cabinet walls. If they are made of chipboard less than 2.5 cm thick, secure fixation is ensured using dowels for self-tapping screws.
- Suitable for storing not only trousers, but also skirts, scarves, and towels.
Ventilation and lighting
Even in mini-dressing rooms, and even more so in large ones, ventilation is necessary: in a closed room, a musty smell quickly appears, which no perfume can mask. Therefore, even when planning, find a way to make ventilation in the dressing room.
The principle of its design is no different: in the upper part of any of the walls, preferably further from the door, an exhaust hole is made into which a fan is inserted. The inflow is provided either into the gap under the doors or into special inlet openings located just above the floor level. They are closed with decorative grilles. The outlet of the ventilation duct should be into the general ventilation system; you can use plastic boxes to take it outside or under the roof of a private house. Air exchange organized in this way effectively maintains the normal state of things.
Principles for organizing ventilation of a dressing room through a bathroom
When choosing a fan, you should pay special attention to the noise level. Since dressing rooms are often located in or close to bedrooms, noise should be kept to a minimum. It can be controlled automatically or turned on/off using conventional or walk-through switches.
The lighting should be bright. Firstly, this is necessary to quickly find things, and secondly, dressing rooms are often used as fitting rooms to immediately see how well the selected items fit together. The mirror is usually placed on the door or mirrored doors are made. In this case, the light should be directed not only to the shelves and storage systems, but also to the fitting area.
One of the lamp options
You can use lamps of any type, but it makes sense to make them turn on from motion sensors. They opened the doors - the lamps came on, there was no movement, they turned off. There is another option for swing doors: there are lamps with buttons that light up when the door is opened and turn off when they are closed.
New life for PVC pipe scraps
It is necessary to connect pipe fragments using the same components as when installing a water supply system. In this way, you can make not only a hanger, but also any useful item that requires a frame (the finished frame of the structure can be sheathed with other materials to get a more functional product) - for example, a children's play tent or a clothes dryer.
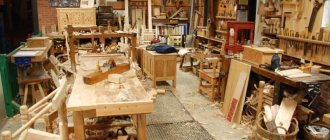
Making structures from PVC pipes is especially suitable for those craftsmen who do not have woodworking equipment - for such an interesting activity you only need a knife and glue. In this case, it is not at all necessary to use leftover materials - the required length and diameter of PVC pipes and components for them (elbows for connections, plugs) can be purchased at a hardware store at a very budget price.
Do not dispose of pipe scraps after repairs
Where to do
Even in small apartments there are “appendicitis” that cannot be used normally. This is where you can make a dressing room.
Another popular option is a pantry. In this case, everything is generally simple. You remove everything unnecessary, change the doors and install the appropriate content: racks, racks, baskets, shelves.
Dressing room from the pantry
If there is nothing like this in the apartment, they fence off part of the room - the end or the corner - you need to look at the layout. The good thing about a corner dressing room is that it allows you to use the most difficult areas to arrange, namely the corners. Especially if there are closely spaced doors in two adjacent walls. This zone is considered “dead”: you can’t put anything there except a small corner shelf: everything will get in the way. About the same option - two windows or a window and doors.
Corner dressing room
If the area turns out to be too small, it is possible to increase it a little, making the wall not flat, but with the middle extended slightly. This will not reduce the area of the room much, but much more things can fit.
A way to increase the area a little
They are also made on the loggia - by making part of the glazing opaque or by building a wall. Only here you can’t do without insulation - it’s unpleasant to wear cold clothes in winter.
Dressing room at the end of the balcony or loggia
The second option is suitable for wide loggias. In them, shelving can be placed along a long wall.
Option for using a balcony
In the corridor or hallway, a corner or “appendix” is also fenced off, if the layout allows. Here everyone can decide only by location: there is a place for this or not.
A dressing room is most appropriate in the bedroom. This is simply the best place to store things: in the sense that it’s more convenient to dress here. Therefore, for these purposes, part of the room is fenced off. In this case, a partition is needed and most often it is made of plasterboard. This technology has long been known and worked out to the smallest detail. It won’t take much time even if you have no experience: a maximum of two to three days for assembly and finishing.
If you make a partition from gypsum board or gypsum board according to all the rules, you will need double cladding, and this will “eat up” centimeters, or even meters, of area. Therefore, most often they are sheathed only on the outside, but in two sheets with overlapping seams. When assembling the frame, do not forget to make reinforced racks for fastening the door. With single cladding, exposed profiles remain inside, but it is convenient to hang shelves-baskets for things on them. If you plan to do this, then take them with a thick wall so that they can hold the weight properly.
Plasterboard partition for dressing room
The partition can also be made from laminated chipboard or OSB, or MDF board. This is an option for those who do not like to bother with putty. But you need to choose a lamination that will fit into the interior without any problems.
The interior design of a one-room apartment is described here.
Pipe connection methods
To make any structure from pipes, you need to know how to fasten parts. Sometimes polypropylene pipes are fixed to each other using a welding machine (if you don’t have one in your arsenal, you can try renting one). But not everyone can handle such a device, so you have to look for other ways to connect PVC pipes.
Table 2. Options for connecting plastic pipes
| Variant, illustration | A comment |
| This method involves connecting one end of the pipe to the other through an extension and a rubber seal. Despite the fact that formally the structure remains collapsible, it is undesirable to move the pipes after assembly because the connection is too rigid. Sometimes rubber seals are additionally coated with sealant to make the joint monolithic. | |
| This is the most popular way of connecting parts of a product to each other. For such purposes, only strong glue is used. It is best to use silicone sealants, as they give the structure some flexibility, and the pipes will not crack at the joints if moved awkwardly or dropped. |
Doors for dressing room
What’s great about a DIY dressing room is that you can install any kind of door: sliding, “compartment” type, accordion type, regular hinged, hinged on rollers. You can even get by without them at all. This option is called a wardrobe-rack, but then everything will have to be kept in perfect order: everything is in sight. The most budget option is thick curtains or something like a Japanese curtain.
Installation options for sliding sliding doors
If the front wall is large, part of it can be stationary, and part can be occupied by doors. In this case, you can also somehow use it on stationary walls. If desired, the doors can be made full width, or consisting of fragments.
Option for a dressing room in the attic: a side part with a low ceiling is occupied for it. Full-width doors make it easier to get to things
The design can be anything as long as it fits into the appearance of the room. If desired, they can be made to match the walls so that they are not visible, or they can be bright and conspicuous.
Advantages of using plastic pipes
Various designs made from PVC pipes have long been used in their projects by designers around the world. This is due to the fact that such material has a lot of positive qualities:
- Finished products have an aesthetic appearance. Snow-white designs fit especially well into a laconic interior in a minimalist style.
- This type of plastic is considered environmentally friendly and does not cause any harm to health (can be used in children's rooms).
- If any part of the structure cracks or becomes deformed, it will be easy to detach it and replace it with a new part. You can install another part or an entire block at any time to modify the product.
- The structure does not need to be painted, but if desired, you can cover the surface with acrylic paint, decorative varnish, or even spray paint it.
- Collapsible structures can be easily stored on mezzanines in the garage, and can be assembled if desired - for example, when guests arrive.
- Plastic does not deform under the influence of the sun and can withstand even high temperatures.
- The design has good strength and is difficult to damage.
- Thanks to the existence of pipes of various diameters and components for them, it is possible to create a product of any size.
- If you wish and have free time, you can make structures from plastic pipes not only for yourself, but also for sale.
- Low cost. You don’t have to spend a lot of money to purchase the material.
- Plastic pipes have good corrosion resistance and are not afraid of water.
PVC pipes do not lose their original appearance even after time
Table 1. Types of PVC pipe hangers
| Type | Description |
| One-piece | They are secured with strong glue, making the structure reliable (non-removable). |
| Collapsible | Fixed with rubber seals. Such products will be less durable, but they can be disassembled and reassembled at any time. At the same time, such hangers will be especially appreciated by those who like to travel, because the pipes are quickly assembled into a single product, similar to a construction set. The product can be transported to the country without any problems. |
PVC pipe hanger on wheels
Arrangement: filling and storage systems
If the area is limited, there is no point in making furniture from wood, MDF or chipboard into the wardrobe. They take up precious centimeters of space and also interfere with air movement. Another disadvantage is that redoing something is problematic.
“Standard” type furniture takes up too much space
Recently, the general trend is the installation of lightweight metal storage systems. They are modular and assembled on special racks. Racks can be attached in two ways - to the walls or to the ceiling and floor: different manufacturers make different systems. And everything that is needed is hung on these racks.
The racks can have notches along the entire length, which makes it possible to install any element at any height. These are the most mobile systems that can be modified easily and simply - simply by moving them from one row of notched hooks to another, arbitrarily changing the height of the shelves and baskets, and other elements.
Convenient modular system
There are racks of rectangular cross-section, with grooves cut on both sides. The necessary components are attached to the clamps in these grooves.
Different type of racks and different mounting system
Please note that there are different shelves and drawers - made of wood or wood materials, metal - chrome-plated or painted. They can be retractable, they can be placed one on top of the other or on shelves.
All these systems are sold: racks and a list of various components. But they are produced mainly in European countries, so the price is high. An economical option for dressing room equipment can be made independently from a round chrome-plated furniture pipe and various fasteners for it. It turns out that this furniture is not as mobile as we would like, but it costs significantly less.
Accessories for a wardrobe made of round furniture pipe
Devices for placing clothes
In addition to standard and not so standard drawers and shelves, there are interesting special options. For example - skirts or trousers. Special guides on which the transverse strips are attached, sometimes they have clips. They allow you to hang your skirts/pants straight and not be afraid that they will fall. It is convenient if such a hanger extends, allowing you to inspect all the contents.
One of the options for filling a dressing room is a bracket for skirts or trousers
This device can be replaced with a simpler one, but much cheaper - a hanger with crossbars located one below the other. It's not as convenient, but it allows you to organize your clothes just as well.
Budget option for hangers for trousers and skirts
There is a retractable design for ties, only it is usually oriented differently and extends out in length, although not everyone likes such a system, but prefers folded drawers into cells.
Tie devices
There are several ways to place hangers. The simplest are pipes, the more economical (in terms of space use, but not in terms of money) are tie-like retractable brackets.
Pull-out brackets for clothes hangers
Another device is a pantograph for clothing. This is also a pipe, but capable of descending. A kind of lift for clothes. This device allows you to use the space right up to the ceiling, without compromising your comfort. It can be attached either to the side walls (the more common option) or to the wall. There is a handle-bar attached in the middle of the pipe, by pulling which you lower it to a horizontal position. The carrying capacity of such devices is usually small (up to 18 kilograms), so they are used for lightweight clothing.
Furniture pantograph - for light (by weight) clothes
Shoe storage systems
Problems often arise with storing shoes: some people have dozens of pairs of them, so it’s time to arrange separate dressing rooms for them. But among the standard sets of equipment there are several interesting ones for storing shoes.
Let's start with the retractable system. IKEA has it. Pins with shoe modules mounted on a movable frame. Convenient, compact.
Retractable shoe system
There are mini chests of drawers that do not take up much space, but are hung on the walls, and there are hanging organizers that can be easily placed on a horizontal pipe.
Shoe storage systems in the dressing room These are mini chests of drawers on the wall
In general, there are many interesting ideas for shoes that allow you to place them compactly and at the same time conveniently. See photo:
Wheel for storing shoes. Rotating round cabinet. Great use of corner space
Such “rotating” drawers are very convenient not only for shoes, but also for small items and linen
The way to store boots is on hangers with clothespins Devices for compact shoe storage
Such systems are mounted on doors or walls
There are very inexpensive options. For example, the seasonal one, which is currently in use, can be stored on a grid with rearrangeable hooks or wire shelves. You've probably seen similar ones in stores. This is a mesh or perforated panel on which hooks/shelves are hung. Convenient: you can move it under any type of block, make the distance larger or smaller.
An economical option for storing shoes - a mesh with hooks and shelves
Hanging such a grid is not a problem - even on a wall, even on the side surface of a cabinet or door. Hooks and shelves simply cling to the crossbars. This option is ideal if you are short on money and space. If you like the idea but need something more presentable, make or find a perforated metal shield on the frame. Hooks are also inserted into it with a bang.
Modification - shield with hooks
In general, when arranging a dressing room and on a limited budget, you should look for storage systems not in furniture stores - online or offline. It’s better to look at sites that sell commercial equipment. There are many interesting devices that save space: stores also try to display the maximum amount of goods in a minimum area. For example, these are shoe racks.
Shoe stands
If you attach wheels to the first one, you get an excellent retractable system. The price of such equipment is much less than similar equipment, which is sold in furniture stores.
Coat hanger made of PVC pipes
In order to assemble such a simple structure from plastic pipes, you will need to prepare the following:
- Plastic pipe 2.5 meters long. The base of the entire structure will be made from it. The diameter of the pipes should be 2-2.5 centimeters. You can buy 200 centimeters of thick pipe and 50 centimeters of thinner pipe, which will give the finished structure an interesting look. Such pipes can be connected using adapters of suitable size.
- Bends with an even angle, the size of which must match the pipes.
- Connecting crosses needed to secure additional branches.
- Plastic pipe ends that are installed at the end, upon completion of the frame assembly.
- The cap needed for the top of the product.
- Soft fabric. If desired, it can be installed on the legs of the hanger so as not to damage the floor covering.
- Spray paint (any color). Of course, the product can be left snow-white, but some craftsmen prefer to paint the finished hanger structure.
- Scotch tape or glue. If you choose the first option, the structure will be less durable, but collapsible.
You can purchase colored pipes to skip the dyeing process
Important! During the work you will not need any specialized tools; you can get by with a regular hacksaw. In addition, coarse sandpaper is needed to sand the cuts.
The process of making a hanger
Table 3. Instructions for making a hanger from plastic pipes
Step two: collecting the crosspiece parts
First you need to prepare a convenient place for cutting pipes, and then make the following markings of the parts:
Then, according to the marks, you should cut the pipes into fragments using a hacksaw. The cut areas will need to be immediately treated with sandpaper, after which it is necessary to distribute all the parts by size for ease of further assembly. | |
| Two fragments 120 millimeters long must be inserted into one crosspiece for connection (into the holes on both sides). For greater reliability, the edges of the pipes must be treated with glue or wrapped with adhesive tape. Next, you need to make three more connections in the same way. | |
| Step Three: Connecting the Base | Then you will need to connect these fragments to get a hanger rack. To do this, two connections are placed in one row, and another one is installed in the middle, as shown in the photo. |
| Next, you need to make stable legs for the hanger. Round bends are installed on each side of the pipes, then caps are attached to them and pieces of soft fabric are glued exactly to size (so that the hanger does not scratch the floor). | |
Step Five: Adjusting the Base | Then the legs must be turned in the desired direction. In addition, you should trim the part that is in the middle and, if necessary, expand it, which will allow you to get a finished rack. |
| Step Six: Installing the Center Piece | The longest fragment (800 millimeters) must be connected to the central piece to form a leg for additional branches. |
Step seven: connecting the hanger | Then you will need to put the prepared cross onto the central pipe. It is worth noting that one of its openings should look down and the other should look up. |
| Step eight: connecting the branch | A piece of pipe 150 millimeters long should be attached to the hole on the side, and a rounded outlet should be fixed to it (end up), then closed with a plug. If you wish, you can not add this corner. |
Step Nine: Adjusting the Hanger | Next, you need to expand the branches to the sides - this will allow you to better distribute the total load on the frame. In addition, this arrangement gives the hanger a complete, aesthetic look. |
Step ten: installing plugs | It is necessary to attach the last fragment 100 millimeters long to the top of the pipe, and then put a cap on it. |
Step Eleven: Painting | At this stage, the structure is considered ready, but if desired, it can be painted in any color using special paint. Here you can use your imagination and paint the product with various patterns. You can stick strips of tape on the hanger, paint it, and remove them after drying. |
The only disadvantage of this design is poor stability, so if the hanger is not supposed to be disassembled, then you can pour sand into the pipes at the assembly stage, so that it will not fall under the load of clothes.
Video - Floor hanger made of pipes
Making a dressing room project
As you can see, there are a lot of ideas for equipment and storage systems. But so that it doesn’t turn out that the great thing you bought simply doesn’t fit into your wardrobe, you need to draw a plan on which to indicate all the dimensions and dimensions. It is drawn to scale, then you mark on it those parts that must be present. They are drawn to the same scale. If everything “fits in”, armed with the dimensions (you have them, or you can measure them in the drawing and, using the scale, calculate the real values), you can go to the store to choose systems.
There is another approach. Find out the dimensions of the devices and systems you like (installation dimensions), cut them out to scale from cardboard or thick paper and try to combine everything. If it works, great, you can buy it. No - look for other options. As a result of your efforts, you should end up with a layout approximately like the one in the photo.
An example of organizing space in a dressing room (indicating the minimum sizes for different types of clothing)
To make it convenient to use the equipment and get things out, you must maintain the following distances:
- minimum distance from shelf to shelf: when storing things - 30 cm;
- when storing shoes (without stilettos) - 20 cm;
- folded in half - 100 cm;
At the very top we reserve space for clothes from a different season or rarely used items. There is often space for a vacuum cleaner at the bottom, and a built-in ironing board is installed in one of the cabinets.
For those who like to work with their hands, here are several diagrams with dimensions so that you can equip your dressing room with your own hands (at least partially).
Drawing of a shoe rack with dimensions How to make shoe holders
Shoe storage system made of plastic pipes…
Planning space for things
A separate dressing room, planned taking into account the needs of the owners, helps not only to arrange things as comfortably as possible, but also saves space.
Before creating a room, you need to roughly imagine its dimensions. Then determine how many people it will be intended for. When the entire space belongs to one person, it is easier to plan a wardrobe, but if the room is owned by the whole family, then each member should have their own personal area.
If shoes do not fit on the lower shelves, then you can allocate a separate rack for them
You should determine what types of things will be located in the room:
- cloth;
- shoes;
- blankets and pillows;
- suitcases;
- bags;
- Sports Equipment;
- decorations.
Variations in the set of items depend on the size of the wardrobe.
The third step for planning involves sorting your things. It is necessary to determine which of them should be stored on hangers, and which will be sufficient to install shelves. Based on the data obtained, you can estimate the required number of shelves and hangers. A small reserve should be left for the possible appearance of new things in the wardrobe. In addition, you can take into account that the dressing room is not limited to rods and shelves. Can be added to existing systems:
- pantographs (bars with a mechanism that allows you to change their height);
- pull-out trouser hangers;
- drawers and shelves;
- boxes and baskets;
- shelves for storing shoes;
- hangers for ties, scarves, umbrellas, belts;
- compartment for ironing board;
- place for a mirror.
Measuring the length of hanging items allows you to understand what height of hangers you will need. But you can't base it on just one piece of clothing. If you focus on a single long dress when choosing the height of the shelves, then you can pack it in a case and throw it over a hanger and use the rest of the clothes as a basis for determining the size.
To determine the height of areas for clothes on hangers, you should use various items of clothing
Knowing the dimensions of the room and the approximate number of storage elements that are needed, you can begin to draw up a rough plan and draw a sketch. It is worth considering not only the possibility of placing clothes and accessories, but also the ease of use of the room, as well as zoning rules. They are simple, but allow you to rationally arrange your wardrobe. You need to start planning with the distribution of long clothes. It will require the installation of a barbell taking into account the length of the outfits. Afterwards it’s easier to arrange the rest of the hangers and shelves.
Things are placed according to the height according to the principle “both we wear and store”, that is, shoes are at the bottom, and hats are at the top. Clothes that are constantly worn must be placed in plain sight, that is, on rods or in the most accessible drawers. The upper part of the dressing room is a place to place things that are rarely used. This could be suitcases, bed linen, blankets and pillows, seasonal clothing.
You need to plan pull-out shelves in advance to provide space for them into which they will be pulled out. Usually, a space of 50 cm deep is left for this. A person also needs space to move between cabinets. Usually a 60 cm wide passage is sufficient.
You can get a rough idea of the size of the sections by looking at the image below.
The main priority when placing things should be ease of use of the cabinet
A dressing room is a useful and multifunctional room that is suitable both for storing clothes and for arranging various items. Before deciding to install it yourself, you should watch several training videos to take into account the features of the work. It is necessary to create a drawing that will allow you to accurately formulate an idea and think through ventilation and lighting. You need to use high-quality materials. A competent approach to creating a room guarantees a structure that will be of high quality, durability, can withstand heavy loads and will last for a long time.
- Author: CherryRain
Rate this article:
- 5
- 4
- 3
- 2
- 1
(0 votes, average: 0 out of 5) Share with your friends!
Useful tips for making crafts from plastic pipes
When making a structure, you must follow the advice of experienced specialists:
- The special glue used to join pipes is quite expensive. When you have to build a three-dimensional structure, you have to spend a lot of money. Therefore, it can be replaced with a conventional composition for attaching plastic - such glue is not inferior in strength, but at the same time has a budget cost.
- Despite the fact that most designs are quite primitive, it is recommended to first draw a drawing of the hanger. This will allow you to follow the instructions and not get confused in the details.
You can bend pipes using heat
Important! Before cutting a solid pipe into parts, it is necessary to double-check the correctness of the marks several times. Otherwise, you can only ruin the product.
Children's clothes hanger
Since modern plastic is not toxic, pipes can be used to make children's hangers. In addition, this design is quite compact, so you won’t have to spend a lot of time creating it, and it won’t take up extra space in the nursery.
To make a children's clothes hanger you will need the following:
- pipe with a diameter of 2 centimeters and a length of 125 centimeters;
- pipe with a diameter of 2.5 centimeters and a length of 260 centimeters;
- tees - 15 pieces (according to pipe diameters);
- plugs – 13 pieces;
- adapters – 2 pieces;
- turning corners – 2 pieces.
The process of making a hanger: step-by-step instructions
Step one: cut the pipes into fragments of the required sizes and prepare all the components.
Step two: arrange the parts in the exact assembly sequence. This will prevent you from losing sight of the desired fragment.
We arrange the parts of the hanger in the desired sequence
Step three: connect the parts of the future hanger to each other and, if necessary, secure with glue.
Connecting the top of the hanger
Step four: upon completion of fastening the individual parts of the structure, you will get a stand that can even support outerwear.
The baby hanger can be left unpainted because not all types of paint are considered safe.
Kinds
- Corner wardrobe. One of the ideal options for a small space. Most often it is a spacious corner cabinet with many compartments. Thanks to this shape, there is enough free space at the entrance, which is suitable for changing clothes and trying on.
- U-shaped. If the space you want to allocate for a dressing room is rectangular in shape, then this is an ideal option. Thanks to this arrangement of shelves, it will be convenient for you to move around inside the room, and clothes hung on both sides will always be in sight.
- In one line. This is an option for those who have very little wardrobe space. This is how you can convert your pantry. It differs from the previous version in that the shelves are located not on two sides, but only on one. Externally it resembles a wardrobe without sliding doors.
- Built-in. The most popular option because it is highly compact. There is no space between the ceiling and the floor, no gaps between the corners. Its only drawback is that it is unlikely to be dismantled when moving/
Implementation options
Any drawing is based on reality. Your reality is empty space. The smallest dressing room will require at least 1.5 square meters. m. Find this area, and we will tell you how best to use it.
There are 4 known types of dressing room arrangement:
Table 1. Types of dressing rooms.
| № | Name | Shelf arrangement | pros |
| 1 | Linear/one-sided | Along one wall | Space saving |
| 2 | Angular | Along the corner | Increased capacity in a small footprint |
| 3 | Parallel/two-way | Along two parallel walls | Increased capacity |
| 4 | U-shaped | Along three walls of a niche or room | Increased capacity, fitting room inside |
Each variety is best made from a specific room.
From the closet
The advantages of a dressing room in a pantry are significant:
- it does not take away living space;
- no materials needed for walls;
- allows you to position yourself in a U-shape;
- the door, sockets and ventilation are already installed.
If you live in a Khrushchev-era building with a small storage room, build a linear closet into it - and a cozy storage space is ready (photo 1). Choose sliding doors so that they are not in the way.
A great idea is to make a closet from a closet under the stairs in a private house or on the balcony in an apartment.
Storage system
In the bedroom
The idea of a dressing room in the bedroom will seem especially attractive to women.
Advantages:
- change clothes where you store clothes (and sometimes inside);
- store bedding next to the bed;
- don’t waste money on other chests of drawers in the room;
- Move your own clutter into your closet in a minute.
- If you get too tight, 3-5 square meters is enough. m. It is better to allocate 6–8 sq. m.
Corner wardrobes in the shape of a semicircle, trapezoid or triangle look good in the bedroom. They squeeze the most space out of empty corners, like in photo 2.
Round corner dressing room
You can store things in other conditions - when they are open. But you will always have to maintain order and be prepared for dust. Instead of a door to a dressing room, a curtain is also suitable.
A curtain separates the living area
In the corridor
Corridors and hallways often have an elongated shape, and professionals suggest installing a wardrobe system along a narrow wall. The dressing room in the hallway has its advantages:
- you save useful space;
- store outerwear and hats near the exit;
- store your shoes where you change shoes.
Built-in furniture
Experts suggest combining options. For example, place a closet for outerwear in the hallway, and make the main storage place with your own hands in the bedroom. Experiment!
Hanger from plastic pipes in 15 minutes
To make the structure you will need to prepare the following:
- PVC pipes 1.8 meters long and 20 millimeters in diameter - 4 pieces.
- Plugs – 8 pieces. They are installed at the ends of the pipes on each side.
- Durable fabric cord. It will be needed to connect the pipes together. For such purposes, you can use leather belts (depending on the interior design where you plan to place the hanger). The main thing is that the cord securely fixes the structure.
- Sand, which will be needed to fill the pipes.
- Paint for plastic. It is important to consider here that not every paint is suitable for painting such surfaces - choose quick-drying and non-caustic options.
- Adhesive tape. This will be required if you plan to paint sections of pipes in different colors.
The process of making a hanger: step-by-step instructions
Step one: first you need to put plugs on each side of the pipes, then carefully pour the required amount of sand into the cavity. After which the free sides should, as in the previous case, be closed with plugs.
It is enough to fill sand up to half the pipe
Step two: paint the pipes in the desired color. Of course, you can leave them in their original color, but in this case it will give the design some flair. First you need to paint the pipe from a spray can or with a brush in the chosen color and let it dry. This should be done carefully and preferably outdoors, because there is a risk of staining various objects in the apartment. If you want one pipe to be painted in two or more colors, mark the boundaries with masking tape.
Adhesive tape will allow you to make the borders of flowers even
Step three: form the frame of the hanger. Everything is very simple here - you just need to connect the pipes with a strong rope. The legs of the structure should be placed on different sides. The finished product looks like a wigwam.
To assemble the hanger, it is better to use a decorative thick cord
It is worth noting that this design is quite bulky, so it is unlikely to be suitable for a small room. In addition, it is more of a decorative element than a functional one.
Multi-level pipe hanger
In addition to simple options for creating hangers, there are also larger models. In this case, we are talking about a product that will accommodate the entire wardrobe of the average person.
During the manufacturing process you will need the following:
- plastic pipes with a diameter of 2.5 centimeters and length: 100 centimeters - 4 pieces, 65 centimeters - 2 pieces, 48 centimeters - 4 pieces, 20 centimeters - 6 pieces, 5 centimeters - 8 pieces;
- connecting crosspieces – 10 pieces;
- corners for tapping - 6 pieces;
- plastic panel for shelf;
- spray paint.
Manufacturing process: step-by-step instructions
Step one: you need to mark the length of the pipes and cut them with a pipe cutter or saw. Next, all the parts should be sorted to make it easier to assemble the structure.
For convenience, you can place sheets with written dimensions next to the pipes.
Step two: assembly should start from the bottom, similar to the previous options. It is necessary to attach crosspieces to the pipes, and rotating angles on them, until the base of the frame is formed.
Hanger with compartments for shoes
Step three: next you need to install the crosspieces on the longitudinal pipes, and then attach the transverse part to them, which will be the first level of the hanger. Then the longitudinal pipes are again installed on the crosspieces, and then the upper transverse one.
The hanger is quite durable
Step four: then you should install a plastic panel down, which will serve as a shelf for shoes and other items.
The panel can be cut to your size at a hardware store
Step five: at the end the structure can be painted, but this step, as in previous cases, is not mandatory.
When spray painting a hanger, be sure to wear gloves.
Over time, the paint may fade a little and lose its original appearance. Therefore, it is recommended to periodically touch up the hanger using aerosol paint. This way the product will always look neat.
Kinds
Depending on the type of structure, the filling for dressing rooms can be:
- cabinet - made of wooden panels;
- mesh - the fillers are mesh baskets;
- loft systems made of aluminum.
There are a lot of ways to fill dressing rooms and they depend only on the size of the budget. These can be either self-designed racks, rods with plastic drawers, baskets, or expensive natural wood facades with glass front panels and drawers.
Options for filling wardrobes can be combined in different ways: wooden shelves with mesh baskets, metal racks and closed wooden drawers. The main thing is that the chosen system for the dressing room makes it easy to maintain order, provides a clear overview, and quick access to things.
Corpus
Loft
Mesh
Hull
Frame systems are fixed structures and include corner elements. All elements of such a dressing room are rigidly connected to each other and securely attached to the walls. If you want to change something in the location, it will be somewhat difficult to do this
Therefore, when choosing traditional systems, you should pay special attention to planning the room, think through every little detail
Mesh
Such structures are also called cellular structures. The principle of the device: metal mesh shelves are hung on vertical slats attached to the walls, equipped with special mounting holes, and rods are attached. Instead of wooden boxes, mesh baskets are installed on the grids. The main advantage of mesh systems is visibility and transparency. When entering the dressing room, you don’t need to open the drawers yet, everything is immediately visible - where and what is stored.
The second important advantage is mobility: shelves and drawers are easy to hang and rearrange. Therefore, this storage organization option will really appeal to those who like to optimize space through changes and rearrangements. IKEA and Elfa have a wide selection of such designs; they are easy and quick to assemble using improvised means.
One of the disadvantages is that all the parts are presented in strictly defined sizes: the depth of the shelves is 30, 40, 50 centimeters, the baskets are 45 centimeters in size. Also, those who love sophisticated design may not quite like the simplicity of the honeycomb filling. Typically, all parts of mesh structures are made of white or silver metal. When purchasing, you should choose models without unevenness, roughness, or protruding parts that things can cling to or tear.
Loft
The name of the structure comes from the word loft - this is the architectural style of former factory buildings converted into residential premises. It is characterized by an abundance of space and metal parts. By choosing the filling for a room in this style, you will visually expand the room and make it very modern and ergonomic. The structures are represented by metal racks connecting the ceiling and floor, or the upper racks are fastened directly to the walls in the shape of the letter L.
The rods themselves, shelves, shoe racks, and drawers are attached to the racks. This option is also suitable for various rearrangements, but not independently, but with the use of special tools. Not everyone may like to store things so openly, unprotected from dust, but this arrangement option is the most conducive to ideal order. Any boxes or baskets can be installed here: made of plastic, wood, wicker materials. The convenience of the loft system is that it is easy to install modules of various configurations, even the most non-standard shapes.