Every welder knows that the strength of the welding joint directly depends on the chemical reactions occurring in the molten metal. Therefore, it is necessary to carefully monitor what does end up in the reaction zone.
One of these unfavorable substances is water. It dissociates at high temperatures into oxygen, which oxidizes the metal, and hydrogen, which causes the metal to boil and form pores.
All this crap gets into the welding zone from rust, wet coating of the electrode and air. And if you can easily fight rust with a brush, with air using the gas-forming components of the coating, then moisture from the coating can only be removed by annealing in an oven for several hours. Not everyone has such a stove. Therefore, electrodes must be stored in a dry place.
Now, with a clear understanding of the situation, let's begin making a sealed container for storing welding electrodes from what is left after the repair.
The manufacturing process takes (subject to the availability of materials) about fifteen minutes.
We will need:
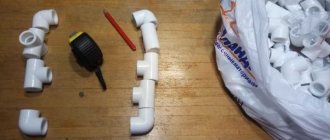
- Sewer pipe Ø110 x 400mm (adjusted to the length of the electrode)
- Plug Ø110
- A piece of plastic
- Glue gun
We mark a circle of slightly larger diameter on a sheet of plastic.
Then we cut out our workpiece with a jigsaw.
Now use a glue gun to secure the circle, forming the bottom of the container.
The tightness is ensured by a rubber gasket inside the pipe.
We close the cap and take it to storage.
In total, in just fifteen minutes, we made a reliable sealed container from the remnants after the repair and protected our electrodes from moisture.
Source: mozgochiny.ru
Why is it needed?
The coating of the electrodes absorbs moisture during storage . Technologically, it is a flux that affects the creation of a weld pool, the continuity of the seam and the cooling rate of the welded metal. Raw electrodes during welding are immediately visible:
- a lot of splashes are generated;
- the arc constantly goes out;
- The slag layer covers the seam unevenly and does not come off well.
Additionally, air bubbles form inside the seam, and some of the flux remains that does not float to the top. All these defects impair the strength and quality of the seam and make it unusable.
During mandatory calcination, moisture is removed from the electrodes . Furnaces that heat up to 400⁰C are usually stationary and located away from the welding stations. They are not sealed and cool down after switching off; moist air from outside enters them.
To keep consumables dry, welders use a pencil case for electrodes. It provides several operational advantages:
- easy to carry and always at hand;
- When transported over any distance, the electrodes remain dry;
- heating from the network and welder up to 110⁰C and above;
- eliminates re-calcination of unused materials.
When working on the road, such as repair crews, the welder does not know exactly how many electrodes he will need. It may be away from the oven for several days. Consumables are kept dry and heated by connecting a thermal case for electrodes to a 220V network and current from the welding machine.
Making homemade goods
First of all, take the pipe and mark the length of the electrode on it! This needs to be done from the exit side - that is, not where the pipes are connected, so even segments will do!
We cut the pipe according to the mark: it is advisable to do it as straight as possible! I cut it with a hacksaw and then straightened the edges with a sander - it turned out no worse than from the factory!
We cut the plastic bottle in half: it is desirable that it has smooth walls, without any relief patterns.
We take silicone sealant and, without sparing, apply it first to one edge and then to the other. The sealant should be evenly distributed over the surface using your finger.
We place the neck and bottom of the bottle on the pipe one by one and carefully seat the plastic with a construction hairdryer.
As the sealant shrinks, it will be evenly distributed over the surface and, after hardening, will create an airtight seal. Therefore, it is better not to skimp on the sealant: I applied too little of it, and gaps formed at the joint - I had to redo everything!
It is very convenient to store electrodes in such a tube: it is not at all afraid of even complete immersion in water, since it is completely sealed! It easily fits a standard pack of electrodes, and even has some left over!
Video of the homemade making process:
Source
Design and functionality
The case for calcining electrodes has a rectangular shape. The dimensions depend on the volume of the electrodes to be accommodated; for household devices it is approximately 150x170x600 mm. The pencil case consists of:
- frame;
- camera;
- a heating element;
- electrical insulation;
- thermal insulation;
- front cover for loading the camera;
- back cover and heating control unit;
- wires.
Before drying the calcined electrodes, they are placed in the chamber and tightly closed with a lid. Then, on the reverse side, the wires are connected to the power source. The heating element is turned on - a spiral wrapping around the outside of the chamber.
The heating element raises the temperature inside the device to 110⁰C. This is enough for the moisture to evaporate. After 2 hours you can start working.
In a home workshop, with a small amount of welding work, they use covers for electrodes that have a plastic sealed housing . They retain the heat of hot objects placed inside and do not let air through. The coated rods cool for several hours, remaining hermetically sealed.
Sealed tube for electrodes with moisture protection
I weld with electric welding quite often, and sometimes I have to do it in rather damp conditions. It often happens that the electrodes get wet, since their packs are mostly paper. To avoid such unpleasant situations, I decided to make a simple tube that will not be afraid of moisture!
To make a tube you will need:
- Plastic bottle with a wide neck, volume - 0.5 l
- Sewer pipe ∅50 mm (used)
- Silicone sealant (preferably aquarium sealant)
- Construction hair dryer and auxiliary tools
Exploitation
The instructions for proper operation of the equipment recommend taking out the electrodes while hot after calcination is completed and placing them inside the thermal case. Inside the chamber they will be inaccessible to moisture. They can be moved long distances and stored for a long time.
Before drying the welding electrodes, the device is installed on a special leg . Select the method of connecting to power. The plug is plugged into a power outlet. The two wires are connected to the cables going to the holder and clamp on the part.
The thermal pen is turned on in advance so that the camera has time to warm up. After about 30 minutes, you can open the front cover, take the electrode and start working. The pencil case should be kept closed to dry remaining materials.
Main stages of work
At the next stage, we make markings and drill two holes in two covers at some distance from each other.
We connect the covers together using a bolt and nut (we insert the bolt into the central hole). Screw the neck of the bottle into the cap.
Next, cut a piece of plastic pipe of the required length so that the electrodes fit inside. Both necks must be put on the pipe. The homemade product is ready.
This tube can also be used to store and carry drills or long pins.
For details on how to make a tube for electrodes from PVC pipes and plastic bottles, see the video below. The review was prepared based on a video from the LaKema YouTube channel.
Source
Calcination and drying at home
Hobbyists are interested in how to dry electrodes at home if there are no special ovens. To do this, use conventional ovens in which pies are baked.
- Unpack the electrodes and take the amount needed for work.
- Place in the oven. It is advisable to use a lattice rather than a sheet.
- Turn on intense all-round heating.
- Set the temperature to more than 200⁰, which can be obtained in this oven model.
- Leave for 2 hours.
- Transfer to a thermal case.
The oven used is electric. When burning, a gas wick releases soot, moisture and other substances that settle on the coating and worsen its properties.
Drying electrodes at home can be done using a thermal pencil case. You need to take your passport and look at the maximum heating temperature. Then check the table on the electrode packaging. It depends on the material of the rod. Heat the chamber to maximum, after 2 hours switch to 110⁰. This temperature is enough to dry the electrodes.
Some craftsmen who do a lot of welding recommend simply placing the electrodes in a pack on a heating radiator. They claim that the coating completely dries within a few days. For simple structures that do not require particularly strong seams, this method may be suitable.
Proper heating is carried out at temperatures above 100⁰ so that the water evaporates . The amount of air should be small with a minimum moisture content.
Making a pencil case for electrodes with your own hands does not seem difficult. It looks like a small muffle furnace. Mineral wool or asbestos pipe is used as a heat insulator.
The chamber is made of a stainless steel sheet 2 mm thick. The top is covered with insulating fabric. Then the spiral is wound. A fire hose can be used as a material for the camera. It can withstand temperatures up to 200⁰C, is impervious to moisture and is made of electrically insulating fabric. The ends of the spiral are brought back and everything is covered with mineral wool.
The body can be made from a metal sheet, using the remains of a laminated roof and metal profiles. It is divided into 2 parts. The front one is large and accommodates a thermal chamber. There is a small space at the back for installing the switch and wiring. A handle is attached to the top for moving. A bracket is mounted in front - a stop.
The camera wrapped in mineral wool is placed in the housing and secured. The lid is double, inside there is a layer of heat insulation.
It is difficult to heat electrodes in a homemade chamber. It is used more like a dryer .
Tube for electrodes from a sewer pipe
Authorization on the site
How to make a pencil case or tube for electrodes and not only from scraps of plastic pipe with your own hands.
Hello to all DIY lovers!
In today’s article I want to show one of the options for making a pencil case (tube) for various long objects. In such a pencil case you can store electrodes (in fact, it was made for them), and if you make it a little shorter, you can store drills, drills, pins, and so on. The advantage of storing electrodes this way is that, unlike a cardboard box, they will not get damp in a plastic case, even if they get exposed to rain (dampness greatly affects the quality of the electrodes), also in such a tube, due to the fact that there is It has a handle, it’s easy to carry, and most importantly, it’s very easy to make it with your own hands, literally from scrap materials.
Popular models
The main characteristics of the thermal pencil case are determined by the model designation. The first letters TP stand for thermal pencil case, PE stands for electric pencil case. The number behind them indicates the maximum load weight. The temperature that the equipment can reach is written through a fraction.
Hobbyists and welders in small workshops often use TP5/150. The chamber volume is enough to carry out repair work in the field and welding at home. A temperature of 150⁰ is suitable for drying electrodes stored for a long time . Connects to a 220V network and a welding machine.
The fully loaded weight of 10 kg makes it easy to carry in your hands. The reverse side of the rotary handle serves as stops in the working position.
Powered by a welding machine. The body can be metal or fiberglass. Designed for stationary posts. It has good thermal insulation. The electrodes remain hot for a long time when the heating elements are turned off.
The model has a round shape. Connects to the network and device. Often used by repair teams. The maximum weight of a loaded pencil case is 10 kg.
A chamber with 2 compartments is convenient for carrying out diverse work using materials of different brands. Easily transported from place to place.
Professional equipment with devices for automatically maintaining and adjusting temperature . It is mainly used in production with stationary welding stations. With the Thermopenal weighing 9 kg, it can be loaded with electrodes up to 10 kg.
Tube for electrodes
#1 7 Yuri
I’ll lay out three tubes, I don’t know about you, but I quite like the idea of a plastic sewer under the tube, the main thing is that it’s not plastic but polypropylene.
The easiest way to make a tube for electrodes: Take a sewer pipe (polypropylene) and close the end with a plug for a sewer pipe, this is the bottom, cut the length of the pipe so that the electrode sticks out of the pipe by 2-3 centimeters. In order to make a plug, you take a coupling (channel pipe) and close it at the end with a plug, and there you have it. I removed the rubber seal from the end of the plug (coupling) because closing, closing, and then opening is already a problem, for this I remove the seal, then when you close the tube with a plug, a vacuum is created that prevents you from opening and closing normally, for this purpose there is a plug in the side , I drilled a hole about 3-4 mm. under the plug itself. That's all the wisdom :-) you can cut a mat out of thick rubber on the bottom and into a cork on top.
Recommendations
Comments 37
I have 2 pencil cases) one is from a container of polyurethane foam, in it I carry eyelets (for potholders) and a cleaver with a square, and the second for wands) is the plastic one in which they are sold)
wheels are missing
I cook a lot, but I haven’t even thought about such a coffin... A leather quiver for 1 kg of electrodes is enough for my eyes. And then for working at heights, so as not to jump after them. In all other situevins there is one in the holder and 2-3 pieces in the hand, the rest is nearby in a pack.
if you do, then use a sealed box (as much as possible). Otherwise, they get damp
