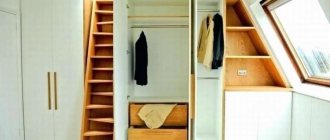
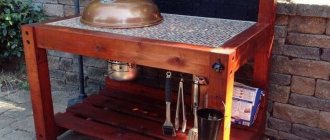
So that the “goods” in the garage do not interfere with movement, it is necessary to somehow organize its storage. Garage racks are the most convenient. If there is enough space, they can be made on the entire wall or even on several walls. If there is no space below, you will have to move upstairs and make shelves under the ceiling. Not the best option, but sometimes the only one. Still, garage shelving that sits on the floor is safer, especially if it is securely attached to the wall (to avoid unpleasant situations).
= What shelves can be made from:
| made of wood Example: DIY flower shelves 230 | from metal pipes Example: DIY pipe shelves | from PVC pipes |
| made of cardboard Example: Shelf rack made of cardboard boxes | from paper | from plasterboard |
| from glass Example: Shelves in Art Nouveau style 180 do-it-yourself photos | from old boxes Example: DIY drawer shelves 120 photos | from pallets pallets |
| stainless steel | from glass | from old stairs |
| From bars | from bottles Example: Glass bottle shelves | from driftwood and branches Example: Bookshelf made of branches and driftwood |
| made of bricks Example: Bookshelves made of bricks and boards | from newspapers Example: Newspaper shelf | From cans Example: DIY kitchen shelves: 456 photos, drawings, instructions |
Designs and sizes
Structurally, garage racks consist of racks, crossbars and shelves. Sometimes, to increase rigidity, transverse ties are also made on the back side - two steel strips welded/screwed to the outer posts diagonally. They compensate for lateral loads, increasing overall stability and reliability.
Garage shelving can be made according to this drawing (dimensions are approximate)
The dimensions - the height and depth of the shelves - are chosen almost arbitrarily, depending on what you intend to store. The only thing that needs to be selected carefully is the span length - the distance between the racks in one section. It depends on the rigidity of the material that you decide to use: the shelves, even under full load, should not bend. For heavy things/objects, the span is about 1.5 meters; if the load is not too large, the distance can be increased to 2 meters, but it’s definitely not worth doing more. If you need a longer garage rack, install intermediate racks, the distance between which still cannot be more than 2 meters.
A few words about the height of the shelves in the rack. The lowest shelf can be raised from the floor level by 50-70 cm (even more if desired). The heaviest items are usually placed here. The remaining shelves can be made at different heights; 30 cm is inconvenient and impractical. In general, a 1.5 liter plastic bottle should optimally fit on the shelf, which is 35-37 cm. This distance is convenient for use.
Making a brass loft chandelier
The loft style is characterized by a combination of similar lamps in one area. But you can make your own chandelier, which will have shades of different shapes.
In this case, lamps of different lengths are hung on a massive beam made of wood or metal, which are decorated with brass caps of different shapes: cylindrical, semicircular or triangular. Design elements can include water taps, kitchen utensils and other scrap that remains after repairs.
The unifying link will be the material of the lampshades and decorations – brass.
Floor shelf for books
Making a bookcase from plastic elements with your own hands is an original and definitely affordable solution. Starting with the shelf, you can create an interior ensemble that matches your individual style. The work will not require a lot of money and time. Even a beginner can handle this.
The dark matte paint and wood details give the piece an elegant and industrial look.
Materials and tools
- 1 inch (2.5 cm) PVC pipe with a total length of 30 feet (about 9 m);
- 0.5" (1.3cm) x 24 metal screws
- spot;
- pine board measuring 6x12 feet (1.8x3.66m);
- PVC glue;
- screwdriver;
- paint in vacuum containers;
- drill with drills;
- 90 degree rotating corners 1 inch – 4 pcs.;
- 2.5 cm (1 inch) galvanized shelf hinges with 2 holes – 12 pcs.;
- latex gloves;
- a circular saw;
- PVC cutter;
- Roulette;
- polymer tubing 1 inch long, 30 feet
- PVC cuff 1.25×0.75 inches (3.2×1.9cm) – 4 pcs.;
- plastic connector 3-pin 1 inch – 12 pcs.;
Before you begin assembling the shelf, use a special cutter to cut the PVC into pieces of the required length:
- 12 pieces 18 inches (45.7 cm);
- 4 pieces 2 inches (5.1 cm) long.
- 2 pieces 17 inches (43.2 cm) long;
- 6 pieces 12 inches (30.5 cm) long;
Now use a circular saw to cut the wood into 3 2 x 12 ft (0.6 x 3.66 m) pieces. Sand the edges and surfaces of the wooden shelf blanks in advance.
Layout, diagrams, drawings, ideas
In the garage you need not only a rack, but also a workbench and a stand for hand tools - all kinds of keys and other small things, of which there are a lot and it is difficult to come up with a specific convenient storage place.
The workbench can be made in the center of the rack. This is convenient - everything you need will be at hand, you won’t have to constantly go to the shelves.
Garage shelving with workbench is convenient
The workbench can be part of the system, or you can make two separate modules, between which you can install the required table. If you don’t like this arrangement, you can change the configuration - at least put it at an angle.
As for the tool stand. There is a factory option - a perforated sheet of metal with holders hung on it. The idea is very good except for the price.
Comfortable))
As usual, there are also several homemade projects (what would a garage be without them) on the same topic. The ideas are simple to implement, maybe not so elegant, but convenient:
- On boards, chipboard sheets, plywood, place nails under each tool. To avoid confusion about where to hang something, trace the instrument in place and paint it with some color.
Everything is in order and in its place - For heavier equipment - large keys, etc. You can use a mesh onto which you weld hooks from wire. Nail the mesh to the wall.
Option for heavier and bulkier tools - Make a bar with holes cut in it into which tools are lowered.
This tool stand is very easy to make with your own hands.
And if desired, all this can be put on wheels - to make the tool stand mobile. This is the case if during the warm season you prefer to work with the machine outside.
You can easily roll back to where you want
Well, for inspiration... so that all the tools are in place))
Full order))
The process of making a lamp from pipes in steampunk style
The word steampunk comes from the English steam, which means “steam”.
The concept of “steampunk” is broader than a design direction: it is an entire philosophy in art and a subculture with its own trends in clothing, painting and cinema. Moreover, all items of this genre exist in 1 copy, because they are made by enthusiasts, and not by workers at industrial enterprises.
The basis of the design are the details of the mechanisms:
- hinges;
- levers;
- valves;
- gears;
- chains;
- aged wood;
- pieces of old pipes;
- parts of clock mechanisms;
- Edison lamps;
- pressure gauges from steam engines.
They allow you to experiment endlessly with lamp designs. This could be a pendant chandelier made from scraps of water pipes, a futuristic table lamp in the form of a flask screwed into a water tap, or a floor lamp made of brass wire.
The manufacturing process takes from 30 minutes to several weeks, if the desired color must be achieved through the process of natural oxidation of the metal.
Lamp with Edison lamp in steampunk or retro style (PVC)
A cheap and uncomplicated model of a lamp with an Edison lamp in the popular steampunk or retro style.
Despite the fact that PVC pipes are used here, after painting they cannot be distinguished from copper ones.
Plastic tubes are cut to the required size:
Using connecting elbows, the lamp body is formed from tubes and coated with paint:
The stand is cut out of a wooden plank, and fastening is done using a flat fitting with mounting holes:
A lamp socket is mounted to the lamp leg:
With such a lamp, reading is doubly pleasant:
Photo source: www.instructables.com/id/Edison-Lamp-Made-With-Wood-and-Faux-Copper-Pipe
Read in full (link)
Required Tools
To work, you need to prepare a basic set of carpentry tools. It is simply impossible to make any wooden furniture without carpentry tools. Professional furniture manufacturers have fully equipped workshops with expensive, specialized equipment. But in order to prove yourself as a carpenter, of course, you shouldn’t immediately buy professional equipment, but you still need to prepare some tools.
Main conclusions
The main advantages offered by self-production of lamps from tubes are:
- Low price of the finished product.
- Availability of components.
- Easy to install.
- Reliability and durability.
During the production process, as a rule, difficulties arise such as fastening the socket, grounding the housing, fastening the ceiling, correct selection of components according to parameters, fastening the lamp to the surface, compliance with fire and electrical safety.
Before assembling such a device, it is advisable to create its schematic diagram indicating all components and their characteristics, based on the rules for electrical installation work. The most common options for such lamps are a pendant chandelier made of copper or brass pipes, sconces made of metal-plastic pipes and a table lamp made of sleeves.
Preparation
Sand the pipes to remove any dirt or paint markings. Determine how tall the lampshades will be. I recommend starting with a small, wide piece; this will make it easy to master the technique and even find your own design options. In general, you need to catch the inspiration and drive of creativity. Grind the ends of the pipes; if you plan to further install the lampshade on the stand, then check the level of inclination of the lower part of the workpiece.
Failures in personal life, conflict with Fedunkiv: the fate of Svetlana Permyakova
“No Joseph Kobzon, no Vali Gaft”: Sadalsky showed a photo from 3 years ago
With the help of a huge balloon, tourists can begin to be sent into orbit
Draw a lampshade pattern with a marker, thanks to it the lamp will diffuse light in space. It’s worth imagining a little, for example, you can draw a schematic flower, leaves, letters, symbols or the silhouette of a building. There are a lot of possibilities in this process, but the first experience should be simplified a little, so I decided to make squares and narrow stripes, and the end result was beautiful.
Variety of plastic products
There is something attractive about furniture made from scrap materials. Thus, plastic pipes make it possible to produce structures of ideal geometric shapes. They will add zest to the interior of the room. In addition, the owner of such furniture will have an excellent chance to show off to his friends the masterpiece he created with his own hands.
Chairs made of plastic pipes have the following advantages:
- ease;
- compactness;
- strength;
- ease of manufacture.
And the most important thing is that you can build them with your own hands in a relatively short time. This will require a minimum set of tools and materials, and a little patience.
You need to start making a chair from polypropylene by choosing the design of the product and its design implementation. In this case, you need to start from the function that the furniture will perform.
If there are a lot of pipe scraps left, then you can use them to build a chic, creative chair or bar stool. To fasten parts together, it is not necessary to have a soldering iron; this can be done using special glue
Having decided on this, they begin to select the parameters of the product: the size of the future structure, its type (collapsible or solid), the method of connecting the parts. You need to draw a rough sketch of the future product in order to understand how much and what material will be needed for the work.
The design of PVC chairs is limited only by human imagination. To get ideas, you can look through interior design magazines or furniture catalogs. You don’t have to look only at plastic products; you can get ideas by looking at furniture made from any material.
Stools made of plastic pipes can be placed in the kitchen, country veranda, garage, and just in the yard - everywhere they will look stylish and original.
For trips to barbecue or fishing, you can build folding chairs that are convenient to store and transport when folded, and they do not take up much storage space.
You can make comfortable and bright chairs for children by covering a frame made of polypropylene pipes with brightly colored fabric.
Choosing the right material
All pipes made from polymers are commonly called plastic. However, their appearance and properties differ markedly due to the difference in the raw materials. Accordingly, the methods of connecting them differ.
Polyvinyl chloride (PVC) pipes:
- Various colors (originally white).
- They are connected to the fittings with glue; you can do without it (then the structure will be collapsible).
Polypropylene (PP) pipes:
- Various colors (initially black).
- Rigid, produced in the form of segments of a certain length; are connected by low-temperature welding or using metal components.
A profile pipe is a metal pipe that has a cross section other than circular. The most common are square and rectangular, but oval and diamond-shaped ones are also produced. It is easy to achieve the required bend from a profile pipe using a “Snail” type machine.
