Here you will learn about what is needed to make a barbecue area comfortable. The article contains several options, how to make a grill table with your own hands. Each is functional and attractive, but has its own style. A grill table will help you better organize the process; it is very convenient when everything is at hand, especially if you cook outdoors. Now you can focus on the most important part - food.
From the article you will learn how to make a table with a built-in grill, auxiliary mobile trolley tables, a removable table top for the veranda, as well as how to make useful accessories for a barbecue and other necessary things. I hope this information inspires you to create your own project.
An original barbecue table for a festive feast
This unique table with a place for a barbecue will not leave anyone indifferent and will gather a large and warm company around it. You and your guests will be able to watch how the dish is prepared, and this, you see, will add zest to any feast.
The design of the table is laconic, simple and safe to use. The temperature of the metal box is not felt at all, and the heat from the coals will not disturb guests.
Despite its appearance, the table is extremely fireproof. The wooden tabletop does not come into contact with the metal and therefore does not heat up.
In this step-by-step article you will learn how to make a barbecue table with your own hands.
To work you will need:
1. Materials:
– metal profile of square section; – thin board (plywood); – mineral wool to insulate the metal box; – basalt slabs (fiber cement); – wood varnish; – wood glue; – silicone as a sealant; – paint for wood processing; – epoxy resin; – rubber plugs for legs; – work gloves; – welder’s mask; – magnetic corners; – drill bits for a drill; – consumable fastening materials – screws, bolts, nuts.
2. Tools:
– Bulgarian; - welding machine; – grinder; – jigsaw; – screwdriver; – furniture stapler (you can do without it); – drill; - roulette.
Now that all the materials and tools have been collected, you can get to work
.
First of all, it doesn’t hurt to draw a diagram of the future product on paper. Decide on the size and dimensions of the table and its parts. Since the frame of the product is welded, it is better to calculate and double-check everything in advance, otherwise it will be difficult to correct anything later.
Step 1.
Using a grinder, cut the metal profile into pieces of the required size.
When it's bad weather outside
Snow, rain, and drizzle prevent you from enjoying the holiday, and they also prevent you from lighting a fire. In this case, a barbecue with a roof is required.
You can build a gazebo with a barbecue with your own hands. To do this, we choose a spacious area,
so that the wooden parts do not get hot from the heat source. We drive in the metal support posts and fasten the veins between them. We cover it with light and durable profiled sheets. They can also be secured on the sides for protection from the wind. We put a grill in the center and no vagaries of the weather are scary.
Note!
How to make a garden (construction) wheelbarrow with your own hands: detailed instructions with description + 85 photos of fresh ideas
How to make a bench with your own hands - 90 photos of the best ideas from the master. Review of finished drawings, diagrams and dimensions of the bench
How to make a hot smoked smokehouse with your own hands: drawings, dimensions, choice of material, photos of finished options
BBQ Oven Materials
The barbecue oven is assembled from standard red brick, which is always available on the site. It is impossible to coat layers of brick with ordinary clay; here you need high-quality cement mortar.
At the completion of the construction of such a furnace, a pipe is always removed; it serves as an exhaust hood, a canopy from bad weather and strong winds.
If there is an exhaust hood, such a stove can easily be placed in a gazebo or on an open terrace; it will not emit acrid smoke directly in your face.
Grills and barbecues have become very popular with absolutely everyone lately. Who doesn't love eating delicious food outdoors?
Without exception, everyone loves the taste of juicy, roasted meat. It is for such pleasure that it is worth using all your strength and experience to build such a stove. You will be proud of your invention, and also delight your loved ones with new kebab recipes.
Size variations: width, depth and length
The width of the frying pan should be 10-15 cm less than the length of the skewer (excluding the size of its handle). From the point of view of rational use of thermal energy , a width of 35-40 cm is considered optimal for a rectangular shape. Taking into account the peculiarities of the geometry of the cylindrical shape of the roaster, its width can be increased to 45 cm.
The depth of a box-shaped brazier is usually 15-25 cm. Of this, at least 5 cm is the layer of coals, which is necessary for normal cooking of one portion of meat. And for sequential frying of two portions, the layer should already be 1.5-2 times larger. In this case, the distance from the surfaces of the coals to the meat is approximately 8-10 cm. And you also need to take into account the size of the shish kebab pieces and the depth of the slots for the skewers (if they are provided for in the design).
Preparing to assemble all parts
As soon as we have prepared the tabletop, arranged the brazier and made other auxiliary elements of the barbecue table, we can begin the final assembly of the structure. We need to make its fasteners, for which holes are drilled on the front side. The bolt heads must be wide enough.
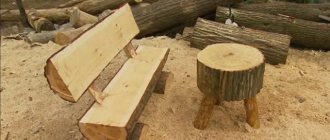
The legs of the structure are rounded by a milling machine and prepared for further final grinding. After this, they are closed with rubber plugs. The tabletop is now assembled and ready for final finishing and thermal insulation.
Types of structures
Depending on the purposes for which a compact brazier is chosen, several types of braziers can be distinguished.
- Barbecue suitcase. One of the striking examples of mini-barbecues. The product does not take up much space either folded or unfolded. The assembled structure becomes a flat steel suitcase, which is convenient to store and transport. Most often, the design includes a handle to make the barbecue easy to carry in your hands.
Brazier-suitcase
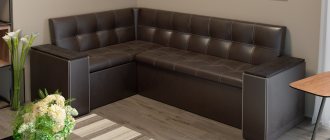
- Transformable grill with table. A functional solution for those who want to not only save space on their site, but also do it with maximum convenience. When you need to cook barbecue, you can unfold the structure and light the firebox. The rest of the time, the structure will serve as an ordinary small table.
Transformable grill with table
- Stationary or mobile grill. The main guideline here is the size of the firebox, and not the size of the entire grill. Such designs are suitable for families of 2-4 people, when there is no need to prepare a lot of food at once. Plus, due to the small area of the fryer, fuel savings occur. Another advantage of a stationary or mobile mini-barbecue is the ability to easily move it into a house or barn for storage in the winter or during bad weather.
Mobile and stationary grill
- Collapsible mini-barbecue. If you are afraid that a collapsible roasting pan will wear out over time and you will not be able to fold it into a compact case, pay attention to simple collapsible models. They usually consist of several plates that can be easily connected to each other using cut grooves. Less often you can find models with a solid firebox and circuit legs.
Collapsible mini-barbecue
In some models of compact barbecues of a stationary or mobile type, it is easy to separate the firebox from the frame, so that they can be transported in the trunk of a car.