Features and Benefits
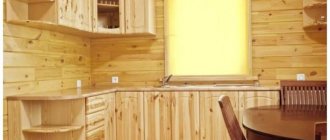
Regardless of any design of your kitchen, a pencil case will always look stylish and profitable there. This is what is called the classic version. Every housewife will appreciate the practicality and functionality of a convenient closet. The main advantages of this furniture:
- Functionality. This cabinet will allow you to place a wide variety of kitchen items. You can put pots, frying pans there, store plates, cups, etc. A variety of spices, as well as your kitchen appliances, will fit perfectly there.
- Optimal organization of space. Buyers will be pleasantly surprised by the ergonomics of the model. Thanks to this furniture, you can organize your kitchen space as cozily, easily and comfortably as possible.
- This model will take up little space. Thanks to its optimal elongated shape, you can place the product in a specific place in your kitchen. This model is optimal for storing dishes and various kitchen utensils.
- Possibility to make a custom cabinet. You can create the necessary parameters yourself. The pencil case can have standard sizes, and also fit your preferences and your kitchen. Please note that a custom order will have a higher price. However, in this way you can increase the functionality of your room and make your stay in the kitchen more comfortable and relaxed.
- Versatility. The pencil case will fit well into any of your interiors. It will decorate any kitchen and increase its functionality. Thus, you will purchase a stylish model that will become indispensable in the kitchen.
- Small dimensions. The wardrobe has small dimensions. It will look beneficial even in a small kitchen. You can use such furniture when planning a non-standard room.
- Affordable price. This furniture can be purchased at an affordable price. Such a wardrobe will not cause losses to your family budget.
Step-by-step manufacturing instructions
Hand-made furniture products appear mainly in kitchens of non-standard or small sizes. Sometimes it is difficult to find a suitable option on sale. Instead of searching for the desired design, it is faster and cheaper to make it yourself.
Article on the topic: Do-it-yourself kitchen furniture made of plasterboard
Step 1. Select a style
Recommendations from professionals for selecting a style concept:
- The tone of the module must match the overall color scheme of the kitchen.
- Modern kitchen furniture is laconic and devoid of excesses in the decoration of facades. Provence, classic and retro imply the presence of figured elements on the facades.
Kitchen in Provence style
In addition to the fact that all modules are combined with each other in a cozy kitchen, they are endowed with extreme functionality.
Cabinet parameters should correlate with the size of the room
Step 2: Choosing a Shape
A large kitchen requires the installation of several cupboards. In small-sized ones they resort to all sorts of tricks. The dishes are placed as follows:
- Open shelves and racks. Since cutlery is not protected from dust, this option is considered impractical.
- Chest of drawers or kitchen cabinet. Inconvenient models for everyday use. More suitable for storing services or utensils that are used on holidays.
Recently, preference has been given to mounted modules.
Table 1. Main varieties for placing dishes
Installing kitchen furniture is a simple task that even an inexperienced craftsman can handle if he has the necessary tools. How to hang kitchen cabinets on the wall is a question that worries those who do the renovation themselves.
In most cases, the cabinet is equipped with the following options:
Transparent glass doors
- top part. In floor structures it often acts as a tabletop;
- bottom;
- sides. Sometimes they function as legs;
- backdrop In corner designs it is divided into 2 parts.
The solid back can be replaced with a tie strip. If the corner model is used as a sink cabinet, this element is skipped.
In addition to the listed details, almost any module has a façade. Popular options:
- Several swing doors or 1 in a small cabinet.
- 1 door adjacent to the false panel.
- Several doors opening up or down, equipped with locks or furniture gas lifts.
- Semi-closed facade with an open niche in the upper part.
- Accordion door. This model is often used in L-shaped structures.
- Combining the facade with a false panel or elements of retractable drawers. Often found in L-shaped products.
A popular model in small kitchens is a cabinet with a shelf in the form of a carousel.
Stained glass doors are often installed in tall modular structures
General recommendations for choosing a form:
- As the depth of wall cabinets increases, the need to install additional lighting in the form of spotlights increases. Wide modules darken the work area.
- Tall construction is not always practical. Due to the fact that it may be difficult to use dishes stored on the top shelf, it is not suitable for miniature housewives.
- When installing a cutlery dryer in a wall cabinet, you should ensure that its depth matches the diameter of the largest plate.
- It is preferable to combine structures of different heights and façade arrangements in one room. For example, open shelves or racks are suitable for decorative kitchen utensils, wall-mounted modules with glass doors are suitable for dishes, and cabinets with blank doors are suitable for large utensils.
- It is advisable to install drawers for cutlery in floor cabinets. Large compartments store large household appliances.
For small kitchens, corner cabinets with built-in rotating storage systems are popular.
Hanging structures should not be overly massive
Step 3. Drawing up a drawing
To correctly calculate the dimensions of the future cabinet, knowledge of the standards is required. Thanks to many years of experience, kitchen furniture manufacturers have developed a scale of optimal sizes.
Leather pencil case: stylish and original
If you are a creative person and don’t want to use ordinary and boring pencil cases, then this idea is definitely for you!
For a leather pencil case you will need:
- rectangular piece of leather,
- stationery knife,
- ruler,
- braid or silk fabric.
Progress:
- First of all, we measure the required size of the leather flap. It should be cut evenly and neatly into a rectangular or square shape.
- Using a utility knife, we make vertical and horizontal cuts in a checkerboard pattern. To make the cuts smooth and neat, be sure to use a ruler.
- On top of the flap in the middle we sew two strips of braid or silk fabric.
- We thread our pens and pencils into the holes, wrap and tie the pencil case in a bow. Our original and very interesting leather pencil case is ready!
Assembling the pencil case
The ends of the finished chipboard parts must be covered with edge tape. It comes with or without a pre-applied adhesive layer. Pasting the edges of the first group is done with a simple iron, ironing them several times. The second type of edges requires preliminary application of PVA glue to the edged chipboard and further heating with the same household appliance. The remaining part of the edge along the planes of the parts is cut off with a sharp knife.
Having prepared all the parts, you need to mark the places for drilling holes for installing fasteners and accessories. The most common type of screws for chipboards are self-tapping screws of a special shape - confirmats. They have a special hexagonal slot in the head and are screwed in with a key of the appropriate size. The diameter of the hole for them is 7 mm.
We assemble the finished parts manually or with a screwdriver, controlling their relative position. We hang a door of the appropriate size on the finished box and install a handle and a magnetic latch. So, at the lowest cost, you can make a pencil case with your own hands. It will last as long as factory-made furniture.
Types of corner kitchen cabinets
Today, the kitchen furniture market offers a large selection of narrow pencil cases. Based on the shape of the body, the following options for tall cabinets are distinguished:
- trapezoidal;
- docking;
- free-standing corner modules
Trapezoidal kitchen cabinets
The modular design in a trapezoidal shape fits perfectly with other pieces of furniture; cabinets of different shapes can be attached to the side parts of the trapezoidal pencil case.
The main positive quality of the model is the relief space inside. At the same time, the pentagonal design takes up more space, and the cabinet-column looks quite bulky. Professionals do not recommend choosing a trapezoidal corner pencil case for a small kitchen.
Docking models of kitchen cabinets
The docking cases are a corner module of a quadrangular shape. Part of the facade of a single-door cabinet consists of two parts, one of which is blank. The component parts of the kitchen set are adjacent to the blank panel at an angle of 900.
In the next article we will talk about the topic - corner closet in the hallway photo. Let's try to describe this topic in more detail.
Corner-type docking cases have a simple system; the cost of the modules is much lower compared to trapezoidal models. However, the rectangular design is not without its drawbacks, since it is difficult to get to the space hidden behind a blank panel. It is possible to increase the practicality of a rectangular corner pencil case through the use of today's storage systems.
Stationary type pencil cases
A free-standing corner cabinet is considered an independent element of kitchen furniture. The main difference between a separate cabinet-column and built-in trapezoidal and rectangular models is the conical shape of the product. The pencil case goes around the corner of the room and takes up a very small amount of space. Very often, the design of a free-standing corner module consists of a configuration of open and closed compartments.
Oven cabinet designs
There are two main types of oven modules. Moreover, each of them has its own additional variation. The most common type is an oven under the hob. And the second, in my opinion more convenient, is an oven in a pencil case.
The design of the cabinet under the hob has two options - with a drawer at the bottom of the oven and with a drawer at the top of the oven. I will tell you about the pros and cons of each design in the following paragraphs.
The design of a cabinet in a pencil case, at eye level, has an option with a work surface above the cabinet and in a pencil case at eye level without a tabletop. I will tell you about the pros and cons of each design in the following paragraphs.
Kitchen cabinet on the wall. Do it yourself! Step-by-step wizard + drawing
This wall cabinet is completely assembled using glue and woodwork. The only places where screws are used are on the back panel and on the door hinges.
The design is inspired by early American buffets.
This diagram shows all the details of the cabinet:
The cabinet elements are cut out of a wooden board, and the grooves for joining are made using a chisel:
The walls and shelves of the cabinet are assembled together and fixed with wood glue:
The cabinet door is mounted on furniture hinges:
After coating with impregnation, the cabinet is ready:
Photo source: www.instructables.com/id/Wall-Cabinet-with-Glue-and-Joinery
Read in full (link)
Basic bathroom furniture
Before starting work, you need to make a list of items that should be installed in the bathroom. By default it includes the following elements:
- Washbasin cabinet. It is especially needed for bathrooms, because... allows you to embed a sink and organize a useful niche for storing detergents and cosmetics.
- Hanging cabinets. Such an element is fixed in the upper part of the walls using brackets. Externally, the products are compact, but their internal space contains many useful little things.
- Linen closet. Such an item is installed on the floor covering if there is an unused empty corner in the room. It is better to make a structure with 2 sections - large and small. In the first you can keep clothes that need to be washed, and in the second - cosmetics.
Calculation of furniture sizes
This is the most important stage of the entire project, here you need to strain all your attention and concentrate on the details. You need to break down each drawer and cabinet and count them separately
According to the advice of experts, special attention should be paid to the cooking cabinet and oven; according to them, this is the element where beginners make the most mistakes when designing a kitchen that they make themselves. The drawing of this part must be approached with due care and concentration.
The main thing in furniture drawings is the ability to break down all the elements of furniture into parts, and then be able to correctly divide them into components. This example includes:
- Side walls.
- Back panel.
- Doors.
- Shelves.
If a drawer is being designed, then it also needs to be detailed, with special attention indicating the location of the furniture fittings. The main thing in this process is to indicate all drawings accurately, since error in this matter is unacceptable
Drawings of kitchen cabinets with dimensions for manufacturing
Modern kitchen sets consist of separate modules, wall cabinets, floor cabinets and pencil cases. The unifying elements give the furniture a holistic look: a single kitchen countertop, an apron, a cornice and a plinth. If you want to save money, “assemble” your kitchen in bulk from modules from series of well-known manufacturers. But be prepared for compromise solutions: it’s unlikely that you’ll be able to choose the ideal size and contents of a kitchen from standard modules. Another budget option is to make your own kitchen. Drawings of kitchen cabinets with dimensions for manufacturing will help you in drawing up a design project and subsequently calculating the costs of purchasing materials and components.
Types of corner cabinets for the kitchen
A corner cabinet is a tall and narrow cabinet, the surface of which at the back resembles a corner. This element does not take up much space and has a large capacity. This type of cabinet is most popular for use in small rooms; it can make corners less noticeable and saves kitchen space. It can be part of a kitchen set or installed as a separate object. In such cabinets you can store almost everything that is useful for use in the kitchen - food, appliances, household products and more.
Types of corner cabinets:
- Trapezoid - a trapezoid-shaped structure, often used not as a separate element, but together with a set. The main advantage of such a cabinet is its capacity. However, such a cabinet is bulky and takes up a lot of space; you should not buy it for use in a small room.
- Rectangle - docking cabinet, usually used as part of a headset. Their main advantage is price and simplicity of design; you can make them yourself.
- Stationary - corner pencil case, standing separately. Its difference is that it is built-in.
Often a corner cabinet is used to house household appliances. This is especially true for built-in and bulky appliances, such as a microwave, oven, coffee machine, bread oven or freezer. One such cabinet can accommodate several types of equipment.
Advantages of a kitchen column for a small kitchen
When there is a problem with organizing storage in kitchen cabinets, you can use a special pencil case. As a rule, it holds a lot of kitchen utensils; it is convenient to put in such a cabinet those items that are not used every day.
Article on the topic: How to make a folding kitchen table with your own hands
Manufacturers' catalogs offer many different options for organizing the kitchen space.
To learn more about the range and see design ideas, you can go to the website of the official manufacturers. One of the most popular is the column cabinet.
The main advantages of such a cabinet:
- Capable of holding many different items;
- Has a small width;
- Has various shelves inside;
- It can be produced in various variations - it can be open or closed;
- Has a different number of doors;
- It has a different version of the facade; if there is no glass on the doors, you can close the contents from prying eyes.
The speakers can be glazed completely or in parts, so you can easily plan your interior and create a unique design for your room or kitchen.
Particularly popular at present are models that have additional shelves at the top or bottom, and at the same time these shelves are open. They are often used to establish decor. You can use them as niches for cans of bulk products that are the same size and made in the same style; such a thing looks very stylish and is pleasant to look at both for guests and residents of an apartment or house.
No less popular than speakers is a corner cabinet in the form of a pencil case. This element creates an interesting interior and has many advantages. It smooths out sharp corners in the room, making the room or kitchen visually more spacious; it looks harmonious and advantageous in almost any interior. Its depth and capacity are much greater than that of a regular rectangular cabinet. There is an option to make a composition that will consist of several elements or modules - thus, you can create separate niches that are suitable for storing household appliances and convenient access to them, and storing products that can be kept warm, and household chemicals.
Velvet pencil case from a box
Everyone certainly has unnecessary boxes. Don't have a pencil case? Use the box and you won’t have to overpay at all! Making such a pencil case is as easy as shelling pears!
For this idea you will need:
- a rectangular box that holds school supplies,
- decorative velvet or velvet paper, velvet fabric,
- scissors,
- glue.
Progress:
- Wrap your box in fabric and measure the cut lines. If there is no fabric, then you can use cardboard with a velvet surface.
- Cut the required amount of fabric and then glue it onto the box.
That's all! Two easy points and your exquisite pencil case is ready!
Drawings with dimensions of floor kitchen cabinets and pencil cases
The standard dimensions of floor-standing tables/cabinets for the kitchen are largely determined by the dimensions of the built-in household appliances.
The tabletop cannot be narrowed by changing the depth of the bottom row if a standard sink and hob with 4 burners, an oven, and a dishwasher are installed. In all other cases it is possible. There are sinks with a narrowed platform, washing machines of smaller depth and free-standing stoves; the hob with 2 burners can be positioned lengthwise.
The standard height of the bottom row of the kitchen is 850 mm. It is designed for “standard” human height. If you are taller or shorter, it is better to change it to suit your height. Working in such a kitchen will become much more convenient.
The width of the lower kitchen modules is quite flexible. The narrowest cabinet table is designed for a bottle holder and has a width of 150-200 mm. And the widest one can be designed up to 900 mm and equipped with drawers or nested shelves.
There are certain standards regarding the corner modules of the lower row of the kitchen. They are based on providing access to the internal space of the table-cabinet. It is undesirable to make the front of a corner cabinet smaller than 350-400mm. Therefore, standard sizes vary within 900x900 mm from the corner for L-shaped and trapezoidal, 1000x600 mm for tables with raised panels.
End modules are designed according to the residual principle. For lengths of 200-300 mm it is possible to develop a version with a closed door. If there is less space left for rounding the tabletop, then it is better to leave open shelves.
The dimensions of kitchen cabinets and high cabinets with a tabletop largely depend on the height of the entire kitchen unit and the features of the overall design. Based on their dimensions, the internal contents are developed and working drawings are drawn up.
If you are planning to equip your kitchen with built-in appliances, we recommend that you familiarize yourself with the nuances of installing an oven.
Source
DIY drawings of pencil cases
Usually the question of how to make a pencil case with your own hands is asked when there is a need for additional storage space and some kind of narrow space to place a compact piece of furniture. The design of the pencil case is quite simple and, at first glance, it is not at all difficult to implement the plan.
- The first step: take measurements and decide how this cabinet will look.
- The second step: think through its internal contents so that the cabinet is functional and fully fulfills its assigned role.
Often the allotted overall dimensions initially “interfere” with ideas. And already at the design stage you can understand that what you want is impossible to achieve. Let's dwell on the main points and nuances of design.
Pencil case with shelves and a niche for clothes on hangers
So that the sides of the pencil case do not “bend” over time, and the cabinet itself does not warp, it is necessary to stiffen the structure. This can be done in two ways:
- In a cabinet with shelves, it is worth rigidly securing some shelves, in addition to the lid and bottom. At a height of about 1.5 m, one in the center is enough; higher, two are better. The remaining shelves can be made removable, mounted on shelf holders.
- In a pencil case where a high niche for storage is required (for clothes on hangers or household equipment), a so-called “stiffening rib” is installed. Its role is played by a panel installed vertically along the rear wall. It is usually located under the top shelf.
Pencil case with drawers
When designing drawers, you should think about their practicality. Let's highlight a few key points:
- The internal width of the box with a material thickness of 16 mm is 90 mm less than the overall width. That is, with a pencil case width of 300 mm, the “useful” width of the box will be only 210 mm.
- The depth of the drawer is limited by the length of the guides. The shortest is 250 mm. You can read more about calculating a drawer in a closet here.
- It is better to place drawers in a pencil case at a height of no more than 1200 mm from the floor. Otherwise, they will be inconvenient to use.
DIY cabinet pencil case for the kitchen
Most often, a pencil case in the kitchen is a tall floor cabinet with built-in household appliances - an oven, microwave, and sometimes a washing machine or dishwasher. The last two units are placed strictly on the floor, and the cabinet is “built on” above them.
The oven and microwave can be placed at a convenient height. Usually they maintain symmetry with the position of other cabinets and cabinets in the kitchen.
The design of the kitchen cabinet itself is extremely simple. Just like other cabinets, it is installed on adjustable legs. For built-in appliances, it has a width of 600 mm and a depth of 550 mm along the body. It is better to look at the distance at which to mount the shelves and, possibly, make cuts, in the technical data sheet of the installation.
DIY bathroom cabinet
Increased humidity in bathrooms requires increased moisture resistance from furniture. This quality is achieved in several ways:
- Firstly, when making a bathroom cabinet with your own hands, moisture-resistant materials are initially selected.
- Secondly, the design eliminates the traditional plinth box in the plinth. The cabinet body in the bathroom should stand on high legs or be suspended.
- Thirdly, when assembling, avoid through holes - through them, access to moisture is “opened”. The case body is assembled on eccentric ties and furniture dowels.
- Fourthly, all joints (fasteners, butt ends) are additionally treated with sealant.
Wooden vanity cabinet for bathroom
A bathroom vanity cabinet should not only be functional, but also aesthetically pleasing to match the interior design of the room. You will need to find a style that can accommodate the number of sinks you want. Of course, many would prefer double sinks. Unfortunately, there are often space limitations. A size of less than 150 cm usually allows you to install only one sink; it can be located in the center, to the right or to the left. The sink cabinet may also have drawers or standard doors. Here's an example custom made by Marko Studio. If you prefer to make furniture with your own hands, 30 photos of the master class are at your disposal.
Stylish bathroom cabinet
A great example of how to make an English-style sink cabinet in a bathroom. This design requires careful planning and attention to detail. There are many decisions to make, from layout and style to types of sinks and countertops. This project was also developed in Marko Studio and made by professional craftsmen, but if you have the necessary tools and a great desire to make a cabinet with your own hands, a detailed master class is shown below with 100 step-by-step photos.
Hanging cabinet under the bathroom sink
This is part of a bathroom project, a minimalist vanity cabinet.
See the manufacturing master class below in the step-by-step photos.
Photo source: www.instructables.com/id/Walnut-Bathroom-Cabinet/
Bathroom cabinet with sink Ikea
An interesting project for a small bathroom. First you need to make shelves, in this case the upper part of the cabinet is 96 cm x 30 cm. The author used three boards from oak parquet. To make a bowl for a bathroom cabinet sink, you need a hole that fits a standard drain. To prepare the wood pieces, drill two holes in the top of the cabinet in the middle near the edge so that the bowl extends over the edge. Aluminum doors will slide on F-profiles. But aluminum does not slide very well on aluminum, so you can use a 4x4mm brass rod in the bottom F-profile. All doors should be slightly wider than the cabinet. In this case, the frame is 96 cm. Thus, 96/3 – 32. In general, there are many different nuances, you can read all this in the detailed instructions on the website of the author of this project, and below see the master class with step-by-step photos.
Photo source: www.instructables.com/id/Bathroom-cabinet-with-Ikea-bowl/
Round cabinet under the sink
A good solution if, due to the layout of the bathroom where the washbasin is located, you need a round cabinet under the sink. You are unlikely to find such a design in a store. An option is to make a bathroom cabinet with your own hands. The instructions provided here do not include complete assembly information, just the rounded door part as this is the most difficult part. To make curved doors, start by making two identical molds from 18mm MDF. True, this stage is not in the step-by-step photos, but the process is quite simple, read the instructions on the website, there are only 7 points. Note: The molds can be reused later for the top and bottom (or inner shelf). So the time required to make these two identical molds is not only to create a disposable mold, but also to make other cabinet parts.
Photo source: www.instructables.com/id/Bathroom-cabinet-with-curved-doors/
What it is
A pencil case is a rather unique piece of cabinet furniture, in which the height is much greater than the width. Overall, this product has modest dimensions. It will fit perfectly into the living room or hallway, and can also be placed in a children's room, bathroom and even in the kitchen.
Today, narrow cabinets have become very popular. Distinguished by their large height, they have door leaves of different types. The pencil case acts as an independent piece of furniture or in combination with other interior items
It is important here that the color of the product is combined with the prevailing palette in order to maintain harmony and comfort in the home
Drawings and dimensions of wall kitchen cabinets
There are certain standards for wall-mounted kitchen modules:
Drawings with dimensions for a regular wall cabinet with hinged doors and formulas for independently calculating the detailing of the body and facades:
Basic drawings with dimensions for a wall cabinet with horizontal facades and formulas for calculating body parts, facades for DIY manufacturing:
Drawings with dimensions for a corner hinged module “trapezoidal”, with a false panel and an L-shape and an example of calculating the details of the body and facades:
Hood cabinets, showcases with overhead pilasters and drawers, end and other non-standard modules are designed individually, with minor changes to the above standard modules.
Case cylinder made from toilet rolls
A pencil case made from toilet rolls? Don't be surprised, because materials are not important to us. The end result will be an original pencil case that will never give away what it is actually made of. For this pencil case you will need:
- 2 toilet plugs,
- textile,
- zipper for the lock,
- scissors,
- needle and thread,
- stationery knife.
Progress:
Prepare the bushings. We cut one bushing carefully and evenly in half.
- Attach the second cut part of the sleeve with tape for now.
- We outline the bottom of the future pencil case. The bottom of the pencil case should be made of durable cardboard. There should be two cardboard circles.
- We do the exact same action on the fabric you want to choose. It can be absolutely anything. There should also be two fabric circles.
- Now we take our cylinder and wrap it in fabric with the front side inward, making reserves along the edges.
- Mark on the fabric where the two bushings will join. It is at this point that you need to carefully sew in the zipper.
- Mark a line where you will need to sew the fabric and start sewing the cover for the pencil case
- Then turn out the cover, take the cylinder and separate from it the part of the cylinder glued with tape, which will be the lid. Sew a zipper to the lid so that when opened, it swings freely and easily closes the future pencil case.
- Now sew 2 cardboard circles to the pencil case, to which fabric circles have already been sewn.
- Remove the cover again, turn it right side out and you can put it back on, enjoying the result. The original cylindrical pencil case is ready!
New forms of a modern kitchen cabinet
For some time, pencil cases practically disappeared from our kitchens. After all, they were associated with the Soviet past, where in every standard apartment there was an equally standard set with an invariable narrow module with two doors in the corner. Installing furniture on the same level under a common countertop seemed to be the most convenient and modern solution, and in such a room, a pencil case for the kitchen seemed like a foreign object.
Now, half-forgotten interior elements are again winning their place in the sun, although they have noticeably changed in accordance with the requirements of modern design. Externally, they have become much more interesting than their predecessors, and inside - more functional.
Column
The column, a tall and narrow structure with many niches and closed shelves, deserved the greatest love from owners and housewives. Such a cabinet is not a separate piece of furniture, but this is even a plus: it will be easy to make such a pencil case with your own hands even at the renovation stage from plasterboard or MDF sheets, securing them to a metal frame. At the same time, you can give the entire structure individuality and harmoniously fit into the overall interior with the help of properly selected finishes. However, you can ask furniture makers to make the cabinet as an additional module if you order the entire set to be made to your own measurements. Then the pencil case-column will complement the kitchen set without standing out from the general row - except perhaps by its “height”.
The functionality and application possibilities of such a cabinet are simply off the charts. There is room here for a large number of household appliances that would be difficult to place in a standard kitchen any other way. You can build into a column:
- Dishwasher or washing machine. Usually they are located in the lowest compartment of the pencil case cabinet, and are covered from the outside with a front panel that matches the color of the rest of the set.
- Oven. It was always inconvenient to bend over to the dishes being prepared in it, but with the advent of independent built-in models, this issue was removed. Now it is customary to install the oven in a separate niche of the column at a level of 1-1.5 m from the floor - it is convenient to use and easy to monitor the preparation of dishes.
- Microwave. Special models of microwave ovens are available for installation in kitchen cabinets. But their cost is quite high, even if the number of functions is not impressive. The beauty of a column cabinet is that you can simply make an open niche in it of suitable dimensions and install a regular microwave in it - it will look no worse.
DIY felt school pencil case for boys
A comfortable and soft children's organizer can be made from felt. To make such a product with your own hands, you need:
- Cut out a rectangular space from a piece of material, lay out the markers and apply glue on top of each other at a distance of three centimeters from each other;
- Next, you should tuck the bottom part of the fabric, thus gluing it between the markers, after which you need to take them and apply strips of glue for the tapes;
- After gluing the tape, you need to cut the remaining fabric;
- Then you need to turn the case upside down and apply glue for the tape that will wrap the product and stick it;
- All that remains is to wrap the product in a tube along with felt-tip pens and complete the decoration that the child will like.
How to make a rotating bathroom cabinet
This type of furniture will probably require more effort. You will have to make several boxes of any height from MDF or chipboard materials. Next, use a screwdriver to make a hole in the center from the bottom, except for the bottom drawer, and from the top, except for the top one.
Pass them in order through the bolts, which are then tightened with a nut and spacer. At the corners of the lowest shelf, holes are cut for the wheels at a distance of two centimeters from the edge of the corner on each side. Then the wheels are screwed tightly and the cabinet is placed in its normal position.
Thus, creating any type of cabinet will be possible for you if you have patience and the process goes through in a good mood.
Subscribe to our Social networks
Types of speakers
Even in a small space, you want to have more free space and not clutter it with furniture. A narrow cabinet or column ideally copes with this task. The small width of the product with a large number of shelves inside allows you to accommodate many useful and necessary things. Products come in several types:
- single-leaf;
- bivalve;
- open.
They are often equipped with sliding shelves at the bottom. The most popular version of a pencil case is with space for built-in household appliances. It is always convenient to place a food processor, multicooker or dishwasher in such a product. Thanks to such pencil cases, the kitchen space immediately becomes much more organized. Sometimes a refrigerator is placed in a high pencil case if there is no desire to focus on it.
For a small kitchen, a corner cabinet is ideal. He will be able to save space as much as possible.
Some housewives order a pencil case with doors, and it immediately turns not into a closet, but into a narrow pencil case with shelves. These models are convenient for storing household appliances and household utensils. Most designers advise ordering a column with doors for the kitchen. This is explained by several reasons:
- the door for the pencil case can be made using frosted glass and other original materials;
- They allow you to hide many items that you would not want to put on public display.
If you choose a cabinet with a glass door, then this element of the interior should be supplemented with something similar to create a harmonious style.
Types of products
The need to always save space, as well as satisfy the requirements of different styles, has allowed furniture designers to develop a lot of different models. For any room, even if its area is 2 m2, and the equipment consists of a shower and washbasin, you can find the necessary furniture.
Installation methods
- Floor-standing – rests on a base or legs. The latter are considered a better solution, since it is easier to clean under them. In addition, there is no danger of deformation of the lower part of the furniture when the floor is flooded.
- Wall mounted – classic cabinets and console models. They are mounted on the wall and do not take up space on the floor.
- Corner - can be either floor-mounted or wall-mounted. They differ in the installation location - the corner, and the design feature - the rear wall consists of two elements that meet at right angles.
- Built-in is a niche, a space between a partition and a wall, a blocked door or window opening, equipped with shelves, and sometimes even drawers. The big plus is that such models use the already existing “non-standard” space. The appearance of the product is determined by the design of the sash. The latter, by the way, can be either a hinged or a compartment.
Photo of a bathroom with cabinets
Shape of models
The attractiveness of the product is determined not only by the color of the facade, but also by its shape. Designers offer the following options.
- A straight facade is an ordinary flat surface, which in a bathroom is more justified than anywhere else: condensation does not accumulate on it. The outline of the facade can be more original, for example, a leaf-shaped door with smoothly rounded corners, etc.
- Convex - this shape is typical for furniture in the Baroque or Rocaille style, but is also found in the classics. Sold in floor cabinets, especially in models under the washbasin. Mounted models of this kind are very rare - they look too massive.
There are also modern versions of this technique. However, in high-tech or techno models, the relief is formed not vertically, but horizontally.
Radial - the surface of the facade is smoothly curved, forming a sector of a circle. Option for modern styles - hi-tech, techno or modern. Wall cabinets also rarely have this shape - with the exception of corner ones, but pencil cases - floor and console - are often found.
The following video contains even more stylish and elegant models of cabinets and cabinets for the bathroom:
Sash decoration
The decor of the cabinet is determined by the door - one or two, as well as the design of the fronts of the drawers. The color palette or finishing features depend on the style of the interior, but general design techniques allow us to distinguish several groups.
- Furniture with blind doors - vertical and horizontal cabinets with a small width almost always have blind doors. From a design perspective, models are structural elements.
- A cabinet with glass doors is a rarity today, as it has a classic design and considerable size. But if the bathroom satisfies these conditions, then such a model will undoubtedly decorate the room.
Instead of glass, acrylic transparent plastic is more often used. This material is suitable for decorating a modern narrow pencil case or horizontal cabinet.
- The mirror version is much more common. Usually it means a wall cabinet above the washbasin, in which one or two doors act as a mirror. This is a truly practical and convenient solution. However, mirror inserts can be found on both console and floor products, especially corner ones. The mirror reflects light, visually reducing the size of the furniture and “adding” space to the room.
- Furniture with lighting - in most cases, we are again talking about a model installed above the washbasin. The small size of the bathroom often becomes the reason for economical lighting - one ceiling lamp. But this is not enough for makeup or a good shave. A backlit pencil case solves this problem. Note that mirrored cabinets with lighting for the bathroom are now very popular.
- Less commonly, you can find floor and console cabinets, where the lighting plays a decorative role, emphasizing the contours of the facade or only the lower part of the product. This technique makes the furniture literally “airy” and is very effective in techno, futurism and hi-tech interiors.
- A cabinet with shelves is usually a wall-mounted version of quite large sizes, where there is also a side section with open shelves. Due to their size, such models are only possible in spacious rooms.
Photo of a bathroom cabinet “under wood”
Convenient kitchen with pencil case
A cabinet-pencil case is a narrow object, similar to a column; it can be used as a separate element of furniture or come complete with the rest of the set.
Cabinet purpose:
- Storing dishes and other kitchen utensils, such as gift sets, that are not often used;
- Storage of cleaning products, textiles and napkins;
- Storage of built-in and small appliances, such as a toaster, coffee machine, etc.;
- Storage of spices and bulk products, canned food;
- Storage of alcoholic beverages.
Often not all compartments of the pencil case are filled. Some are left free and various decorative elements are installed. The size of such a cabinet can be chosen by anyone, depending on the wishes of the apartment owners. In cases where the standard size is not suitable, you can make custom-made furniture.
Performance characteristics
The height of the pencil cases ranges from 150–200 cm, width 30–50 cm, these dimensions make it possible to have quite roomy furniture with relatively small dimensions. Inside there are shelves for storing bathrobes, towels, household chemicals and personal hygiene products.
Floor cabinet
The pencil case has compartments of various sizes, adjustable shelves, drawers, metal baskets for temporary storage of dirty linen, etc. Depending on the layout of the bathroom, the doors can open in any direction, a mirror can be mounted on the facade, and lighting can be installed inside. Modern industry produces pencil cases in various styles, from the familiar and ever-in-demand classic to the most modern avant-garde or high-tech styles.
Bathroom cabinet
To make the right choice, you should briefly familiarize yourself with the existing designs, their strengths and weaknesses.
| Type of pencil case | Short description |
| Angular | It has a triangular shape, is installed on legs or hung in free corners. Advantages: high stability, minimal dimensions. The disadvantage is small capacity. |
Suspension | Suspended above the floor, they have a small height. In terms of capacity they are inferior to other models. Advantages - you can select the mounting location depending on the plumbing equipment available in the bathroom. Disadvantage - they can only be hung on solid walls; plasterboard partitions cannot support the weight of furniture. |
Floor | The optimal option for a bathroom cabinet from all points of view. The furniture is mobile, which makes it possible to change its location if the situation changes. The most spacious furniture option for small spaces, for universal use. It can be installed not only in bathrooms, but also in the hallway, kitchen, balcony or loggia. |
floor-standing bathroom pencil case
It is the last version of the pencil case (floor-mounted) that we will dwell in more detail.
What is a kitchen floor-standing pencil case made of?
The materials for making a floor cabinet can be very different, their choice depends on the financial capabilities of the customer, the overall interior of the apartment and the purpose of the pencil case
When choosing materials, special attention should be paid to pencil cases for the kitchen and bathroom, these places have high humidity and the temperature often changes in them
Basic materials:
- Wood - this material is distinguished by its high cost, but despite this, a wooden set is very popular. One of the disadvantages is the impossibility of using it in places with high humidity, since the wood may lose its appearance and properties.
- MDF is a material that costs much less than natural wood, has an impressive appearance, but also needs proper care.
- Chipboard is the cheapest option, but is sensitive to water and does not tolerate moisture.
- Plastic - this material is not the most environmentally friendly, but it is not afraid of water and wear-resistant, is inexpensive and is the best option for decorating bathrooms and kitchens.
- Metal - furniture made from this material is very durable, but does not fit into many interior styles. Metal is often used for the frame.
For final finishing, surfaces can be painted and polished; glass doors are used as decoration, which makes the product light and also simplifies the process of finding dishes in the cabinet. Such cabinets - speakers in the kitchen are very convenient, many items fit into them, and you can put built-in appliances there. Even if the size of the kitchen is small, they will not be bulky.
You can make a furniture set yourself by drawing up drawings and diagrams.
When choosing furniture, you need to carefully monitor the quality of the goods offered and make purchases only in well-known stores.
Installing doors on a pencil case
Quite a difficult process for beginners. Incorrect installation of doors is common among them. Moreover, technology violations can be so significant that they are difficult to correct. In order to avoid annoying mistakes at the final stage of furniture assembly, we recommend that you carefully read the procedure. To install the hinges, you will need a Forstner drill of the appropriate diameter for the hinge.
Forstner drills
For furniture of such dimensions as a pencil case, it is recommended to buy hinges with a mounting diameter of 32 or 35 mm; accordingly, the drill should have the same diameter.
Set of tools
Step 1. Place the pencil case on its side and the door next to it. Carefully align their position at the ends; the junction of the elements with each other should be tight without gaps. The standard distance of the hinge from the edge of the door for chipboards is 10 cm. It is allowed to slightly adjust it only if there are shelves or drawers at this level.
The photo shows how to position the door
Step 2. Draw a line for the placement of hinges on the surface of the door and body; it should be strictly perpendicular to the edges.
Performing markup
Step 3. The standard distance from the edge of the loop to the edge is 6 mm, to this parameter you need to add half the radius of the drill. Make a mark at this distance. It is better to mark with an awl; a small hole will serve as a marker for the tip of the drill.
The master puts a mark
Step 4. On the frame, step back from the edge 37 mm, at this distance the second part of the loop will be fixed. The parameters we indicate are standard for loops of the specified sizes; there is no need to change anything.
Step 5. On the side panel, draw a line parallel to the edges, and make marks on it on both sides at a distance of approximately 16 mm. The distance between the oblong holes of the hinge is approximately 34 mm, but the holes for the screws must be made in the middle. Due to this, it will be possible, if necessary, to precisely adjust the position of the valves. We will explain how this is done in this article below. The markings are ready, you can start drilling holes.
The photo shows what the markings for the loop should be
Step 6: Place the Forstner bit in the drill and drill while rocking the tool slightly. Carefully control the depth; it should be several millimeters greater than the thickness of the seat. For safety, it is recommended to insert the loop into the recess several times and check its position.
Drill installation
Hole
Step 7. Using the adjusting screws, move the hinges to the middle position. Clean the hole from sawdust, insert the loop, and use a pencil to mark the places to fix it.
Inserted loop
Loop after adjustment
Pay attention to the compatibility of the markings and hinge holes. Step 8
Remove the special drill from the drill and install an ordinary one. To make screwing in the screws easier, it is recommended to make holes in the plates. The diameter of the holes should be 1–2 mm smaller than the diameter of the screw thread
Step 8. Remove the special drill from the drill and install an ordinary one. To make screwing in the screws easier, it is recommended to make holes in the plates. The diameter of the holes should be 1–2 mm smaller than the diameter of the screw thread.
Drilling holes with a simple drill
Step 9. Fix the loop with self-tapping screws. In order to facilitate the fixation process, first you just need to tighten all the screws, and then tighten them one by one until they stop. Do not use too much force; chipboard does not have sufficient strength; the screws may turn in the thread. If such a problem occurs, then you need to remove the self-tapping screw, insert a match into the hole as tightly as possible and screw it back. This repair holds the doors quite securely, but it will no longer be as strong as before.
Fixing the hinge with self-tapping screws
Screwing screws into holes
The hinges are installed, you can start adjusting the position of the doors.
When the hinges are secured, you need to adjust them
Purpose of the pencil case
Kitchen cabinets are divided into several types, and one of them is a floor cabinet. It does not take up much space in the kitchen, although it is roomy, tall and not bulky. Such a narrow piece of furniture is today considered one of the most ergonomic types of kitchen furniture. The pencil case performs a wide variety of tasks in the kitchen area or dining room.
Storage of dishes - there are many shelves on which a large number of different dishes can be freely placed. A tea or table set that is not used every day will always be at hand and, if necessary, everything can be easily reached. The size and number of shelves can be changed at the request of the hostess. Household appliances – every year more and more different household appliances are added to the kitchen. Some of them are used periodically, so they can be given a place in the pencil case where household appliances can be compactly placed
Very often, when ordering furniture, housewives focus on certain household appliances, which they want to place in a specially equipped niche in the pencil case. A coffee maker, microwave oven or multicooker, without taking up extra space on the table, will stand freely on the shelf, and cords and electrical outlets will be hidden from view. Canned and shelf-stable food products are conveniently placed on the lower shelves
Most pencil cases are equipped with roll-out niches for bottles. The niche is often used as a wine bar or for other drinks, which saves refrigerator space. Plumbing products for kitchen care are another important point in everyday life. Any housewife has means for washing dishes, cabinets, napkins, towels and other small items. They are very convenient to keep on one of the lower shelves without cluttering up the kitchen space. Plumbing pipes and other devices - since the cabinet cabinet is tall, it can be used to hide pipes in the wall, wiring or meters if the cabinet does not have a partial back wall. The pencil case creates a unified style and hides everything unnecessary and unsightly.
Bathroom cabinet with mirror
The shapes and sizes of the bathroom can be very different, which determines the size of the cabinet. The latter also depend on the availability of free space on the wall above the washbasin. It is better to design a small cabinet with one door and without a lower open shelf (Fig. 1). The cabinet can have one or two doors, and to keep it clean, it’s a good idea to provide it with removable shelves.
To place tall items in the cabinet, we suggest limiting yourself to one horizontal shelf. At the bottom there is an open shelf for soap dishes, toothpaste and other small items.
You can provide an open shelf on both the left and right sides of the cabinet. Fastening the cabinet to the wall will be provided by steel overhead hinges or hidden brackets
It is important that the mirror is located strictly above the sink. Shelves can be made from regular or acrylic glass in a glass workshop
The shelves are relatively small, so we recommend ordering them from tempered glass - it’s safer. For a home first aid kit, it makes sense to organize your own small compartment, and if you do not exclude children from accessing it, then a door with a lock will be useful.
Related link: DIY storage system - drawings and photos
The cabinet has a compartment without a door, a mirror is attached to the back wall, and a lamp is mounted above the latter. Some lamp models are additionally equipped with a socket. It can be useful for electrical appliances - a hair dryer, electric razor or rechargeable toothbrush. In the open compartment you can mount a stand for toothbrushes, made, for example, of tinted plexiglass. It is recommended to use laminated 15 mm chipboard for the cabinet body, and waterproof plywood 6 mm thick is suitable for the back wall. Connections of chipboard parts are made with dowels and glue. Waterproof paint should be used for the surface of the cabinet. You can attach the cabinet to the wall using pendants.
The place of the pencil case in interior design
Most furniture sets are equipped with vertical pencil cases. At the same time, their design matches the design and decoration of other items included in the furniture set. In this case, the main question is solved - how to furnish the premises harmoniously and efficiently with a minimum of time, for a small amount. Typically, pencil cases are located at the edge of the headset. With the height of the cabinet from floor to ceiling, any housewife will be able to place most of the kitchen utensils in the floor structure, differentiating them according to the degree of frequency of use.
Everyday products can be placed in the middle part, the lower compartment is used for storing food, and at the top you can hide something that the housewife uses from time to time - for example, a food processor. If there is a glazed compartment, then it can be used as a display case, placing the most attractive dishes on its shelves.
No less popular are products that have an open section in the middle part, where it is convenient to store everyday utensils that are used to set the table every day.
How and from what to build a bathroom cabinet?
First of all, you should determine the place where the homemade piece of furniture will be located. The possibilities here are quite limited; it can be placed on the floor or hung on the wall. As a last resort, if there is a window opening in the bathroom, and for some reason you do not need it, it is quite possible to make shelves in it, if, of course, this window does not go out onto the street, but into the next room.
Homemade bathroom furniture item
And, as an original option, combining an interior door with a closet, and, if the bathroom space allows, you can make such a design with your own hands in the form of a sliding door. Floor-standing cabinets can be conventional, with a 4-point support, or with fastening directly to the wall, when only two legs located in the front part of the case rest on the floor. Special mention must be made of cabinets installed under sinks (preferably counter-mounted or, in extreme cases, wall-mounted). In this case, the water supply pipes are either hidden behind the wall cladding or are routed inside the cabinet along the back wall. Another interesting solution is to use the space along the bathroom, where you can place a number of low modules from the floor to the side of the bowl.
The simplest option is hanging, and if the side walls are narrow, you can make them yourself even from ordinary edged planed boards. MDF and fiberboard are also suitable for this purpose; these materials are quite dense; there are also special moisture-resistant panels. However, it is a good idea to purchase wood impregnation in advance, which will fill the pores and become an additional factor to ensure that the cabinet is reliable.
How to make a pencil case with your own hands using a plastic bottle
We also suggest considering the option of a pencil case for a school-age child, using the most ordinary plastic bottle.
Of course, the option of a fabric pencil case is very interesting. But, by and large, it is suitable exclusively for girls. But you can also make such items, with your own hands, for boys, or universal options!
Oh, what beautiful ways you can come up with! In this matter, no one tells anyone, there are only recommendations, and if it comes to your mind to supplement the product with something else, you can experiment. Surely, you can make a very original version of a pencil case, and many children will envy your student! After all, you can’t buy such products anywhere!
To make a pencil case you need to prepare:
- Plastic bottles, two pieces. They should not be thin; it is best that the plastic is dense.
- Take one, beautifully colored wide zipper. It can be made of plastic or metal, whichever you like best.
- Superglue, but the best option is hot glue.
- Scissors.
To make a pencil case from a plastic bottle with your own hands, you will need its lower part, from both bottles. The principle is this: both parts should be connected to each other using one zipper.
On each bottle, to begin with, you should cut off the top. First, decide how long your pencil case will be. This will affect how long you will need to cut the pieces.
For example, to store pens, felt-tip pens, pencils, you will need to make one long part and one short one. The first one will serve to insert the accessory into it. The second one is used as a cover.
Then take the zipper. You should check that the correct length of the zipper is selected. This is easy to do by simply wrapping your bottle in bulk with a zipper. If the prepared zipper is too long, it needs to be shortened by cutting it on the opposite side of the one in which it ends.
Approximately, the total length of the zipper should be one and a half centimeters larger than the circumference of your bottle.
When you start gluing the zipper, the dog should be on the outside, the ends of its zipper are glued directly to the plastic parts from the inside. Each half should be glued in turn; to do this, the zipper must be completely unzipped.
During the gluing process, make sure that the dog moves freely along the zipper. This means that you need to leave at least a little space for it. Be careful. Do not stain your pencil case with glue during the manufacturing process!
That's all. Then the bottles can remain the same color as they are. You can also get creative and decorate it brightly and colorfully!
DIY PENALTY CASE WITH YOUR HANDS * 4 different designs * Back to school * Bubenitta
https://youtube.com/watch?v=pnVBRHPCE8Q
How to sew a funny school pencil case with your own hands? – Everything will be fine – Issue 658–08.25.15 How to make a pencil case with your own hands or how to give a second life to a CD cover
Installing doors on a pencil case
Quite a difficult process for beginners. Incorrect installation of doors is common among them. Moreover, technology violations can be so significant that they are difficult to correct. In order to avoid annoying mistakes at the final stage of furniture assembly, we recommend that you carefully read the procedure. To install the hinges, you will need a Forstner drill of the appropriate diameter for the hinge.
Forstner drills
For furniture of such dimensions as a pencil case, it is recommended to buy hinges with a mounting diameter of 32 or 35 mm; accordingly, the drill should have the same diameter.
Set of tools
Step 1. Place the pencil case on its side and the door next to it. Carefully align their position at the ends; the junction of the elements with each other should be tight without gaps. The standard distance of the hinge from the edge of the door for chipboards is 10 cm. It is allowed to slightly adjust it only if there are shelves or drawers at this level.
The photo shows how to position the door
Step 2. Draw a line for the placement of hinges on the surface of the door and body; it should be strictly perpendicular to the edges.
Performing markup
Step 3. The standard distance from the edge of the loop to the edge is 6 mm, to this parameter you need to add half the radius of the drill. Make a mark at this distance. It is better to mark with an awl; a small hole will serve as a marker for the tip of the drill.
The master puts a mark
Step 4. On the frame, step back from the edge 37 mm, at this distance the second part of the loop will be fixed. The parameters we indicate are standard for loops of the specified sizes; there is no need to change anything.
Step 5. On the side panel, draw a line parallel to the edges, and make marks on it on both sides at a distance of approximately 16 mm. The distance between the oblong holes of the hinge is approximately 34 mm, but the holes for the screws must be made in the middle. Due to this, it will be possible, if necessary, to precisely adjust the position of the valves. We will explain how this is done in this article below. The markings are ready, you can start drilling holes.
The photo shows what the markings for the loop should be
Step 6: Place the Forstner bit in the drill and drill while rocking the tool slightly. Carefully control the depth; it should be several millimeters greater than the thickness of the seat. For safety, it is recommended to insert the loop into the recess several times and check its position.
Drill installation
Hole
Step 7. Using the adjusting screws, move the hinges to the middle position. Clean the hole from sawdust, insert the loop, and use a pencil to mark the places to fix it.
Inserted loop
Loop after adjustment
Pay attention to the compatibility of the markings and hinge holes. Step 8
Remove the special drill from the drill and install an ordinary one. To make screwing in the screws easier, it is recommended to make holes in the plates. The diameter of the holes should be 1–2 mm smaller than the diameter of the screw thread
Step 8. Remove the special drill from the drill and install an ordinary one. To make screwing in the screws easier, it is recommended to make holes in the plates. The diameter of the holes should be 1–2 mm smaller than the diameter of the screw thread.
Drilling holes with a simple drill
Step 9. Fix the loop with self-tapping screws. In order to facilitate the fixation process, first you just need to tighten all the screws, and then tighten them one by one until they stop. Do not use too much force; chipboard does not have sufficient strength; the screws may turn in the thread. If such a problem occurs, then you need to remove the self-tapping screw, insert a match into the hole as tightly as possible and screw it back. This repair holds the doors quite securely, but it will no longer be as strong as before.
Fixing the hinge with self-tapping screws
Screwing screws into holes
The hinges are installed, you can start adjusting the position of the doors.
When the hinges are secured, you need to adjust them
How to properly design a pencil case with your own hands
Typically, a swing façade is designed to be no more than 500 mm wide. If you need a wider cabinet, then it will no longer be a single-door, but a two-door, with two hinged doors. The only exception is the kitchen cabinet for building in an oven and other household appliances. In this case, the standard cabinet width is 600 mm. Although it is also commonly called a “pencil case”.
Let's look at the design of a pencil case in the drawing with dimensions of 2000x500x500 mm. With a finishing depth of 470-480 mm, such a model could well be used as a dress model, under clothes on hangers for light teenage and women's clothing. In this case, the equipment can use either a longitudinal pipe with flanges or a transverse retractable rod.
With a pencil case height of 2 m or more, it is better to “grab” the sides in the center with stationary shelves so that they do not begin to bend over time. The remaining shelves can be made removable.
How to make a rigid pencil case with your own hands if it is a wardrobe? Use a stiffener under the top shelf (that’s where it “works” best).
Let's start production
To begin with, the parts you cut yourself for the pencil case need to be processed:
- Inspect them for chips and splinters.
- Sand any questionable areas.
- If necessary, stain it (although this is not required when working with laminated chipboard).
Assembling the frame
There are not many parts in a homemade pencil case. You need to start with the body, but where exactly? Oddly enough, from the markings of the side panels:
- Mark the locations for the hinges.
- Using a hand router, make grooves to fit the hinges.
- Attach the roof and bottom - this is done with wood glue and finishing nails (available at a furniture store). If a fixed shelf is provided, add that too.
Important! Don't forget to check the corners - a metal carpenter's square is used for this.
Nailing the back wall
After the frame is assembled, the time comes to attach the back panel of the bathroom cabinet - made of plywood, chipboard, and sometimes even fiberboard (although this option is not very good for a kitchen or bathroom). To work you need:
- PVA or wood glue;
- galvanized nails;
- ruler;
- pencil.
Important! In order for the back wall of the pencil case to hold better with your own hands, it must be placed on glue. Then you need to secure it with nails, having previously marked the places where you will drive them (if this is not the first time you are taking on cabinet furniture, you don’t have to do this). The nails are driven in approximately 7-10 mm from the edge (so that they hit the end of the sidewall), at a distance of approximately 5 cm from each other.
Putting up a closet
The main element of the pencil case is ready. The following work can be done while the cabinet is in place. But before you put it in a vertical position, decide on what your product will stand on:
- on legs;
- on special panels.
The legs for the pencil case cabinet with your own hands need to be screwed on and adjusted in height so that the structure does not wobble:
- Raise the cabinet
- Place it in the desired corner.
- Check stability.
- Check the angles between elements.
- Mark the locations of the shelves.
Important! When marking the shelves of the bathroom cabinet, distortions must not be allowed - all distances must be carefully checked.
We install the fastenings
For shelf brackets, prepare a holder - a metal profile. You need to start sawing from the top end. After all the elements are ready, they are inserted into the grooves that you have already cut out on the sides. The holders are secured with nails. Then supports for the shelves are installed to make the design of the homemade pencil case more reliable and convenient.
Face frame and shelves
After the elements of the holder and support have taken their place, you can begin making the front frame of the bathroom pencil case with your own hands:
- Cut out the frame posts according to your drawing.
- Attach them to the body using finishing nails (optional with glue).
- Cut the crossbars - their length is equal to the distance between the posts.
- Nail them flush against the posts.
- Secure the structure with finishing nails.
Important! The shelves should be shorter in length than the opening, by about 3 mm; do not forget to take into account the thickness of the edge tape.
Finishing
The last element in creating a pencil case with your own hands is the doors and fittings. But before you install them, you need to put in order what is already ready. Sand all surfaces with sandpaper:
- Cut out solid panels for the doors - they should be 1 cm longer than the opening on each side.
- Mark the locations for the hinges on the doors and sides.
- Check all angles and distances.
- Secure the hinges with self-tapping screws, first on the doors, then on the racks.
What to finish with?
In any hardware store you will find several types of self-adhesive film. Choose one that matches the rest of the furniture to give your new DIY wardrobe a makeover. This is the easiest and most reliable way to finish your product:
- After all surfaces are covered, screw on the handles.
- Check how smoothly the doors open and close.
- Check for sagging and distortions, as well as the reliability of the fasteners.
Important! If the cabinet is tall, it is better to attach it to the wall, and make one of the shelves supporting the ceiling structure.
How to Install Kitchen Cabinets
With these simple techniques, you can learn how to install kitchen cabinets level, strong, and long lasting.
Learning how to install kitchen cabinets may seem intimidating, but the techniques are actually very simple. Just think that you need to screw several wooden boxes to the wall in the correct sequence. The main task is to find the best starting point and save all the levels. The step-by-step photos provided show the key points on how to install kitchen cabinets in a simple and affordable way. You can read more detailed instructions on the website, which tells you how to place items in the closet in advance to avoid mistakes. You'll also learn how to install base cabinets so they're perfectly level, and an easy way to install wall cabinets. The entire process usually takes less than a day, depending on the size of the kitchen. You only need a few basic tools to get the job done. This is a one and a half meter level, a screwdriver, a couple of good clamps that open at least 20 cm. A belt sander and half a kilo of screws.
Photo source: www.familyhandyman.com/kitchen/diy-kitchen-cabinets/installing-kitchen-cabinets/view-all/
How to attach furniture hinges to a cabinet door
Furniture hinges are different, in this case we show how to properly fasten cabinet hinges with a diameter of 35 mm.
You can read the instructions with a list of necessary tools on the website. Below, look at a small photo gallery, where there are fastening diagrams and individual moments of installing hinges on a kitchen cabinet.
Photo source: www.dd-space.com/2016/03/set-furniture-hinges-dd.html#more
How to make a simple kitchen cabinet
If you have some woodworking knowledge and a few tools, why not try your hand at making kitchen cabinets from scratch. You can choose the boards, impregnation, finish and calculate the exact size that suits your needs. With minimal skills, a table saw and regular tools, you can make a kitchen cabinet the easy way. The main task, which even a novice craftsman can handle, is making wooden boxes and installing them on the walls using staples.
The kitchen cabinets featured here are made from birch veneer, medium density fiberboard (MDF) plywood for cost savings. Instead, you can use hardwood plywood, MDF, glazed or melamine particle board and boards.
Double check the thickness of the material before sizing the cabinet.
Over the years, craftsmen have standardized cabinet sizes based on practical considerations such as the average height of a person. You don't have to strictly adhere to these rules, change them to suit your personal needs. With a depth of 60cm, standard base cabinets allow you to comfortably bend down and reach from the back shelf. Make cabinets as wide as you like, but remember that the wider the doors, the greater the tendency for them to warp. In addition, the wider the door, the more free space is needed in front of the cabinet. Standard wall cabinets are 30 cm deep. If made deeper, access to the countertop of the lower cabinet will be limited.
Wall cabinets are usually installed at a height of 45 cm above the tabletop of the lower cabinet. More information can be obtained on the author’s website, where there are detailed instructions, as well as all the main nuances that are worth paying attention to. Below, see step-by-step photos on how to make a kitchen cabinet with your own hands.
Photo source: www.woodmagazine.com/make-cabinets-the-easy-way
Kitchen cabinet on wheels
If you liked the photo and are planning to make the same cabinet for a kitchen on wheels, be sure to watch the accompanying video on the author’s website, the link is under the gallery. And at the same time read the instructions. This design is not that complicated, but there are some nuances that are not shown in the step-by-step photos. You will also find some useful tips on the site, so the information will be useful in any case. Below, see step-by-step photos of how to make a mobile cabinet for the kitchen with your own hands.
Photo source: www.instructables.com/id/Kitchen-Cabinet-Island-Shelving-Storage-on-Wheels/
How to make a wall cabinet for a bathroom
Need more space in your bathroom?
Try this simple project, making a bathroom cabinet is not at all difficult, spend just a couple of hours, but you will have a neat cabinet with a mirror where you can put your toiletries and cosmetics. You will need 1x2, 1x6 and 1x8 boards with a length of 185 cm.
The photo below shows the cutting of parts, dimensions in inches. Converting to centimeters is very simple, multiply the values by 2.54 and that’s it. For example, 23-1/2 inches, this multiplied by 2.54 is 59.95 cm, for a total of 60 cm.
How to make a bathroom cabinet with your own hands, see the step-by-step photos below.
Photo source: www.diynetwork.com/how-to/rooms-and-spaces/bathroom/how-to-build-a-bathroom-medicine-cabinet
Spacious cabinets and options for their use
Limited square meters in modern apartments make us think about the compactness and capacity of storage systems. For this, the designers created a new and original furniture design - a pencil case . They are relatively inexpensive, spacious and take up little space. Closets for clothes are very popular .
A pencil case is a good solution for small spaces.
How to choose a pencil case for a room
When buying pencil case furniture, you should consider the following points:
- Dimensions. The standard width is 50 cm, but even if the room is small, you can choose a narrower, corner wardrobe
- Materials for production. Solid wood, chipboard , MDF , plastic and metal fittings are used.
- Style. Must match the overall interior of the room.
- Color solution.
- Purpose ( pencil case for clothes , as a storage place, for children, etc.). The design features of the furniture depend on this.
Furniture made from natural wood, due to its high cost, is not suitable for everyone, so cheap pencil cases for clothes have become widespread. economy class furniture with a frame made of 16 mm laminated chipboard and a facade made of framed MDF . A pencil case for clothes is often equipped with a mirror. Doors can be with glass inserts. A pencil case with a mirror is most often used in the hallway. Moisture-resistant models are suitable for home and garden.
In terms of their purpose, narrow cabinets are universal and can be used in any room in the house.
The wardrobe for clothes in the bedroom will be equipped with drawers and shelves. For bathrooms, use a pencil case with a mirror and increased protection from moisture. A set consisting of separate modules with a common design is installed in the kitchen. For the hallway you can use a pencil case with a mirror , hooks, shoe rack, etc.
Cabinet in the hallway
The entrance area in the apartment does not involve the placement of massive models. A narrow cabinet with a mirror is the optimal solution in such cases. A lot of things can fit in such a clothes pencil case
The optimal solution for a small hallway is a pencil case with a mirror.
Install the pencil case in the hallway so that it does not block the passage with its structural elements. It is filled in different ways:
- Hooks for everyday clothes.
- A rod built into a narrow closet - a pencil case for clothes . Used to store items that are out of season.
- Open shelves . Convenient for storing keys, phones, gloves and other small items.
- Drawers and baskets for bags, hats, umbrellas and other large items.
- Built-in shoe rack (less common, but also useful).
All of the above can fit into a fairly tall and narrow cabinet with a mirror . This is an excellent solution for small apartments.
However, a narrow cabinet may not be stable. This must be kept in mind during installation, since both a pencil case with a mirror and a pencil case for clothes can cause injuries.
Wardrobe in the bedroom
room is mostly occupied by the bed, leaving little space for a wardrobe. A narrow closet solves this problem . In furniture stores you can choose a spacious pencil case for the bedroom , which will organically fit into the interior of the room.
A pencil case with a display will organically fit into the bedroom interior.
Since one narrow cabinet is not enough, they are put together in a composition. They house a clothes rail, closed and open shelves, and drawers. A narrow cabinet inside such a composition can additionally be equipped with a mirror where you can see yourself in full height.
A narrow cabinet is also used as a separate element of the interior: to display shelves with pleasant little things.
Children's pencil case
This wardrobe-case for clothes differs little in functionality from a similar adult one. Many parents choose ready-made corner options for children's things. Cabinets with shelves and closed doors are well suited for storing clothes, and various types of pencil cases .
A beautiful pencil case rack will be an additional incentive for teaching children to be in order.
For a children's room, the optimal choice is a narrow pencil case with shelves or a pencil case rack , where the child can put all his toys and favorite things.
A pencil case in a children's room will instill in children a love of order.
Books displayed on the open shelves of a pencil case . Storage of school supplies can also be entrusted to a pencil case with shelves . The drawer of the school pencil case allows you to place what does not fit on the desktop.